
Pergola Privacy From Upstairs Neighbours: Map Sightlines
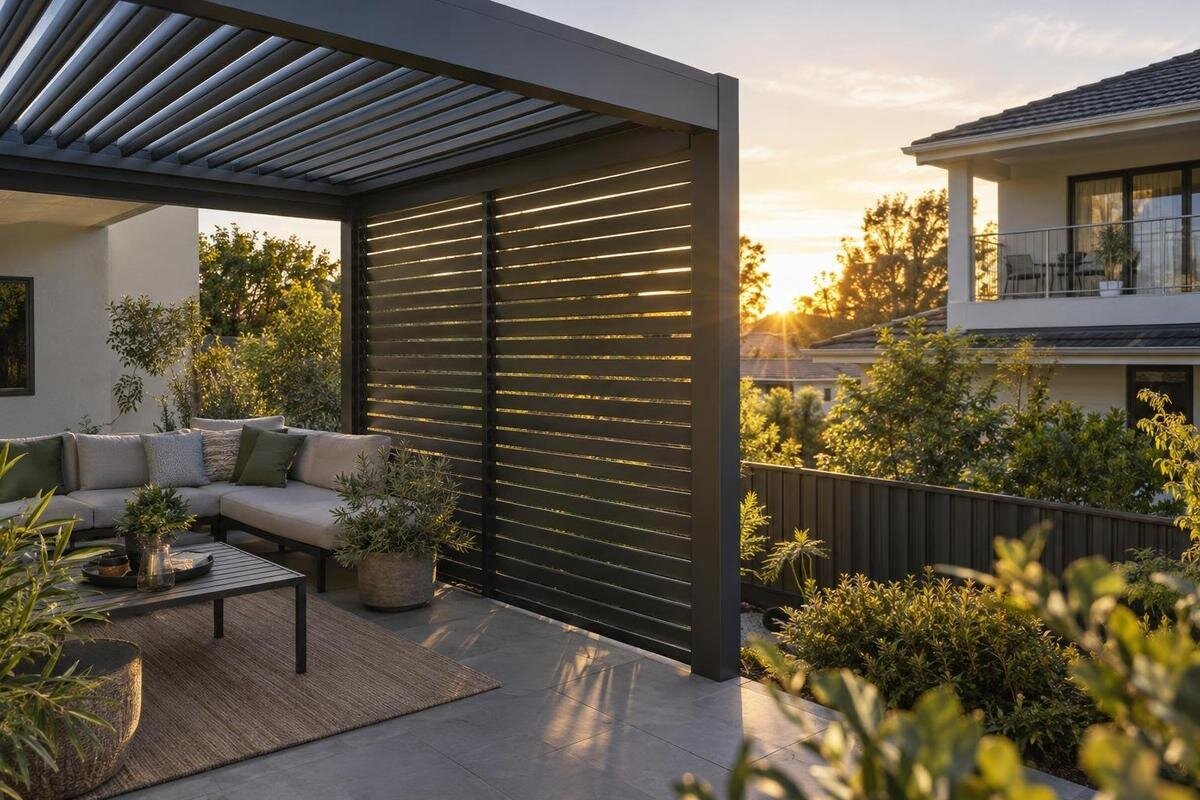
Pergola privacy planning
A second-storey window can look down into a pergola seating area that seems private from the fence. That is not simply a matter of adding a taller side screen: a diagonal view may pass over its top, through an opening in the roof, or around an end. Draw likely viewing points and the seats you want to protect in both plan and elevation. The sketch reveals whether overhead coverage, a screen on one side, a seating change or a combination addresses the actual line of sight.

Why upstairs privacy needs a separate check
A fence or screen at eye level is designed around a mostly horizontal view. Someone looking from an upper-floor window or balcony has a downward angle, so the same barrier may leave the seating area visible over its top. A roof can interrupt some of that view, but only where a physical surface lies across the line; gaps, open sections and exposed edges can leave a direct path. The word pergola, or a product photograph, does not show how a particular viewing point relates to a particular seat.
Keep visual privacy separate from shade and weather considerations. A roof may provide shade without hiding the area from above, and a side screen may block one direction while doing little for a steep view. Define what you want to protect: perhaps the dining chairs, a lounge seat beside the house, or the whole covered area. Decide whether seated use, standing movement or both need privacy, since each creates a different line of sight. That distinction helps avoid planning full enclosure when only one spot is exposed.
Locate the actual upper-storey viewing points
List possible elevated viewing points before choosing a solution. Mark each upper-floor window, balcony or deck edge that faces the patio; note whether it is close to the proposed pergola or farther away, and whether the view comes from the side or a corner. Similar-height windows can produce different angles because they sit in different places. Include more than one likely room or balcony where relevant. If you do not know the exact viewing position, sketch a small range rather than relying on one guess. You are mapping possible views, not assuming anyone is watching.
Work from information visible from your own property; do not enter a neighbour’s space or photograph private interiors. Label each viewing point A, B or C so you can check all of them against the same seats. Once the approximate footprint is clear, use the Bloomcabin Pergola product page to identify the model for your enquiry. Keep your viewing-point labels on the sketch you share with the supplier, along with any uncertain positions. This makes it clear which views the proposed configuration needs to address and which parts of the drawing are estimates rather than confirmed dimensions.
Draw each view in plan and elevation
Make two simple sketches. On a plan, looking down, draw the house, patio edge, proposed pergola footprint, supports shown on the supplier’s plan, main access route, table and every seat that matters. Mark each elevated window or balcony, then draw a line in its horizontal direction towards each target seat. This shows which side a view comes from and whether a corner or the end of a proposed screen may remain exposed. A top-down plan alone does not show how steep the view is.
Add a side elevation for the most exposed direction: show the ground, the upper viewing point, the roof line and the seat. Join the viewing point to the area you want to keep private, then mark where the line meets the proposed roof or side. Use relative heights from reliable drawings when available, and show a range where they are not. If you are considering the Wall-Mounted Pergola listing, request the wall, roof-edge and support positions for the proposed configuration. Include these in the same elevation as the window and seat, so the relationship between them is clear.
Check the seats, not just the pergola centre
Mark seats rather than relying on the centre of the pergola. A person sitting at a dining table, reclining, or standing to move a chair occupies a different sightline. Put the expected seat position and the area you wish to keep private on the drawing; if exact eye heights are unknown, compare a reasonable range instead of using one universal figure. Test the places where you actually spend time, including the seat nearest the house and the one nearest an open edge. If two viewing points cross one seat at different angles, mark both lines separately.
Then check the layout as a working space. Show the table, chair pull-back, route from the door and clear path across the patio before shifting furniture under a roof. Sometimes moving the dining set or turning a chair addresses the view with less screening, but keep access and everyday use in the drawing. For model comparisons, the Bloomcabin Bioclimatic Pergola page lists an area range from 9 to 24 m². Request the exact footprint before positioning seats: the area figure alone does not show how the table, chairs and circulation routes will fit within the proposed layout.

Separate overhead exposure from side exposure
Follow each drawn line to the first place it crosses the proposed pergola. If it reaches the roof, overhead coverage is the question; if it crosses a side opening, screening on that side may address it; if it passes beyond a corner, a panel in the middle of the side will not. This first-crossing check is more useful than saying the patio needs more privacy in general. A high viewing point can create a slanted line that meets a side, not necessarily a straight-down view through the roof, so read the plan and elevation together. If the line misses the pergola, changing the seat or footprint may matter more than adding a panel.
Group the results by seat and viewing point. One chair may need overhead coverage from a balcony behind it, while another is visible only from a window at the side; an outer corner may be exposed from both. That points towards a targeted arrangement rather than treating all faces alike. When discussing Bloomcabin’s regular pergola model, show which roof edge or side opening each line crosses. Keep separate notes for the dining area, lounge seats and any standing space you want to protect. This preserves the differences between exposed areas instead of reducing the whole patio to one general privacy request.
Roof openings and viewing angles
A line that reaches the roof is not automatically blocked. The proposed roof must provide a surface that interrupts that particular view; slats, openings, gaps, transparent sections or a changed position can leave a view through. Designs differ, and some roof configurations may be fixed while others change. Map every position in which the pergola will realistically be used, not just the one that looks most closed in an illustration. If the roof can be adjusted, note the privacy result in each relevant position; do not assume a shade setting also blocks an elevated view.
Ask for a roof drawing or configuration view showing the surface pattern from the direction in your sketch. Check the edge nearest the seat as well: the line may pass under an edge or through a gap while the centre appears covered. For an enquiry about the Bloomcabin Bioclimatic Pergola listing, mark the roof positions you want the supplier to explain. Keep the viewing point and seat visible on the drawing rather than sending a roof detail alone. A view from directly above may not show what happens along the diagonal sightline that concerns you.
Position side screening for the actual view
If the elevation shows the line crossing a side rather than the roof, mark where it would meet the proposed screen. In plan, locate that crossing along the pergola edge; in elevation, check its height and whether the line passes over the screen’s top. A panel that looks tall from the yard may still leave an opening from above, and a correctly placed panel may block one window’s view while a second line slips around an end. Treat each viewing point and target seat separately. The map shows where a barrier would need to be; it does not establish whether a particular accessory can be installed there.
Keep the screened area as narrow as the privacy need allows, then check doors, paths, daylight and airflow. A fixed barrier changes how open the patio feels; a movable option, if offered and approved for the model, also needs checking in its deployed position. For the Bloomcabin Wall-Mounted Pergola page, ask whether the proposed side accessory is compatible, where it can sit and whether it is included or optional. Do not assume an outdoor curtain or third-party screen comes with the pergola. Compare the confirmed screen position with the crossing points on your drawing, including any lines near its ends.
When roof coverage and side screening work together
A combined approach may make sense when some lines reach the roof and others cross a side opening, or when a view passes around a corner. Match each solution to the line: overhead coverage can only address views that meet a blocking surface, and side screening can only address views that cross it at a height and width it obscures. Keep the seats inside the protected area on the sketch. If one dining chair is exposed, moving it may be simpler than screening the whole pergola; if several seats are visible from different angles, record each line rather than assuming one panel covers them all.
Before increasing coverage, consider what might be lost: a view to the yard, daylight near the house, the open side you use for access, or a breeze. Weigh these trade-offs against when and where privacy matters. Use Bloomcabin’s bioclimatic model page as the reference when asking about a combined arrangement for that model. On your sketch, identify the seats that need both overhead coverage and side screening, as distinct from those that need only one. If a compatible deployable screen is available, compare its open and deployed positions and check that the access route remains usable in each.

Confirm the model drawing and accessory fit
Take the plan, elevation and priority seats into a model enquiry. Ask for the proposed footprint, roof outline, support locations, and any openings or operating positions shown for the exact configuration. If a screen is part of the plan, request its position and dimensions, and confirmation that it is approved for that model; ask what is included rather than inferring it from a lifestyle photograph. A broad area figure does not show the shape or how far the roof extends past the supports, so it cannot settle a sightline question. Where the plan depends on a wall or support connection, have a qualified professional confirm the site-specific arrangement.
Use the Bloomcabin Pergola model page to identify the product in your enquiry, then keep the discussion tied to your marked drawing. A photograph or model name cannot establish a site-specific privacy result. Ask the supplier to distinguish confirmed configuration details from questions that remain open, using your viewing-point and seat labels. If a response describes a screen as compatible, check that it refers to the selected model and the side where the line crosses. Record the answer beside that line so you can see which views have been addressed. Leave any unanswered view marked as unresolved rather than assuming the same answer covers every seat.
Review the plan in the conditions you actually use
Make a clean copy of the sketch and use tracing paper or a second sheet to outline the roof and each proposed side screen. Run the same sightlines against the surfaces, including openings, end gaps and alternate roof positions. At ground level, mark the proposed footprint and chair locations with removable tape or chalk so you can judge whether circulation still works. Compare the drawing from all mapped viewing points, not just from your own position at the patio edge. This mock-up tests placement only; it cannot show whether a particular material blocks a view.
Review the plan for the conditions that matter to you: daytime use, evening gatherings, or seasons when existing foliage is thinner. Lighting can change visibility, so a daytime check should not stand in for an evening use case. Trees and shrubs may change the view over the year, so do not rely on leaves as permanent screening. After a layout change, recheck the door path and chair pull-back as well as privacy. If a line remains open, decide whether to move the seat, revise the protected area or ask about a confirmed compatible option; one adjustment will not necessarily cover every viewing point.
Frequently asked questions
Can a side screen block an upstairs neighbour’s view?
Only if the line from the upper viewing point crosses the screen where it can actually obscure the view. A steep line may pass over the top or around an end. Check the side in both plan and elevation for each priority seat, then verify the proposed screen’s dimensions and compatibility.
Will a pergola roof provide overhead privacy?
Not automatically. The line must meet a surface that blocks the view, and gaps, openings, roof position, material and viewing angle all matter. Ask for a drawing of the selected configuration; a model name or product photograph does not confirm privacy.
How can I map a sightline without knowing an upstairs neighbour’s exact eye height?
Show a range of plausible viewing points on a side elevation, connect them to the seat you want to protect, and check where the lines cross the proposed roof and sides. A range is more useful than a precise guess. No angle calculation is needed for this first comparison.
Should I screen every side of the pergola?
No. Add screening only where a mapped view calls for it, and check how it affects light, access, airflow and openness. A smaller protected seating area or a furniture adjustment may address one exposed spot without changing the rest of the patio.
What should I ask before choosing a pergola accessory?
Request a drawing for the exact model and configuration, showing the roof outline and relevant positions. Ask whether the proposed side accessory is approved for that model, and whether it is included or optional. If attachment or installation depends on site conditions, confirm the arrangement with a qualified professional.
A useful sightline map shows which seats are visible, from where, and which proposed surface interrupts each view. Roof coverage, a side screen or a furniture adjustment may each help under different conditions; no product name or broad area figure replaces a drawing of the exact configuration. When exposed lines are labelled and accessory compatibility is confirmed, you can plan privacy for the seats that need it without screening more of the patio than necessary.
