
Planning a Pergola for Outdoor Exercise
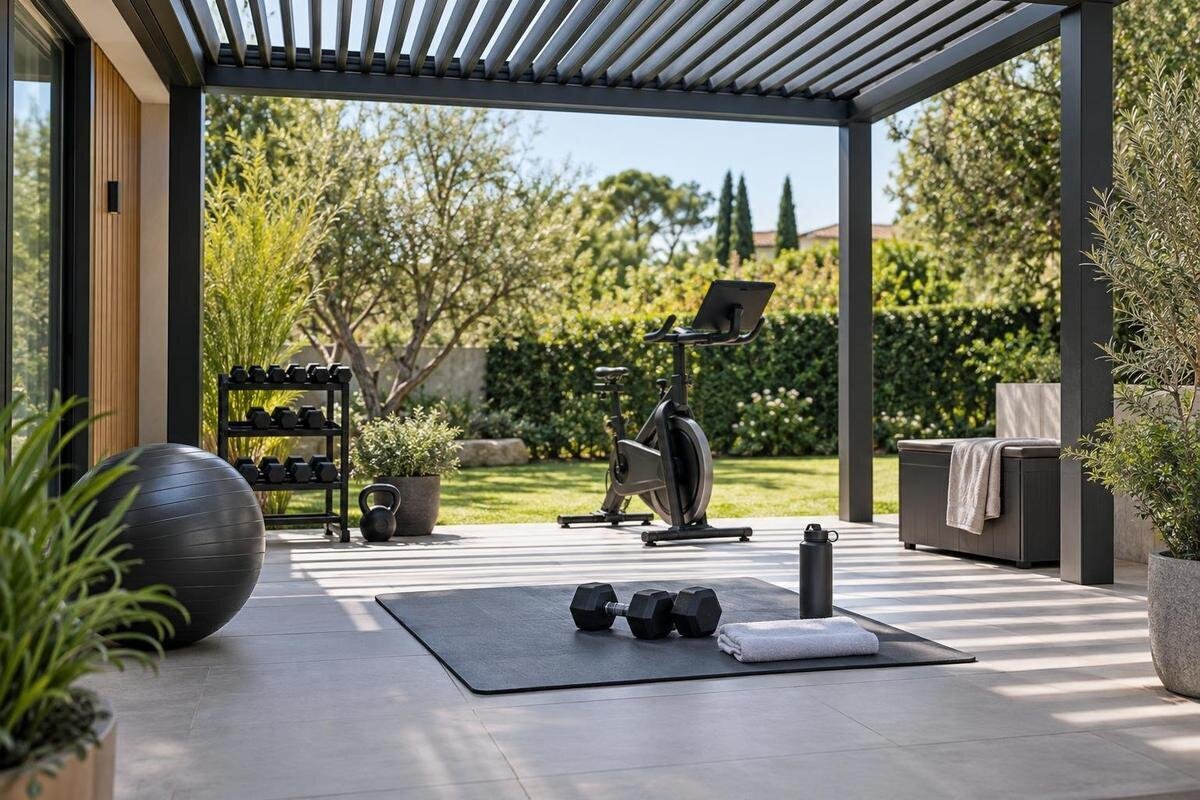
Pergola planning guide
An outdoor exercise area under a pergola is planned around movement, footing and the equipment you actually use—not just the structure's listed area. Measure the widest positions of each activity, preserve a clear route through the space and assess the floor in dry and wet conditions. A pergola may define a workout zone, but its appearance does not confirm weather protection or approval for hanging equipment.

Activities, equipment and shared use
List each intended session before choosing a pergola footprint. Mobility work, mat-based exercise, body-weight movements and a workout using a bench or compact machine occupy different shapes of floor. Note how many people may move at once, which direction each activity faces and what equipment stays in place. Include what must be carried out before a session and stored afterwards; occasional equipment needs a storage spot and a clear route, while a permanent station changes the layout every day. This keeps the plan tied to ordinary use rather than an idealised empty patio.
Rank the activities by how often you expect to do them. Give the most frequent activity enough clear floor space before adding occasional extras, and decide whether the area must remain available for another household use. Separate your equipment list into items that stay in place and items brought out for each session. For a shared patio, record what needs to move before exercise begins and where those items will go; shifting a chair into a walking route does not create a workable layout. Consider the setup you are realistically willing to repeat, rather than one that requires rearranging the entire patio. As you compare catalogue options, use the Bloomcabin Pergola listing alongside this activity list. Distinguish equipment you already own from possible future purchases so that an optional item does not determine the whole plan.
Measure movement clearance, not just equipment
A mat, bench or machine shows only part of the space an activity uses. Measure the widest positions you intend to take: reaching, turning, stepping to either side or getting down to and up from the floor. Allow for the whole movement, not just the spot where you begin. If a routine changes direction, map each direction rather than drawing one narrow rectangle around the equipment. There is no universal clearance that suits every exercise; the useful measurement comes from the movements and equipment in your own plan.
Include height as well as floor area. An overhead reach needs space above the user, while an exercise performed close to the floor still needs an unobstructed area around the body. Record these requirements separately so that a floor plan does not hide an overhead conflict. Add the space required to pick up, set down or reposition equipment without entering another person's movement area. Getting onto a bench or approaching a machine also belongs in the measurement, even if the exercise itself takes place within a smaller area. If two people may exercise together, draw both movement zones at once, including how each person enters and leaves. Distinguish simultaneous activities from ones performed in sequence. If the layout only works when people or equipment are squeezed against a support, revise it before comparing pergola sizes.
Separate the pergola footprint from clear floor space
The pergola's listed area is not automatically the area available for exercise. The exact plan may include support positions, and the usable zone can also be reduced by a wall, steps, a doorway or fixed items nearby. Measure the inside clear span shown for the configuration you are considering, not just the overall outline. Check the meaning of any published area figure instead of assuming it describes an unobstructed workout floor. Small changes in support placement can affect where a mat or machine can sit.
The regular pergola product page lists an area range of 9 to 24 m². That range is a useful starting point for comparison, but it does not by itself show the clear span or support positions of a particular option. Put a current, dimensioned plan beside your activity measurements and compare them directly. Keep overall dimensions, clear dimensions and equipment dimensions separately labelled so that you do not compare unlike measurements. If a drawing leaves a relevant dimension unclear, record it as an unanswered question rather than estimating it from an image. Check both the width and length of the usable zone against your layout; a total area figure cannot show its shape. If you are sketching before you have exact dimensions, label the drawing as a concept. It can guide early planning, but it is not proof that a configuration or piece of equipment will fit.
Floor traction and surface condition
Assess the walking and exercise surface where it will actually be used. Look for changes in level, uneven joints, loose edges and places where water or debris can collect. A mat may cover part of a surface, but it does not correct every uneven spot or guarantee reliable traction. Check that any mat and portable equipment stay stable on the chosen floor, and ask the surface supplier for information about outdoor use and traction in relevant conditions. Do not judge grip by appearance alone.
Consider how the surface changes after rain, when dust or leaves accumulate, and during frost or freeze-thaw conditions. A pergola does not automatically keep its floor dry, especially around open sides or exposed edges. Decide how you will assess the floor before using the area and whether wet or icy conditions mean moving the session elsewhere. Include the route to the workout zone in that assessment, not just the patch beneath a mat. After bringing out portable equipment, check that its placement has not introduced a loose edge or obstructed a threshold. Keep transitions clear of curled mats, cords and stored items. Make the pre-session check specific to your layout: identify the exposed edges, joints and equipment positions that need attention. These checks help make the space more predictable without assuming that any surface is slip-proof.

Plan for sun, rain and changing weather
Observe the proposed location at the times you are most likely to exercise. Sun moves during the day and across seasons, while low-angle light can come in from the sides. The amount and position of shade depend on the exact structure, orientation and surrounding conditions, so do not assume that a pergola will block direct sun throughout a session. Note where glare falls and whether a different time or orientation would make the space more usable. Treat shade as one part of the layout, not as a fixed property of every pergola.
Plan for conditions beyond sunshine, too. Rain, wind, snow, leaves and freezing temperatures can affect both the floor and the equipment, even when the area is partly covered. Check the documentation for the configuration you are considering and decide which conditions would make you postpone or relocate a workout. Separate what you expect the pergola to provide from what your routine still requires, such as bringing portable equipment inside after use. The Bloomcabin Bioclimatic Pergola listing is a starting point for comparing its documented features with those expectations; the model name alone does not establish weather protection. On your concept plan, identify which equipment positions and access routes remain exposed. This gives you a practical basis for deciding whether the arrangement will suit your usual exercise times, rather than planning only for a dry, calm day.
Keep doors and circulation routes clear
Draw routes to the house, yard, gate and storage area before placing the workout zone. Include the full swing of doors and gates, stairs and any narrow passage people use to cross the patio. A route should not depend on someone stepping through the space where another person is moving or where equipment is set down. Check these paths with equipment in its intended position, not only on an empty plan. Keeping circulation separate makes it easier to bring equipment out and put it away without disrupting the activity area.
Consider how the layout works for other people who use the outdoor space. Leave a practical route around the workout area and avoid turning a doorway or shared passage into a storage spot. Check the arrangement in both its exercise and non-exercise states: a folded mat, parked machine or stored bench still occupies space after a session. Trace the route used to carry equipment from storage, including any turns near a door or support. If comparing the Bloomcabin Wall-Mounted Pergola, use the exact plan to check its relationship to doors and walking routes at your home. Show the door swing and the equipment position on the same drawing rather than assessing them separately. Where several routes meet, consider whether moving the workout zone would preserve access more simply than repeatedly moving equipment. Verify the dimensions and intended placement before settling on the arrangement.
Treat equipment anchors as a structural question
Do not assume that a pergola beam, post or connection to a wall can support workout equipment. Rings, suspension trainers, punching bags and other hanging or anchored gear can place forces on a structure that ordinary use of the space does not address. A visible beam or sturdy appearance is not evidence of an approved attachment point. Check the equipment maker's instructions for outdoor use and storage as well; equipment designed for indoor conditions may need different care when used outside.
Use suspension equipment only when the manufacturer and a qualified structural professional have approved the exact structure, attachment point and intended use. Approval for a different pergola, connection or piece of equipment does not establish approval for yours. The wall-mounted product page identifies a model, but its name is not a load rating or permission to attach exercise gear. If that approval is unavailable, plan around equipment that stands independently and can be used on the selected floor as its maker directs.
Compare pergola sizes against a full-scale layout
Once you know the activity envelope, compare it with the available dimensions for each configuration. Mark the proposed supports and the usable floor on a scaled drawing, then place the equipment, movement zones and walking routes on top. A larger overall area may not solve a layout problem if its clear span or support positions do not suit the plan. Likewise, do not select a smaller footprint simply because the equipment itself fits; the space needed to move and reach can be larger than the equipment.
If practical, mark the proposed arrangement on the patio with removable tape or other temporary markers. Label equipment outlines, support positions and movement boundaries so that each marking has a clear purpose. Walk the access routes and check how you would approach, use and leave each equipment position. Include the place where portable items will be set down between activities. If the space will be shared, test the planned route around the workout zone while the equipment outlines remain in place. Record any conflicts on the drawing before moving the markers; otherwise, it is easy to lose track of what the test revealed. Do not attach anything to the structure as part of this test. Compare the Bloomcabin Pergola size options with your marked layout and exact product drawings, keeping the advertised area separate from clear exercise space.

Check the chosen configuration against the site
Look beyond the outline of the workout zone. Mark nearby walls, fences, steps, fixed planters and other obstacles that could narrow a route or interrupt a movement. Notice where people pass and whether vigorous activity, repeated footfalls or music would affect a nearby window or shared outdoor area. A pergola does not contain sound, so the location and timing of exercise may matter to others. These site details can change where equipment belongs even when the open floor appears large enough on a simple drawing.
Compare the site's dimensions with the current drawing for the configuration you are considering. Use the bioclimatic model page as the product reference, then locate its proposed outline relative to the fixed features of your patio. Keep site measurements and product dimensions identifiable on the drawing, particularly where a wall, step or planter limits placement. Check whether a change in position would solve one conflict but create another at a doorway or shared route. If the proposal depends on a house connection or an unusual site condition, identify that question separately from the exercise layout and have it reviewed by a qualified professional where needed. An illustrative image cannot establish how the configuration will fit those conditions. Keep any unresolved placement assumptions visible in your notes rather than building the rest of the layout around them.
Comparing configurations before purchase
Bring the activity plan, equipment outlines and site measurements together when comparing your shortlisted configurations. Use the same requirements for each option: clear floor space, overhead needs, support positions, door access and storage arrangements. Record which activities fit as planned and which would require a change. If a smaller option works only by removing an occasional activity, make that trade-off explicit; if a larger option still obstructs a route, do not treat its extra area as a solution. Also note how much equipment must be moved before each session. This helps distinguish a layout that fits on paper from one that suits your intended routine. Keep early sketches labelled as concepts, and update them when exact configuration drawings replace provisional dimensions. The comparison should make your choices clearer, not conceal compromises behind a single area figure.
For each option, separate confirmed dimensions and documented features from unanswered questions. Ask about the clear span, support locations and roof configuration where those details affect your layout. Match each answer to the activity or site requirement it addresses, rather than collecting specifications without a purpose. The Bloomcabin Bioclimatic Pergola page can be one catalogue reference in this comparison. Floor suitability and approval for any proposed attachment remain separate questions; neither is settled by choosing a pergola model. Resolve structural questions with the manufacturer and a qualified professional rather than guessing from appearance. Before purchasing, check that your preferred option is still the one shown on the final layout, especially if its size or configuration has changed during the comparison. That final check connects the buying decision to the space you actually intend to use.
Frequently asked questions
How large should a pergola workout area be?
There is no single area that suits every activity. Measure the full movement space, equipment, number of users, supports and walking routes, then compare that plan with the clear dimensions of a specific pergola configuration. A listed area alone cannot confirm that everything will fit.
Will a pergola keep the exercise floor dry?
Not necessarily. Rain may reach an open-sided area, and wind, roof design and site conditions affect exposure. Check the documentation for the exact configuration and assess the floor itself. If it is wet, icy or otherwise slippery, do not assume the pergola makes it suitable for exercise.
Can I hang rings or a suspension trainer from a pergola?
Only if the exact structure and attachment have been approved for that use by the manufacturer and a qualified structural professional. A product name or general drawing does not establish that approval. Without it, use equipment that stands independently and follow its instructions.
What kind of floor works for outdoor exercise?
Choose a surface intended for outdoor use and assess its traction in the conditions where you will exercise. Check for uneven joints, loose edges, water, dirt and compatibility with any mat or equipment. Ask the surface supplier for relevant performance information rather than relying on appearance.
How can I check whether my movements will fit?
Measure the widest positions of each planned movement, including reaching, turning and stepping, as well as the space needed around equipment. Mark supports, doors and routes on the same plan. A full-size floor layout can reveal conflicts that a pergola area figure will not.
A practical outdoor workout layout leaves room for the movements you intend to do, keeps routes clear and accounts for the floor in changing conditions. Start with measured activities, then compare them with the exact pergola plan. Treat shade as variable and every hanging attachment as a separate structural approval question. That way, the exercise area is planned for what the structure and site actually provide.
