
Pergola Clearance Below Eaves and Roof Overhangs
Pergola planning
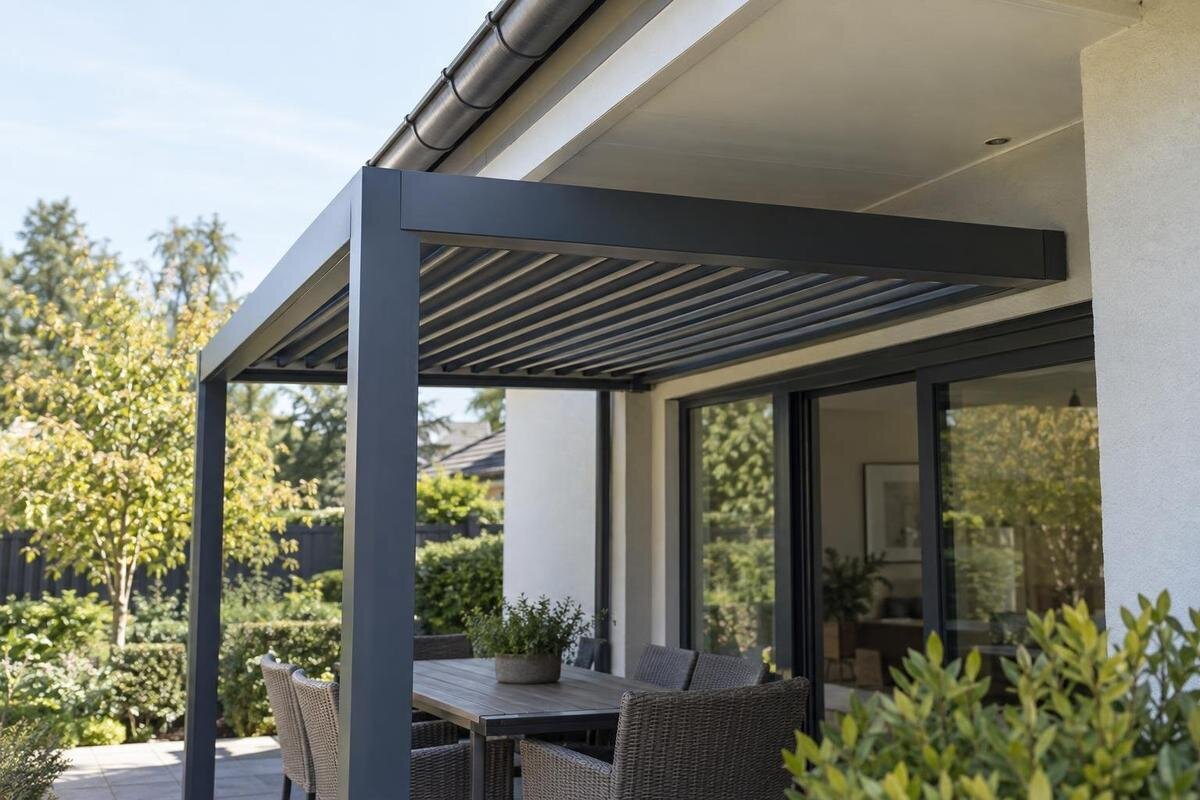
Low eaves do not automatically rule out a pergola, but the listed height is not enough to confirm a fit. The roof edge, fascia, gutter and downspout may occupy the same space needed by the pergola, while moving components may need room to operate and gutters need future service access. Compare the pergola’s full installed dimensions and operating space with measured site conditions, then assess runoff and wall connections before choosing a position. Where clearances or attachment details are uncertain, use model drawings and a qualified site assessment.

01
Measure the whole roof edge
Begin by identifying exactly what sits above the proposed footprint. At the roof edge, note the underside of the soffit, projecting fascia, gutter and brackets, along with any downspout or outlet that turns around a corner. Measuring only to the underside of the roof misses parts that project lowest or furthest out. A pergola beam may also need to pass beneath the same projection, so height and horizontal reach matter together. The leading edge can be lower than the wall-side soffit, so record its position separately. Where a downspout turns out from the wall, note the elbow and any offset as well as the vertical pipe.
Use the finished patio or other ground-level support surface as the vertical reference, not soil or an unfinished base that will later change. Record surface levels and the height of the lowest overhead obstruction at each place a post or beam would sit; both the roof edge and the paving can slope. Include trim, lights, vents, door frames and any fixture that must remain. A change in paving, threshold or planned surface layer can alter the reference height, so record proposed levels separately from current ones. These measurements help screen a location, but they do not confirm adequate clearance: the selected model’s drawing must show which overall and component dimensions apply. Follow the installation arrangement specified for that model rather than subtracting an arbitrary margin from a catalogue height.
Map clearance across the pergola footprint
Make a simple plan and side view. On the plan, mark the house wall, intended post positions, outer edge of the eaves, gutter and downspout. In the side view, record the surface height and the underside and outermost edge at several points along the proposed beam line. Where the roof slopes or the ground changes, repeat measurements rather than extrapolating from one corner. If the frame spans more than one roof section, check across its width too; do not assume the eaves run level. This shows whether the tightest point is over the house-side beam, at a corner or across a broader part of the frame. Record measurements in one unit and label what each one reaches.
Separate footprint size from overhead clearance. A listing can describe how much ground a model covers without showing how a particular configuration sits below your soffit. The Bloomcabin Pergola listing gives an area range from 9 to 24 m²; that information helps compare footprints, but it does not tell you how much space remains below an eave. Ask for a drawing for the exact size and layout being considered, and compare its reference points with measurements from the finished surface. Do not compare an overall height with a clear opening until you know whether both use the same reference point and include the same installation components. If the drawing uses a different datum, have the installer explain the comparison before relying on it.
02
Check moving roof parts in every position
If a design has adjustable, sliding or retractable roof parts, assess its full operating envelope, not just its closed outline. A panel or louvre may need room to turn; a canopy may travel along a frame; hardware may extend beyond the visible roof edge. These are possibilities to check, not features to assume for every pergola. Ask which roof positions are intended and whether any part approaches the soffit, fascia, gutter or downspout during movement. The tightest point can change as a component moves. If controls or a handle are on the wall side, check that they will still be reachable once the frame is in place.
Request a model-specific side elevation or clearance drawing that shows how the roof moves and the limits around adjacent building surfaces. The name Bloomcabin Bioclimatic Pergola identifies a catalogue model; the name alone does not state its operating envelope at your eaves. Ask the supplier or installer to confirm the space needed for operation and access to service moving components, and to identify any position that should not be used in this layout. If the documentation shows only one position, ask for clarification about the others before treating the arrangement as workable. Do not infer these details from a product photograph or plan to trim or reposition house components without review by the relevant tradesperson.
Account for runoff and debris from the house roof
Look at how the house roof sheds water before placing a pergola under its edge. Water may fall from the roof edge, run along a gutter, spill at a joint or be directed through a downspout; valleys and concentrated outlets can send flow to one particular area. If that route reaches the proposed pergola or seating area, it can create a recurring nuisance and should be considered alongside any drainage from the pergola. Note where water goes during ordinary rain and after a heavier flow. If you cannot observe the route in wet weather, ask the person responsible for the roof drainage to explain it rather than assuming a dry-weather inspection proves the path is clear.
Also consider material shed from a sloped roof. Leaves and twigs can accumulate, while snow or ice may slide or drop from some roof configurations; a pergola beneath a release path still needs to be assessed for that exposure. Ask a roofing professional about uncertain roof-edge behaviour, and discuss proposed changes to house drainage with the appropriate contractor. Do not assume house runoff can be redirected into pergola drainage; review how the routes would work together for the specific layout. When seeking a site review for the Bloomcabin Pergola model, include the roof edge and discharge points in the same photos and plan so the question is about the actual exposure, not the product name alone.

03
Keep gutters and downspouts accessible
Do not treat the gutter as a harmless strip that can be covered after installation. Someone may need to reach it to remove leaves, inspect joints, clear an outlet or repair a leak, and that work route can be blocked by a beam, roof panel or post. Show the gutter’s full run on the site plan, including corners and connections, and mark where a person or service provider would need to work. Maintenance means access along the relevant length and to the joints, not merely a visible gap beneath one section. If the only route is a narrow space between pergola and house, ask whether it is genuinely usable for the expected work. Consider planned screens or other additions that could occupy the same space.
Follow the downspout all the way to its outlet. Check that a pergola post, screen, stored item or future enclosure will not hide the pipe, prevent inspection or obstruct its discharge. If the layout would require the gutter or downspout to move, have the proposal reviewed by a qualified contractor before settling the pergola position; a new outlet still needs an appropriate route for water. Where the pergola has its own drainage arrangement, obtain its model-specific route and compare it with the house system. The Bloomcabin Bioclimatic Pergola product page can identify the candidate, but it does not establish where water will be discharged at your site. Keep both systems visible on the drawing so a conflict is not missed.
Compare wall-mounted and freestanding layouts
Compare a freestanding layout with a wall-mounted one before assuming either solves a low-eave problem. A freestanding model has support positions to coordinate with the patio and roof projection; a wall-mounted model brings the building connection into the clearance question. A wall-mounted label does not mean the unit can attach anywhere beneath the eaves, and a freestanding frame does not remove exposure to water or debris falling from the house roof. The workable arrangement depends on the model’s actual footprint, height, component movement and connection details. Look at the plan and side views together: changing a support position can also affect a passage or drainage route that made the location attractive.
Consider a wall-mounted option only if the intended fixing location and pergola geometry can both be reviewed. The Bloomcabin Wall-Mounted Pergola page identifies a wall-mounted model, but it cannot establish whether a particular wall, soffit or eave provides the required location. A freestanding alternative may avoid relying on the wall, yet its own support positions still need review and it may remain beneath roof runoff. Neither category automatically resolves a low eave; compare complete drawings and site constraints rather than choosing by the label alone. Proximity to the wall or a compact-looking image is not evidence that the overhead clearance works.
04
Verify the wall connection
Before selecting a wall connection, identify the actual substrate behind the exterior finish and the intended connection points. Cladding, trim or a visible fascia is not, by itself, evidence that a surface can support a pergola. A qualified installer or other appropriate professional should match the proposed connection to model-specific approved anchoring drawings and evidence about the substrate. If a drawing assumes a different wall build-up, resolve that mismatch rather than treating the finish as a substitute for the structure behind it. Tell the assessor about known repairs or changes to the wall; a photograph of the finish alone cannot establish what is behind it.
Map the connection against the eaves and the rest of the wall. The intended fixing line may sit too high, too low or directly behind a soffit, gutter, door trim or service route; shifting it can change the beam position and clearances. Include the listing for Bloomcabin’s wall-mounted model with the questions you send to the installer, then ask for confirmation of the proposed connection location and how it relates to the pergola’s full installed outline. Include doors, windows, visible vents and drainage parts in the same elevation so the installer can see how the connection fits among them. If the proposed fixing line changes, show the revised beam position rather than treating the connection and overhead clearance as separate decisions.
Plan for maintenance after installation
Think beyond installation day. In addition to gutter access, the house roof edge may require inspection or repair, and the pergola may need routine cleaning or access to its own components. A narrow slot can look adequate on a plan yet be awkward for hands, tools or a service person once posts, beams and roof parts are in place. Identify the components that need attention and describe how someone would reach each one. Ask the person who carries out the work what space and approach they need; cleaning a surface and servicing a moving component may call for different access.
Consider where leaves, needles and other debris could collect between the house and pergola, and whether they can be removed without reaching across a moving part or blocking a drain. Also allow maintenance equipment to approach the relevant area; do not treat the pergola as a work platform or a substitute for safe access to the roof. Check the approach as well as the space beside the component: a visible gap alone does not show that someone can work there. Resolve an awkward cleaning or repair route while the position and configuration can still be adjusted, rather than relying on a workaround after installation.

05
Request drawings for the exact configuration
Ask for drawings that match the model and configuration being considered, not a generic catalogue image. Useful views include a plan and side elevation showing the complete outline, reference heights, beam and post locations, any moving-part positions, and the intended relationship to the wall. Confirm what each dimension measures and whether it includes installation components that affect clearance. Ask which surface or point each height starts from, and how it relates to the finished patio or ground-level support surface. If the supplier provides separate diagrams for different roof positions, keep them together; an open or extended position may be critical even when the closed profile appears to fit. Ask for clarification about any missing dimension.
Product photos are useful for appearance but can hide scale, wall offsets and the way an overhang intersects the frame. Keep the Bloomcabin Pergola model page beside the exact drawing when discussing a candidate, and ask the supplier or installer to identify information the page does not show. For a tight site, request a marked-up elevation using measured eave, gutter and surface heights, plus clearances for operation and maintenance. A drawing that shows only the pergola’s overall height may not resolve a local obstruction, so ask about each potential contact point. Keep the agreed drawing with your notes, and review it again if the selected model or configuration changes.
Document the site before confirming a model
Prepare a compact site record before committing: a plan with the wall, eave edge, gutter, downspout, proposed posts and wall connection; measurements from the finished surface; and photos from the side and below. Note where the roof releases water, where someone needs to reach the gutter, and which moving positions need clearance. If the patio will be resurfaced or its level changed, show the proposed final level as well as the current one. Send the same record with the exact model and configuration to the supplier and qualified installer. Consistent information helps show whether the proposed arrangement addresses the actual constraints rather than an idealized, flat wall.
Complete the review when the main uncertainties have answers: the minimum clearance after installation is understood; the roof can operate as intended; runoff and material falling from the house roof have been considered; gutter service remains possible; and any wall connection is supported by the relevant assessment and approved drawings. The Bloomcabin Bioclimatic Pergola listing can identify one candidate in that exchange, but it is not a site approval. If clearance depends on moving a gutter, cutting a soffit or altering the model, ask the appropriate professional to resolve the proposed change before ordering. If that review changes a position or component, update the drawing and check the new arrangement rather than carrying over an earlier conclusion.
Frequently asked questions
Is the underside of the eaves the only height I need?
No. Measure the lowest point of the soffit and any fascia, gutter, bracket, downspout, light or other obstruction over the footprint. Check the horizontal projection as well, then compare your measurements with the drawing for the exact model.
How much clearance does a pergola need below an eave?
There is no single figure that applies to every model or site. Use the selected configuration’s installed dimensions, operating envelope and service requirements, then compare them with measured surface levels. Ask the supplier or a qualified installer to confirm any tight point.
Can I attach a wall-mounted pergola to the fascia?
Do not assume the fascia, soffit, cladding or gutter is an approved fixing surface. The connection must match the model’s anchoring drawings and the actual substrate. Have a qualified installer assess it before choosing that position.
What if the pergola roof has moving parts?
Check the complete movement range and required service access in model-specific documentation. Clearance in the closed position alone may not be enough; confirm that all intended positions remain clear of the eaves, gutter and downspout.
Can I still clean the house gutter after installation?
Only if a practical route to the full gutter run, joints and downspout remains. Ask the person who handles maintenance to check the proposed gap and approach, including any screens or later additions that could block access.
Low eaves do not have a single pass-or-fail measurement for every pergola. The answer depends on the exact configuration, the full roof-edge geometry and the space needed for operation, drainage and future access. A measured elevation and model-specific drawings provide a firmer basis than a headline height or product image. If the layout depends on a wall connection or changes to house drainage, have that detail assessed before finalizing the position.
