
Planning a Pergola Connection Through Exterior Insulation
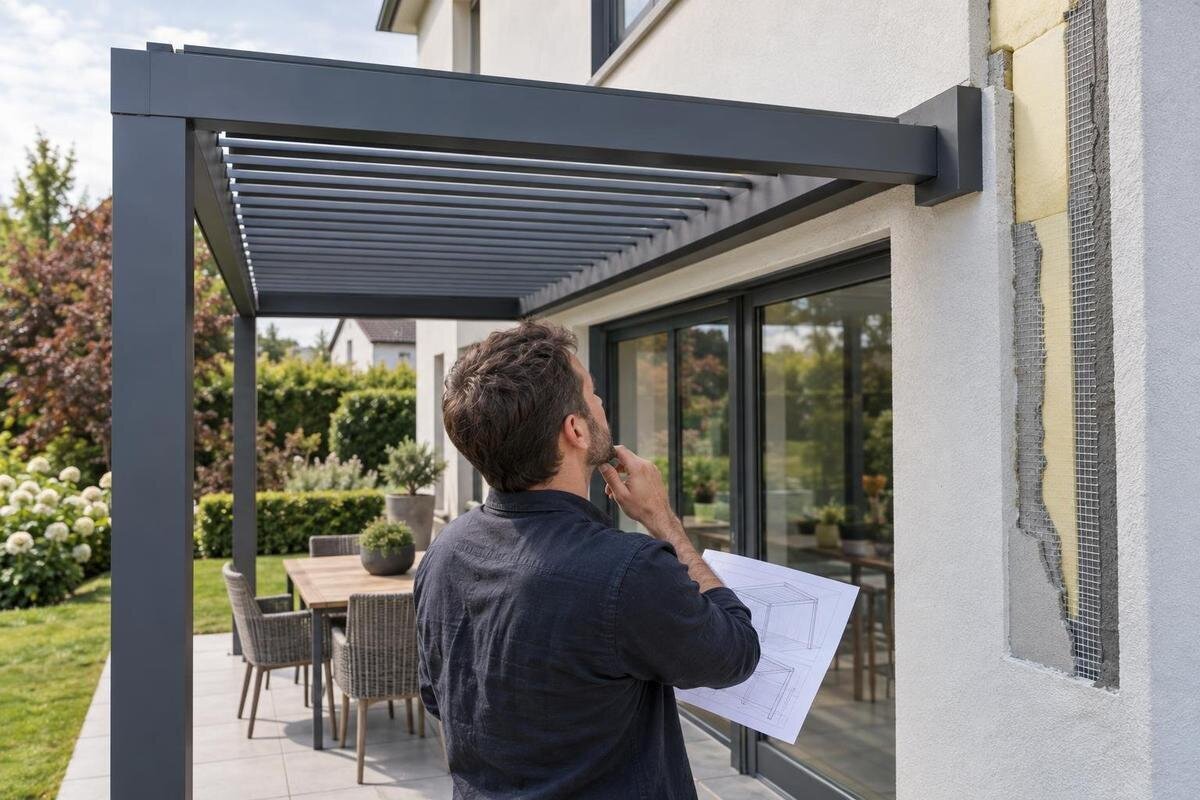
Pergola planning guide
Attaching a pergola to an insulated exterior wall is not just a matter of allowing for the insulation thickness. The visible finish may sit several layers away from the structural part of the building, and the wall assembly may have changed during renovations. Before a connection is chosen, the substrate at the proposed location needs to be identified and the load path designed for the specific pergola and site. The detail also has to preserve the wall’s weather-control functions. This guide covers the evidence to gather, the professionals to involve and the questions to resolve before installation begins.

Why exterior insulation changes the connection
A pergola attached to a house has to transfer the forces identified for its design through its mounting connection to a part of the building able to receive them. The visible wall surface rarely tells you where that part is. Depending on the construction, the outside layers may include render, siding or other cladding, insulation, a cavity and sheathing. The structural substrate may be masonry, concrete or framing, and some layers can play more than one role. A finish may keep water out without being intended as the pergola’s structural support. Do not infer attachment capacity from how solid the wall looks or feels. Two walls with the same exterior finish can conceal very different support arrangements.
Exterior insulation creates a stand-off between the pergola’s mounting point and the structural substrate. The connection has to bridge that zone in a way the design supports; choosing a fastener longer than the insulation is thick does not establish a suitable load path. The actual layer order and depth, verified substrate, model configuration and site conditions all matter. A designed detail must also account for how its supporting parts bear across the insulated zone and how the wall’s thermal and weather-control layers are addressed. A generic drilling sequence cannot answer those questions, and a detail drawn for a different wall may not suit this one.
Confirm the wall build-up before choosing a detail
Start with information about how the wall was built, rather than with the appearance of the finish. Look for original construction drawings, wall sections, specifications for the exterior insulation and cladding, and records of later renovations or repairs. Ask previous owners, builders or contractors whether the façade has been replaced, patched or altered, and note when the work occurred. A renovation may have changed the insulation depth or concealed the original substrate without changing the room-side wall. Photographs and invoices help frame the investigation, but they do not prove what sits behind every proposed attachment point. Mark gaps clearly instead of filling them with assumptions. Record where each fact came from and whether a measurement is exact or approximate, so the designer can see what remains uncertain.
Have the wall build-up confirmed at the proposed attachment location. Record the exterior layers and their thicknesses, any cavity or supporting layer, and the type and condition of the structural substrate. A drawing for a nearby wall section may not represent the area beside a window, corner or later addition. If records are incomplete, a qualified professional can decide whether a planned opening or another form of investigation is appropriate and how the wall should be restored afterwards. Avoid trial holes or a guessed wall depth as a substitute for identification. Keep uncertainty visible in the project notes until it has been resolved.
Identify the structural substrate at the connection point
Knowing that a wall is described as brick, concrete or framed construction is only a starting point. The attachment designer needs evidence for the specific zone and for the part of the structure that the connection is intended to engage. Exterior masonry, cladding and interior finishes can conceal a different supporting assembly; openings, joints and renovations can also change what is present at a particular location. A house’s age, product label or a neighbour’s similar-looking wall cannot establish the material or capacity at your connection point. Structural capacity and current condition are separate questions, and both need appropriate review.
Condition matters as well as material. A sound-looking finish does not demonstrate the condition of the substrate behind it, while visible cracking, loose cladding, staining or past repairs should prompt a closer review rather than a quick diagnosis. A qualified structural professional can assess the proposed attachment zone and identify what evidence is still needed. As you review the Bloomcabin Wall-Mounted Pergola, request the drawings for the exact model and configuration; compare those with verified wall information, rather than treating the product name as proof that a particular building can accept the connection. Make sure the evidence covers the planned attachment positions, not just a general description of the house.
Trace the load path through the complete pergola
A complete load path starts at the pergola and follows each designed connection into the building structure. The wall connection may see more than vertical weight; wind can push or pull on the assembly, and local snow conditions may matter for the particular configuration. A qualified structural professional should establish which site actions apply and assess the pergola, connection and supporting wall as one system. This is not something that can be determined from insulation depth or a generic anchor chart. The design should state the support assumptions it relies on, including the role assigned to each connection. The offset, projection and orientation of the pergola can affect how the design actions reach the connection, so the reviewed configuration must match what will be installed.
Check whether the selected arrangement relies on the wall as primary support, uses it for restraint, or shares support with posts or another component. Those roles are not interchangeable: a post does not automatically remove forces from a wall connection, and a wall fixing should not be assumed to carry all loads if the drawings say otherwise. When considering the Bloomcabin Pergola model, use its applicable drawings to clarify the intended support arrangement and compare it with the planned layout. Resolve any mismatch before selecting the wall detail.

Design the stand-off across the insulated zone
The insulated zone creates a physical offset between the outer face and the structural substrate. A connection design has to account for that offset and show how the projecting support transfers forces without asking compressible insulation or an unverified finish to carry them. The measured insulation thickness is useful information, but it does not by itself determine the hardware, attachment point or amount of support required. Nor should the cladding be squeezed or altered by a detail chosen only to pull the pergola close to the wall. These are design questions for the complete wall-and-pergola assembly.
Depending on the verified construction and model, a professional may specify a purpose-designed stand-off connection, an identified structural mounting zone or a different support arrangement. These are design routes, not interchangeable off-the-shelf answers; each has to fit the substrate and address the wall layers around it. For the Bloomcabin Bioclimatic Pergola, as for any candidate, request the applicable model drawings and have them matched to the actual façade. Do not choose a spacer or substitute a fixing on site simply because its length appears to span the insulation. If a stand-off is specified, the drawings should identify its structural components; improvised spacers are not a substitute for a designed connection.
Coordinate the connection with the building envelope
Strength and weather protection are related but distinct checks. Any planned penetration through an exterior wall can affect the cladding, drainage plane, water-resistive barrier, insulation or air-control layer. The connection detail should identify how the bracket passes through the assembly and how those layers are integrated around it; a neat bead of sealant at the visible surface does not, on its own, show how the wall manages water. The appropriate treatment depends on the construction materials and existing envelope design, so a detail borrowed from another house can be unsuitable even when the outside finish looks similar. Near a window or existing joint, surrounding flashing and water paths may influence where the connection can be placed.
Ask who is responsible for the envelope detail and how it will be coordinated with the structural connection and installation sequence. If the wall uses a drained or ventilated cavity, confirm that the proposed connection preserves its intended drainage or ventilation path. The designer or building-envelope specialist should identify compatible materials, transitions and any inspection or maintenance needs; the installer should know which reviewed detail to follow. If you are considering the bioclimatic pergola model, distinguish the product’s connection details from the envelope detail needed for your home. Product information alone cannot establish how the connection will meet the wall’s water-control layers.
Check the pergola layout against the actual façade
Set the proposed position against the actual wall, not only against a product photograph or a sketch. The model-specific drawings and an on-site measurement should establish the intended attachment line, projection and relationship to openings and façade details. Check for doors and windows, trim, cladding joints, exterior lights, vents, downspouts and service equipment near the planned connection. These can limit where hardware can go, where an envelope detail can be completed or whether the finished pergola would obstruct normal access. Record conflicts before the connection is designed, rather than after parts have been ordered.
Photographs help explain the site but are rarely a substitute for measured dimensions; perspective can make offsets, corners and clearances look different. Measure from reliable reference points and make sure everyone is working from the same wall elevation and product configuration. Leave enough access for the installer to complete the reviewed interface and for the owner to inspect it later, where the design allows. If an intended bracket location conflicts with an opening or wall feature, do not shift it by eye. Ask the designer to review the revised location and update the detail. Note surface changes and wall transitions, since an elevation drawn as flat may not describe the façade at every attachment point. Compare those drawings with the wall-mounted pergola model under consideration.
Consider another support arrangement if the wall is unsuitable
If the structural substrate cannot be confirmed, or the wall detail cannot be made compatible with the envelope, compare whether a different documented support arrangement is viable. This is a design decision, not a reason to improvise by omitting a wall connection or adding posts. Review the drawings for each candidate and ask what structure is meant to carry the pergola. The Bloomcabin Pergola may be part of that comparison, but its name alone does not show whether its intended configuration can be used independently or adapted to this site.
An arrangement that relies less on the house can shift demands to posts and their supporting ground, which also need a design suited to the product and site. A hybrid layout may still rely on the wall and therefore still needs the insulated-wall connection assessed. Do not assume that removing one attachment leaves the rest of the system unchanged. Have the complete support layout reviewed, including any required foundations, before treating another arrangement as a simpler solution. Ask which specific configurations are documented for the selected model; a general suggestion to add support does not establish an appropriate arrangement. This comparison keeps the focus on a workable load path rather than on avoiding one difficult detail.

Coordinate the structural and envelope reviews
Treat this as a coordinated review rather than passing one drawing from one trade to another. The structural professional should establish the substrate evidence, support roles and designed connection. A building-envelope specialist should address the wall penetration, water management and continuity of layers. The installer should confirm that the intended fixing locations and construction sequence are achievable on the actual façade and match the reviewed detail. Depending on the project, one person may coordinate more than one part, but the responsibilities still need to be clear. No role should be left to guess where another person’s design stops.
Ask for a shared project set showing the exact pergola model and configuration, measured attachment location, verified wall build-up, structural assessment, and the connection and envelope details. If you select the model shown in the Bloomcabin Wall-Mounted Pergola listing, ensure that the same product identity appears throughout the project set. Keep assumptions and exclusions visible, especially if part of the wall remains unverified. Before work begins, make sure the installer knows whom to contact if the exposed construction differs from the records. A coordinated record prevents the wall detail and pergola drawing from being treated as separate plans. If several specialists are involved, have them review the same drawing revision so their details do not conflict.
Settle the connection details before installation
Before installation is scheduled, the project file should answer a small set of connected questions: Which exact pergola and configuration are being installed? If you chose a product from the Bloomcabin Pergola listing, does that identity match the model named in the project drawings? What wall layers and structural substrate were verified at the attachment zone? Which model-specific drawing defines the support roles? Who designed or reviewed the connection, and where can the detail be found? How will the exterior wall’s water- and air-control layers be maintained? The answers should agree across the design and installation documents.
If the site presents different masonry, framing, insulation depth, cladding or damage than the assessment assumed, pause the affected work and have the detail reviewed. Do not let the crew compensate by choosing a longer fixing, adding an improvised spacer, moving a bracket or covering an uncertain joint. Any change can alter either the load path or the wall’s weather protection, so it needs a considered response from the responsible designer. Record what was found and what revised direction was issued. Retain the final detail and authorized revisions with the house records; later owners may need to know where the connection was made. That hold point is more useful than trying to resolve hidden construction during installation.
Frequently asked questions
Can I attach a pergola directly to exterior insulation?
Do not treat insulation, render or siding as the structural anchor point. The connection needs a designed path to a verified substrate; any support that bridges the insulation must be specified for that wall and pergola. The visible finish alone cannot confirm where or how to attach.
Is choosing a longer fastener enough?
No. Length only describes reach; it does not establish how the connection bears across the insulated zone, what structural material it engages, or how the wall layers remain weather-tight. Those points belong in the project-specific detail, not in an on-site guess based on insulation thickness.
What if I cannot find the original wall drawings?
Collect renovation records, invoices and photographs, then ask a qualified professional to verify the assembly at the proposed location. If the evidence remains incomplete, that professional can decide what further inspection is appropriate. Do not use exploratory drilling or a neighbouring house’s construction as proof of your wall.
Who should review the connection?
A qualified structural professional should assess the connection and load path for the specific pergola and site. A building-envelope specialist should address penetrations and continuity of the wall’s water- and air-control layers. The installer should confirm that the reviewed detail matches the actual wall and product configuration before work begins.
Can I choose a model from a product photo?
A photo can help identify a product, but it cannot show intended anchor locations, support roles or whether a wall detail suits your building. Identify the exact model and configuration, obtain the applicable drawings, and compare them with verified site information before deciding on the connection.
A pergola connection through exterior insulation is a wall-design question as well as a product choice. Insulation depth describes only one part of the assembly; it does not identify the support or prove the connection. A sound plan brings together verified substrate evidence, drawings for the exact model, a structurally assessed load path and an envelope detail for the actual façade. When those pieces agree, the installer can follow a project-specific connection rather than improvise around hidden layers.
