
Planning a Pergola for Accessible Outdoor Dining
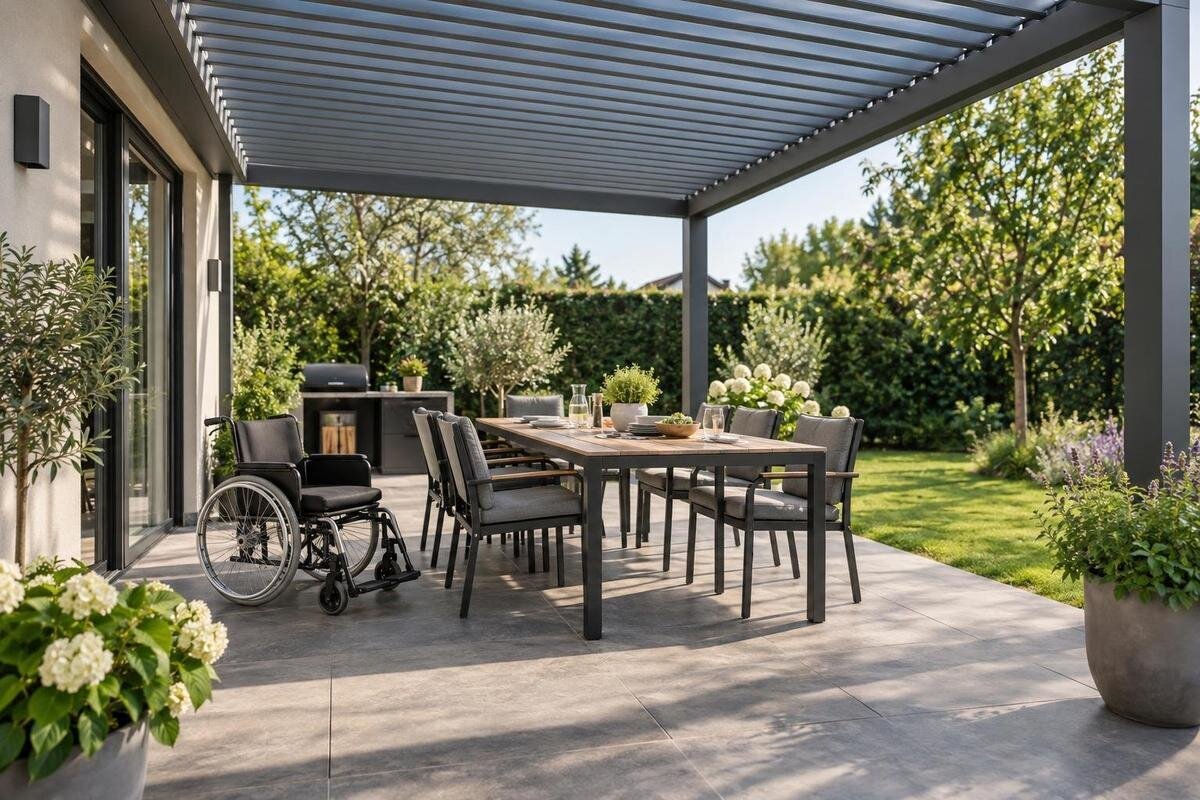
Accessible outdoor dining
Planning an accessible dining area under a pergola begins with the route people use, not with the product footprint. Diners need to reach the table, position a wheelchair or other mobility aid, pull out chairs, turn and leave without a post, door or stored item narrowing the way. A step-free approach helps, but access also depends on the surface, table supports, furniture and the habits of the people using the space. Measure the patio, entrance and chosen furniture, then test the arrangement at full scale. The result is a comfort-focused concept, not evidence that the design meets an accessibility code.

Diners’ needs and everyday routines
List who uses the patio regularly and the largest group you expect to host. With diners’ input, note whether they walk, use a cane or walker, arrive in a wheelchair, transfer to a dining chair or stay in the wheelchair at the table. Record whether a companion needs to sit beside them, where the mobility device should stay, and how much room is needed to get into position and leave the table. These details determine where an accessible seating position belongs. Wheelchair dimensions, armrests, footrests and turning preferences vary, so avoid planning around an assumed standard device. When several people use the patio, consider each person’s preferred way of arriving and sitting.
Observe an ordinary meal from arrival to departure. Note whether diners come from the kitchen, a side door or the garden; where serving dishes are set down; and who carries food or drinks. Include a helper, children or pets only if they are part of the household’s routine, since each changes how people share a path. Also consider how often someone gets up or needs to retrieve something during a meal. Separate everyday needs from occasional seating preferences: extra chairs for a gathering should not remove the route used day to day. Write these details down before sketching so later measurements answer real questions.
Map a step-free route to the dining area
Draw a continuous route from the house door or garden gate to the dining position, then measure its narrowest points. Include the door or gate in its normal open position, plus screen doors, thresholds, changes in level, railings, planters and storage that could constrict the path. Look at the surface under the mobility aid in use: loose gravel, soft ground, raised joints, gaps and grates may make an approach harder to manage. A step-free route still needs to be predictable and clear. If altering a surface or threshold is part of the project, have the proposed work assessed by an appropriate professional rather than improvising a transition.
Mark turns as well as straight sections, and keep the arrival path separate from the space where chairs move back. That separation lets someone reach the table without squeezing behind a seated diner or waiting for a chair to be moved. For an early size comparison, the Bloomcabin Pergola is listed in sizes from 9 to 24 m². On your sketch, show the route as a measured band rather than a centre line, then place the proposed pergola outline around the dining arrangement. Keep the route visible throughout this comparison so the choice of footprint does not displace the space needed to reach the table.
Check the table approach with the actual mobility device
Plan a genuine place at the table for someone using a wheelchair, rather than leaving a gap that works only while every chair is pushed in. Check whether the person can approach from a preferred direction, line up without blocking the main route and move close enough to eat comfortably. Look at tabletop height, the underside and the position of legs, apron or supports in relation to knees, footrests and armrests. These relationships depend on the actual person, chair and table; assess them together instead of relying on a product photo or nominal seat count. If a companion sits beside them, include that chair in the same test.
Try the table with the mobility device in place and the other seats occupied. A central pedestal, trestle, corner legs and crossbars create different obstacles; no base style is automatically right for every approach or transfer. Check whether a diner can pull in, reach food and leave without moving the table or asking someone else to shift. If someone prefers to transfer to a dining chair, leave a place to park their device within reach but outside the circulation path. Test the arrangement with the chair at its intended height and position, not with the tabletop alone. A small change in table orientation may improve the approach without changing the furniture.
Measure circulation with chairs in use
Measure circulation with the dining set in use, not on an empty patio. Show each chair pulled back far enough for its user to sit down and stand up, then add the space occupied by the seated person. Check the route from the entrance to the table and on to the exit; a chair, side table or serving cart can turn a generous-looking gap into a pinch point. Ask whether someone can pass a seated diner without touching a wheelchair or asking that person to move. If passing behind a chair is not part of the intended plan, make sure everyone still has a clear way to enter and leave their place.
Mark a place to turn around and exit comfortably instead of expecting someone to reverse through the full dining zone. Test with the wheelchair or other mobility device that will be used there; turning needs depend on the device and the person’s movements. Tape can show the table, supports, pulled-out chairs and route before anything is ordered. When comparing options on the Bloomcabin Wall-Mounted Pergola page, retain this turning area on each proposed layout. Check whether someone leaving the table can turn towards the exit while the other diners remain seated, rather than testing the movement only with the chairs empty.

Pergola supports and usable dining space
Treat the pergola’s stated size and the clear floor left for dining as separate measurements. On the site sketch, show the frame outline and support positions from the exact configuration, along with walls, railings, steps, fixed equipment and any objects that cannot be moved. A support near the end of a table may interrupt a turn; one at the edge of a path may narrow the approach. A wall can also prevent circulation around one side even where the floor looks open. Do not estimate post positions from a catalogue image. Ask for product information showing the configuration under consideration and compare its stated dimensions with a measured site plan.
Place the table and access lane only after the fixed elements are shown. Someone approaching from outside the frame still needs room to manoeuvre, while diners need space to move chairs without taking over the only route. If a path passes beside a support, test its narrowest point with the door or gate open and chairs occupied. Use the wall-mounted pergola listing to identify the model under consideration, then obtain the configuration details needed for your drawing. Its name and images alone do not establish connection details, support positions or usable floor area. Keep the early sketch labelled as a concept until those details are confirmed.
Place chairs and serving items without closing the route
Trace the occupied outline of each chair, including how far it moves back and whether it turns as someone sits down. A bench, armchair and dining chair need different amounts of floor space; draw the furniture you own or intend to use rather than a generic rectangle. Put the wheelchair position and any companion’s chair on the same plan. If a seat must be moved for access, decide where it will go during the meal. Parking it beside the door, at the end of the table or in the turning area can create a new obstruction. A flexible seating plan works only if the route remains clear in each arrangement.
Reserve places for side tables, serving carts and storage before finalising the route. Keep frequently used items within diners’ reach without leaving a narrow passage or a low obstacle around footrest height. Consider how a server reaches each seat and where a tray can be set down without blocking the approach. Furniture that can be rearranged may help when guest numbers change, but a setup that must be lifted or shifted at every meal may not suit daily use. Compare options in the Bloomcabin Pergola listing with a drawing that includes these serving and storage spaces, rather than one showing only the table and seats.
Connect the dining area to doors and paths
Check the entrance as carefully as the dining area. Draw the full arc of each door and gate, including a screen door, and leave room for someone to open it, pass through and close it without backing into furniture. A door that opens directly into the dining zone may conflict with a chair or wheelchair position; adjust the table location or create a defined lane before fixing the pergola layout. Record the threshold, handle and landing as existing conditions to assess separately. A route that looks open with the door shut may be blocked as soon as a person enters or another diner goes inside.
Follow the trip in both directions: from the home to the table, and from the garden or gate back to the house. Consider where someone carrying food or a drink can pause without standing in the route, and whether the path is still easy to identify when chairs are occupied. When reviewing the Bloomcabin Pergola product page, compare possible placements on a plan that includes both entrances. Pay particular attention to where arriving diners and people returning indoors would meet. If the patio or entrance needs a permanent change, involve a professional qualified for that part of the work before treating the alteration as an accessible route.
Plan visibility and controls around the access route
Check daylight and evening lighting at the times you expect to eat. A table may be comfortable while the route to it is in deep shade, or low sun may make changes in the surface harder to distinguish. Observe the whole path, not just the seats, and note shadows cast by the frame, furniture and nearby plants. Decide where any lighting belongs before installing it so a fixture, stand or cable does not become another obstacle. If the patio is used after rain or watering, watch where wet patches collect along the route and avoid placing loose items where people must step or roll around them.
Include any blinds, screens, controls or optional accessories in the circulation drawing if they are part of the plan. Check that someone can approach and use a handle or switch without furniture blocking access, and keep loose cords out of the walkway and turning area. When considering the Bloomcabin Bioclimatic Pergola, establish which components are included in the exact configuration and where they are located; the model name alone does not provide those details. Show their positions on the same drawing as the dining furniture, and ask a qualified installer about any fixed or electrical work.

Test the layout at full scale
A full-size mock-up can reveal awkward points before you commit to a layout. Use removable tape, chalk or another surface-appropriate marker to indicate the product’s stated outside dimensions and support positions from its drawing; then mark the table, chair pullback, wheelchair position, route and turning area. Walk through the plan from the entrance and try each seating place. Keep the mock-up clearly labelled as a concept: it is not a construction drawing or accessibility approval. If the existing surface is uneven, do not use a loose board or improvised ramp as a substitute for professional advice about permanent changes.
Test the whole routine with the people and equipment that will use the patio, if they are comfortable taking part. Try arriving, positioning at the table, turning, leaving, opening the door and passing while chairs are occupied. Test both a usual meal and a larger gathering if the furniture arrangement changes. Note any point that requires someone to reverse, wait, lift an item or ask a diner to move; revise the drawing and test again. If comparing a configuration from the bioclimatic pergola listing, use its dimensioned drawing for the mock-up. Record which configuration you tested so the results remain tied to that particular layout.
Confirm the plan and any applicable requirements
Before selecting a configuration, compare the final measured site plan with current, dimensioned product information. Confirm the outside dimensions and support positions for that exact option, then check that the intended approach and turning area remain clear with doors open, furniture occupied and fixed objects in place. When selecting an option from the Bloomcabin Wall-Mounted Pergola page, make sure the configuration matches the one used in your layout test. Record any changes made since that test and reassess the affected space. If the design depends on a wall connection, changes to the patio or a permanent access route, involve a professional qualified for that part of the project.
Keep comfort planning separate from compliance. A route that feels workable in a tape mock-up does not, by itself, prove that a project meets accessibility or building requirements. If compliance is required, ask the relevant local authority or a qualified accessibility or design professional which requirements apply to this project and how to document them. Do not treat minimum dimensions from an unrelated online plan as a local rule. The household test remains useful, but it answers whether the arrangement works in daily use, not whether it has been formally assessed.
Frequently asked questions
Is there one minimum width for an accessible pergola dining area?
There is no single comfort-planning figure that works for every route, mobility device, table and chair arrangement. Turning, passing and approaching a table are different tasks, so measure each part with the people and equipment involved. If the project needs to meet formal requirements, ask the relevant local authority or a qualified design professional which dimensions apply instead of treating an online example as a rule.
How can I check whether a wheelchair can reach the table?
Test the actual wheelchair alongside the intended table and seat position. Check the approach direction, knee and foot clearance, table supports, turning route and exit while the other chairs are in use. A catalogue image cannot show how a particular person and mobility device fit. If they wish, invite the person who will use the space to try a full-size concept layout.
Is the pergola’s listed area enough to plan the dining layout?
No. A published size range can help compare products, but it does not show the clear circulation left after the frame, supports, table, chairs, door swings and storage are accounted for. Compare current information for the exact configuration with a measured patio plan, then test the arrangement with the furniture in place.
Can movable furniture make the dining area more accessible?
It can offer options for different numbers of diners, provided each arrangement keeps a usable approach and exit. Mark where chairs, spare seats and serving carts will go when they are not in use. If access depends on lifting or moving furniture at every meal, reconsider the everyday setup rather than assuming those items will always be shifted.
Does a full-size mock-up confirm code compliance?
No. A taped layout helps test comfort, turning, furniture conflicts and daily routines, but it does not certify a design or replace a formal review. If compliance matters, confirm the project-specific requirements with the relevant local authority or a qualified accessibility or design professional. Keep the concept mock-up distinct from any verified project drawings.
An accessible dining plan is most useful when people can follow the route, approach the table and leave in the arrangement that will actually be used. Keep the mobility device, open doors, occupied chairs, frame supports and storage on the same measured drawing; then test it at full scale and revise any pinch points. Use a listed pergola size only as a product-comparison starting point, and deal separately with exact configuration details and formal requirements. The finished setup should work during an ordinary meal, not only when the patio is staged with every chair pushed neatly aside.
