
Planning Pergola Drainage Without Sending Water to a Neighbour
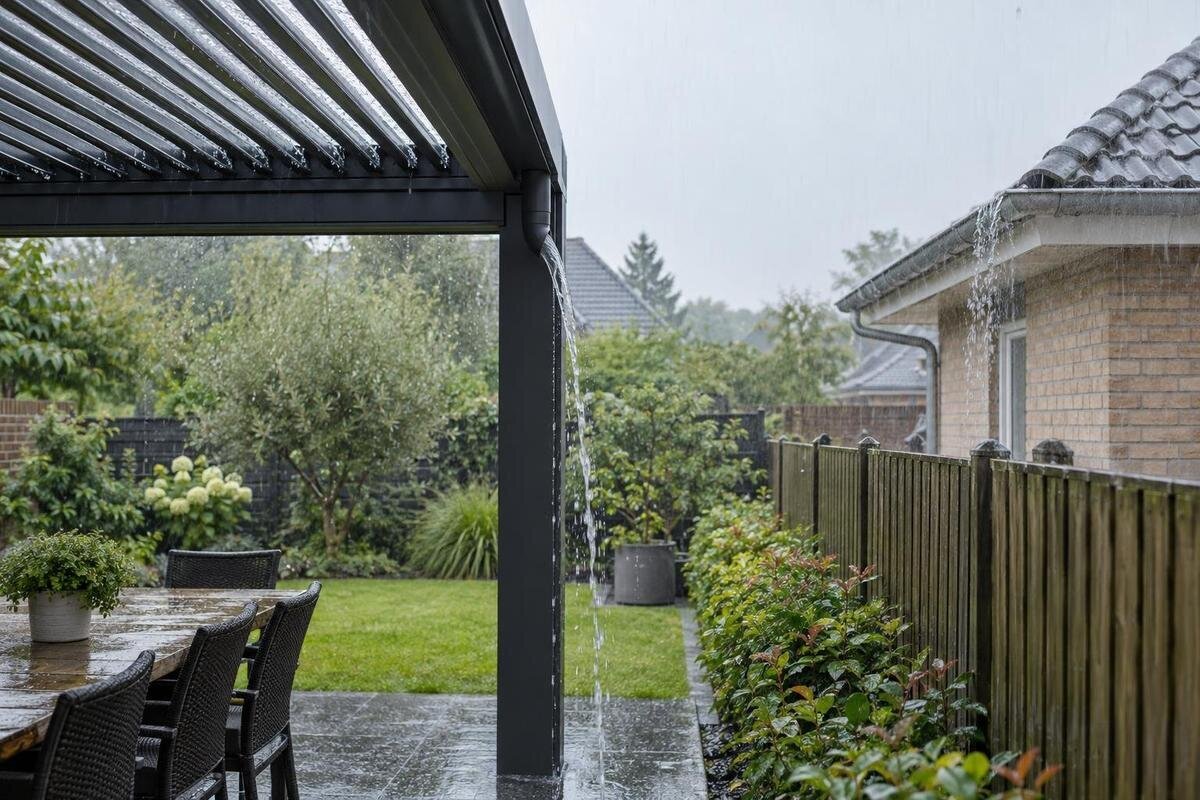
Pergola drainage
Water leaving a pergola is only one part of a site’s drainage pattern, but an outlet can concentrate it at a single point. A sound plan follows water from the exact model’s documented outlet, across the ground, to a suitable receiving area and any overflow route. Mapping existing grades and runoff before choosing the structure helps avoid directing new water towards a neighbouring property. Local project requirements and site conditions still need to be confirmed.

Map the whole site's water flow
Trace rainwater from the pergola’s top to its final receiving area rather than marking only a point beneath each post. Water may be gathered by a channel or shed from an edge, then land on soil or paving and travel farther. Rain falling outside the footprint can also arrive from an uphill lawn, a nearby roof or a paved area. Draw those flows separately: concentrated discharge from the pergola differs from broad surface runoff, even when they meet in one low spot. Note whether water enters from another part of the lot or leaves towards a shared or public area, as those connections can affect where you place the structure.
Before installation or finalizing the layout, observe the yard during and after ordinary rainfall and, where relevant, seasonal thaw. Record existing puddles, visible flow paths, current downspouts, low points, raised beds, patios, gates and property edges. A few photos or a simple annotated sketch can show an installer or drainage professional what happens before the pergola changes the site. This baseline helps distinguish a new discharge problem from runoff that was already present. Note where soil or paving stays wet and where water crosses a walking route; one light-rain observation is useful, but it does not represent every storm.
Confirm the pergola’s documented drainage route
Pergola drainage is model- and configuration-specific. Depending on the design, rain may be channelled to a particular edge or outlet, or fall from a more open perimeter; for a louvred roof, its operating position may change where water runs. Do not infer the route from a product photograph or assume that two pergolas behave alike. Request the current drainage diagram and weather-performance information for the exact model and chosen configuration, including intended outlet locations, flow direction and stated limits. For the Bloomcabin Bioclimatic Pergola, the listing identifies the product; it does not, by itself, establish a particular outlet position or drainage capacity.
Read the documentation alongside the proposed orientation and any enclosure you are considering. Confirm whether outlet positions are fixed or selectable, which edges are intended to carry water, and whether different roof positions change the documented route. Ask what the instructions say about conditions beyond normal operation and whether a separate overflow path is specified. If a diagram or limit is unclear, ask the supplier or installer to explain it before setting the foundation or paving layout. The aim is to know where the pergola’s water enters the site plan, not to assume that the structure will solve the property’s wider drainage needs.
Place outlets over a suitable receiving area
Choose a place that can receive water without immediately directing it towards a boundary, entrance or building. Check each possible outlet against the house foundation, patio doors, stairs, paths, outdoor seating and areas where people need a dry route. Consider both where water lands and where it travels afterwards: a pipe ending on a sloped slab may discharge well away from the post but still send runoff towards an unsuitable area. Do not select the nearest patch of lawn just because it looks absorbent. Before choosing a Bloomcabin Wall-Mounted Pergola, confirm the exact outlet side and documented discharge arrangement for the configuration under consideration.
An outlet should lead to an intended on-site route, not rely on a fence, planter or temporary object to stop the flow. Avoid concentrating discharge beside a foundation, onto loose soil where it may erode, or across a walkway where it could pond or freeze. Keep inspection access in mind as well: a concealed outlet is harder to monitor. If the only apparent receiving area is close to a property line, pause and have the grade and route assessed. Extending a hose or channel towards neighbouring land is not a substitute for choosing a suitable destination.
Read the grade before setting a route
Walk the ground from the pergola’s proposed footprint towards each possible receiving area. Look for the overall fall, shallow depressions, retaining edges and places where paving joints or lawn already guide water. A yard that looks flat when dry can still have a defined route in rain; a small change in grade may carry water, or two surfaces may meet at a pooling point. Mark higher and lower areas in plain terms on your sketch rather than estimating a slope from memory. Also note where a nearby roof or an upper part of your lot adds water, since an outlet placed in that path could add to an existing flow.
Do not treat grass or garden soil as guaranteed drainage capacity. Compaction, saturation, soil layers and seasonal conditions affect whether water can soak in, while a new patio or raised bed may change its route. If grading, an infiltration feature or a change near a retaining wall seems necessary, ask a qualified local professional to assess the site rather than improvising a berm or trench. Before fixing the layout for the Bloomcabin’s bioclimatic pergola model, place its documented discharge side on the grade sketch. That makes it easier to see whether the proposed outlet and the ground route work together.

Choose the final destination before the outlet path
Identify the receiving area first, then plan the route from each outlet to it. A designated drainage feature or appropriately designed conveyance may be suitable, but a garden bed or permeable paving is only an option if the site’s grade and ground conditions can accept the water. Water can run off a surface that appears porous, and a planted area may already receive flow from elsewhere. Keep concentrated discharge away from foundations and places where it can erode soil, cross a path or spill towards adjoining land. Consider what happens when the ground is already wet, not only where water goes on a dry day.
When reviewing the Bloomcabin Pergola, distinguish the point where water leaves the structure from the place where it will ultimately be received. Your plan needs to identify both, with a continuous route between them. A storage or infiltration feature is not automatically an adequate destination: confirm its site suitability and overflow route with a qualified professional, and check whether local approval is needed. Likewise, a nearby house drain, catch basin or municipal connection should not be marked as the destination until its ability to accept additional flow is confirmed. Include a secondary route in the plan before installation rather than leaving overflow to find its own path towards a neighbour.
Drainage near the house and property line
Where a pergola sits beside a house, draw separate routes for the pergola and the building’s eavestroughs and downspouts. Mark where each system currently discharges and where the proposed pergola outlet would end. This makes it easier to distinguish two routes that merely pass near one another from a proposed connection that combines their flow. When planning the position of the Bloomcabin Wall-Mounted Pergola, include the nearby wall, foundation and doors on the drawing. Have the installer or a qualified drainage professional assess any proposed connection; convenience and proximity alone do not establish that the house drainage can accept additional water.
Mark the property boundary as well as fences, retaining walls, shared driveways and walkways. A fence is not a drainage plan: gaps below it or a slope along it can let concentrated runoff continue beyond the intended area. Conversely, solid edging can hold water and create pooling on your side, so do not rely on it to manage a flow. If the boundary position is uncertain, verify it using reliable property information. On townhome, strata or condominium sites, shared landscaping and drainage may also require coordination with the responsible manager or board.
Consider enclosures and nearby water sources
Plan for the configuration you will actually use, including any side panels or enclosure that may be added later. Screens, fixed walls and glazing can alter how wind-driven rain reaches the ground, while the position of a louvred roof may affect its drainage path; the exact effects depend on the product. Verify them in current instructions instead of assuming a diagram for one arrangement applies to another. If reviewing the Bioclimatic Pergola listing, request documents for the specific model and accessories you intend to use, then identify where water can leave each side.
Map other water sources that share the surrounding area: downspouts from a house or shed, an upper patio, a slope from the back of the lot or an existing channel. An outlet aimed at the same low point can combine flows and create more pooling than the pergola alone suggests. A future patio extension, deck skirt or raised planter could also block a route that worked on the original plan. Review proposed landscaping with the pergola layout. On the sketch, distinguish existing flows from the pergola’s proposed discharge so the combined route can be assessed rather than considering each source in isolation.
Check local project requirements
Check requirements for the actual property and project before changing grade, adding a discharge route or proposing a connection to a public or private drainage system. Ask the municipality or other local authority responsible for building, drainage or stormwater what approvals or design conditions apply. Requirements can depend on location and project scope, so generic guidance is not a substitute for a current local answer. If a homeowners’ association, strata corporation, condominium board, landlord or shared-property agreement governs the site, check its process as well. Keep any written direction with the drainage sketch so everyone is working from the same assumptions.
Get qualified local help if the yard falls towards a neighbour, water already pools, a retaining wall or buried drain is involved, or the proposed route depends on soil infiltration. The pergola supplier or installer can clarify the model’s documented outlet path; a drainage professional or suitably qualified landscape or civil designer can assess the ground and onward route. These are separate questions, so one answer does not replace the other. Share the same plan with both, ask who will verify the final discharge point, and avoid relying on an undocumented assumption about how much water the site can receive.

Draw and verify the entire drainage route
Turn the discussion into a one-page site plan before work starts. Mark the pergola footprint, each documented outlet, the expected direction of flow, the proposed receiving area, the property line, buildings and downspouts, pavement, paths, doors, visible low points and existing drainage features. Add arrows for the ground’s fall and note which observations were made during rain. Write a question beside every unknown, such as whether a proposed connection is acceptable or whether a planted area can receive discharge. A clear plan makes omissions easier to spot than a conversation based only on left and right.
For the Wall-Mounted Pergola model, transfer the specified outlet locations to the site sketch in the orientation you intend to install. Ask the installer to review the drawing on site, tracing each outlet to its designated destination rather than relying on descriptions such as left or right. Clarify which route applies if normal flow is obstructed or exceeds the intended path. Record who is responsible for the pergola installation, any separate drainage work and verification of the final discharge point. Include access to visible outlets and mark planned additions, such as a patio or screen, so everyone can see whether later work would close off the agreed route.
Observe the route after installation and keep it accessible
After installation, observe the first ordinary rainfall from a safe place and compare what happens with the plan. Check where water actually exits, whether the intended ground route carries it away, and whether it pools, cuts a channel or approaches a door, path or boundary. This is a check of that particular rainfall, not proof of performance in a severe storm or a substitute for the model’s stated weather limits. If discharge differs from the documented route or creates an unexpected problem, contact the installer or a qualified drainage professional before moving the outlet or changing the grade.
For buyers considering the Bloomcabin Pergola model, maintenance access belongs on the drainage plan alongside outlet placement. Keep the relevant manufacturer’s instructions with your site sketch, and include both the visible outlet and the downstream route in routine checks. Revisit the sketch after changes to paving, planting or grade and after seasonal changes to ground conditions. Compare any new pooling or flow paths with the observations recorded before installation. Maintain access to components as directed by the manufacturer; seeing the outlet does not confirm that the route beyond it is clear. Keep the planned receiving area and secondary route identifiable rather than allowing later landscaping to obscure them.
Frequently asked questions
Should I choose the pergola position or the outlet location first?
Consider them together. First map existing runoff and identify areas that can receive water, then confirm the selected model’s documented outlet positions. A layout that fits the seating area may still need adjustment if its outlets leave no suitable route across the site.
Can pergola rainwater simply run onto the lawn?
Only if the ground and surrounding grade can manage the discharge. Grass does not guarantee that water will soak in; soil may be compacted or saturated, and the lawn may slope toward a boundary. Observe existing runoff and get site-specific advice if you are unsure.
Can I connect a pergola outlet to a house downspout?
Do not assume the existing eavestrough or downspout can accept additional water. Confirm compatibility, capacity and any applicable local requirements with a qualified professional or local authority before planning a connection.
What if my yard slopes toward a neighbouring property?
Have the proposed outlet and ground route assessed before choosing a location. Avoid adding a concentrated discharge at the low edge, and check local project requirements. There is no universal berm, pipe or grading change that suits every site.
Does checking the drainage in ordinary rain prove it will work in every storm?
No. An observation shows how water moved in that rainfall, not how the system will perform in every weather condition. Use the selected model’s documentation for its stated limits and ask a qualified professional about the site route and overflow.
A neighbour-conscious drainage plan connects four things: the pergola’s documented outlet route, the ground’s actual grade, a suitable receiving area and the requirements for the specific property. Follow the water all the way across the site, plan an appropriate overflow route, and check what happens in ordinary rain. This helps avoid creating a concentrated flow towards neighbouring land without promising performance in every weather condition.
