
Planning a Pergola Foundation Below Porcelain Pavers
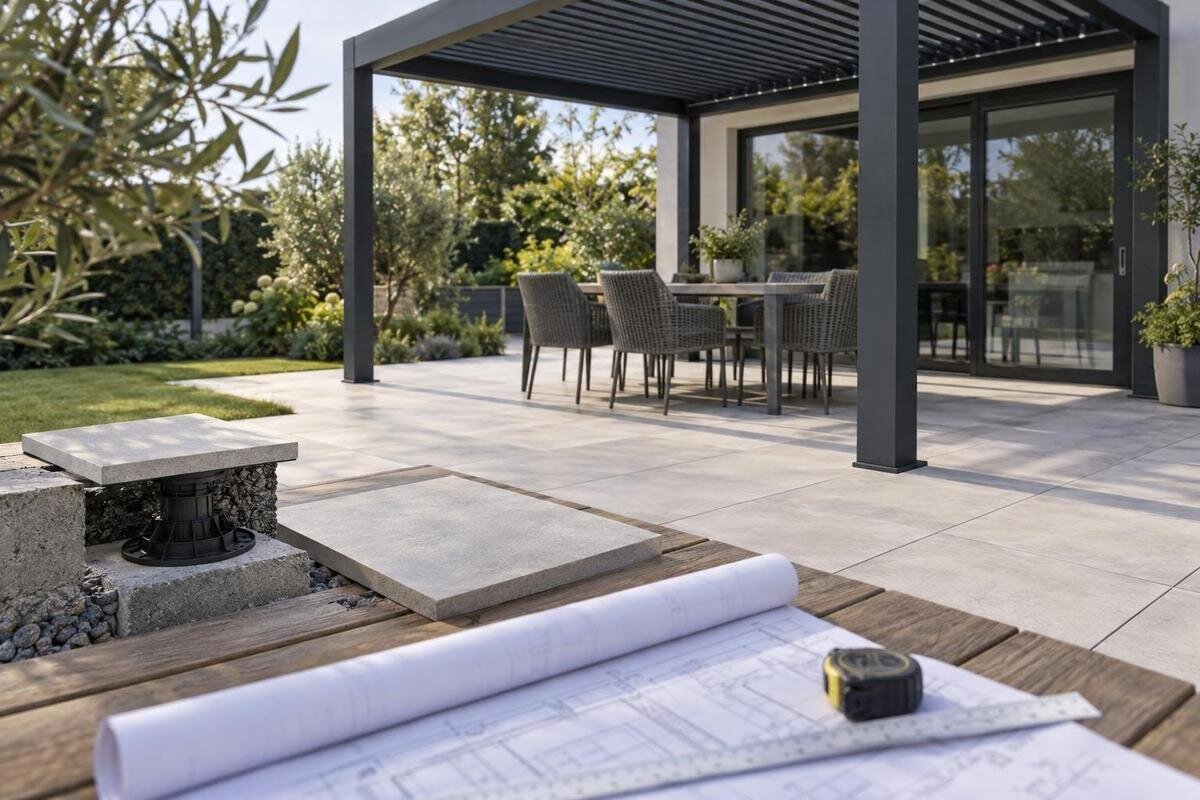
Pergola planning
Porcelain paving gives a pergola patio a crisp, finished surface, but the tile grid does not show what carries the structure below it. Each post needs an approved connection to a structural footing or other designed support; the paver and its joints are part of the finish, not an anchor. Coordinating the foundation before the paving is cut helps avoid misplaced posts, awkward tile pieces and conflicts with finished height or drainage. The useful planning document connects the post layout, site conditions, footing design and actual paving assembly.

Before you order 1
Keep the structural footing separate from the porcelain finish
Treat the pergola’s load path and the patio’s walking surface as separate systems, even though they meet at each post. The post transfers forces through a model-approved base or connection into a footing or other structural support. Porcelain pavers, grout and jointing materials create the finished surface; they should not be treated as the part that resists post loads. A patio can feel rigid underfoot while the pavers are supported by a separate bedding layer, pedestals or another assembly with a different structural role. A solid-looking tile is not evidence that it can carry a pergola connection.
That separation must appear in the design detail. It should show how the post, connector, footing and finished paving relate in plan and section, including whether pavers stop short, are cut around a support or meet a structural element in another approved way. Do not assume a fastener through porcelain reaches suitable structure, or that a cutout makes the remaining tile a bearing surface. The finish can be arranged around the support; it cannot substitute for a designed load path. Keep the anchor independent of later tile repair, and assess structural movement separately from a cosmetic crack at a joint. The approved interface also determines whether a paver can be removed without disturbing the connection.
Identify the full paving build-up
Before anyone marks post centres, identify exactly what lies under each paver. An outdoor porcelain surface may be bonded over a slab, set on a prepared bedding and base, or supported on pedestals; the view from above does not reveal which assembly is present. Ask the paving installer for construction details or as-built information, including the paver product and thickness, bedding or support layer, underlying structure, joint layout and drainage routes. Note any edge restraint or prior repair that may affect excavation. If records are missing, arrange an appropriate site investigation rather than choosing a footing detail from assumptions.
These layers affect excavation, support and final height. A footing pit may cross a slab edge, disturb the paver base, intersect a drain or conflict with buried services; a pedestal system may leave an accessible void rather than a solid bed. Record the elevation from a stable benchmark to the finished paving and, where known, to the structural surface below. Draw a cross-section at each support, marking confirmed layers and unanswered questions. If you are considering Bloomcabin Bioclimatic Pergola, identify the exact model and configuration when requesting its post layout and anchoring information. Combine those drawings with the paving cross-sections so the support locations can be reviewed against the actual patio assembly.
Before you order 2
Set out post centres from fixed site references
Start from the current drawing for the exact pergola configuration, not a gallery image or dimensions inferred from its overall area. Locate each post centre relative to fixed references that can be re-established on site, such as a surveyed building face or a marked control line. Show the front-to-back orientation, centre-to-centre dimensions and proposed finished support positions on a plan. State whether each dimension is measured to post centres or outside faces, and record the drawing revision. If the configuration includes a wall connection, show that interface as well as the post grid; a product name alone does not tell a paving installer where every support lands.
Then survey the patio that actually exists: its edges, steps, thresholds, drains, changes in paving direction and areas that cannot be excavated. A grout line can help lay out a pattern, but it is a poor sole datum if the paving may shift or joints are not square to the house. Carry verified post centres onto the prepared base before pavers are installed and check dimensions from more than one reference. If measured conditions conflict with the approved plan, resolve the mismatch before excavation; do not shift a column simply to land neatly on a joint. For Bloomcabin Wall-Mounted Pergola, use the approved drawing to locate the supports and wall connections on the same site plan. Keep the reference point protected through paving work so both trades can check their measurements against it.
Coordinate post centres with the paver pattern
Overlay the approved post grid on a scaled paver plan before ordering, laying or cutting tile. Use the actual paver module and intended joint width, plus perimeter cuts and any border band, rather than a nominal grid from a catalogue. If a post centre falls near a joint or close to a paver edge, have the paving installer review the resulting pieces and proposed cut method. A pattern that leaves a narrow strip, awkward notch or fragile corner may need redesign; there is no universal minimum piece width that can be prescribed without knowing the paver and installation system. Include the planned installation tolerance in the review.
Decide whether the paver layout can shift to meet the structural post grid, or whether a border or revised starting point can absorb the difference. The post itself cannot be moved casually to suit a tile joint: its position may be fixed by the approved frame and anchoring design. Show the base or connector footprint, not only the post centre, because the visible cut may need clearance around more than the post shaft. If selecting the regular Bloomcabin Pergola, obtain its current post-layout drawing before the paving installer prepares the pattern. Agree on the final layout before any pieces are cut, and keep replacement pieces where possible. A tidy joint alignment does not justify an unapproved change to a support location.

Before you order 3
Agree on finished elevations and drainage
Establish one vertical datum for the patio and show the proposed finished paver top at each post. The post or base detail has to work with that level, while footing elevation is set by the structural design; the two are related but not interchangeable. Allow for the actual paver thickness and the bedding, adhesive, pedestal or base layer that belongs to the selected system. Measuring from rough ground and adding an assumed tile build-up can place a base too high or leave a connection inaccessible. Note nearby thresholds, steps and drain grates on the same section, and identify the point from which each height is measured.
Drainage needs the same coordination. The finished surface should retain its planned water path, and a footing head, post base, collar or cutout should not accidentally form a dam or trap debris. Ask the paving designer and installer how the perimeter around each support will be finished without blocking intended drainage or compromising the paving assembly. Check elevations in plan as well as in cross-section; water may travel toward a post from more than one direction. Include snowmelt and seasonal wet conditions in the discussion where relevant, without guessing at a universal slope or clearance. If a height change is proposed, have the team recheck nearby thresholds and drains rather than hiding a mismatch by raising the paving.
Base footing design on site evidence
Footing type and size depend on more than the visible patio. The pergola’s design loads and post arrangement, soil and fill conditions, water, ground movement associated with seasonal freezing and thawing, nearby retaining structures, excavation limits and site exposure can all affect the support design. Wind and snow actions may also be relevant, depending on the model and location. A qualified structural professional should assess those inputs using the manufacturer’s current approved anchoring drawings and appropriate site information. Do not borrow footing dimensions from another pergola, a patio detail or an online rule of thumb; no single footing size suits every site.
A useful review package includes the exact model and configuration, post-centre plan, anchoring detail, available soil and site information, paving cross-section, finished-level survey, drainage and utility information, plus photographs of constraints. Record gaps in that information instead of filling them with a standard detail from another job; if soil information is uncertain, ask what further assessment is needed. When planning foundations for this bioclimatic pergola model, include its applicable drawings in the package so the structural professional can assess the proposed support arrangement alongside the site conditions. Confirm permit or inspection questions with the local authority or qualified professional responsible for the project. Address unresolved design questions before foundation work begins, including whether the proposed anchor suits the exact support detail.
Before you order 4
Coordinate construction before paving
For a new patio, coordinate the work in an order that protects both systems. First agree the post grid, footing design, anchor positions and finished paving plan; then locate services and other known obstructions before excavation. Install the structural support to its approved detail and verify position and elevation before it is concealed or surrounded by paving. Only then should the paver layout and cuts be finalized against the confirmed set-out. Agree who checks the work at this point, what evidence they record and whether another review is needed before the finish proceeds. This planning sequence does not replace the project-specific construction method.
On an existing patio, investigate the construction before deciding how many pavers to lift or cut. Have the paving installer identify the actual assembly, and have the structural professional assess the proposed excavation and support. Label and protect pavers if they may be reused; replacing a piece or changing a joint can alter the visible pattern, but must not drive an unapproved post relocation. Coordinate lifting, excavation, anchor installation and reinstatement between the pergola and paving trades. If you have selected the wall-mounted pergola, confirm its approved support arrangement before agreeing on the extent of the paving work. Note how adjacent pavers will be supported during the work and protect identified drainage components according to the project details.
Plan the cutout and joint around each post
The cutout is both a finish detail and an access decision. The approved support drawing should give the dimensions needed to coordinate clearance around the post or base, but it may not specify the finished edge treatment; resolve that with the paving-system supplier. A cut tight against metal or another hard surface can create contact or be difficult to install, while a large opening can expose the base layer and collect debris. Do not invent a standard gap or rely on grout to disguise a mismatch. Ask what joint, cover or trim is compatible with both the paving and anchor details, and who is responsible for maintaining it.
Plan how the opening will handle movement and water. A structural footing and a paver field can settle or respond differently, so rigidly tying the tile edge to a post without an approved detail can damage the finish. Equally, a flexible seal or collar should not be chosen casually if it could block drainage or prevent access to an anchor. The finished detail should support cut edges as intended, avoid unwanted contact with the post, and leave connections that require inspection reachable. Identify cut edges, opening dimensions and any required movement joint on the paving plan before ordering. For the regular pergola model, request the actual base and support dimensions needed to draw this interface. Account for installation tolerance and future access when agreeing on the opening.

Before you order 5
Assign responsibility for drawings and measurements
Give each specialist the same coordinated drawing rather than asking them to reconcile separate sketches on site. The pergola supplier or installer should provide the current model-specific post layout and approved anchoring information; the structural professional should assess footing design; and the paving installer should confirm the build-up, paver module, jointing, cut feasibility, finished elevations and drainage. A site coordinator can combine these into one plan and section showing post centres, base footprints, known footing extents, layer build-up and agreed datum. State who confirms each measurement and before which work proceeds, and mark older sketches as superseded.
Record the model name, configuration, drawing revision, measurements verified on site and any agreed tolerances. Changes matter: moving a post to align with a grout joint can affect frame geometry and the designed load path, while changing tile thickness can alter the base interface and final clearance. Ask the responsible designer to approve a change before the footing or pavers are altered. If Bloomcabin Pergola is selected, use that exact product name in the shared record and identify the applicable drawing revision. If the preferred tile pattern conflicts with approved supports, revise the paving layout or discuss a different design rather than choosing a footing location by eye. Use consistent units and reference points in site mark-ups and construction drawings.
Inspect and record the work before it is covered
Before pavers conceal the work, set a hold point agreed by the project team. Compare each marked post centre, connection orientation and footing or anchor elevation with the current approved drawing; resolve discrepancies before the finish is laid. Check that excavation has not exposed an unexpected service or damaged adjacent construction, and confirm the connection remains accessible as designed. A check against the site datum is more useful than measuring from a tile edge that may shift during layout. Photograph each support and record offsets to fixed references so its location remains known if a paver needs to be replaced later.
After paving, check that cutouts match the approved detail, pavers are not wedged against posts, drainage paths remain clear and any connections requiring access are not buried. Update the as-built plan with finished levels, final cut positions and changes approved on site. Keep the product drawing and footing assessment with that record. If the selected unit is the Bloomcabin bioclimatic model, identify it as Bloomcabin Bioclimatic Pergola in the installation records and retain the drawings used for the work. Have the relevant trades confirm the completed paving and structural connections before closing the project file. Include the date and the responsible parties so future repairs can be coordinated.
Frequently asked questions
Can a pergola be anchored through porcelain pavers?
The paver, bedding and grout are finish components; a fastener passing through them does not make them a structural anchor. The post needs a connection to suitable structural support using the pergola’s approved detail. If that detail passes through the paving, have a qualified professional confirm that the load is transferred to the designed support below.
Does every pergola post need its own footing?
Do not assume the number or placement of footings. The approved drawing for the exact model and configuration, together with an assessment of the site, determines the support arrangement. Ask for the current post layout and anchoring information rather than inferring what is needed from a product name or photograph.
Should I shift a post to line up with a grout joint?
Not unless the responsible designer approves the change. A post position may be fixed by the frame and anchoring design, so moving it can affect the intended support. Ask the paving installer to test a different starting point, border or cut pattern against the approved post centres first.
How deep or large should each footing be?
There is no universal depth or size. A qualified structural professional needs the model and anchoring information, along with suitable evidence about soil, fill, water, seasonal ground movement, exposure and site constraints. Wind and snow considerations may also matter. A neighbour’s footing or a generic rule of thumb is not a substitute for that site-specific assessment.
What should I have ready before requesting a site assessment?
Gather the current approved post layout and anchoring drawings, the exact model and configuration, the paver product and actual build-up, measured finished levels, and a plan showing patio edges, thresholds, drains and known services. Include available soil or site information. Mark which details are confirmed and which still need investigation.
Good results depend on resolving the hidden work before the tile pattern is fixed. Treat the footing as the pergola’s structural support, the porcelain as a finish, and the connection between them as a designed detail. With exact post centres, verified paving build-up, shared elevations and agreed cutouts on one current drawing, the trades can coordinate a neatly finished patio without relying on the tile for structural support. Keep the site assessment and as-built record together for future repairs.
