
How to Create a Garden Courtyard Around a Pergola
Garden planning guide
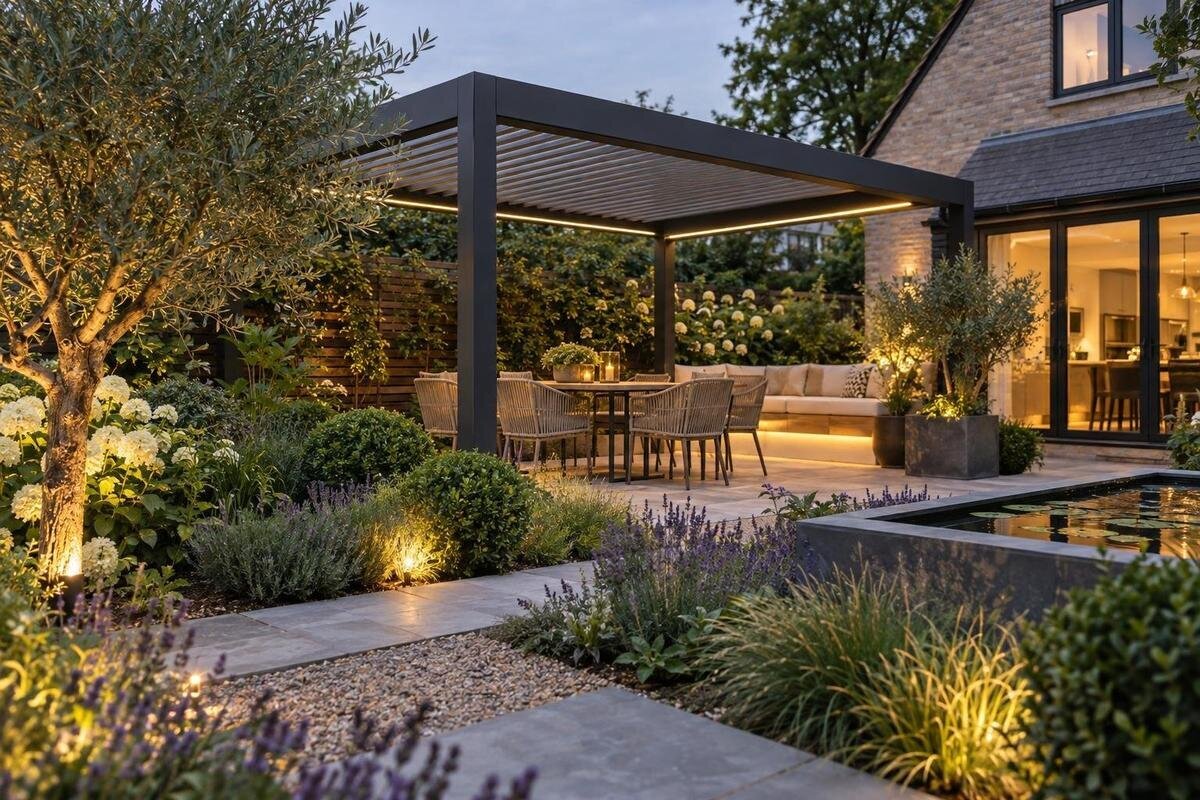
A garden courtyard feels like an outdoor room when the pergola, paving, planting and paths read as one plan. The structure gives the space a focal point, but the surrounding edges determine whether it feels connected to the garden or boxed in. Start with the activities and routes, then draw the full footprint, planting beds, hard surfaces and drainage together. That order helps shape a comfortable space without blocking access or sending water where it should not go.

Choose the courtyard’s main use
An outdoor room feels intentional when its main activity is clear and its views are considered from both the house and the garden. Decide whether the pergola-centred area is mainly for meals, conversation, quiet sitting or a flexible mix. That choice affects how much uninterrupted floor space you need and where furniture can sit. For a mixed-use courtyard, sketch the everyday arrangement first, then test the occasional one. A dining table and a lounge grouping may each fit separately but compete for the same space when used together. Decide which arrangement takes priority rather than trying to accommodate every activity at once. Note what you want to keep in view, such as a mature tree, a planting border or open lawn. A courtyard need not be fully enclosed: paving under the pergola and planting along one or two edges can define a room while leaving the wider garden visible.
Think of the pergola as one layer in a larger composition. Its posts and overhead frame mark a central zone; paving sets the floor, planting softens the perimeter, and paths connect the courtyard to other parts of the property. Decide how much enclosure you want before adding screens or dense shrubs. One open side can preserve a garden view, while a planted edge still distinguishes the seating area. If furniture will be rearranged, leave enough open floor for more than one layout. When routes, surfaces and boundaries support the same use, the space reads as a courtyard rather than a collection of separate features.
Map the complete footprint
Begin with a dimensioned drawing of the whole working area, not just the pergola footprint. Include the house, doors, gates, existing trees, utility locations, eavestrough outlets and changes in level. Measure the outside dimensions and post positions for the specific configuration you are considering, then place them on the plan. The Bloomcabin Pergola is listed in sizes from 9 to 24 m²; that area range can help with an initial comparison, but it does not replace the selected configuration’s exact dimensions or post positions. Confirm those details from current product documentation before fixing paving or planting-bed lines. Use the same scale for the structure and surrounding landscape so their proportions can be compared directly. Label existing features separately from proposed ones, and mark any measurements still awaiting confirmation. This keeps an early estimate from being mistaken for a settled dimension when you revise the courtyard’s edges.
Add furniture at its actual size, including the space needed to pull out chairs, walk around a table or reach a lounge seat. Show where cushions, garden tools or other items will be stored if they need to be close at hand. Then mark the principal routes from the house, gate and garden beds. A hose, chalk line or removable tape can transfer the proposed layout to the ground. Walk those routes and sit within the marked area before choosing materials. This simple full-scale check can reveal a tight corner or excess paving while the plan is still easy to change.
Connect the courtyard to the house
A courtyard is easier to use when its connection to the house is clear. On the plan, show which door people will use, how it opens and where a step or change in surface already exists. If you are considering Bloomcabin Wall-Mounted Pergola, place the proposed house-side line on a drawing of the exterior as well as on the garden plan. The product name identifies a wall-mounted format; it does not establish whether a particular wall or location is suitable. Have a qualified professional assess the proposed attachment before treating it as a settled part of the layout.
Plan the threshold as part of the landscape rather than an afterthought. The patio surface might continue from the house, change material at the pergola or meet a planted edge, but the transition should make the route easy to read. Keep door swings and access to exterior fixtures visible on the drawing. Check whether a proposed post, screen or tall plant would obscure a useful window view or overlap an eavestrough outlet. Leave room to reach the wall for routine upkeep instead of letting paving or planting make the house-side edge difficult to maintain.
Keep routes clear through the garden
Trace the main path from the house or gate to the pergola, then connect it to other places people need to reach, such as a garden bed, lawn or storage area. A route that passes through the middle of the seating layout can interrupt the courtyard; one that runs beside it may work better. When you place Bloomcabin Bioclimatic Pergola on the drawing, use confirmed outside dimensions and post locations to check how the route passes the structure. Distinguish a path used to reach the seats from a through-route used by someone heading elsewhere in the garden. The latter should remain usable while the courtyard is occupied. Test the layout with chairs pulled out and people seated, not only with furniture neatly tucked away. This shows whether everyday movement depends on someone standing up or moving a chair.
Set path width from the actual pattern of use rather than from an arbitrary standard. Consider whether two people need to pass, whether a garden cart will use the route and how chairs or planters affect its edges. Keep the walking line consistent where possible; a sudden narrowing beside a post or shrub can make a route feel awkward. Surface changes should be easy to notice, especially where paving meets lawn or gravel. If a path curves, let it lead somewhere or frame a view, rather than bending only to fit leftover space.

Choose paving for the setting and the use
Choose a surface that suits both the house and the amount of activity in the courtyard. Pavers, stone, brick, concrete, gravel and decking create different visual textures and maintenance needs. A restrained palette can help the pergola remain the focal point; a contrasting border or change in laying direction can distinguish the seating area from the garden path. Compare samples beside the house exterior and any paving you intend to keep, rather than judging each material in isolation. View them from the house as well as from the proposed seating area. Decide whether the courtyard should continue an existing colour scheme or introduce a clearly defined change. In places where freeze-thaw conditions matter, check that the proposed material and its care requirements suit the site. Avoid choosing a finish from appearance alone when the surface will be used often or needs regular cleaning.
Coordinate the paving pattern with the structure and the garden edges. Once you have confirmed the layout of your chosen Bloomcabin Pergola configuration, use its actual post positions when planning cuts, joints and border lines. Do not treat the listed area as a dimensioned layout. Plan where paving meets soil, lawn or gravel, and decide how that edge will be kept tidy. Use hard surface where it supports sitting and circulation, rather than paving every available corner by default. The remaining areas can provide room for planting and help the courtyard feel connected to its surroundings.
Plan planting for mature size and upkeep
Choose plants for the conditions they will actually receive, including light, soil and moisture, and plan for their mature height and spread. A low planting edge can soften paving without hiding the courtyard; taller plants can frame a view or provide a greater sense of enclosure. For a mix of structure and seasonal change, combine plants with different forms and periods of interest, while keeping the overall palette manageable. Before finalizing a bed near the pergola, plot the confirmed post locations for the Bloomcabin Bioclimatic Pergola. This helps keep planting from crowding the structure or the routes around it.
Record planting requirements rather than choosing by a plant’s appearance at the nursery. Note mature dimensions, light and moisture needs, likely pruning, and the room required to reach each bed. Keep utility routes and existing trees in view, and ask a local nursery or landscape professional about plants suited to the site. If you are considering a climber, do not assume the pergola frame is designed to support it; confirm that separately for the model under consideration. Leave clearance for routine care so pruning, weeding and surface cleaning do not require moving furniture or squeezing between branches and posts.
Plan drainage before setting surface levels
Observe where water goes after rain before fixing the courtyard’s paving edges or planting beds. Note low spots, existing drains, eavestrough outlets and places where water already collects. Include those details on the landscape plan alongside proposed hard surfaces and planted areas. If a wall-mounted Bloomcabin option is part of the concept, show its proposed position with the house’s existing drainage features; do not assume how water will move based on the structure’s style. Keep planned runoff away from the house and neighbouring areas, and ask a qualified landscape professional to assess changes to grades or drainage.
A surface that allows some water through does not automatically solve pooling. The surrounding soil, the layers beneath the finish and the route water can take all affect the outcome. Likewise, a planted bed is not a drainage plan by itself. Make sure the drawing shows where hard surfaces meet soil and how those transitions fit the existing site. If the plan adds a new drain or changes ground levels, have the approach reviewed before work begins rather than trying to correct a problem after paving is installed. This protects the intended layout from avoidable changes later.
Create privacy without closing off the garden
Use planting, a screen, a fence or a low wall to control specific views rather than enclosing the courtyard automatically. From the planned seats, look toward nearby windows, paths and garden areas to decide where screening would be useful. A partial boundary can make the seating zone feel distinct while leaving a view open on the other side. Before setting that edge, check how it relates to the confirmed footprint of Bloomcabin’s Bioclimatic model. Keep screens and mature plants clear of the routes and the space needed to reach posts or clean the surrounding surfaces.
Consider how a boundary will look and function from both inside and outside the courtyard. A hedge may grow beyond its original outline; a screen can make an already small route feel narrower; a low edge may be easier to see from the path. Leave access for trimming, weeding and repairs rather than planting right against every boundary. Also check the location of utilities and existing trees before digging. A useful boundary defines the seating area while preserving garden routes, maintenance access and the drainage paths identified in the plan.

Coordinate fixtures, storage and maintenance
List the fixed features that compete for space around the courtyard, including exterior lights, hose taps, vents, eavestroughs, air-conditioning equipment, bins and storage. Mark them on the plan so they are not hidden behind furniture, planting or a screen. When considering Bloomcabin’s wall-mounted model, include those features in the house elevation and leave room to reach them. Consider access as well as visibility: a fixture may remain in view but be awkward to reach behind a chair or shrub. Show the route used to move bins or stored items, including any gates or corners along the way. Give frequently used items an accessible location rather than assigning them whatever space remains. Have a qualified professional review the proposed attachment and any work involving building services.
Plan the small routines that keep the room usable: carrying cushions, sweeping paving, watering beds, pruning plants and moving furniture for seasonal storage. A hose route should reach the beds without becoming an obstacle across the main path. Leave access to outdoor fixtures and enough room to clean along the house and pergola edges. If snow clearing is part of your seasonal routine, consider where it can be moved without blocking a door or burying a planting bed. These practical details belong in the landscape layout, not in the narrow gap left after every feature has been placed.
Bring the landscape plan together before work begins
Review the garden as one measured drawing before committing to materials or planting. It should show the pergola’s confirmed dimensions and post positions, furniture, house doors, paths, paved areas, bed edges, existing trees, utilities and drainage features. Add a planting schedule that records each plant’s mature size and documented light, soil and moisture requirements. A sketch can help test the idea, but distinguish it from a dimensioned plan intended to guide site work. If the design changes ground levels or adds drainage, have the relevant details reviewed by a qualified landscape professional.
Check the plan in layers: first the routes and furniture, then paving and boundaries, then planting and maintenance access. Look for conflicts such as a chair extending into a path, a screen covering a fixture or a mature shrub narrowing an entrance. Resolve the drainage approach before setting the finished surface levels, and confirm the selected pergola’s exact configuration before finalizing nearby edges. A coordinated drawing makes it easier to see which elements belong together and where adjustments are still needed. It also helps the courtyard develop as a usable part of the garden instead of an isolated paved area.
Frequently asked questions
How much paving should go around a pergola?
There is no universal border width. Start with the chosen structure’s confirmed outside dimensions and post positions, then add furniture, chair movement, door swings and the route that needs to stay open. Mark the layout at full scale and adjust the paved area to the way you plan to use it.
Can I grow climbing plants on a pergola?
Choose plants for the site’s light, soil and moisture, and check their mature size before planting. Don’t assume the frame is intended to support a climber or its mature growth. Ask the pergola supplier about the chosen model, and leave access to posts and nearby surfaces for maintenance.
Will permeable paving prevent water from pooling?
Not on its own. Soil, the base beneath the paving, surrounding grades and water from nearby roofs all affect where runoff goes. Observe the area after rain, include existing outlets in the plan, and consult a qualified landscape professional if the design changes grades or requires drainage work.
Does a garden courtyard need a solid boundary?
No. Paving beneath the pergola, a planted bed on one side or a low edge can define an outdoor room while leaving other sides open. Consider the views from the seating area, routes through the garden and access needed to care for plants or clean the surfaces.
What should a garden courtyard plan include?
Show the pergola’s confirmed footprint and post positions, the house and doors, furniture, paths, paving edges, existing trees, utilities and drainage outlets. Add planting requirements such as mature height and spread, light and moisture needs, and space for pruning or other routine care.
A well-planned pergola courtyard is more than a paved square around a frame. It connects a clear route with usable floor space, planting that has room to mature and boundaries that define the seating area without closing off the garden. When those elements appear together on a measured plan, it is easier to see whether the courtyard will feel settled within the landscape and remain practical to care for.
