
Where to Position a Heater Under Your Pergola
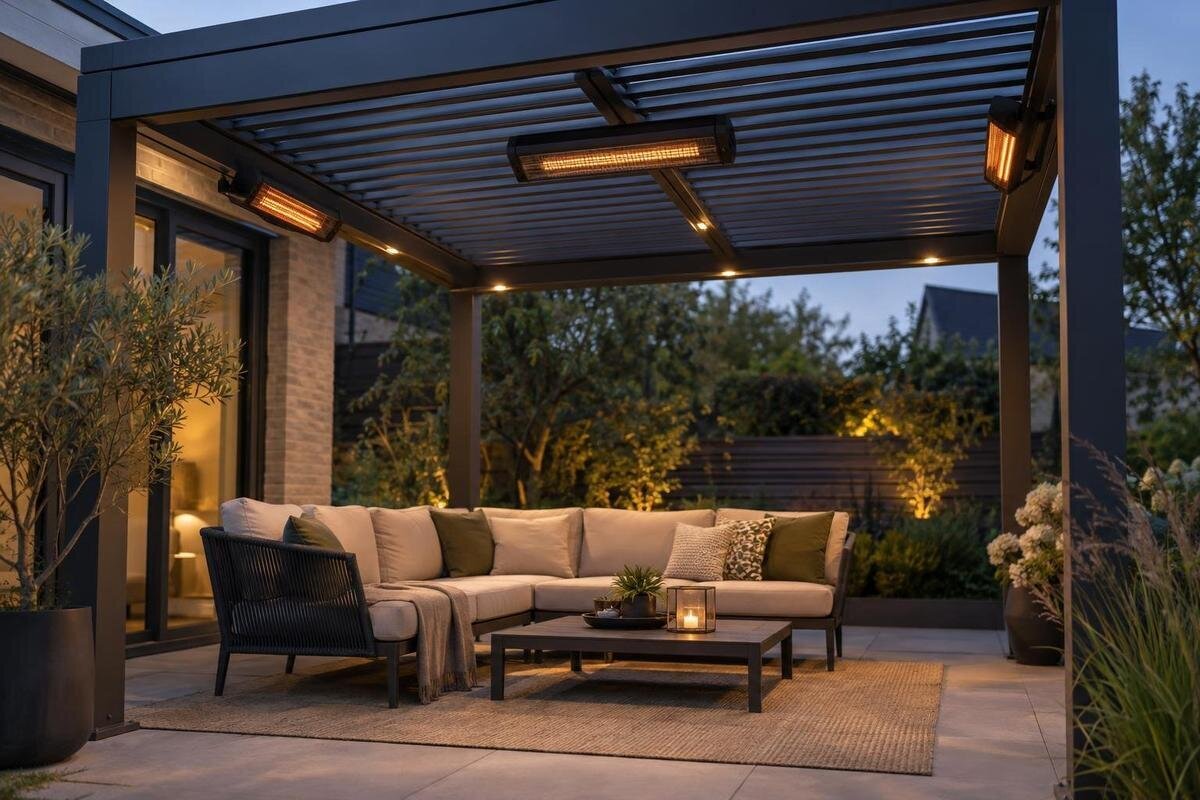
Pergola heater placement
Position a pergola heater around the people who will use it, then confirm that the exact heater and pergola instructions allow that location. There is no universal centre point or mounting height: heat direction, clearance, wind exposure, the structure and electrical supply all affect the decision. A reliable plan begins with the occupied seats, not with an attractive-looking spot on a beam.

Map the occupied area
Draw a simple plan and mark where people sit during normal use: dining chairs, lounge seats and any place someone regularly stands to serve or chat. Include room to pull chairs out and move around them; a table outline alone understates the occupied area. If the pergola is used differently at different times, sketch those arrangements separately. Identify the seats used most often and any occasional seating, so the intended coverage is clear. For example, a dining arrangement and a lounge arrangement may place people in different parts of the same pergola. Decide which arrangement the proposed heater position needs to serve, or ask the supplier to assess both. This gives you a practical target for judging heat direction instead of relying on a guessed centre point. It also makes clear whether you are planning for one main group or several separate seating areas.
Use the pergola’s confirmed plan or measurements to mark posts, roof edges, doors and fixed obstacles; do not estimate from a product photograph. For scale context, the Bloomcabin Bioclimatic Pergola listing gives an area range from 9 to 24 m², but that is not a heater coverage figure or a mounting specification. Label the dimensions of the particular configuration you are considering. Mark the regular seats and the routes people use, keeping the drawing consistent with your furniture sketches. A clear plan helps a supplier, pergola manufacturer or electrician discuss the same proposed location rather than interpreting phrases such as near the middle or over the table.
Match the heat direction to the seats
Check the exact heater’s documentation to understand how the model delivers heat and what its stated coverage means. If it provides directional radiant heat, its position and orientation need to serve the people in the intended zone; it is not simply a way to warm every part of the open-air space. A unit above the table may point at the tabletop or an empty area if most people sit to one side. Beams, screens and other obstacles can also affect the intended path, so check whether anything lies between the proposed heater location and the seats.
Compare each regular seat with the heater’s placement guidance, including any specified distance or direction limits. Note whether people face inward, sit along one side or occupy opposite sides of a table, since those arrangements put them in different positions relative to the heat source. Label the seats on the drawing and note which ones fall within the coverage described by the manufacturer. This makes a gap at one end of a sofa or on the far side of a table easier to discuss than a general request to heat the whole pergola. A location that suits one chair may not serve the rest of the group, while moving the heater closer could conflict with its clearances. If the manual does not illustrate a layout like yours, ask the manufacturer or supplier to review the drawing rather than guessing from a product photo.
Follow the heater’s clearance diagram
Use the installation manual for the exact heater model to establish every required separation. Check the distances and conditions it specifies for overhead surfaces, nearby walls, combustible materials, furnishings and people. Also look for any minimum mounting height, permitted orientation or approved bracket requirements. Read how the manual defines each measurement: it may refer to a particular part of the heater or mounting assembly. A clearance from one model cannot be carried over to another, even when the units look similar or are intended for the same kind of space.
Sketch the required clearance area on your pergola plan and check it against furniture, screens, curtains, plants and anything that may be brought under the roof. Account for ordinary changes, such as a pulled-out chair or a moved lounge seat, rather than measuring around furniture in only one position. Label the required distances separately from the heater’s intended coverage: the space that must remain clear is not the same as the area you hope to heat. Where a clearance concerns an overhead surface, add a side-view sketch so that the vertical relationship is visible as well. Do not average different instructions or choose whichever clearance is easiest to meet. If the heater and pergola documents appear to conflict, pause and ask the manufacturers or a qualified professional to clarify the exact combination.
Confirm the approved mounting point
Do not choose a fixing point because it looks solid or happens to be above the seats. A post, beam, roof member, fascia, decorative cover or other frame part is not automatically approved for attaching a heater. Use only a point and mounting arrangement documented for the exact pergola, together with the heater manufacturer’s permitted bracket and orientation. Avoid making assumptions about what the structure can support; the appearance or position of a frame member does not establish that it is an approved attachment point.
Ask for confirmation that the proposed heater, bracket and pergola mounting point are compatible, and keep that confirmation with the installation documents. When discussing the Bloomcabin Wall-Mounted Pergola, identify the proposed attachment point on the drawing rather than describing it only as a beam or the house side. The product page identifies the model but does not establish a permitted heater attachment. If no approved mounting point can be confirmed, revisit the equipment or pergola plan with the relevant manufacturers instead of improvising a mount or adding an unapproved support.

Allow for wind and outdoor exposure
Consider the conditions at the seats, especially near an open edge where wind may affect comfort. Air-warming and directional radiant heaters behave differently, so a sheltered corner is not automatically the best position for every model. Compare the likely exposure at the proposed location with the heater’s instructions, while keeping all required clearances. Do not add curtains, screens or other barriers around a heater unless the exact instructions allow that arrangement; changing the enclosure can change the conditions in which the unit is being used.
Confirm that the heater is rated for the outdoor exposure and setting described by its manufacturer, including any stated limits for moisture or weather. Record the exposure at the proposed position, not just the general fact that the heater will sit under a pergola. For a layout using the Bloomcabin Pergola, note which sides are open and where the heater would sit relative to the roof edge. Those details help the supplier compare the location with the heater’s documented conditions of use. If the manual does not clearly address the intended location, ask the manufacturer or supplier before treating the position as acceptable.
Check moving parts and overhead accessories
If the selected pergola has a movable roof, retractable cover or screen, check how each permitted position affects the heater’s clearances and intended direction. A location that appears unobstructed in one position may not remain clear when a component moves. Do not assume that moving the roof or screen to a particular position makes an otherwise unapproved mounting point acceptable. Confirm the operating positions and restrictions in the exact pergola and heater instructions before settling on a location.
Include other planned fittings on the same drawing, such as lights, fans, sensors, wiring routes or drainage components. They can compete for space or intersect with a heater’s required clearance, and each fitting needs its own documented placement. Distinguish existing fittings from proposed additions so that a later lighting or fan choice does not disappear from the discussion. Where a component moves, show its different positions rather than only its outline when closed or retracted. If you are considering Bloomcabin’s Bioclimatic Pergola, use the specific technical documents to identify its components and their movement; the model name or image alone is not enough. This combined drawing should show whether the heater location works with the complete arrangement, rather than checking each accessory against an otherwise empty pergola.
Keep walking routes and access clear
Mark doors, gates, steps and the paths people take between seats, the house and the yard. Check the route with chairs pulled back and with people moving around the table; a heater position that clears an empty floor plan may interfere with everyday use. Include the space used when serving food or carrying items through the seating area, not just the narrowest route between fixed objects. If furniture is regularly rearranged, compare the routes in each layout. Keep the required separation from people and furnishings, and avoid placing equipment where someone would naturally reach up or pass close to it. Comfort is not the only measure of a workable location: the space should remain usable without asking people to detour around the heater. Mark any conflict on the plan so it can be resolved through the layout or an alternative approved position.
On the plan, distinguish occupied seats from walking routes and the heater’s documented clearance area. Keep access to controls and any service points consistent with the heater’s instructions, without making someone reach through a restricted area. For a project using Bloomcabin’s Wall-Mounted Pergola, pay particular attention to the actual doors and routes between the house and the seating area. Show door movement as well as the opening itself, and include furniture near the entrance. Review the finished layout with the pergola manufacturer and installer so that access remains clear after the heater and other planned fittings are accounted for.
Plan the electrical supply with a professional
Set the proposed heater location before the electrical plan is finalized, then give a qualified electrician the exact heater model and its documentation. The electrician can assess the supply, the equipment’s stated electrical requirements, controls and the proposed route. This should happen early enough to coordinate the heater with any other planned electrical equipment, rather than treating the connection as an afterthought once the mounting point has been chosen. This is a planning handoff, not a reason to improvise wiring or rely on an assumed connection.
Discuss how the proposed electrical route relates to the heater’s clearances, any moving pergola parts and areas exposed to weather. The electrician can confirm the applicable electrical requirements and protective measures for the exact installation. Identify the selected configuration from Bloomcabin’s Pergola product page alongside the heater model, so the discussion concerns a specific layout rather than a generic outdoor connection. Mark any alternative heater positions separately; moving the unit to resolve a seating or clearance issue also needs to be reflected in the electrical plan. Do not finalize a position until the equipment instructions and qualified electrical advice support the same arrangement.

Assess coverage across the seating area
Compare the occupied seating area with the coverage guidance for the exact heater, using only the approved mounting height, orientation and conditions described in its instructions. A pergola’s floor area is not a reliable proxy for the area a heater will serve. For a layout based on the Bioclimatic Pergola model listing, use the dimensions of your selected configuration and the furniture plan, rather than treating the product’s area range as heated coverage. Identify the seats the proposed position is intended to serve and any seats outside that zone. This separates a plan for the main seating group from an expectation that every part of the pergola will feel the same.
If the seating is divided into distinct areas, ask whether one approved heater position can serve the layout or whether the design needs another approach. Explain whether both areas are usually occupied together or whether the pergola alternates between dining and lounging. That distinction helps the supplier assess the intended use without assuming that every seat needs coverage at all times. Do not add equipment based on a simple area calculation or assume that two units will automatically provide even comfort. Additional units may change the mounting and electrical plan, and overlapping zones may not suit every arrangement. If several units are proposed, identify each one and its intended seating zone on the drawing. Have the heater manufacturer or supplier review the combined coverage and involve the electrician if the proposal changes the equipment or its supply.
Document the proposed position before buying
Prepare one location drawing that shows the pergola, regular furniture arrangement, heater’s intended direction, approved mounting point, clearances, moving components and electrical route. Note the exact heater model and which manual version you used, since clearances and instructions are model-specific. Include the conditions under which the heater may be used, such as any limits stated for roof or screen positions. A written plan lets everyone assess the same proposal and makes it easier to spot a conflict before equipment is purchased or work begins.
Record the exact pergola model alongside the heater details; the Wall-Mounted Pergola model page can help identify the product being considered. Keep the proposed mounting point, manufacturer confirmation and electrical review together with the location drawing. Label any alternative positions clearly, so a response about one location is not mistaken for approval of another. If a clearance, exposure condition or fixing point remains unresolved, mark that specific question on the plan and keep the position provisional. Update the drawing when a proposed location changes, including its heat direction and relationship to the seats. Before buying, check that the final drawing reflects the arrangement actually reviewed, rather than an earlier furniture layout or a mounting point that was later ruled out.
Frequently asked questions
Should a pergola heater go in the centre?
Not automatically. The centre is useful only if it is an approved mounting point and the heater’s direction serves the main seats without violating clearances. A centred unit can miss a seating area along one side. Map the furniture first, then compare the proposed position with the exact heater and pergola instructions.
How do I choose which way the heater should face?
Use the orientation specified for the exact heater model, then compare its intended coverage with where people sit. Note whether seats face one another, line up along one side or sit around a table. If the manual does not show a layout like yours, ask the manufacturer or supplier to review your plan rather than guessing from the heater’s appearance.
Can I mount a heater to a pergola beam?
Only if the heater and pergola manufacturers approve that exact mounting point and bracket for the proposed installation. A beam that looks substantial is not, by itself, documented approval for a heater. Confirm the permitted orientation and attachment in writing; if approval is unavailable, treat the location as unconfirmed.
Do clearances change when a roof or screen moves?
They may depend on the position of the roof or screen, so check the instructions for the exact pergola and heater together. The required space must remain available in every operating position the manufacturers permit, unless they explicitly specify otherwise. Do not assume that opening a roof or moving a screen makes an unapproved mounting point acceptable.
How can I tell whether one heater is enough?
Compare the occupied seating zone with the coverage guidance for the exact heater, using its approved mounting position and orientation. Pergola floor area alone does not establish heated coverage. If seats are spread across separate areas, ask the heater manufacturer or supplier to review the layout. Any proposal for multiple units also needs mounting and electrical confirmation.
A good heater position is not simply the centre of the pergola. It is a documented location that serves the intended seating area, respects the heater’s clearances, suits the exposure and uses a mounting point approved for the exact structure. When the seating plan, heater instructions and pergola documentation do not agree, keep the location provisional. Resolving those details before purchase makes the final choice clearer and avoids relying on assumptions about coverage, weather suitability or the frame.
