
Planning a Pergola Around an Extendable Dining Table
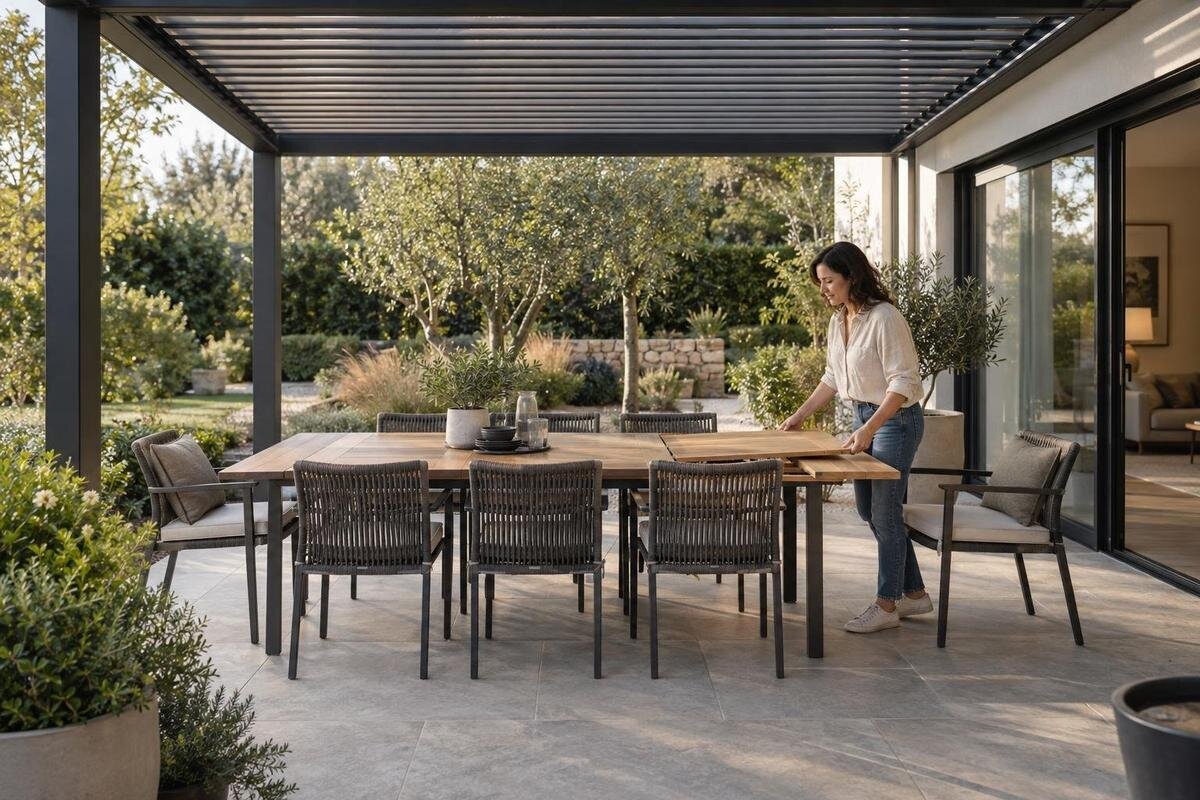
Outdoor dining layout
An extendable dining table changes the shape of an outdoor dining area as well as its capacity. A layout that feels generous on an ordinary evening can become cramped when the leaves are in, chairs are occupied and someone needs to carry food from the house. Plan the closed and fully extended table positions separately, then add chair movement and real walking routes before comparing pergola configurations. A measured plan helps show whether the dining area works on a quiet evening and when the full table is in use.

Plan for both the closed and extended table
An extendable table has at least two working footprints: its everyday length and its fully extended length. If you plan only for the open table, you can use up patio space needed for normal circulation; if you plan only for the closed position, the extra seats may end up near a pergola edge or in the route to the house. Treat the two arrangements as separate tests rather than averaging their dimensions. The extended position is often the more demanding fit, but the closed layout still matters if that is how you use the space most evenings.
Begin with a simple site sketch showing the house, doors, steps, railings, fixed planters and any furniture that cannot be moved. Add the table in its usual position, then draw it again fully extended. Keep its direction and location consistent unless you genuinely intend to move it for larger meals. Use a solid outline for the closed table and a dashed outline for the extended one, with both sets of dimensions clearly labelled. If moving the table is part of your plan, mark both positions rather than leaving that adjustment implicit. Label the sketch as a concept plan, not a construction drawing. It should make the difference between everyday meals and larger gatherings easy to see, while leaving the final position of the pergola supports and other site details to be confirmed.
Measure the furniture, not just the tabletop
Record the tabletop’s length and width in both positions, using the widest points when it is open. Note how the extension works and which area needs to remain clear while you operate it. Watch whether both ends move or whether the extra length is added at one end, and show that movement on the sketch. Do not assume the extended table stays centred over its original footprint. If leaves are stored separately, include the place where they are kept and the route for bringing them to the table. Allow for setting them down while you prepare the extension, without using the only clear walkway. Also mark the legs or base in each position: a tabletop can appear to fit on a plan even when a leg makes a particular seat awkward to use. Record any seating changes needed when the leaves are added.
Measure the chairs you actually own, including their widest points, arms and backs. A chair’s outline when pushed in does not show how much room someone needs to sit down, stand up or pull it back. Mark different chairs separately if you mix styles, and note any bench or sideboard that changes how people approach the table. These details turn a rough furniture sketch into a plan based on your dining set rather than on a generic table shape.
The fully extended table footprint
Place the table in the position you would use when it is fully open, then mark its complete top outline. Add the seats you expect to use, including seats at either end if you plan to place chairs there. Check that the extension does not push one end into a door route or leave an end seat close to a fixed boundary. If the table can face more than one way, compare those orientations on paper before deciding which one to test on the patio.
The Bloomcabin Wall-Mounted Pergola is listed with an area range of 9 to 24 m². Treat that figure as a catalogue comparison, not as proof that a particular table layout will fit: it does not replace checking the length, width and support positions of the exact configuration. Compare those measurements with the open-table plan, including the space needed for chairs and movement around them. Look at each end separately rather than dividing the spare length equally on paper. One end may need to accommodate a seat, while the other also carries the route from the house. If you shift the table to resolve a tight spot, draw the new position and check the opposite end again. A layout should account for that adjustment rather than relying on a vague intention to move the furniture when guests arrive.
Give every chair room to move
Draw each chair in more than one position: pushed in, occupied and pulled back far enough for someone to sit or stand comfortably. The full group matters. A single chair may move freely in isolation, while several chairs pulled back at once can narrow the way past the table or bring a seat close to a support or patio boundary. Use the actual chairs and your normal seating pattern rather than assuming every guest will make the same small movement.
Then trace the walking lane behind or beside the chairs that are most likely to be occupied together. Decide whether people need to pass through while others remain seated, or whether the route can run along a different edge of the dining area. Keep chair movement and through-traffic distinct on the drawing: a gap used for pulling out a chair is not automatically a clear walking lane at the same moment. Test an end seat as well as a seat along the side, especially where the routes meet. When comparing the Bloomcabin Pergola listing with your plan, look for a configuration that accommodates the seating pattern you actually intend to use. If passing behind one row is impractical, show the alternative route clearly and check that each person can still leave the table without moving several other chairs.

Keep a serving route clear
Choose where food and dishes will come from, such as the back door or a nearby preparation surface, and draw a route from there to the table. A useful serving path should not depend on weaving between occupied chairs or moving a chair every time someone brings out a dish. Mark the point where a person carrying food reaches the table, too; the approach may need more room than the route along a clear patio edge.
Check the route with chairs in their normal in-use positions, not only with the patio empty. Include any serving trolley or outdoor storage you expect to use, but do not add furniture simply to fill the plan. If you use a trolley, mark where it will stand during the meal as well as how it reaches that spot. Its parked position should not occupy the space needed to leave an end seat. As you assess the Bloomcabin Bioclimatic Pergola, compare the selected configuration with this complete serving arrangement. Follow the route to both ends of the extended table, including the return trip with dishes. Decide where a serving dish can be set down without blocking circulation. This helps distinguish the space needed to bring food out from the space needed to serve and clear the meal.
Door access in both table positions
Show how people enter the patio and reach the dining area. For a hinged door, draw its swing; for a sliding door, note the opening people use. Include steps, a gate or other changes in level if they affect the usual path. The table should not make it awkward to leave the house or force people carrying food to squeeze through a gap that only exists when the chairs are pushed in.
Repeat this door-to-table check with the table closed and extended, and with the chairs pulled back. Include the space where someone pauses to open or close the door; do not draw a route that begins only after they have stepped onto the patio. If the same entrance also serves people heading farther into the garden, trace that route past the dining area rather than ending it at the nearest seat. When reviewing the Bloomcabin Pergola product page, use the dimensions for the configuration you are considering to place the pergola on this access plan. Mark any support locations shown in the relevant documentation. Check the narrowest point along the route, not just the gap beside the table, and make sure the everyday arrangement does not depend on keeping a normally used doorway or gate closed.
Account for pergola supports and site boundaries
A clear rectangle on a patio plan may not show the space available around a finished pergola. Note fixed boundaries such as a railing, wall, planter or neighbouring door, then check the proposed roof outline and any support positions against them. A support can interfere with a chair pull-back zone or interrupt a serving route even when the tabletop itself appears to fit. Keep the roof outline, furniture and walking paths visible on the same drawing so those conflicts are easy to spot.
If you are considering the wall-mounted Bloomcabin model, check the documentation for the exact configuration and how its dimensions and attachment requirements relate to your wall and nearby doors. On the concept plan, keep the roof outline separate from the support outlines so you can see which part affects a seat or walkway. Record the distance from each proposed support to a fixed reference point, such as the wall or patio edge, rather than judging its position from the furniture alone. That makes it easier to compare a revised layout without losing track of the site boundaries. The model name alone does not establish whether a particular building or patio is suitable. Have a qualified professional assess any site-specific structural attachment question instead of trying to resolve it by shifting furniture on a sketch.
Check where shade falls during meals
A pergola outline on a plan shows its footprint, not the shadow it casts at every time of day. The sun’s position changes, so a table that appears covered on paper may receive sun from the side during a meal. Note when you usually eat outdoors and which seats you most want shaded. If you can, observe the patio at those times; otherwise, use the relevant layout information to assess the orientation rather than assuming the roof’s footprint guarantees shade across the whole table.
Consider the table, the chairs and the place where food is served together. A shaded tabletop may still leave an end seat or the serving approach exposed, depending on the orientation and roof coverage. Record your observations against the closed and extended outlines, noting the meal time rather than simply labelling the patio sunny or shaded. If rotating the table looks promising, check the seating and access consequences before adopting that orientation. When assessing the bioclimatic Bloomcabin model, check the exact documentation for the roof coverage and operation the selected configuration provides. Compare that information with the seats you want shaded in each arrangement. Do not infer from the model name that a particular seat will be shaded at a particular hour, or assume that a satisfactory closed-table position also covers the extra seats.

Test the layout at full scale
Use removable tape or another suitable marker to show the closed and extended tabletop outlines on the patio. Mark the chairs in their pulled-back positions, the door route and any support locations shown in the relevant drawing. Use different colours or labels for the two table positions so you can read the plan without confusing the outlines. If space allows, place the actual chairs within the marked area; their size and shape are easier to assess in person than on a small sketch.
Walk the serving route and try sitting down, standing up and moving the chairs in both arrangements. Test the changeover itself: bring out any separate leaves, operate the extension and put the additional chairs in place. Check whether a chair or fixed object has to be moved temporarily, and decide where it will go during that task. Then return the table to its everyday position so you know what resetting the patio involves. Use Bloomcabin’s wall-mounted pergola page to compare the mock-up with the exact configuration dimensions; ask for any missing measurements before relying on the layout. Note each conflict directly on the sketch and retest the affected area after an adjustment. Keep the test as a planning aid, not as a substitute for confirming site details, and distinguish measurements you have checked from assumptions that remain.
Match the drawing to the exact pergola configuration
Before comparing options, make a two-position plan that records the table dimensions, chair locations, pulled-back positions, door access, serving route and fixed patio boundaries. Add the proposed pergola outline and any support positions only when you have dimensions for the configuration being considered. Use one measurement system throughout the drawing, and label any assumptions, such as a chair that might be replaced or a serving surface that is not yet in place. That way, a change in the furniture does not quietly invalidate the plan.
Compare the regular Bloomcabin Pergola model with this measured plan using the exact configuration dimensions, not an area label as a stand-in for fit. Record the result for each table position: whether the seats can be used, the door opens as intended and the serving route remains available. This makes differences between configurations easier to assess than a single overall judgement that the table fits. Consider any furniture movement as part of the choice, too. Moving a chair for an occasional gathering may be acceptable to you, while repositioning the whole table before every meal may not be. Keep unresolved site-specific structural or attachment questions separate from the furniture comparison and take them to a qualified professional. Choose on the basis of the complete dining arrangement, with any compromises made explicit, rather than the largest tabletop outline that fits beneath the proposed roof.
Frequently asked questions
How much room should I leave around an extendable dining table?
There is no single clearance that suits every table and chair. Measure how far your actual chairs move when someone sits down or stands up, then add the walking route you need behind them. Test that arrangement with the table both closed and extended, including all the seats you expect to use at once.
Should I plan the pergola for the table’s open or closed position?
Draw both positions. The fully extended table often creates the tighter fit, but the closed layout still needs to work for everyday meals. Include chairs, door access and circulation in each plan; fitting the tabletop alone does not show whether the dining area will be comfortable to use.
Can a pergola’s square-metre area tell me whether my table will fit?
Not by itself. An area figure does not show the exact length, width or support positions of a particular configuration. Compare a dimensioned plan for the configuration you are considering with your table, chair and route measurements.
How can I test my dining layout before choosing a pergola?
Mark the closed and extended table outlines on the patio with removable tape or another suitable marker. Add the chairs in their pulled-back positions, note any support locations shown in the relevant drawing, and walk the door-to-table route. Repeat the test for both table positions.
Where should the serving route run?
Map the route from the door or other place where food is prepared to the table, and keep it clear of occupied chairs where possible. Check the route with the table extended and people seated; a path that works only when every chair is pushed in may not suit a gathering.
Treat the fully extended table as a useful stress test, but keep the closed arrangement in view because it may be your everyday layout. The pergola choice should follow a plan that includes the table, moving chairs, doors, serving route and any supports—not just the tabletop or an area figure. When both table positions work on the same measured concept plan, you have a clearer basis for comparing the exact configurations available for your patio.
