
Reducing Glare From Pergola Lights: Shielding and Placement
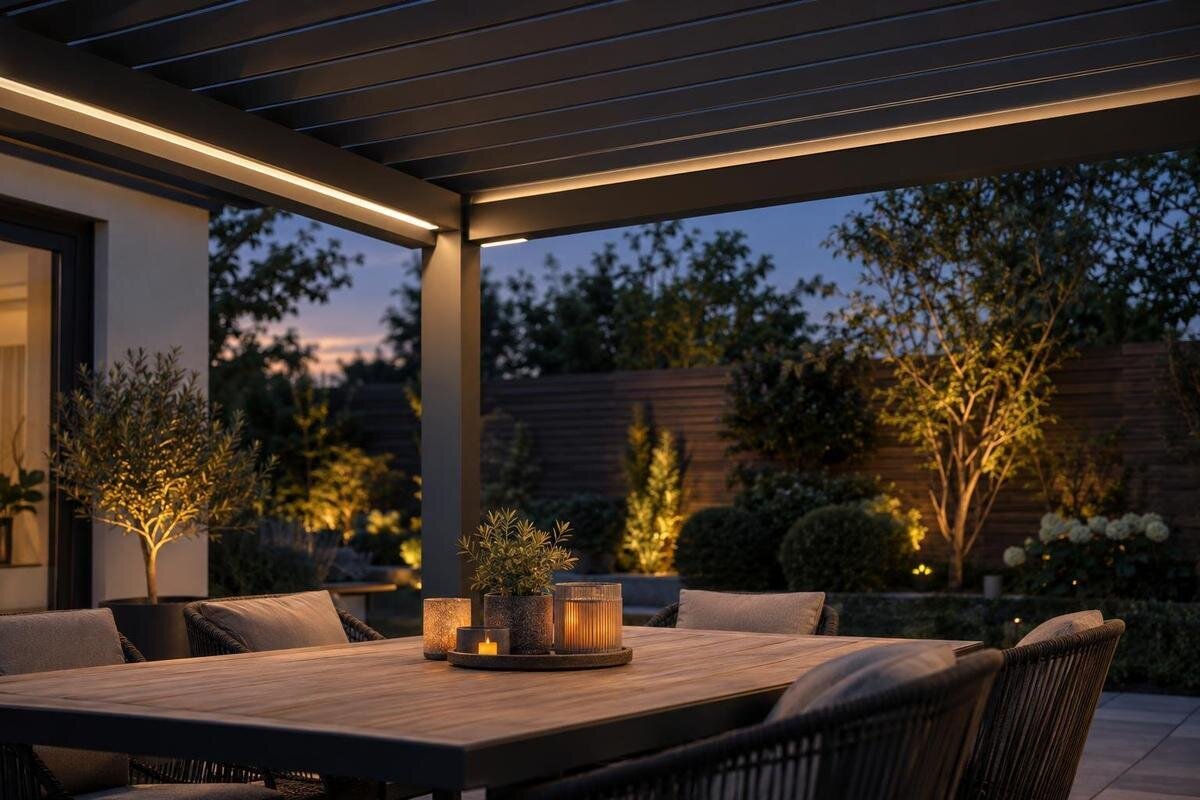
Pergola lighting
Pergola lighting can look unobtrusive from across the yard and still shine straight into someone’s eyes at the table. The difference is often the viewing angle, not simply the number of fixtures: a bright source may be visible from a chair, reflected in a glossy surface or exposed when someone leans back. A plan-and-elevation sketch checked from real seating positions can catch those problems before fixture locations are finalized. This guide focuses on glare, shielding and placement, rather than a full lighting design or electrical installation.

What causes glare from pergola lights?
Glare is not simply another word for too much light. It often occurs when a concentrated, bright source stands out against a darker view or sits where someone naturally looks. Under a pergola, the same fixture may feel unobtrusive from the yard but distracting from a chair, a reclined lounge position or the far side of a table. The discomfort may come from seeing the source directly or from seeing its image reflected in glass, a glossy tabletop or another polished surface. Ask regular users which seat and posture feels uncomfortable: one person may see the source while another sees a reflection. If it happens only when someone leans back or looks towards the yard, record that posture; it points to a different sightline.
Glare can feel strong even when the overall area is not brightly lit. At dusk, eyes adapt to a darker yard, so a concentrated point may draw attention; some people notice it sooner than others. Turning the whole system down may reduce contrast, yet leave dining or walking less comfortable while the source remains in the same sightline. Label the initial sketch with the product under consideration—for example, Bloomcabin Wall-Mounted Pergola—and the furniture arrangement being assessed. Keep the complaint tied to a location and viewing angle, not only to a general request for less light.
Draw sightlines from the seats people use
Start with a plan view of the space and a side elevation through the main seats. Draw the pergola outline and any walls or posts shown on the actual project plan, then mark the table, chairs, lounge furniture and usual routes. Include chairs pulled away from the table and room to pass behind them; a fixture that looks clear on a tidy furniture plan may line up with someone sitting farther back. Add candidate lights as points rather than assuming a fitting can go in every attractive location. The plan view shows horizontal direction; the side view reveals whether the source will appear above, beside or across a seated eye line. Use site measurements where available and note any positions that are still approximate.
Mark viewpoints from real postures: upright at the table, leaning back, seated at each end, reclined in a lounge chair and standing on the approach. If people change seats or shift as they talk, show a viewing range rather than one precise dot. A marker on the ground or someone sitting in the furniture can help locate the viewpoint without relying on a standard eye-height figure. Label the sketch with the selected Bloomcabin Pergola model and configuration, and match the seat positions and proposed fixtures to the actual site plan. If furniture is likely to move, make a note of the alternate arrangement too.
Compare fixture positions on the drawing
Once the seats are marked, draw a line from each eye point towards every candidate light on the side view. Along each line, note whether the luminous surface would be visible or hidden by the fixture housing or another obstruction. A source hidden from one viewpoint may still be visible from the next chair or when someone leans back. Distance alone is not a dependable test. A fixture near a seat may be screened by its housing, while a more distant point can stand out against a dark background. Check viewing direction as well as beam direction: aiming light away from the table does not necessarily hide the emitter. Compare more than one candidate position, and do not centre lights only for visual symmetry.
Look for repeated alignments, not just one isolated view. A row of fixtures can place several bright points across someone’s field of view, while moving them all to one edge may create another exposed angle or a bright reflection. Also consider views from a doorway or approach if people see the pergola from there. Mark what improves and what becomes worse at each seat. If the project is based on Bloomcabin Bioclimatic Pergola, record the candidate positions on the drawing for that specific configuration. Keep alternative layouts clearly labelled so that observations from different fixture arrangements are not mixed together.
Choose shielding by viewing angle
Shielding aims to keep the luminous surface out of a particular viewing angle; it does not guarantee that a fixture disappears from every position. Depending on the product, a deep-set source, an opaque lip, a baffle or a directional housing may block a seated view. Ask for a fixture drawing or cut-off information, if available, and compare its limits with the sightlines on your sketch. A shade that works from one dining chair may not screen the opposite end, a reclined lounge seat or someone approaching from outside the pergola. Product photos rarely show every viewing angle, so review the actual fitting rather than relying on a single image.
A diffuser can soften a sharply defined point, but it is not automatically glare-free: the luminous surface may remain directly visible or become a larger bright patch. A shield can also reduce light in the direction it blocks, so check whether the table or reading area still receives useful light. Avoid improvised covers or materials placed over a fixture; use only options documented for the exact product. For the Bloomcabin wall-mounted option, ask the supplier or installer which fixture and shielding choices are approved for that configuration. Compare those documented options with your views rather than assuming any shade will suit. Check the result from the other seats as well.

Check for reflections as well as direct glare
Not every bright spot comes from looking straight at a light. Glass doors, windows, glossy tabletops, polished metal and glazed finishes can reflect a fixture back towards a seat. A reflected image may sit where someone looks across the table, or appear only when someone leans into a particular posture. Identify the fixture, reflective surface and viewing position together on the drawing. If the light source itself is not visible but a bright image remains in glass or on a tabletop, reflected glare may be the issue. Check the view from both sides of the surface, since changing seats can move the reflection into or out of sight.
Try changing one element at a time on the drawing: the light position, its orientation if approved, or the finish of a surface that has not yet been selected. Light bounced from a surface can avoid a direct source view, but a very bright patch on a wall, soffit or table may create a different distraction. Judge the result from the same eye point and retain enough light for the intended task instead of dimming every fixture by default. Include nearby reflections in the notes for the Bloomcabin Pergola model being reviewed. A product listing cannot predict how a particular door, tabletop or finish will reflect light, so the actual surfaces matter.
Keep useful light on the table and route
Glare control should preserve the light people need to use the space. At a dining table, check both the view across the table and where light falls on the eating area; hiding the source is not a complete solution if the table becomes uncomfortably dim. For reading, assess the reader’s view of the fixture and the page together. A shiny cover or screen can show a reflection even when the light is outside the direct sightline. Mark these task positions separately, because a comfortable placement for one seat may not work for someone at the opposite end. If regular users disagree about brightness, record their different views as well as their preferences.
Include walking routes and transitions too. Someone crossing a patio may look up towards the roof or approach a light from the side, seeing an emitter that is hidden from seated guests. Moving a source away from the table can also leave a doorway, step or route poorly lit, so review how the space is actually used rather than aiming for the darkest possible fixture view. On a drawing for Bloomcabin’s wall-mounted pergola, mark doors, seats and paths relative to the proposed structure. This ties the glare decision to real activities without assuming one brightness level suits every use.
Glare checks for adjustable roofs
A pergola roof can change the background behind a light and the openings through which it is seen. If the chosen design has adjustable roof elements, repeat the sightline review in the positions people expect to use. A source hidden from view in one position may become visible through an opening in another; reflections on nearby surfaces can change too. These are conditions to assess, not assumptions about a particular product. Use the operating positions specified for the selected model and note which ones you checked. One sketch of a single roof position is not enough when the roof changes during normal use.
Visual comfort and mounting approval are separate checks. A beam, post, panel or moving component that looks convenient on a sketch is not automatically an approved support for a light. Check the pergola instructions and fixture manual for the exact model and proposed position, then ask the supplier or installer to confirm any permitted location. When considering a bioclimatic pergola configuration, ask whether the location remains acceptable across its intended roof positions. Keep any operation or service-access requirements shown in the manuals in the same plan. A sightline drawing clarifies the request; it cannot establish that a fitting is structurally or electrically compatible.
Test the selected fixture after dark
Test proposed positions after dark from the actual seats, before fixture locations are finalized. Removable markers or a non-luminous mock-up can show where a housing would sit and whether it interrupts a view, but cannot reproduce the brightness or beam of the selected fixture. If you use an actual sample, follow its instructions and use it only in a setup suitable for the location; an indoor lamp or loose temporary connection is not an outdoor installation. Observe from several normal positions without staring into a bright source. Note which part of the fixture is visible, rather than relying on memory later.
Check the opposite side of the table, a reclined chair, the doorway and the main approach, then compare direct views, reflections and light on the intended task. Let the space look as it normally does in the evening; bright work lights can mask contrast and make a test misleading. Photos can record fixture location, but camera exposure often changes how bright a source appears, so use them as notes rather than the final comfort test. Repeat the review if you move furniture or change the fixture or shield. Keep observations with the project documents for the selected pergola model so later changes refer to the same configuration.

Confirm fixture details before electrical work
Use the selected fixture’s own documentation, not its catalogue appearance, to review placement. Confirm the outdoor rating for the intended exposure, the permitted mounting position and orientation, available shielding, and any restrictions in the manual. An outdoor label by itself does not show that a product suits every position under a pergola. Match the exact fitting to the pergola documentation and get qualified installer input, especially if the proposed location is tucked behind trim, close to a moving roof element or difficult to reach later. Check that any planned shield will not prevent service access required by the manufacturer.
If dimming or separate switching is part of the plan, ask a qualified electrician to confirm compatibility between the actual fixture and control. Lower output may make a bright source less prominent, but it will not remove the source from a direct sightline and may leave the task area too dim. Treat controls as a refinement after reviewing placement and shielding, not as a substitute for them. Show which fixtures you intend to control together and which activities they serve, so the discussion stays tied to the proposed layout. Leave wiring methods and any fixture adaptations to the qualified professional.
Record the final glare review
Finish with an annotated plan and side views rather than a fixture count. Record each seat and posture, candidate source, direct sightline, reflective surface, roof position checked, shielding or orientation under consideration, and the table, reading area or route that must remain usable. Mark unresolved views and the document or professional confirmation still needed. If the space is used in more than one furniture arrangement, make separate notes for configurations that change the view. That record makes it clear whether a proposed change fixes one glare path while opening another.
Before approving the layout, compare the notes with the exact fixture manual and pergola mounting information. Ask focused questions: Is this location permitted? Does the specified shield block the source from the seats shown? Does roof movement change the view? Can the fitting be serviced as instructed? Keep a dated version with the product and fixture selected, and note who confirmed any mounting details. If either product changes, repeat the relevant sightline check. This avoids signing off on an attractive drawing that never accounted for what someone will see from the chair.
Frequently asked questions
How can I tell direct glare from reflected glare?
Direct glare comes from seeing the light source itself; reflected glare comes from seeing its bright image on another surface. Look from the seat without staring into the source. If the fixture itself is outside your view but a bright image appears on glass or a glossy table, trace the reflection from the light, across the surface and towards your eye. Comparing views from a second seat can help reveal which angle changes.
Does a diffuser always eliminate glare?
No. A diffuser may soften a small bright point, but the luminous surface may still be visible or become a larger bright patch. Ask for viewing-angle information for the exact fixture, if available, and assess it from the seats. A product photo alone cannot show how it will look in your space.
Will mounting a light higher solve the problem?
Not necessarily. Moving a light changes the angles from which it can be seen and the surfaces it can reflect from. Show the new position in plan and elevation, then review seated, reclined and standing views. Keep any proposed location within the mounting details approved for the pergola and fixture.
Can dimming fix a glaring light?
Dimming may reduce contrast if the fixture and control are compatible, but a directly visible source may remain distracting. Lower output can also leave the table or route dimmer than intended. Review the source angle and shielding first, then ask a qualified professional to confirm control compatibility.
Can I attach a light to any pergola beam or louvre?
No. A component that looks convenient on a drawing is not automatically an approved mounting point. Check the exact pergola and fixture manuals, the permitted mounting position and the outdoor rating for the intended exposure. Ask a qualified installer or electrician to confirm compatibility rather than inferring it from a product photo.
A comfortable pergola lighting layout is judged from the chair, lounge seat and route at the time the space will be used—not just from a product photo or fixture count. A drawing that records those views, reflections and shielding options gives a practical basis for final placement. Confirm the fixture and mounting details separately, and make sure the solution keeps useful light where people need it.
