
Pergola Lighting Design for Dining, Reading and Ambient Light
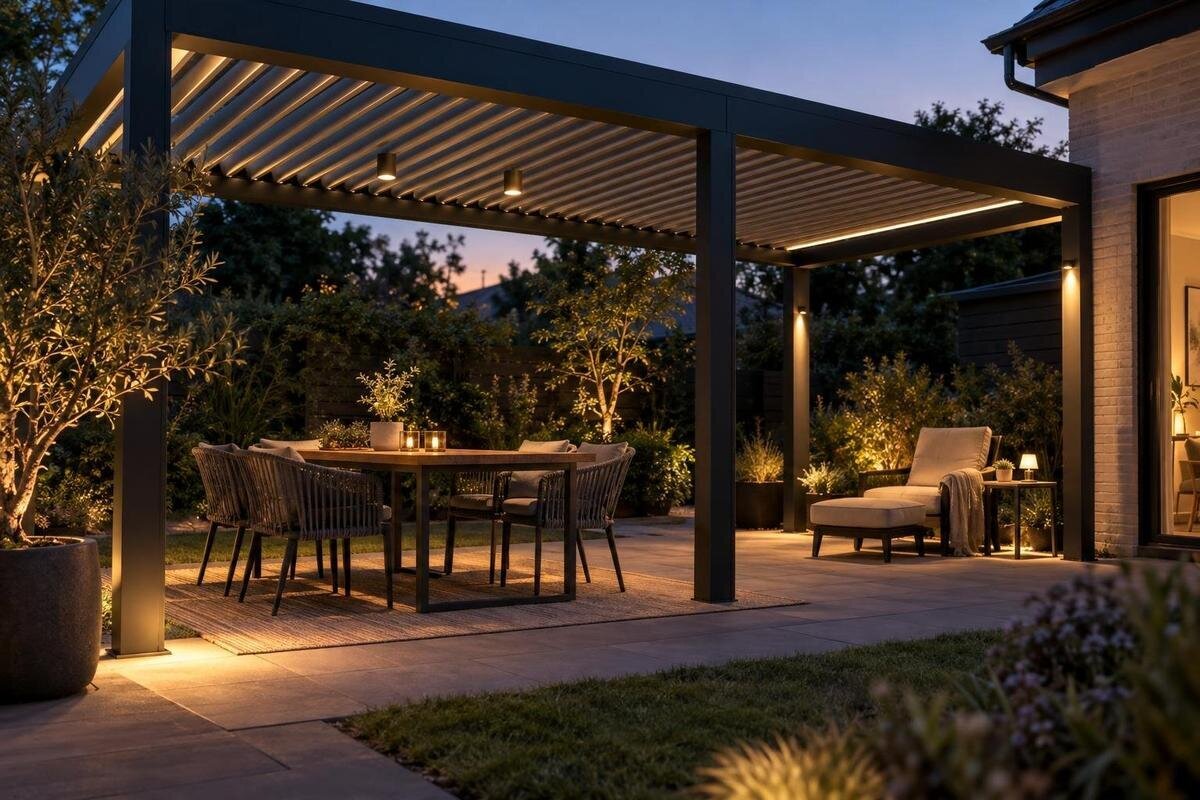
Pergola lighting guide
Good pergola lighting depends on more than the number of fixtures. A dining table needs useful light across the surface, a reading seat needs a focused layer, and conversation feels more inviting when the surrounding patio is not left in darkness. Design these jobs together, then check the view from every chair and confirm that the chosen fixtures and mounting points suit the exact pergola configuration. This creates a practical plan without assuming that any particular lights are included.

Map the evening activities under the pergola
Make a simple plan of the pergola and adjacent patio before comparing lights. Mark the dining table, usual reading seat, doors or steps, and the route people take between them. Draw chairs pulled back from the table as well as tucked in; those positions change sightlines and the area people occupy. Beside each place, note what needs to be clearly visible and what should remain softly lit. This turns a broad wish for an inviting evening space into specific lighting jobs. It also reveals where one source would be asked to do too much, or where someone might sit directly beneath a bright point.
Think in three layers: dining task light, reading task light and ambient light for the wider seating area. The layers can overlap and do not require three separate fixtures. Give each activity useful light without making the table the only bright spot or forcing a reader’s light to compete with conversation. Draw approximate pools on the sketch, then adjust them around actual seats and walkways. If comparing the Bloomcabin Bioclimatic Pergola, use the exact proposed configuration in the discussion and ask which fixtures and mounting positions are supported; the model name alone does not confirm available lighting options. Note which layers need to work alone or together.
Lighting the full dining table
Place the table where it will normally be used, then plan a pool that covers the full eating surface rather than a single centre point. Mark chair positions and space for serving dishes, water glasses and shared plates; a beam that lights only the middle can leave the ends of a long table dim. Check whether people will stand to serve from one side, since their bodies can cast shadows across the food. If the table moves for larger gatherings, draw both positions. That shows whether one fixed task layer can serve both arrangements or whether a different plan is needed. Include nearby serving surfaces only if people use them after dark.
Check the proposed light from each dining seat and from the approach to the table. A bright source in direct view can be more distracting than light aimed onto the surface; reflections from glassware, glossy finishes or a window may also draw the eye. A paper plan cannot show every reflection, so note the materials already present and review them on site when possible. Repeat the check for people of different heights, since seated eye lines vary. When discussing a Bloomcabin Wall-Mounted Pergola, show the table’s position relative to the wall, including which diners face it and which face the garden. This helps explain where useful table light is needed and where a visible source could distract someone.
Give the reading seat a focused layer
Set the reading chair before deciding where its light should fall. The reader should be able to see a page or screen without sitting at a forced angle or holding the book in the brightest patch. Mark the chair orientation, side table and likely head position, then consider whether the source would sit in the reader’s direct view. Light from beside or behind the reader may work, but the best direction depends on the chair, how the reader holds the book and any nearby glass. Treat this as an activity-specific task layer, not simply a dim version of the dining light. Test the view while seated, not only while standing beneath the pergola.
Try the arrangement with the actual book, menu or device the person will use; a tablet’s reflective screen may call for a different angle than a paperback. If two people read in different chairs, draw each position and check whether one source can serve both without shining across the conversation area. Separate control is useful when one person wants to read while others talk, but the design should not assume a dimmer or smart system is included. For a Bloomcabin Pergola, use a confirmed configuration and fixture plan to review these relationships. Ask how the available lighting options could serve the reading seat while allowing the dining and conversation areas to remain more softly lit.
Build a softer ambient layer around the seating area
Ambient light fills the area around the table and reading chair, so people and nearby parts of the patio remain visually connected when task lights are on. Think broad and gentle rather than a second concentrated hotspot. An approved indirect or diffuse arrangement may create that effect where available, but the goal is the distribution, not a particular fixture style. Mark the area that should feel part of the gathering, including the edges where people sit or set things down. Without this layer, a bright table surrounded by a dark patio can feel isolated; if ambient light dominates, the task layers lose their purpose. Decide how far it should reach before choosing equipment.
Plan for the route into and out of the pergola as well as the seats. A gently lit transition near a door or step can connect the space, but ambient light is not automatically enough to make a change in level easy to see; assess those transitions separately. Keep the intended light within the gathering area where practical and avoid aiming it at neighbouring windows. Choose a consistent colour appearance across layers, since noticeably different white tones can make adjacent pools look unrelated. Check samples together if available rather than judging each source in isolation. Surrounding finishes and reflective surfaces can affect the result.

Plan separate controls for different uses
Plan how the layers will work together at different times, not only whether each one can turn on. For dinner, the table layer can do the detailed work with ambient light around it. For reading, keep the chair’s task layer available without forcing the dining area to remain bright. For conversation, reduce or switch off task layers. These are example outcomes, not preset modes a pergola is guaranteed to provide. A simple set of independently controlled lights may be enough. Write down the combinations you want first, including lighting for cleaning up or putting things away if that matters to your household, then ask whether the selected fixtures and controls can provide them.
Put controls where they make sense in the actual routine: near the access point for arriving, and within reach from the seating area if people will adjust the lights without getting up. The exact arrangement depends on the approved electrical design; do not assume one switch can separate task and ambient layers usefully. Dimming adds flexibility only when the chosen fixture and control are compatible, which the supplier and electrician should confirm for the exact equipment. Keep labels clear if visitors or other household members will use the settings. A written plan of the desired combinations helps the electrician understand what each control is meant to do.
Review glare from seated eye level
Check glare from the seats people will use rather than judging a fixture only from directly below it. Sit at the dining table and reading chair, then look toward the fixture, across the pergola and toward the main approach. A source can be distracting in peripheral vision even when it does not shine straight into someone’s eyes. Note its position relative to faces and ordinary conversation; people should not have to turn away from a bright point to speak. If the source is visible, ask whether a different approved position, aiming direction or shielding approach could keep it out of the usual sightline. Repeat the check if chair orientation changes.
Check reflective glare as well as direct glare. A tabletop, glass panel, nearby window or wet paving may mirror the source from a seated angle, and the reflection can shift when someone leans back or moves to another chair. Mark those surfaces on the plan and review from more than one eye height; a standing inspection alone misses the view diners experience. Increasing brightness elsewhere is unlikely to solve a reflection and may create another high-contrast spot. When reviewing lighting options for the Bloomcabin bioclimatic model, compare the documented fixture positions with the reflective surfaces on your sketch. Include the direction each person faces, rather than marking only the centre of each chair.
Confirm where the pergola can support lighting
Pergola members, roof elements and attached walls are not automatically suitable mounting points. Before drawing a fixture directly onto a beam or other part, ask which locations are documented as approved for the exact structure and lighting option. Avoid drilling, cutting or fastening equipment based on an illustration or generic accessory description; the supplier or installer needs to confirm how an attachment interacts with the structure. Where the roof or another component moves, its full range of movement and the light’s clearance need to be considered. Resolve these configuration questions before finalizing the lighting layout. Mounting choices can also affect future service access.
Look at the whole assembly when placing lights: access doors, moving components if present, drainage paths and points that need periodic service all need room. Do not let a fixture or proposed route obstruct operation or make a component harder to inspect; ask the installer to explain the documented route and maintenance access. If considering the wall-mounted pergola configuration, include the adjoining wall and the path back to the building in the discussion, but leave attachment and electrical decisions to qualified professionals. The wall relationship can shape a layout without proving that the wall is an approved support. Mark what is proposed separately from what has been confirmed.
Check fixture ratings and electrical planning
Match every fixture to the exposure at its actual position. A light beneath a well-sheltered area may face different weather than one near an open edge; check rain, snow, moisture and seasonal temperature conditions against the manufacturer’s information. Confirm the documented outdoor rating for the exact fixture and any associated control equipment rather than relying on appearance or a broad label such as outdoor. Ask what the rating covers and whether it suits the position shown on the plan. If exposure is uncertain, have the supplier or electrical professional assess it before purchase. Do not assume protection is identical across every component in a system.
Bring the exact fixture names and manuals to a qualified electrical professional before permanent work is planned. Have that person confirm suitable supply, control and dimming arrangements, and review how the route can be installed and serviced without interfering with pergola operation. Do not use a lighting sketch as wiring instructions or make permanent electrical changes on its basis. If you are considering Bloomcabin’s pergola model, identify the exact configuration and lighting options in the electrical brief. Record which fixtures and controls the plan covers so that advice about one combination is not mistakenly applied to another. Keep those details alongside the layout drawing.

Review the layout at dusk before installation
Review the proposed layout at dusk, when contrast and reflections are easier to judge than in daylight. Before a fixture is permanently positioned, compare a marked plan with the real table, chair and walking route. If a demonstration would help, ask the installer whether an approved temporary setup is practical; do not improvise a permanent mount or power an unapproved fixture just to test an angle. Have someone sit in the dining and reading positions while another reviews the light from the approach. This simple role reversal can reveal a direct view or dark patch the planner missed, and makes the intended task pools easier to explain.
Use the review to decide what to change, not simply to say whether the patio looks bright enough. Note a specific issue, such as a shadow across the table, a reflected point in the reader’s view or a dim transition, then revise one part of the plan and check again. Keep accepted positions, controls and unresolved questions in writing so the installer is not left to interpret a sketch differently. If the Bloomcabin wall-mounted model is on your shortlist, bring the revised drawing to the configuration discussion and distinguish the proposed layout from anything demonstrated on site. Record the positions you decide not to use and the reasons for ruling them out.
Prepare a clear brief for the supplier and installer
Give the supplier and installer one clear brief rather than a collection of fixture photos. Include the pergola footprint and orientation, table and chair positions, route into the area, desired task and ambient layers, and the main seated sightlines. Mark which lights should work together and where independent control matters. Add photos of reflective surfaces or a window if they affect glare, plus questions about outdoor ratings, approved mounting locations and service access. The drawing does not need to specify electrical details; its job is to make the intended use and open decisions visible. Identify assumptions clearly so they are not mistaken for confirmed options.
Ask for confirmation against the exact pergola configuration and fixture documentation: which options are offered, where they may be mounted, what exposure they are rated for, and which controls are compatible. Keep product-specific answers separate from general advice about a different model or third-party light. If you are considering Bloomcabin’s bioclimatic pergola listing, attach the lighting sketch to the configuration enquiry and request documented approval for the options being considered. Once those points are settled, the designer can refine output and placement with the professional responsible for the electrical work. This avoids designing around an assumed accessory package.
Frequently asked questions
Should dining and reading lights have separate controls?
Independent control is useful: you can reduce the table light for conversation or keep the reading layer on without leaving the whole pergola bright. This does not require smart controls. Ask a qualified electrician to confirm that the selected fixtures and controls can provide the combinations you want.
How can I reduce glare from pergola lights?
Review sightlines from each chair, not just from directly beneath a fixture. Keep bright sources out of direct view where possible, then check for reflections on glass, polished surfaces and nearby windows. If glare remains, ask whether an approved position, aiming direction or shielding option would help.
How bright should ambient pergola lighting be?
There is no single brightness that suits every layout. Ambient light should connect the seating area without competing with the dining or reading layers. Review the balance at dusk from the places people use, and confirm that the chosen controls can adjust the layers as intended.
Can I use an indoor light under a covered pergola?
Do not assume that a roof makes an indoor fixture suitable outdoors. Check the exact fixture’s manufacturer information against its actual exposure to moisture and seasonal conditions. A qualified electrical professional can help assess whether the documented rating suits the proposed location.
Does a pergola product name confirm that lights can be mounted on it?
No. Confirm which lighting options and mounting positions are approved for the exact configuration you are considering. Check the fixture documentation and outdoor rating as well, and have the electrical plan reviewed by a qualified professional before any permanent work.
A useful pergola lighting plan shows how the dining, reading and ambient layers work on their own and together. Keep the table, chair positions, routes and seated sightlines on one drawing, then use that plan to confirm the exact fixtures, controls and mounting approvals. When every layer has a clear purpose and the glare checks are done from the places people actually sit, the finished space is more likely to work for both dinner and a quiet evening with a book.
