
How to Plan a Pergola on a Sloped Patio
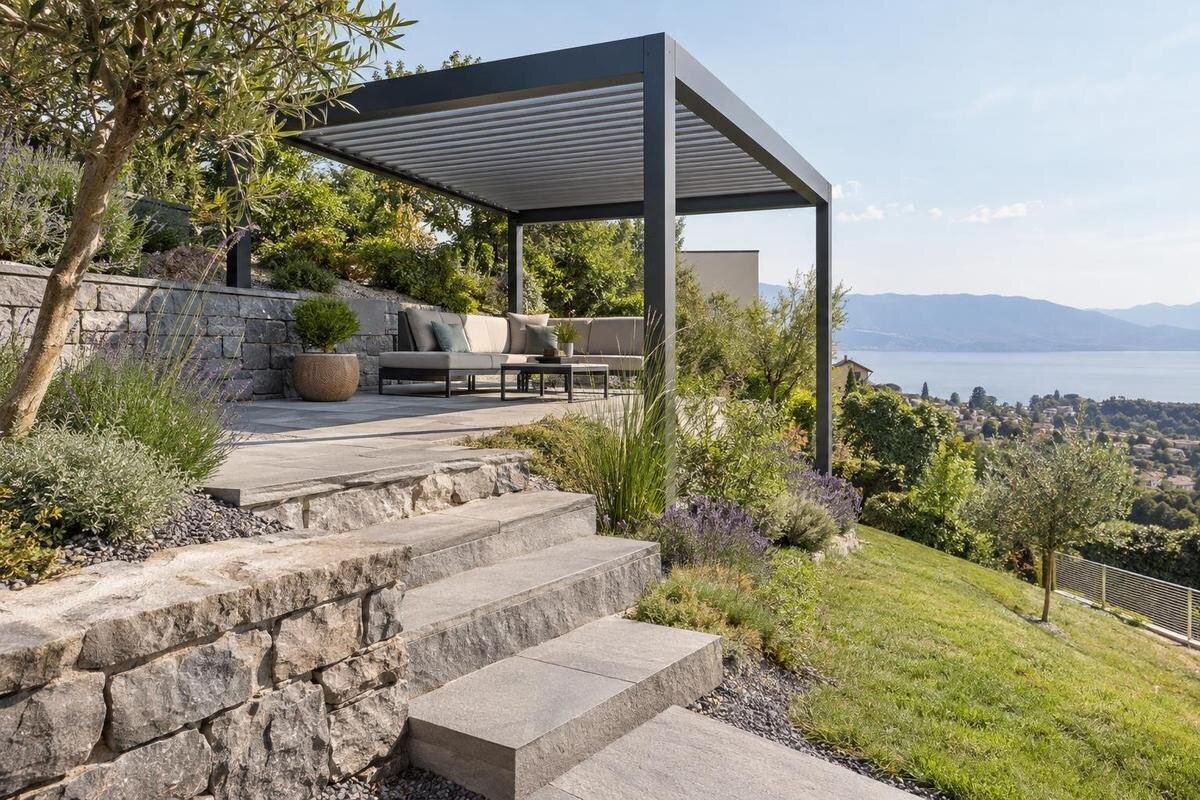
Pergola planning
A sloped patio does not automatically rule out a pergola, but it changes how you set the roof height and support points. Keep two questions separate: what elevation and geometry the chosen model requires, and how the finished patio falls to drain water. Survey the full footprint, confirm the model-approved post arrangement, and have the substrate assessed before deciding on post extensions, footings or paving changes. The goal is a layout that fits the actual levels without compromising drainage or relying on an unapproved adjustment.

01
Set the roof datum separately from the patio fall
Keep the patio fall and the pergola roof geometry as separate design references. The paving may descend to carry rainwater away, but that does not show that the roof should slope in the same direction. Begin with assembly drawings for the exact model and configuration: they establish the intended roof plane and any approved way of accommodating uneven ground. Some models call for a level roof assembly; where yours does, preserve that geometry rather than tilting the frame to match the paving. If the model allows a different arrangement, use only the documented option. A broad product category or a neighbour’s installation cannot establish what is permitted for your build.
Mark the intended roof elevation on a site sketch and tie it to a fixed reference point, such as a surveyed point on the building. Record whether the drawing specifies the elevation of the roof’s top surface or its underside; headroom is measured beneath the structure. Compare the proposed roof position with door and window openings, eaves, lights, screens and the main walking area. On sloping paving, a level roof leaves different clearances at the high and low ends. If the patio will be resurfaced, use the planned finished surface level rather than the existing one when checking clearance. Resolve both the roof level and permitted post arrangement before fixing the footprint.
Survey levels across the full post footprint
Measure across the whole proposed footprint, not just along one edge. Record relative levels at every planned post centre and at points along the roof edges; also mark the direction water travels. Include crossfall, a change of plane, a step, a raised threshold or a settled patch. A reading at the patio’s centre can hide a local high point that affects clearance or a support base. Use one fixed benchmark for all readings and identify it on the sketch. If the fall is irregular or difficult to measure consistently, ask the installer or a survey professional to establish levels before selecting a model or position.
Add practical constraints to the same plan: channel drains, catch basins, utility covers, paving joints, steps, railings, door swings and access routes. Note cracks, repaired areas and places where water stands instead of smoothing them into a uniform slope. Photograph the high side, low side and the edge beside the house, then label the direction of each view. If resurfacing or regrading is planned, distinguish existing levels from intended finished levels; the supports need to be planned against the surface that will remain. Ask the paving contractor to record the intended finished heights before support locations are finalized. This record helps a designer interpret the site without mistaking a surface finish for a reliable level reference.
02
Check headroom where the patio is highest
When the roof plane stays at one elevation, the clearance below it changes with the patio surface. The high side usually has the least headroom, while the lower side may feel more open; a step or raised threshold can change that comparison. Area alone cannot answer the height question: the Bloomcabin Bioclimatic Pergola is listed from 9 to 24 m², but that range does not specify roof elevation, underside clearance or an approved height adjustment. Ask for drawings for the exact size and configuration, then check the underside clearance at the highest surface point within the footprint. Do this before treating the layout as workable or ordering a configuration based only on its advertised area.
Walk the intended route on the plan as well as looking up at the roof line. Check whether doors can open fully, whether a step or railing falls inside a post footprint, and whether an approach becomes awkward at the high end. Include overhead fixtures, lights, window openings and the space needed to move furniture, but do not use furniture placement to disguise a clearance conflict. Write down the minimum headroom and access clearances that matter to your household, then compare them with the model drawing. If an eave or light affects only one corner, record its projection and elevation; measuring from the patio alone will miss it. Base the check on the finished surface if resurfacing is planned.
Use the post layout approved for the exact model
Use the post plan approved for the exact model and size, rather than placing supports wherever the paving looks convenient. Transfer the centre points to the patio with tape or chalk, then compare them with the level survey and obstacles. The Bloomcabin Pergola is listed from 9 to 24 m², but its product name and area range do not show the centre-to-centre positions for a particular configuration. Request the matching layout and anchoring detail before marking permanent locations. Avoid shifting a post to clear a drain, paving joint or planter unless the revised position is approved. A small move can change the frame geometry even if the roof still appears to cover the space.
Review the supports as a set. A simple fall may leave opposite posts at different elevations; a crossfall can make adjacent ones differ as well. Record the surface level at each support point and ask whether the approved assembly accommodates that pattern, and how the bases are meant to meet the prepared supports. Do not assume the visible top of each paver is the right reference for post length. The drawing should make the roof plane, support positions and allowed level variation understandable together. Flag any post centre on a slope break, raised edging or change in paving thickness, since it may have a different base condition from its neighbours. If information is missing, pause before excavation or custom parts.

03
Keep patio drainage and roof runoff distinct
Preserve the patio’s existing drainage function unless a separate drainage plan addresses a change. Identify the low edge, drains and places where water collects; then check whether a proposed post, base or footing would cover an outlet or interrupt a channel. A small obstruction can alter how water reaches a drain, while a newly level patch can create a ponding point. If possible, observe the route water takes during ordinary rain and mark it on the plan. Do not assume the slope is accidental simply because it complicates the pergola layout. Any proposed regrading should be assessed for its effect on the whole patio, not just the area inside the posts.
Roof runoff is a separate flow to resolve. Its discharge point depends on the selected design and configuration, so get the applicable drawing or written clarification rather than assuming water will leave at the patio’s low edge. For the Bioclimatic Pergola listing, ask where water is directed for the exact option and how that route relates to existing patio drains. Then assess possible pooling or splash near doors, steps and neighbouring areas. If the roof layout requires a change to drainage, have the route reviewed before installation. The patio’s surface fall may carry runoff away from the house, but it does not automatically capture or safely carry water discharged by the pergola roof.
Confirm what lies beneath the paving
The visible paving is only the finished surface; it does not establish what can carry or anchor the pergola supports. A patio may cover a slab, granular base, fill or another construction, and old plans may not show later repairs. Gather any records that exist, identify known service routes and note areas that move, crack or sound hollow. Do not infer that a paver or thin topping can hold a post because it feels firm underfoot. Where construction is uncertain, have a qualified installer or structural professional verify the substrate and proposed fixing before drilling or excavation. If the patio is part of a raised or built-up terrace, share that information too; the paving may conceal a more complex assembly.
Foundation requirements are site-specific. They depend on the exact model’s approved anchoring detail as well as the verified patio or ground construction, the slope and the position of each support. A footing that works at one property does not provide a universal size or layout for another. For the Bloomcabin Pergola model, request model-specific anchoring information and have it assessed against the actual substrate; the product name alone cannot show that an existing slab or paving build-up is suitable. Resolve support locations and bearing conditions before cutting paving, placing concrete or completing a new surface. Do not select footing dimensions from a general rule of thumb.
04
Treat edges and retaining structures as site conditions
A slope becomes more complex at an edge, a terrace break or beside a retaining structure. The upper patio may sit on natural ground while the lower area includes fill; a change of level can also coincide with drainage, erosion or signs of movement. These conditions can affect the appropriate support location, so a visual judgement from the finished surface is not enough. Do not choose a generic setback from a wall or terrace edge. Have a qualified professional assess the actual ground, retaining structure and proposed support points when any post is close to an edge, a wall or an area of uncertain stability. Include any visible settlement or past repairs in the site information.
Where the patio meets the house, compare a wall-mounted arrangement with a freestanding one only after confirming what the chosen model is designed to support. A wall-mounted design changes how the structure meets the building, but the ground still matters wherever posts bear on the patio. Bloomcabin Wall-Mounted Pergola is listed from 9 to 24 m²; that area range does not establish wall suitability or a permitted layout over sloping ground. Request information for the precise configuration and have the building connection and any ground supports assessed together. A higher or lower patio edge does not by itself make one support arrangement suitable.
Compare complete model configurations
Compare complete configurations, not just footprint labels or roof styles. For each candidate, obtain a plan view and elevations showing the intended roof level, support positions and any allowed difference between base levels. If considering a wall-mounted pergola option, request drawings for its exact model and size; do not borrow a post arrangement from a freestanding product or assume two variants share support details. Check how the selected footprint sits on the measured slope, where its supports land and what clearance results at the high side. Confirm whether the drawings refer to finished paving or another elevation. Assess the product against the actual patio, not on the assumption that any pergola can be adapted after delivery.
If your measured levels fall outside the documented arrangement, stop and get a technical answer rather than adapting the frame on site. A designer may assess moving the footprint to a more even area, revising the patio plan or developing a site-specific support detail; none should be assumed acceptable until the model’s requirements and substrate have been checked. Ask the supplier or installer to identify in writing which configuration is approved for the proposed site and what evidence supports that conclusion. A general assurance that posts can be adjusted does not show how the roof geometry, support locations and anchoring will work together. Keep the clarification with the drawings used for the order and installation.

05
Do not improvise post heights or base details
Treat every change to a post or base as a design change unless the model’s instructions identify it as an allowed adjustment. Cutting a post, adding an extension, stacking packers, rotating a base plate or moving an anchor can affect frame alignment and how the base meets its support. Do not use the patio slope as a reason to improvise any of these details. Ask which adjustments, if any, are approved for the exact model, how they are measured and what drawing records them. Even a small correction at one corner can affect alignment with the roof and other supports. If a proposed layout needs an unlisted modification, have it resolved before components are altered.
Check that each document relates to the exact product and chosen size, not merely to a similarly named range. For the selected Bioclimatic Pergola model, keep the current model drawing, site levels and anchoring detail together so the installer can reconcile them. If a quote includes unequal post lengths, a special base or a changed footprint, ask for the approved detail to be included in the scope rather than relying on a verbal note. A drawing for another model or configuration does not establish that an adjustment is allowed for yours. Keeping the documents together helps prevent an unreviewed change from appearing between product selection and installation.
Give the installer a complete site brief
Before requesting an installation assessment, assemble one package: a dimensioned plan, level readings at every post point, photographs, information about the surface and substrate, and the locations of retaining edges, drains and known services. Add the desired roof datum, clearance requirements, and exact model and size under consideration. Include any planned resurfacing or landscaping that could change the finished ground level. Ask the installer or structural professional to show the roof elevation, approved post arrangement, support details and drainage implications against that same plan. This makes conflicts between a footing, paving joint, drain or doorway easier to identify before work begins. Note who is responsible for resolving each design question, not only who will assemble the pergola.
Coordinate the review before regrading, excavating, cutting paving or installing new drains; a site change can make recorded levels or drawings inaccurate. If a wall-mounted design is being considered, include the wall and every ground-supported post in the same review instead of treating them as separate jobs. For the wall-mounted model, have the team confirm the approved arrangement against both the building and sloped patio, then keep the agreed plan available during installation. If a service, drain or surface condition differs from the survey, stop and have the affected detail reviewed before continuing. A clear handoff helps ensure that the approved layout matches the conditions encountered on site.
Frequently asked questions
Does a pergola roof have to be level on a sloped patio?
Not every model has the same requirements. Follow the drawings for the exact model and configuration. If they specify a level roof, do not tilt it to match the paving; if they allow another arrangement, use only the documented option. Confirm the roof datum and post layout before settling on a location.
Can I cut or extend posts to keep the roof level?
Only if the selected model’s instructions explicitly allow that adjustment. Cutting, extending or packing a post can change the approved arrangement. Ask the manufacturer or a qualified professional to confirm the permitted detail for your exact model before altering any parts.
Can pergola posts be anchored to paving stones?
Do not assume the paving is suitable for anchoring. It is a finished surface and may cover a different construction underneath. Have the substrate verified and compare it with the model’s approved anchoring details before drilling or excavation.
Should I level the patio before installing a pergola?
Not automatically. The existing fall may be there to drain water, and changing it can affect where water collects or flows. Assess the patio drainage and the pergola layout together before regrading or resurfacing.
What should I have ready for an installation assessment?
Prepare the exact model and size, a dimensioned plan, level readings at each proposed post location, photos, information about the surface and substrate, and the locations of drains, services, edges and retaining structures. Include your intended roof height and clearance needs.
A workable plan brings together the roof geometry approved for the exact pergola, measured surface levels at every support and verified anchoring conditions below the finish. Keep the patio’s drainage route intact unless a reviewed plan changes it, and do not invent post adjustments to make the geometry fit. If the model’s documented arrangement does not match the slope, pause for a site-specific assessment before choosing another position or altering the patio. Those decisions are easier to resolve before paving or foundations are changed.
