
Shade a Pergola Seating Area Without Blocking the Garden View
Pergola planning
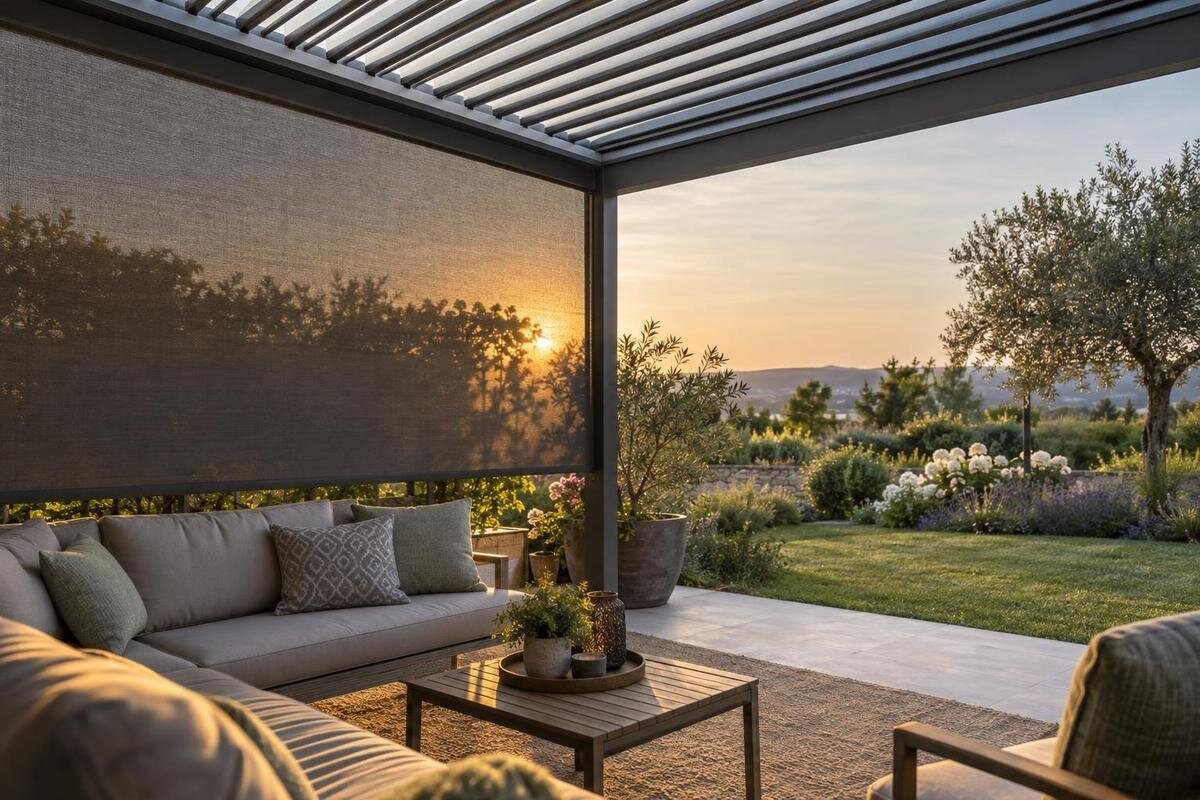
Pergola shade and an open garden view can coexist if you plan for the rays that actually reach the seats, rather than enclosing every side. Choose the view you want to preserve, trace it from the chairs people use, and note when sun reaches those same positions. That sketch can show whether overhead shade is enough or whether a short section of side shading belongs on one edge. Eye height and sun angle both change the result, so a standing photo or a noon-only check can leave important gaps.

01
Choose the garden view that should stay open
Name the feature you want to see from the seating area: a specimen tree, a planted border, the far end of the lawn or an open stretch beyond the yard. A useful view is a direction from a particular seat, not an instruction to leave an entire side unobstructed. Decide whether diners need the focal point, whether an end chair should share the outlook, and whether a side view matters as much as the one straight ahead. Some people value one clear view across the garden; others want a broader panorama. Rank these views before looking at screen locations, so you know which line must remain open and where a little obstruction is acceptable.
Mark the focal point on a simple plan of the patio, proposed pergola footprint, table, chairs and garden edge. Draw a line from each main seat to the centre of the view, then widen it slightly on either side so the feature is visible through more than a narrow gap. A screen can feel intrusive even when it misses the centre line, especially when someone turns to speak to another person. Draw separate lines for seats that face different directions rather than assuming one view axis covers the whole group. When comparing options on the Bloomcabin Pergola product page, request the precise plan for the configuration you are considering and compare it with these view lines.
Measure sightlines from seated eye height
Measure eye position from the patio or deck surface with someone sitting in the chair you expect to use. Repeat this for the actual seat types: a dining chair, bench and lounge chair put eyes at different heights, and reclining changes the angle. Record a range for the people who use the space rather than relying on a standing photo or a generic height. Give the everyday seat first priority; an ideal view from an occasional chair matters less if the main dining place looks into a post. Note any seats that are usually moved, since they may not need the same view protection.
Use those measurements in a side-view sketch as well as a plan. Mark the seat’s eye point and the part of the garden that should remain visible, then draw an imaginary line between them. A post, beam or screen that crosses it may interrupt the view. Check the near and far edges of the focal area, not just its centre, and allow for a little head movement. A photo from the seated position can help compare options, but take one from each main seat and at the real seat angle. This is a sightline check, not a structural design: it shows where you look, not whether a component can support a screen.
02
Map sunlight at the hours you use the pergola
Record when direct sun or glare is troublesome—breakfast, lunch, late afternoon or an evening meal—and note the date, direction and seats affected. The sun’s position shifts through the day and season, so one visit at midday can miss a beam that falls across the table at another hour. Over several clear days, take photos from the same chair positions at the times you actually spend outside. A compass, sun-path tool or dated photo log can help label direction, but check the view on site too: nearby buildings and trees cast their own shadows.
On a plan, draw an arrow from the sun’s direction towards the seats for each problem time. In a side sketch, note whether the selected overhead arrangement could intercept the rays or whether the sun enters beneath an open edge at a low angle. The relevant side can change during the day; a rule such as “shade the west side” will not account for every orientation, season or obstruction. Add the shadows from existing trees or fences separately to see whether the pergola would address a new problem or duplicate existing cover. If you are considering the Bloomcabin Bioclimatic Pergola, confirm the exact roof configuration before plotting its shade on your sketch.
Separate overhead shade from low-angle sun
Identify whether unwanted sun reaches the seating area from above or through an open side. If sun reaches a seat from above and the selected roof arrangement can intercept it, closing a side may add visual blockage without solving the problem. If a low beam enters through an open side, overhead shade may leave the chair exposed even when it covers the table. Mark shadows separately for the seat, tabletop and walking route at each problem time. A dark patch in the centre of the pergola is of little use if the occupied chair is still in direct sun. If glare is at eye level, check where you are looking as well as where the floor shadow falls.
For a wall-mounted design, compare the Bloomcabin Wall-Mounted Pergola with your patio plan. Ask for a drawing of the exact arrangement and plot its roof edge against the times you use the seats. Assess the proposed configuration rather than relying on a category label: the position of the shaded area matters more than whether the patio appears covered overall. If overhead shade addresses the recurring high sun, consider a side element only for the low-angle gap that remains. This keeps the focus on shading occupied seats without closing off more of the garden than necessary.

03
Place side shading where the sun enters
Put side shade only on the edge identified by your sun notes, and only across the length needed to protect the seats. If the focal view lies through the opposite opening, there is little benefit in closing every side for a uniform look. A short panel near an exposed chair may interrupt a narrow beam while preserving a broad garden-facing opening, but both height and distance matter: a low barrier can hide a flower bed, while a taller one can obscure distant trees. Mark the boundary, top edge and end point on the plan before choosing an accessory. The gap left beside a screen matters as much as the area it covers.
Assess that boundary from every seat, not only from the centre of the patio. One end chair may look through the panel while another retains an open view; turning the dining table or changing a chair’s angle can sometimes resolve the conflict without extending the screen. When considering the regular Bloomcabin Pergola, ask which side-shading options and dimensions are offered for your chosen configuration. Compare the proposed panel with the view target, including the panel’s end position rather than just its total width. This helps you choose between moving a seat and shading a larger opening, without assuming that an accessory shown in a similar setup will fit.
Plan post positions and clear walking routes
Posts and beams become part of the view whether or not they are the intended focal point. Draw their confirmed positions over the sightline sketch, then look for a post that lines up with a tree, splits the view into narrow sections or lands directly in front of the garden feature from the main chair. Check the proposed footprint and support positions against the model-specific layout before moving on to screen placement. If a frame interrupts the view, adjusting the seating orientation or table position may be a simpler answer than adding a screen to correct a problem created by the layout.
Include doors, steps, planters and the route between the house and seats. A chair pushed back, an open door or someone walking past changes the view and can leave the seating group cramped even when its static plan looks good. Mark door swings and the everyday route separately from the view lines; shade should not depend on a screen obstructing normal circulation. If you are considering the wall-mounted Bloomcabin model, compare its exact footprint with the doorway and patio, including the space used when chairs are pulled out. Leave some flexibility in chair positions so the layout remains useful when the table is occupied.
04
Compare screen visibility with glare control
The amount of garden you can see depends on how a proposed side element looks from a chair, not on its category name alone. An opaque panel, open-weave fabric, translucent material and clear panel preserve different amounts of visual detail and change the light differently. Ask for a sample of the exact material and, if possible, a view at the proposed height; a small swatch in your hand can seem more open than a full panel across the garden. Check whether you can still recognize the tree or border you chose as your focal point, not just tell that something lies beyond the screen. Compare it against both a leafy background and the sky.
Check the sample under the same light that causes the problem. A see-through surface may preserve a visual connection yet do little to soften glare from a low sun; a denser one may reduce brightness while obscuring colour and detail. Ask how the approved component affects airflow as well as sightlines, and whether that type can be used on the model. If you are comparing Bloomcabin’s wall-mounted pergola, request a representative view of the proposed side treatment. Judge samples from the seat, with the garden behind them, rather than against a wall or only in a showroom.
Confirm compatibility for the exact side accessory
Treat compatibility as a question about the exact model, chosen size and side position. A screen that appears to fit in a photograph may be intended for a different arrangement, and images do not establish which items are included. Ask for confirmation of the approved side options, where each one fits, its available height and width, how it attaches and whether its guides or frame cross the view line you want to preserve. A third-party blind or screen is not automatically a supported pergola accessory simply because its dimensions look close. This matters especially when your plan depends on a short section rather than a treatment around the full perimeter.
Send a marked-up plan with the enquiry: identify the side that receives low sun, show the seats and focal view, and label the section you would like shaded. For the Bioclimatic Pergola configuration you are considering, ask which side components are approved and which are included in the quoted arrangement. Make sure the answer covers your chosen size and identifies where the component would sit relative to the open garden view. Keep that marked-up plan with the proposed configuration so you can compare the response with your original shade boundary. The answer should refer to the model and placement you plan to buy, not simply to pergolas in general.

05
Test the proposed layout at seat height
Mock up the proposed position before finalizing the shade plan. Mark the pergola footprint and seats on the patio with removable ground marks, then show the side element’s outline with a temporary visual marker that does not attach to the structure. A full-height panel sample can reveal how much garden it hides, but set it up securely and supervise it; do not leave a temporary sheet outdoors in wind. If a full-size sample is impractical, take a photo from the measured seated eye position and draw an overlay showing the proposed panel’s height and extent. Place any physical marker at the intended side of the pergola, not merely beside the table.
Take comparable seated photos with the marker present and absent, from the principal chair and any end seat. Repeat at the times in your sun log, and record both outcomes: whether the seat and table receive useful shade, and whether the garden focal point remains comfortably visible. Photos help compare layouts but cannot reproduce every glare or depth cue, so pair them with an in-person view. The Bloomcabin Pergola size options range from 9 to 24 m². Use the selected layout and confirmed support positions for a full-scale check, since floor area alone does not locate a post or show a sightline.
Account for seasonal changes in the garden
Plants make a garden view and its shade change over time. Deciduous trees are fuller in leaf season and more open when bare; new shrubs or climbing plants can also fill a view corridor as they mature. Treat foliage as a variable, not a guaranteed shade system: leaf cover, pruning and planting change, and sun angles change with the season too. If a particular tree currently softens the sun, take the same seat-and-sun notes in leafy and bare conditions, or consider whether your pergola plan still works without that contribution. This prevents a lush summer view from disguising winter exposure.
Look beyond the first planting season when setting the screen boundary. Mark the present view and a reasonable future outline for trees or beds, so an opening does not close as growth fills it. Leave practical access for routine garden care and cleaning around any approved side element; dense planting can otherwise turn a useful open edge into a blocked one. Decide whether the priority is one uninterrupted axis or a wider panorama, and note how much shade at a particular time is worth trading for that view. These priorities will also help if you later change the furniture or planting.
Frequently asked questions
Where should a side screen go if I want to keep the garden view?
Place it on the edge where your sun notes show rays entering, and stop it short of the main view line. Check its proposed height from every seat; a mock-up can reveal whether it hides the focal point or only clips an unimportant edge. If one chair remains exposed, consider changing its position before extending the screen.
Why measure sightlines while seated?
A seated view is lower and often angled differently from a standing one. Dining chairs, benches and lounge chairs also put your eyes at different heights. Checking from the seats you actually use helps show whether a post, screen or beam cuts across the garden feature you want to see.
Will overhead pergola shade stop low-angle sun?
Not necessarily. Sun entering through an open side at a low angle may reach a seat even when the overhead arrangement provides shade. Note the time and direction of the glare, then check whether a targeted side element is needed for that particular opening.
Can a see-through screen reduce glare?
It depends on the material, the angle of the sun and how much of the screen is open or transparent. A panel can preserve some visual connection without softening strong glare. Check a representative sample from the seat, at the time of day when the problem occurs.
Are side screens included with every pergola?
Do not assume that a screen shown in an image is included or compatible with every model. Confirm the approved accessory, exact pergola configuration and intended side. If your plan depends on a particular panel, ask for confirmation of that combination before making it part of the design.
A useful plan starts with the seats that matter, the garden view you want to keep and dated notes on when sun reaches them. Match overhead shade to overhead sun, then consider side shading only where your observations show it is needed. Check the proposed layout from seated positions and preserve a clear line to the focal point. When shade works at the hours you use the patio and the garden remains visible from your chairs, the pergola feels connected to the outdoor space.
