
How to Pair a Pergola with a Traditional Brick Home
Pergola design
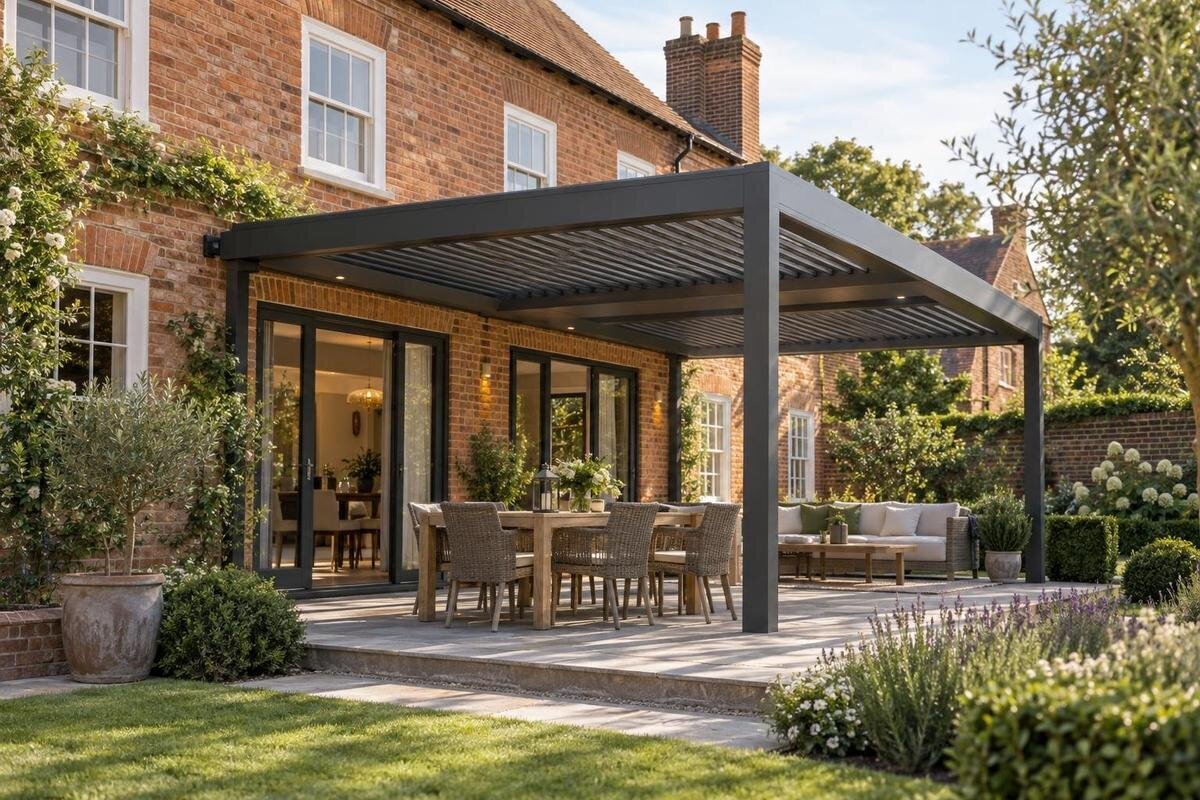
Pairing a pergola with a traditional brick house is less about matching one colour than about giving two distinct structures a convincing relationship. Brick contributes texture, mortar lines, openings and a strong wall plane; a pergola introduces an outline over the patio. A considered design checks their relative scale, roof lines, support positions and connection to paving and planting. The concept in this guide uses a simple plan and elevation to test those elements before finishes are chosen. The goal is an intentional garden addition that respects the house without imitating its brickwork or treating style as proof of site suitability.

Read the brick façade before choosing a pergola
Traditional brick houses do not share one fixed architectural formula. Some are defined by a broad brick wall and simple openings; others have pronounced eaves, arched lintels, stone sills, decorative brickwork or substantial painted trim. Read the rear elevation you actually have: note the main door, window proportions, mortar colour, brick bond, foundation line, roof edge and any porch or rear addition. The patio’s position matters too; a pergola beside a long blank wall has a different visual role from one in front of closely spaced windows. Starting with specific features avoids making a style label do all the design work and helps you decide which details should remain visible.
Pick two or three cues to carry into the garden rather than copying every historic detail. A straight frame, for example, can relate to the geometry of the windows, while its finish might echo a door or window trim. Decorative brick arches can remain the distinctive feature of the house. These are relationships to test, not fixed rules. Look from a favourite indoor seat and from the garden entrance, and note what should stay in view. A restrained pairing can feel more convincing than several near-matches or ornamental details that try to make the pergola look original to the house.
Compare the pergola’s proportions with the full elevation
Use two drawings to judge proportion: a plan and an elevation. On the plan, show the patio, door swing, walking route, dining or lounge furniture, garden edge and proposed footprint; mark support locations rather than drawing only an outer rectangle. In elevation, compare the pergola’s width and upper edge with the door, window group and eaves. A frame spanning nearly the whole wall may overwhelm its openings, while a very narrow one can look detached from the outdoor area. There is no universal proportion to copy: the house, usable patio and views determine the balance.
The Bloomcabin Pergola listing shows area options spanning 9 to 24 m², a useful initial comparison but not a plan for your site. Area alone does not establish the exact width, depth, height or support positions of a configuration, so check the current product details and obtain dimensions for the model being considered. On your drawing, include a chair pulled back from a table, a clear route to the garden and access through each exterior door. Those marks can reveal an obstruction that is hard to notice in a product photograph or a close-up colour sample.
Choose a wall-mounted or freestanding layout
Choose between wall-mounted and freestanding layouts by looking at their relationship to the wall, circulation and visual weight across the elevation. A wall-mounted arrangement draws the eye to where the frame meets the brick; a freestanding one can leave a gap and places its support points within the patio or garden. That distinction affects what appears connected to the house and how the outdoor room is defined, but neither arrangement is automatically more traditional or more harmonious. Test both outlines on the same elevation and plan, with windows, door access and intended seating shown. Judge the full composition, not just the point where the pergola meets a wall.
The Bloomcabin Wall-Mounted Pergola listing identifies a wall-mounted model, but its name does not verify that a particular brick wall can accept an attachment. Brick may be a visible outer layer over a different wall build-up, so ask a qualified building professional to confirm the construction and suitable connection design before selecting an attached layout. If the wall construction is unknown, look for building records or arrange an assessment rather than making assumptions from the exterior. A freestanding alternative also needs site-specific support planning; it simply changes which connection points dominate the design.
Set the pergola roof line against the house
The top line deserves its own comparison. On the house elevation, mark the eaves, soffit, window heads, lintels and any porch roof; then add the pergola’s proposed upper outline. A beam that crosses a window or hides a masonry detail can feel accidental, while a clear separation below the eaves can make the addition read as a distinct garden structure. Check views from indoors, from the patio and along the side yard, since the same line can sit against different backgrounds from each position. This is also where you can see whether the frame leaves a valued window or trim feature unobstructed.
Resist copying a pitched roof, arch or bracket simply because the house has one. A new structure can acknowledge a traditional home through alignment and balanced proportions without reproducing its ornament. When reviewing the Bloomcabin Bioclimatic Pergola listing, compare the chosen configuration’s outline with the house elevation. Include its upper edge and visible supports rather than judging only the footprint. If the dimensions needed for that comparison are not shown, request them before deciding on the visual fit. Check which existing architectural lines remain clear and which are interrupted. One considered alignment usually reads more clearly than an attempt to echo every brick course.

Choose a finish for texture as well as colour
Once proportions are settled, compare material character as well as colour. Brick carries texture, mortar joints and variation from brick to brick; a nearby finish can relate to the house without pretending to be the same material. A clear contrast may make a new frame legible, while a quieter tone may connect it to trim, a door frame or a downspout. Neither is an automatic match. Look at physical samples beside the actual brick and paving in sun and shade, and consider surface sheen as well as hue. A finish that looks close on a screen can read differently against rough masonry.
Use the building’s details selectively: one trim tone, one metal accent or the paving edge can be enough. Compare only material and finish options explicitly identified for the model you are considering; the Bloomcabin Pergola product page is a starting point for identifying those details. Arrange the available samples beside the brick, trim and paving so you can judge the combination rather than each colour separately. Decide which existing detail the frame should relate to, and which materials should remain distinct. Keep that choice consistent across the design instead of introducing a separate match for every part of the house.
Resolve the wall, support and paving junctions
Small junctions often decide whether a design feels finished. In elevation, note where the pergola edge meets the brick wall visually and whether it competes with a downspout, exterior light, window sill, door trim or foundation course. In plan, show supports in relation to paving joints, the patio edge and any step between hard and planted areas. A post that lands in the middle of an awkward paving cut can make an otherwise tidy layout look unresolved. These are questions for the landscape and installation drawings, not details to improvise after the patio surface is set.
With a wall-mounted arrangement, the house-side junction is prominent; with a freestanding layout, the support bases and gap beside the wall draw more attention. When comparing the wall-mounted pergola option, show the proposed meeting line alongside nearby trim, lights and downspouts. Have the landscape designer and qualified building professional coordinate these visible edges with the technical review, including the paving interface and site drainage. Keep unresolved junctions marked on the drawing so they are not mistaken for finished details. This lets the design team consider the appearance and practical requirements of the same connection before the surrounding surfaces are finalized.
Use planting to connect the patio with the garden
Planting can make a pergola and brick wall read as parts of one garden without covering either. Treat beds as shapes in the plan: a narrow border may run along one edge, or a broader planting area may soften the transition to lawn. Keep mature height and spread in view, particularly near windows, doors, support positions and established garden paths. Lower planting can leave brickwork visible; taller planting can frame a view if it does not make the patio feel enclosed. Consider how the beds relate to the house from both nearby and distant viewpoints. The decision is about the whole elevation and garden, not a universal rule for red, brown or buff brick.
Ask for a dimensioned landscape drawing with documented planting requirements, including proposed locations, mature spread and the maintenance access each bed needs. That record helps coordinate planting with the pergola footprint and the routes people use; it does not guarantee how plants will perform on a particular site. Do not use foliage to disguise an awkwardly placed support or a poorly resolved wall edge. Leave visible space around doors, paths and outdoor seating, and consider how the garden will look when plants are newly installed as well as when established. Keep the planting plan practical to maintain.
Check sightlines from inside and out
Check the composition from the rooms that open onto the patio. A pergola may frame a garden view, but its roof edge and supports can also interrupt the line to a tree, lawn or focal feature. Mark those sightlines on the elevation and plan, then position furniture and exterior lighting on the same drawings so they feel related rather than gathered under a frame by default. Use one or two repeated details—a trim colour, a straight border or a consistent metal accent—instead of adding several decorative echoes of the house. The brick remains the visual anchor; the garden structure should support the view, not compete with it.
When a model is shortlisted, assess its actual outline against those sightlines instead of relying on a lifestyle image. Use the bioclimatic model listing to identify the option being compared, then obtain the configuration details needed to place it accurately on the plan. Compare the view with furniture in its intended position, including chairs pulled away from the table. This separates an obstruction caused by the frame from one caused by the seating layout. If support positions or the overall outline change, revisit the affected views while a different footprint or placement is still possible, before fixing the paving and planting plan.

A concept sketch for a brick-house patio
Consider a simple concept sketch: a brick rear elevation with one garden door, windows either side and a paved area that opens toward the lawn. Draw the wall first, including lintels, trim, eaves and downspout; then add a separate rectangle for the pergola outline without tracing ornamental masonry. In the plan view, mark the door swing, a clear route from the house to the lawn, seating and planting beds. Set proposed support points where they fit the usable patio, not where they merely make the elevation look symmetrical. The sketch makes the design testable without pretending that one arrangement suits every brick house.
Now compare finishes and edges: choose a frame tone that relates to a single existing detail, let the paving define the outdoor area, and use planting to soften one or two boundaries while keeping the windows visible. The Bloomcabin Pergola area options span 9 to 24 m²; use that catalogue range only to shortlist, then compare the exact selected configuration with the drawing. If a wall connection is proposed, mark the intended meeting line and have the wall construction reviewed; if the layout is freestanding, include the support positions. The useful concept is the one that resolves proportion, circulation and detail together, not the one that best imitates the house.
Record the design in a dimensioned drawing
Before ordering, make sure the drawing records the proposed footprint, overall height, support positions, nearby doors and windows, eaves, downspouts, patio edges and furniture clearances. Identify the product configuration being reviewed rather than using a generic rectangle. Add the selected finish only after the available options are confirmed, and note unresolved connection or paving questions for the relevant professional. Include an elevation of the house alongside the plan, with view sketches from the main garden approach and a key indoor viewpoint. Together, these show how the proposed structure relates to the house and garden; a list of colours or an attractive image cannot confirm scale or site fit.
Keep the product reference, configuration and drawing together so everyone is comparing the same proposal. If the Bloomcabin Bioclimatic Pergola page represents your shortlisted model, record that choice alongside the dimensions and finish under consideration. Pair the drawing with planting requirements covering locations, mature widths and maintenance access. When a support position or patio edge changes, check the adjoining bed and walking route rather than treating the revision as an isolated adjustment. Keep unresolved questions visible for the designer, supplier and installer, and update the affected views together. The purpose is a coordinated design in which the structure, planting and usable patio space have all been considered.
Frequently asked questions
Does a pergola need to match the brick colour?
No. A close colour match can still look unlike the masonry if the texture and sheen differ. Relate the frame to one or two details, such as trim or paving, and compare physical samples beside the brick in sun and shade. A deliberate contrast can look more intentional than a near-match.
Is a wall-mounted pergola suitable for every brick house?
No. Brick may be a visible finish over a different wall assembly, and appearance alone cannot confirm an appropriate connection. Ask a qualified building professional to review the wall construction and proposed connection. If attachment does not suit the building or layout, compare a freestanding plan and check its site-specific support requirements.
How large should a pergola be beside a traditional house?
There is no standard ratio. Draw its footprint and upper line against the full elevation, then include door swings, circulation, furniture and the patio edge. Use actual dimensions for the configuration you are considering; an area figure alone does not show how its width, depth and support positions relate to the house.
Which pergola finish works with red brick?
Start with the house’s trim, door or paving rather than trying to reproduce the brick colour. Compare documented finish options using physical finish samples beside the brick at different times of day. The best relationship depends on undertone, texture, sheen and surrounding materials, so a general colour rule cannot decide it.
Can a modern pergola suit a traditional brick house?
Yes. A simple contemporary frame can sit comfortably beside a traditional façade when its scale, roof line and position respect the existing openings and details. It need not copy decorative brickwork. Keep the contrast deliberate, and confirm that the product’s dimensions and proposed attachment or supports suit the actual site.
Pairing a pergola with a traditional brick house works best when the drawing resolves the relationship before decorative choices take over. Let the masonry’s openings and details set the visual context, then test the pergola’s footprint, upper line, support locations and paving junctions against how the patio will be used. Finish and planting can bring the pieces together, but the result should feel like a considered garden addition that complements the house while giving the patio its own character.
