
Planning Pergola Side Shade for Low Evening Sun
Pergola planning
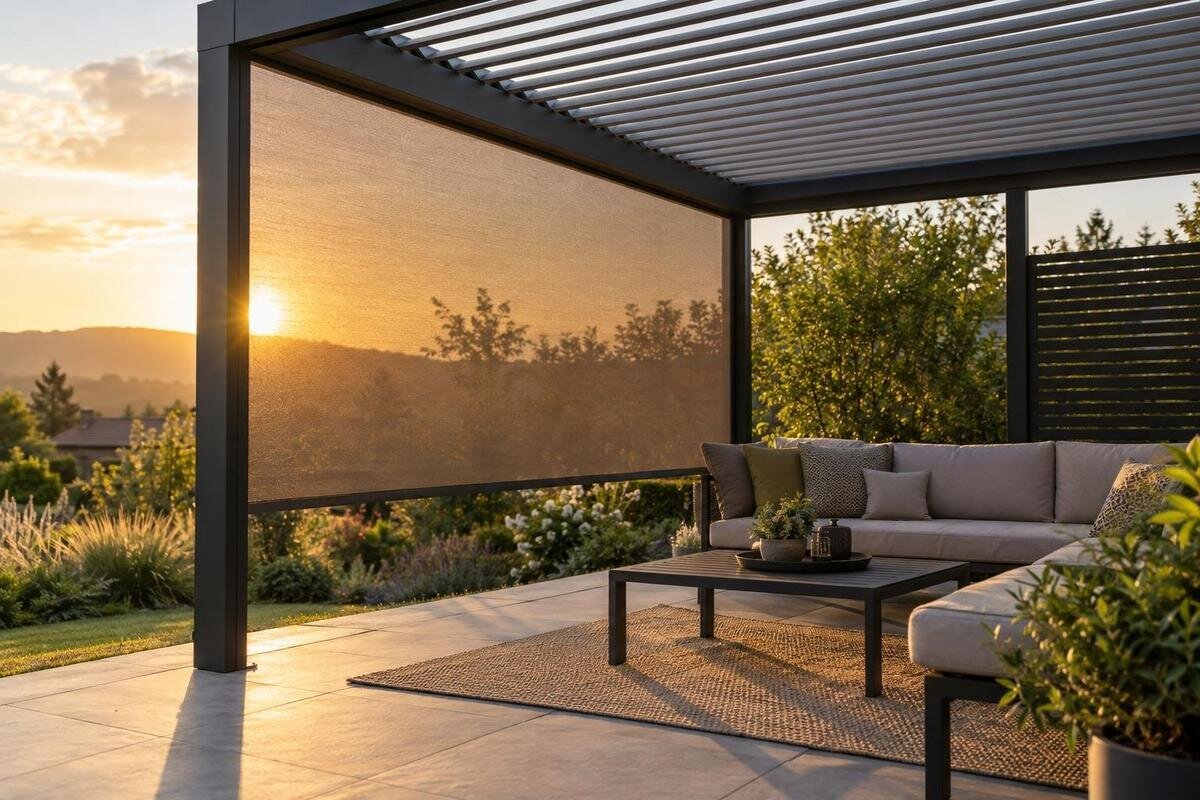
A roof can shade a patio at midday and still leave a dinner seat in direct sun when the light drops. To decide which pergola side needs protection, follow the low sun to the chair or table it affects at the time you actually use the space. The best screen position is the opening the rays cross on their way to that target, not automatically the side labelled west.

01
Choose the evening you need to shade
Pick one representative evening before comparing screen options. Write down the date, the period when you want to sit outside, and the seat or surface that matters most: a chair where the sun reaches someone’s eyes, the end of a dining table, or a work surface. A pergola roof can block sunlight coming from above; as the sun nears the horizon, rays can travel beneath it through an open side. Shade that feels adequate earlier may not reach the same spot at dinner. A specific use period makes the exposed opening easier to identify. Judge the shade from the place you want to use, rather than from the pergola’s midday shadow.
Do not ask one observation to represent the whole year. The sun’s apparent setting point shifts with the date, and trees, fences, buildings or a change in where you sit can alter the light that reaches the pergola. Choose the season or date when you most want evening shade; if you use the space across a longer season, repeat the check at another relevant time of year. Note when direct light first reaches the priority spot and when it leaves, not just the official sunset time. If a tree or building partly blocks the horizon, note when the sun clears it. A brief note about cloud cover can also explain why one observation differs from another.
Mark the seats and openings on a simple plan
Sketch the pergola from above and label the house, posts, open sides, table, chairs and the doorway or path people use. Add a north arrow using a site plan or compass reference; do not infer direction from a product photo or the way the house looks on the page. Mark the centre of the seat or table you are trying to protect, and note nearby obstructions such as a fence or tree that cuts off part of the horizon. Draw the furniture layout you intend to use, since moving a chair changes the target. If chairs move between meals, note which arrangement you are testing. The sketch need only show relationships; it is not a construction drawing.
At several points during the chosen evening, sit or stand in the position that matters and note where the sun appears in relation to the pergola. Draw an arrow from the opening through which light enters toward the chair or table it reaches; add the time beside each arrow. If you are considering the Bloomcabin Pergola, put that exact model name in your notes, but base the arrows on the proposed layout at your home: a model name cannot show how your patio is oriented. A photograph taken from the priority seat can help you recall the direction, but the plan should still mark the opening, target and time. If clouds interrupt the observation, repeat it on a clear evening.
02
Trace the sun’s path through each opening
Trace the ray rather than choosing a side from its compass label alone. For each recorded time, imagine a straight line from the visible sun, through the open boundary, to the affected face or surface. The first opening that the line crosses is the candidate for screening. A low beam can enter at an angle and reach a seat near the opposite corner, so the side where the light lands may not be the side it came through. Mark separate arrows for someone’s eyes and the table if they are in different places; their paths may cross different openings. Show where each ray crosses the frame, not only where it ends.
For example, a sun visible beyond one corner can send a diagonal beam through a side opening and across a chair turned toward the centre. A panel on the far end may seem close to the bright patch but still leave the ray’s entrance clear. Apply the same tracing method to the frame you are considering, such as the Bloomcabin Bioclimatic Pergola; the model category does not decide which edge faces the evening sun at your address. Record the orientation and intended openings on the configuration you ask about. If the entry point is unclear, use another observation point rather than guessing.
Separate direct sunlight from reflected glare
Separate direct sun from general brightness. If you can see the sun from the priority seat and a beam falls across the person or table, a screen across that incoming line may block direct rays. If the glare comes from a bright tabletop, glass door, pale wall or paving, the light may be reflected; a screen at the first opening cannot be assumed to remove every reflection. A broad bright sky can also feel glaring without a beam landing on the target. If practical, turn or move a reflective object briefly and note whether the effect changes. A photo from your seat can help show whether the sun itself is in view. That distinction helps you judge whether screen position alone is likely to address the problem.
Decide how much view and daylight you are willing to trade for shade. A more closed panel generally interrupts more of the view and ambient light; an open-weave screen can preserve more of both but may still let some direct light through. The exact effect depends on the accessory and its location, so ask for product information rather than assuming all mesh or fabric behaves alike. Consider daytime views too if the panel would remain in place then. For a house-attached layout, include the windows and patio door in your sketch. If you are considering the Bloomcabin Wall-Mounted Pergola, use that sketch to show which views you want to retain when discussing compatible screen options.

03
Mock up the proposed screen line
Before settling on a side, do a simple sightline mock-up. On a calm day, have another person hold a manageable opaque board vertically at the proposed screen line while you sit in the affected chair and check the table from its usual place. Move the board to the adjacent opening if the sun enters around a corner. This helps you see what would be hidden and whether the panel crosses the line of sight; it does not reproduce the light transmission or performance of a real screen. Keep the board hand-held, and do not fasten an improvised sheet or panel to the pergola.
Repeat the check at the beginning, middle and end of the part of the evening you care about, or return to the spot at a few recorded times. A side that shades the chair at dinner’s start may leave it exposed later as the sun moves. Use the furniture in its planned positions and check any entry route, patio-door use and view you want to retain. If a full side would obstruct a route or hide too much of the garden, mark a shorter span or a different corner as an alternative to ask about. A second person can also check whether the route remains convenient when someone carries food.
Match screen coverage to the light path
Once the entry side is clear, decide how much of that opening the light actually crosses. Note whether the beam reaches the target near the centre, close to a post or around an end, and whether it shifts across the opening while you are outside. Also note whether the light falls at seated eye level or on the tabletop; a plan view alone cannot show which height matters. A side panel that misses the ray at an edge or corner can leave the key chair exposed, while a very long panel may shade areas you meant to keep open. The angle can shift the patch across the table during one meal, so compare coverage with your actual seating arrangement.
Ask for a dimensioned layout of the exact pergola configuration and the compatible screen’s usable coverage, including where it sits relative to posts and any edge gaps. The listing for the regular Bloomcabin Pergola can identify the product line you have in mind, but an overall area does not tell you which side faces the sun or where the furniture will sit. Do not estimate a screen span from a gallery picture. Ask how coverage is defined, including any unshaded edges in the proposed configuration. If a partial screen seems sufficient, have the supplier confirm that the accessory can be configured that way before you plan around it.
04
Decide whether one side is enough
One protected side is a sensible starting point when the marked ray consistently enters through a single opening. Add a second side to the plan only if the sun swings around a corner, or a separate target is lit through another opening during the same use period. More coverage is not automatically better: each added panel can change the view, access and sense of openness. Compare one-side and two-side sketches against the recorded paths, and note whether the second screen solves a distinct problem or merely covers more of the frame. A brief flare at one chair is different from a need to shade the whole dining area.
Check how the candidate screen relates to the door, steps, gate and route between the house and seating. A panel should not force people to detour through furniture or make the main opening awkward to use. If the bioclimatic pergola product line is on your shortlist, ask whether an approved accessory is offered for the side you marked and how its operation affects access. Do not infer that side shade is included from the pergola name or that an add-on shown elsewhere fits this model. Ask whether the accessory can be opened or removed when the sun is no longer a problem, if that function is offered. Leave any side open where you want a breeze or an unobstructed view unless the light map shows a clear reason otherwise.
Check views and seasonal changes
Include the house and the rest of the yard in the decision, especially when the pergola sits beside windows or a frequently used door. A screen can stop a low ray outdoors but also block a view through the opening; note what you see from the kitchen, living room and pergola at the hours that matter. Mark trees and buildings as well, because a neighbour’s roofline or a tree can hide the sun before it reaches the structure. If direct sunlight reaches the seating area only after the sun clears that obstruction, the period when you need a screen may be shorter than your first estimate. A clear view from one room may matter more than a distant yard sightline.
Check a second relevant date if the screen would remain in place across several months. A west-side opening can receive sunlight from different angles as the year progresses, while earlier or later use may put the beam on another target. Compare the new arrows with your original sketch to see whether the same screen position would still cover the affected seat or table. For a house-attached layout, mark each nearby window and doorway on that plan. Use the wall-mounted Bloomcabin model page to identify the model in your enquiry, and explain whether you need evening shade throughout the season or only during a particular period.

05
Verify screen compatibility with the pergola
Confirm the accessory and its limits against the exact pergola model before treating it as part of the frame. Ask whether the proposed screen is an approved match for the selected model, size and side, and whether the intended span is offered. Confirm what is included in the purchase and what is a separate option; a photo of a screened pergola or a third-party product does not establish either point. Ask for instructions on operating and maintaining the actual accessory, including how it is deployed and stored, and for any documented limits relevant to its use. Do not assume it operates in the same way as another screen you have seen.
Product area is useful for narrowing down a frame, but not for locating shade. The Bloomcabin Pergola model page lists the regular pergola from 9 to 24 m²; a total area alone does not show the side dimensions, post positions or which opening will face the sun. Use the exact size and configuration drawing when you ask about a screen. Check how the approved component attaches and whether a side can remain partly open, but leave installation or suitability questions to the product documentation or a qualified installer. Do not treat the area range as a fit recommendation for your specific site.
Prepare a clear accessory enquiry
Make the enquiry easy to answer by sending a small plan with a north arrow, the proposed pergola footprint, open sides, furniture and doors. Add the date and time of use, the seat or table affected, the direction the sun appears from, and arrows showing its path through the opening. Include the model name and configuration you are considering, plus a photo from the seated viewpoint if it clarifies the sightline. Label photos with their time and camera position so they match the arrows. Ask which compatible side-shading accessory, if any, is available for that arrangement, what it covers and what is included. Request product details for any limits or fitting conditions that affect your plan.
If the Bloomcabin bioclimatic option is your reference, use its exact model name in the question; the same approach applies to a regular or wall-mounted model. Ask for confirmation against the specific configuration rather than a broad statement that screens are available. Keep the reply with your sketch so the selected side, coverage and accessory are clear before ordering. Written confirmation helps avoid confusion with a gallery image showing a different orientation or layout. The useful outcome is a confirmed arrangement that intercepts the low sun where it reaches the people and surfaces you want to protect.
Frequently asked questions
Is the west side always the right one to screen?
No. Evening sun is generally in the western part of the sky, but its exact direction changes through the year, and your pergola may face it at an angle. Follow the light through the opening to the affected seat instead of choosing a side by its compass label.
Should I screen two sides?
Only if your light map shows a reason. The sun may enter around a corner, or different seats may be exposed through separate openings. A second screen can also affect access and views, so compare both layouts before asking about accessory compatibility.
When should I observe the sun?
Choose a clear evening in the season when you most want shade, and note the light at several points during your usual time outside. If you use the pergola through a longer season, repeat the check on another relevant date; one observation cannot represent every seasonal angle.
Will a side screen remove all evening glare?
Not necessarily. A well-placed screen may intercept direct rays where they cross its coverage, but reflected light from paving, glass, a wall or a tabletop can remain. The amount of light passing through also depends on the specific accessory, so ask for its product information.
Are side screens included with a pergola?
Do not assume so. A model name or gallery image does not establish what is included in a particular offer or whether an accessory fits your chosen side. Confirm the exact accessory, configuration and included components before purchasing.
After you have followed the sun from the seat to the opening, the first side crossed by that line is the strongest candidate for shade. Check it at the dates and times you use the pergola, then weigh coverage against access, view and daylight. Match an accessory only after the plan identifies a specific side and span. That keeps the decision focused on the evening light reaching your chair or table, rather than screening sides that do not solve the problem.
