
How to Add Pergola Privacy Without Stifling Breezes
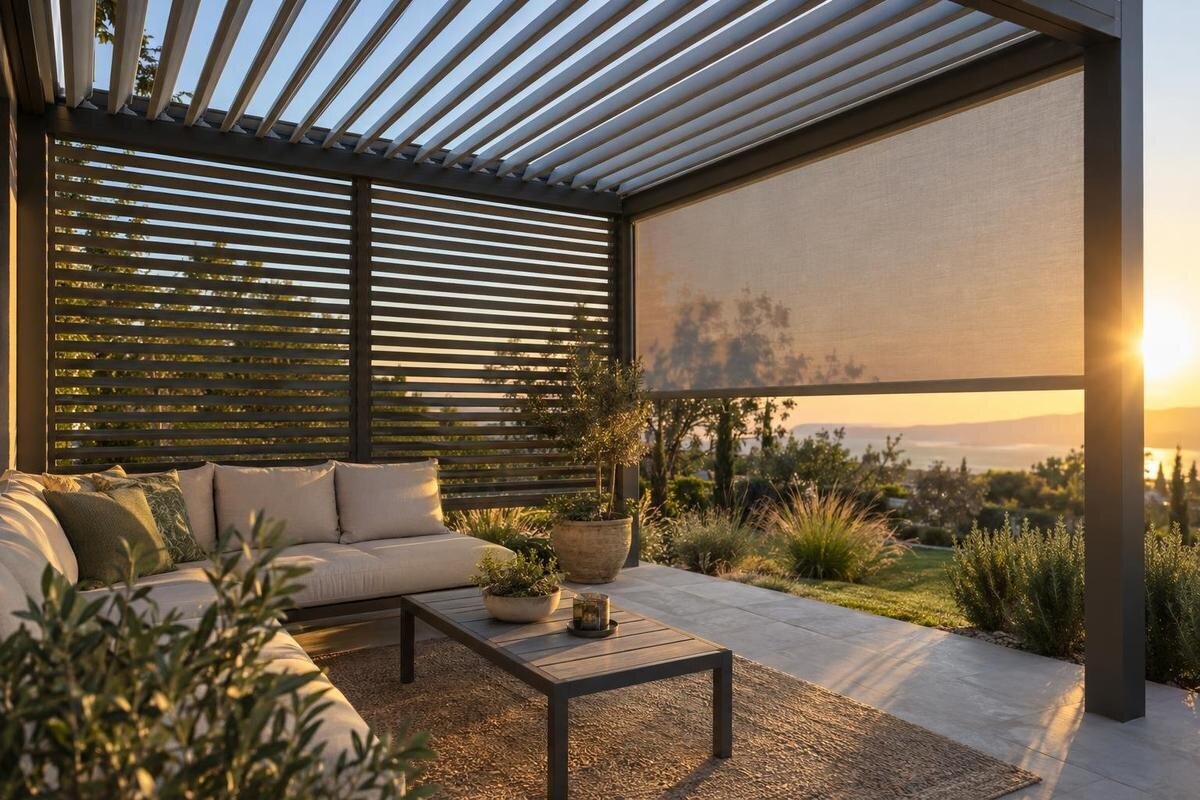
Pergola privacy and airflow
Adding a privacy screen can change how air moves through a pergola, especially if the panel closes the side that usually catches a breeze. The useful planning question is not how many sides to cover, but which view needs blocking and which openings should stay clear. Sketch the wind direction, seating, sightlines and nearby boundaries together before choosing a screen. That makes trade-offs easier to see: a panel can interrupt a neighbour’s view while an open route remains available for air to reach and pass the seating area. No layout can guarantee the same breeze in every condition.

Map the breeze at seating height
Spend time in the intended seating area on several ordinary days, and notice where air arrives from, where it goes and whether it changes around the house or fence. A regional forecast can provide context, but a breeze on a sheltered patio may not follow the same direction as the wind reported nearby. Note the common pattern and occasional shifts separately instead of designing around a single gust or calm afternoon. Observe at chair height as well as while standing. If a hedge or other planting changes through the seasons, record that too; the aim is to identify useful openings during typical use, not predict every condition.
Draw the pergola footprint as a plain rectangle, add arrows for the usual breeze, and label any secondary direction that occurs regularly. Mark the house, fences, hedges, sheds and nearby buildings, since each can redirect or soften the air before it reaches the seats. Keep arrows at the level where people sit, rather than drawing only a route above the roof. For a product reference while mapping the layout, see Bloomcabin Bioclimatic Pergola; use your site sketch, not the model name, to decide which openings matter. Distinguish common arrows from occasional ones so a rare wind shift does not dictate the whole plan.
Which sightlines need privacy?
Mark the seats where you want privacy, then identify the viewpoints you want to screen: a path beside the patio, a neighbour’s window or an overlooking deck. Draw a line from each observer’s position to the person sitting in the pergola. Screening only needs to interrupt relevant sightlines; covering a side with no meaningful view may close an air route without adding much privacy. Check both seated and standing eye levels, and include the usual table position with chairs pulled out. A layout that screens a seated conversation may still leave a standing guest visible. Separate essential views from occasional ones so you do not screen for every possible glance.
Check oblique views, not just a straight line across the property. Someone looking from a deck corner may see around a screen that seems complete when viewed head-on. Mark the screen endpoint, then look from each known viewpoint towards the seats and note where a gap still frames an occupant. A model such as Bloomcabin Pergola may belong on your shortlist, but the sightline drawing needs to reflect your own boundaries, furniture and viewing angles. Privacy is a relationship between particular positions, not a blanket rating for a pergola. Check more than one chair if guests use the space.
A clear route into and through the seating area
Air needs a route into the pergola and a route onward or out. An opening alone may not bring a breeze to the seats if a wall, fence, dense hedge or screen sits directly across the likely flow. When tracing arrows, take them past the chairs and table, not just to the edge of the footprint. An open side facing a solid panel may direct air away from the seats. Where the site permits, preserve more than one usable opening, especially on the sides identified in your observations. Label the openings you intend to keep clear so they remain part of the plan when you add screens and furniture.
Treat the roof and the sides as separate parts of the airflow plan. An opening overhead may allow air to move above the seating area, but it does not show whether a breeze can cross at seated height; open sides do not establish what happens at the roof either. Do not use roof ventilation as a reason to screen every side. If considering Bloomcabin Wall-Mounted Pergola, show the house wall and each proposed screen as separate edges, then ask which side arrangements are approved for that exact model. Your sketch should show how the open edges connect to the seating area, rather than treating every visible gap as a useful air route.
Place screens across the views that matter
Put screening across the view that causes the concern, then keep an adjacent face open if it can carry the usual breeze. For example, an overlooking neighbour’s patio may call for protection on one short edge while a wider opening on another side remains available for entry and airflow. This is more targeted than treating every face as equally exposed. Let the actual viewpoint and your breeze map determine the screen position; a general rule such as screening the street-facing side may not address either the view or the wind. One concern may require only part of a boundary, not a whole perimeter.
Mark where a screen begins and ends, because its length matters as much as the side it occupies. A short panel may leave a diagonal view at its end; extending it around a corner may close the opening you meant to preserve. Check the outline against each important sightline and breeze arrow before settling on its extent. If the Bioclimatic Pergola listing is on your shortlist, ask whether the selective arrangement you have drawn is supported. Include the exact side and screen length in your question so the answer applies to your plan.

Offset screens when airflow and sightlines conflict
Where a direct view and the most useful breeze follow a similar route, test an offset layout. A screen on one side and a shorter one on an adjacent side may interrupt the straight sightline while leaving a turn or gap for air to continue through. The geometry needs care: an opening can maintain a route and still expose a chair from an angle. Draw both the eye line and breeze arrows, because either one alone misses a trade-off. Treat an offset as a layout option to test, not a guarantee of cross-flow. Check it from the main seat, rather than only from an empty footprint.
Keep the planned gap clear of chairs, planters and storage, and check it from the seating position as well as the entrance. A route that looks generous on paper may narrow around a high-backed seat or a nearby boundary. Screen surfaces also differ in how freely air passes through them, so do not assume a gap around the end will compensate for a heavily obstructed face. Test whether the intended openings remain clear in the actual arrangement and whether the most important view is interrupted. If the breeze often reverses, trace that direction separately rather than expecting one offset to serve every condition.
Furniture and planting affect open sides
Place furniture before you finalize the screen plan. Show the table, chairs, loungers and usual walking route; a wide opening can become narrow when a deep sofa back, storage bench, planter or outdoor-kitchen unit sits in front of it. Air may be felt differently around shoulder and ankle height, so consider whether the route reaches the places where people sit, not only an open strip above the floor. Leave room to move chairs and walk through without placing everyday items directly in the openings you are counting on. Consider chairs in their usual pulled-out position, too.
Include existing and planned planting on the same drawing. Containers or a dense hedge can screen a neighbour, but they can also reduce an opening; plants may fill out over time, so a gap that is clear now may not stay clear. Check the airflow route after accounting for mature planting and normal furniture placement, rather than judging an empty terrace. If comparing Bloomcabin’s wall-mounted model, draw the proposed footprint with your actual chairs and planting rather than planning around a model name alone. The surrounding walls and objects help determine what reaches the seat.
Screen height and viewing angles
Choose screen height from the view, not from a universal privacy rule. A low barrier may cover a seated person but leave a standing guest exposed; a taller screen may block more viewpoints while changing how air moves through that side. A neighbour looking down from an upper window or balcony presents a different line of sight from someone at ground level. Mark the eye points that matter, including seated and standing positions, and note any raised deck or change in ground level. This helps show whether the concern is side-on or elevated, rather than relying on a screen’s label or appearance.
Use a simple side-view sketch as well as a plan: show the seat, likely observer and proposed screen top. From viewpoints you can check, see whether the screen interrupts the line without screening more of the side than necessary. An open area above or beside a screen can retain a sense of openness, but it may leave an elevated sightline unblocked; it also does not establish how much air reaches the seats. For the bioclimatic pergola model, ask the supplier to confirm permitted screen dimensions and locations for the exact configuration; a drawing of another setup is not proof that the same arrangement fits. Specify both the screen height and side in your question.
How walls and boundaries affect airflow
Draw fixed obstructions as part of the pergola plan. A house wall, fence, shed, neighbouring structure or mature shrub can already close a route or shelter one part of the patio, so the product outline alone will not show how air reaches the seats. Mark openings, corners and the side where the usual breeze arrives. Corners can redirect or soften moving air, and conditions near the structure may differ from those in the open yard. Do not assume that the face farthest from the house is automatically the one that catches a useful breeze. Observe where the seating will go.
On a wall-mounted layout, the building is already one fixed boundary; evaluate the remaining open sides instead of copying a four-sided sketch. Adding a screen on another edge may narrow the route from an open face to the seating area, depending on your wind direction and nearby features. If considering a Wall-Mounted Pergola model, include doors, windows and nearby walls in the site drawing. Its name identifies the format, not how air will travel across your patio. That distinction matters when choosing the seating position or considering a separate screen.

Check what is included and compatible
A privacy sketch is not proof that a panel is available, included or compatible. Check the exact pergola model and configuration, not just the broad product category or a photo showing screening. Ask which sides can take an approved accessory, which configurations it works with, and whether the screen is part of the quoted structure or needs a separate order. A third-party screen, curtain, lattice or shade sail is not confirmed compatible because it looks as though it fits. Ask the same questions if you hope to screen adjacent sides; the answers may affect the layout.
Send the supplier a marked plan with the screen side, proposed length, open gaps and seating position labelled; ask for confirmation that the arrangement is supported. If a proposal calls for new fixings or changes to the structure, get manufacturer guidance and a qualified installer’s advice before proceeding. The Bloomcabin Pergola product page identifies one model to ask about, but accessory compatibility must be confirmed for the exact configuration. A clear question now can prevent planning around a screen that cannot be fitted as intended.
Test the layout before ordering
Before ordering, test the proposed layout at full scale on the ground. Use tape or chalk to mark the pergola edges, screen positions, furniture and walking route; then sit in the usual places and compare the sightlines with your sketch. A floor outline cannot reproduce a screen’s height or its effect on wind, so pair it with a side-view drawing and breeze notes from more than one day. This check can reveal a blocked doorway, an awkward chair or a screen end that leaves the wrong view open before you commit to a configuration. Check access with chairs pulled back as well.
Review the plan in two passes. First, check from each important viewpoint whether the proposed screen interrupts the view; second, follow each usual breeze arrow through the openings to and beyond the seats. If a barrier fixes one sightline but removes the only useful route, shorten or shift it, or reconsider the seating position before asking about an accessory. Keep occasional wind shifts in mind, and accept that no screen layout can guarantee the same breeze in every condition. The aim is to preserve a practical opening, not calculate a perfect airflow.
Frequently asked questions
Can a pergola screen block a view without stopping a breeze?
Often, if the screen is limited to the sightline that matters and the seating area still has an open route for air to enter and move onward. The result depends on local wind, the screen surface and nearby walls, fences, planting and furniture. No screen placement can guarantee a particular breeze.
Which side should I screen first?
Start with the view that affects your seating most, then compare it with the breeze you observe at the pergola. A screen across a specific sightline may be more useful than covering a whole side by default. Keep another route open where possible.
Does roof ventilation replace an open side?
No. Air moving above the seating area and air moving across it at seated height are different considerations. An opening overhead does not show whether a breeze can pass through the seating area, so plan the sides and roof separately.
Will a gap between screens preserve the breeze?
A gap may leave a route for air, but its position, nearby obstructions and the wind direction all matter. It can also leave a diagonal view into the seating area. Check the gap from the seats as well as from the viewpoints you want to screen.
Can I add any third-party screen to a pergola?
Do not assume a screen is compatible because it looks as though it fits. Check the accessory guidance for the exact pergola model and configuration, and ask whether the screen is included or must be ordered separately. Get manufacturer guidance before changing the structure or adding new fixings.
Good pergola privacy usually comes from blocking a particular line of sight rather than closing every side. Let the breeze map identify the openings worth preserving, then place seats, boundaries and screen edges on the same drawing. Check the layout from seated, standing and elevated viewpoints, account for fixed obstacles, and confirm model-specific accessory compatibility before ordering. That approach keeps the decision grounded in the patio you have: a selective screen can address a specific view while a clear route gives moving air the best opportunity to reach the seating area.
