
How to Prepare the Wood on a Garden Shed for Painting
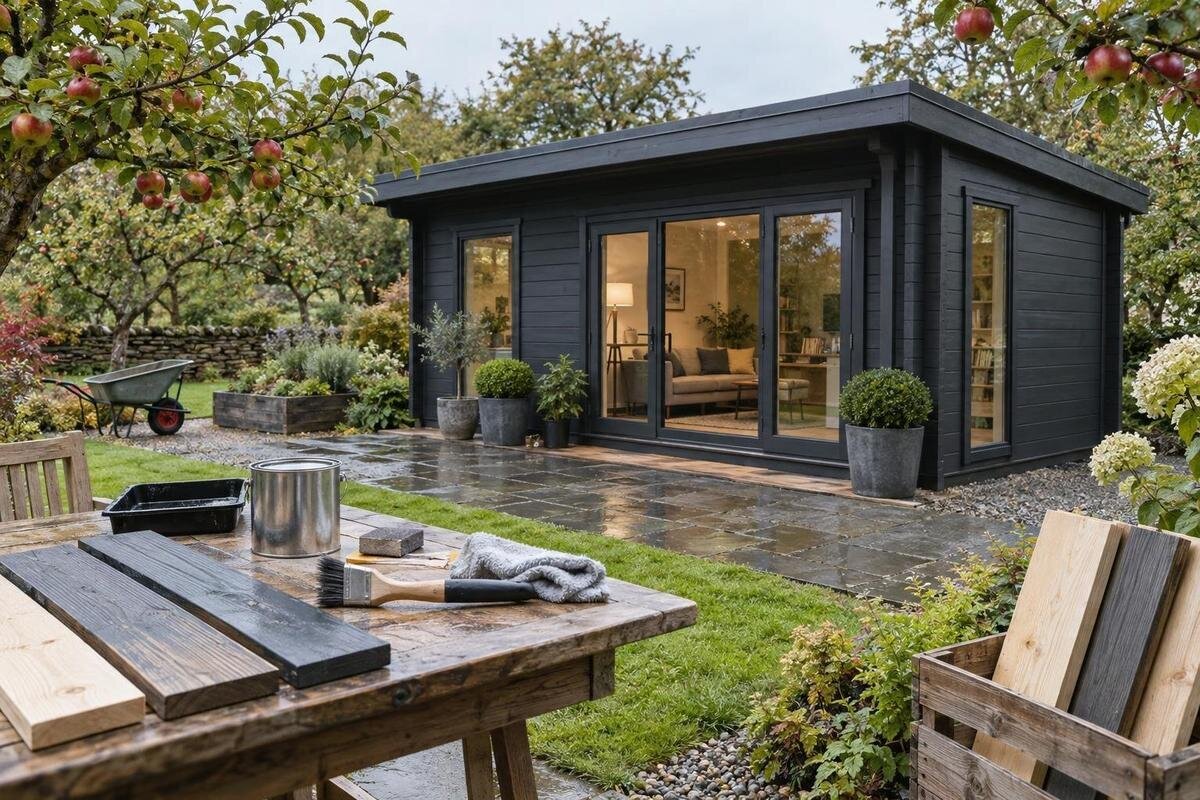
Garden shed painting preparation
Painting preparation begins with the surface, not the paint can. A garden shed may have bare wood, a factory treatment, an older coating or several conditions in different places, and those differences affect how it should be cleaned, sanded and primed. Inspect the whole structure, identify what is on the timber and note repairs before buying supplies. This guide follows that order, from gentle cleaning to drying and the final readiness check. The aim is a clean, sound surface that meets the primer and paint instructions—not necessarily bare wood everywhere.

Before you begin 1
Inspect the shed before choosing a prep method
Inspect the shed in good daylight before buying paint or abrasives. Walk around it and look at each accessible wall, door, trim board, lower edge and exposed wood end. Note peeling or blistered coating, loose fibres, dirt, oily marks, water staining, visible growth, open cracks and areas that look soft or distorted. Pay attention to corners, joints and spots beneath overhangs, where conditions can differ from the middle of a wall. Take photos and mark affected boards on a simple sketch; this makes it easier to tell whether a problem is local or widespread. Appearance alone cannot confirm that wood is dry or sound, so treat stains and softness as clues to investigate, not as a diagnosis.
Record whether the shed is assembled and what you know about its history. Preparation can differ where joints or end grain are hard to reach. If you are comparing models, keep the exact listing—for example, the Verdana 1 garden-house listing—as a reference when asking the seller what finish, if any, is supplied and what the maker recommends before painting. A model name or product image is not proof of surface condition. For a shed you already own, check the assembly and care documents or contact the supplier for the same details. This initial check helps you avoid buying a cleaner or primer for the wrong kind of surface.
Identify the wood’s existing treatment and coating
Separate the surface into broad categories: bare wood, factory-treated or sealed wood, transparent stain, opaque paint, or a mixture left by earlier repairs. A clear-looking surface is not necessarily untreated, and colour does not reliably identify a coating. Look for paperwork, labels or past paint records before reaching for a scraper or solvent. If an old coating is firmly bonded, it may be possible to paint over it after the preparation and compatibility checks required by the new system. If it is flaking, blistered or lifting, deal with the failed areas as the product instructions direct. Check several boards; repairs and weather exposure can leave different layers on one shed.
For a candidate such as Garden House Verdana 2, confirm the specified material and any factory treatment with the seller; colour or a model name does not identify a coating. For an existing shed, consult its care instructions or ask the supplier if you cannot identify what is present. A small, inconspicuous compatibility test can reveal obvious lifting or poor adhesion when done as the paint maker directs, but it cannot identify an unknown substance or make a hazardous coating safe to sand. Record what you establish, including products used in earlier repairs, so your choice of primer follows evidence rather than guesswork.
Before you begin 2
Plan preparation around assembly and access
If the shed is still in pieces, read its assembly and finishing instructions before applying anything. Some faces may be easier to reach before assembly, but that does not mean every component should be coated then. Primer or paint on a joint, contact surface, groove or fastener area can affect fit or assembly if those areas are meant to remain bare; follow directions for exactly which faces and edges to treat. For an assembled shed, note inaccessible areas and exposed cut ends, but do not take panels apart just for access unless the maker’s instructions allow it. The goal is appropriate coverage, not coating every surface indiscriminately.
If the Durano garden-house listing is on your shortlist, ask whether its assembly directions call for any coating before assembly, after assembly or not at all. Keep loose components off damp ground and separated so air can move around them. For an installed shed, protect nearby items and the ground from dust, wash water and drips, and keep the work area clear. Remove or mask fittings only when that can be done safely without damaging them; otherwise, keep any covering neat and temporary.
Clean the surface before sanding
Start by removing loose dirt, webs and grit with a soft brush or vacuum attachment. Then use the least aggressive method that will remove the remaining grime: a cloth or soft brush, controlled amounts of clean water and a mild cleaner labelled for wood and compatible with the existing finish. Work in manageable areas, starting higher up so loosened dirt does not fall onto clean boards. Heavy soaking can drive water into joints and end grain, while stiff wire brushes or abrasive pads can scar the fibres. Test the cleaner on an inconspicuous spot first and stop if the colour or surface changes unexpectedly.
Follow the cleaner’s instructions for dilution, contact time and rinsing. Remove residue if rinsing is required, then let the wood dry fully. Do not mix cleaning products, and use a product for visible algae or mildew rather than painting over the growth. Manage wash water so it does not carry cleaner or loosened debris onto nearby surfaces. When considering the Veltor 1 garden-house listing, ask what cleaning directions apply to its supplied exterior surfaces before choosing a detergent; the model name alone does not establish which cleaner is suitable.

Before you begin 3
Remove loose paint and sand the transitions
Once the surface is dry, remove only coating that is loose, blistered or peeling. Use a scraper carefully, keeping it nearly flat so it lifts the failed layer without gouging the wood. Sand the edge where sound coating meets exposed wood until the transition feels smooth rather than leaving a ridge that will show through paint. A firmly bonded existing finish does not automatically need to be stripped to bare wood; prepare it only as the new coating maker requires. Use a sanding block on broad boards and hand-sand corners or trim so the surface remains even and crisp.
Choose the abrasive grade and method for the timber and paint system rather than using one grit everywhere. Deep scratches can remain visible under a finish, while over-sanding may damage a thin board or soften an edge. Control dust and use eye and respiratory protection suitable for the task, following tool and coating directions. Before sanding an old or unidentified coating, consider that it could contain lead; do not dry-sand or scrape it until you have followed authoritative local guidance or had it assessed. Before planning abrasion for the Orello garden-house listing, establish whether its surface arrives bare or coated and follow its specific preparation guidance.
Repair defects without hiding larger problems
After cleaning and sanding, address small, stable defects that the coating system allows you to fill. Use an exterior wood filler intended for the location and compatible with the primer and finish. Apply it as directed, allow it to cure fully and sand it flush without spreading it over sound grain. Small nail holes or shallow dents may suit filler, while a gap between boards may be part of their movement or drainage. Do not bridge such a gap with filler or caulk unless the shed’s instructions say it should be sealed. If hardware is loose, follow the shed’s guidance before tightening or replacing it.
Paint is not a repair for soft wood, rot, deep splits, loose connections or a recurring damp patch. Address the source of moisture or movement, and replace damaged material or seek qualified help when the work is beyond a surface-level repair. For knots, resin, tannin bleed or stains, use a primer specifically approved for that issue rather than adding arbitrary coats. If you are asking about the Modano 1 listing, use the model name to request any specified touch-up guidance for areas affected during assembly; do not assume ordinary paint alone is the required protection.
Before you begin 4
Let the timber dry to the coating’s requirements
Cleaning adds water, and rain or dew can dampen wood that seemed ready to paint. A surface that feels dry does not always show how much moisture remains within a board. Follow any moisture limits stated by the primer or paint maker and by the shed’s instructions. If a specific reading is required, use a moisture meter as directed and check more than one place, including lower, shaded boards and exposed cut ends. Do not rely on a single sunny wall or a fixed number of hours after washing; drying depends on the wood, airflow and conditions around the shed.
Allow air to circulate and check the surface again after damp weather, especially in sheltered corners and near the base. Avoid covering wet wood tightly with plastic or trying to speed the process with intense heat; either approach can leave moisture or uneven conditions. Paint only when the weather and surface temperature meet the coating label’s requirements, with no rain or dew expected during the stated application and drying period. For the Garden Shed M listing, check whether the maker specifies a moisture or drying condition for the supplied surfaces; do not substitute a generic waiting period.
Choose a primer that matches the surface
Select primer after you know what is on the wood and what the finish instructions require. Check that it is intended for exterior wood and compatible with bare timber, any existing treatment or the sound coating that will remain. Not every surface needs the same primer, and a primer is not a substitute for cleaning, removing loose paint or allowing damp wood to dry. If you are working over an older finish, check that the full primer-and-paint system can be used over it rather than assuming that any outdoor product will bond.
With the Garden Shed S listing as your model reference, confirm whether its supplied surfaces are suitable for painting and which primer system the maker recommends, if that information is not already provided. For an existing shed, follow the selected products’ directions on preparation, application conditions, drying and recoating. If compatibility is uncertain, test the complete proposed system on a small, inconspicuous area and allow it the stated time before evaluating it. Do not cover a failed test or apply the topcoat before the primer is ready according to its label.

Before you begin 5
Remove dust and protect fittings before priming
After sanding and repairs are complete, remove the remaining dust with a vacuum and soft brush or a clean, dry, lint-free cloth. Pay attention to corners, trim and ledges where fine particles settle. Avoid wiping the wood with anything that could leave oil, polish or other residue. If dust returns while you are masking or moving around the shed, remove it again before primer goes on; a clean-looking wall can still hold a fine film that affects the next coat.
Mask glass, metal fittings, locks, hinges and nearby surfaces you do not intend to coat. Remove hardware only if it is designed to come off and can be reinstalled without damage; keep small parts together if you do. Do not block vents, drains or moving parts with masking material or paint. Make sure tape, drop cloths and tools are arranged so they will not brush against the prepared wood. A tidy work area reduces accidental smears and keeps debris from landing on the surface while you prime.
Make a final paint-readiness check
Before opening the primer, check the shed one last time in good light. The wood should be clean, free of sanding dust and dry to the coating maker’s requirements; any remaining finish should be firmly attached, and repairs should be cured and sanded as directed. Check the corners, lower edges and exposed ends again, not just the broad faces. Confirm that the product you plan to use is compatible with the surface and that the forecast and application conditions meet its label. If any of those checks fail, pause instead of trying to hide the issue under primer.
Keep a short note of the products used and any areas that needed extra preparation. That record is useful if the finish later behaves differently in one spot, because you can distinguish a surface problem from a product or weather issue. Revisit uncertain patches, damp areas or unknown coatings before continuing, and follow the primer’s instructions once the wood is ready. Preparation is complete when the surface is sound, clean and dry enough for the chosen coating system—not when every board has been sanded to bare wood.
Frequently asked questions
Do I need to sand every board before painting?
No. Sand where the primer or paint instructions call for it, and remove loose or peeling finish. Sound existing paint may only need the specified preparation, while bare wood may need smoothing or other treatment. Stripping everything to bare wood is not automatically necessary.
How can I tell if the shed wood is dry enough?
Touch alone is not a reliable measure of moisture inside the wood. Follow the primer or paint maker’s moisture limits, if given, and use a moisture meter as directed when a specific reading is required. Check shaded and lower areas as well as sunny boards.
Should I paint a new garden shed before assembly?
There is no universal answer. Follow the shed’s assembly and finishing instructions: some areas may be easier to reach before assembly, but coating a joint or contact surface could interfere with fit if it is meant to remain bare. Ask the seller if the instructions are unclear.
Can I use a pressure washer to clean the shed?
Avoid high-pressure washing as preparation for painting. It can drive water into joints, damage the wood surface or loosen a finish that was still sound. Use a soft brush or cloth, controlled amounts of water and a cleaner suitable for the surface.
What if I don’t know what coating is already on the wood?
Check care documents or ask the supplier, and don’t identify a finish by colour or sheen alone. Follow the paint maker’s directions for a small compatibility test. If an old coating could contain lead or another hazard, have it assessed or follow authoritative local guidance before sanding or scraping.
Good preparation means matching each step to the surface you actually have. Identify existing treatments, clean without soaking the wood, remove only loose finish, address repairs and allow the timber to dry to the coating system’s requirements. When those checks are complete, primer can go onto a surface that is ready for it rather than covering uncertainty or damage.
