
Can Pergola Rainwater Be Collected in a Garden Tank?
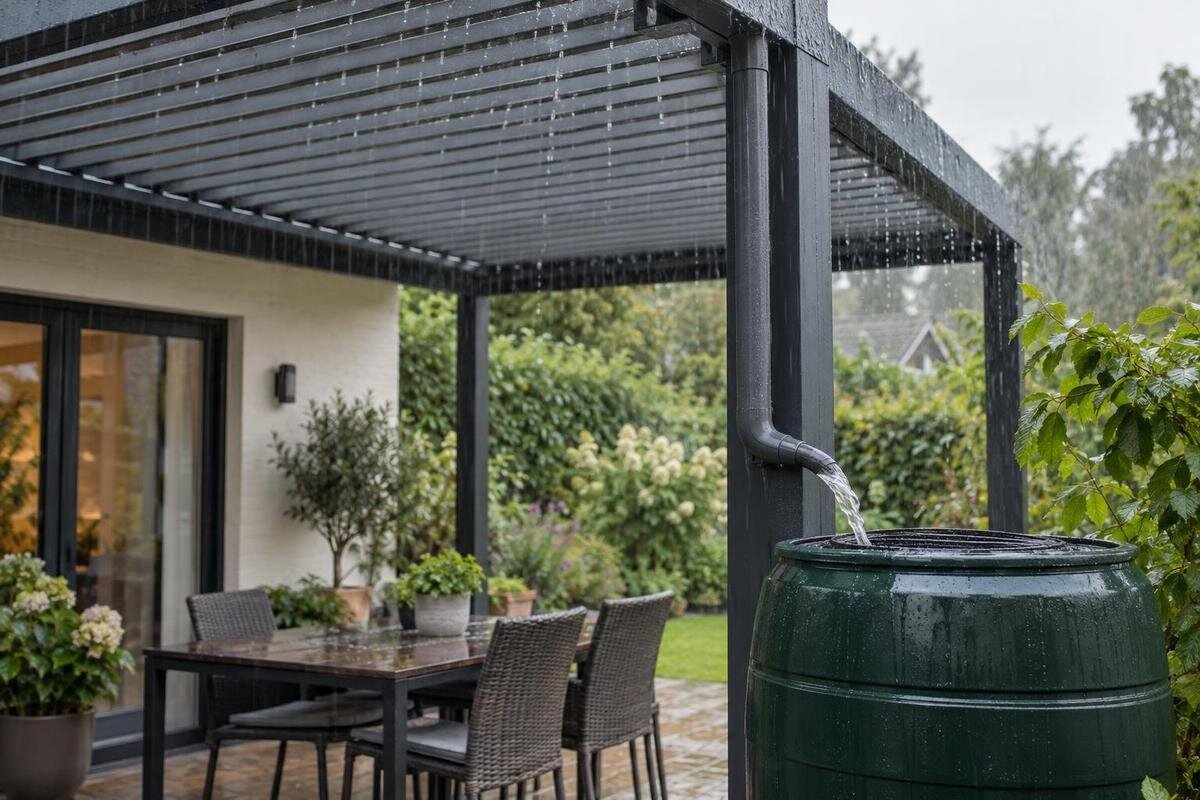
Pergola rainwater planning
Rain falling on a pergola does not automatically make it a useful source for a garden tank. The deciding details are the roof’s actual drainage route, an outlet that matches the tank connection, practical storage capacity and a safe way to handle overflow. Check the exact model and configuration before choosing a tank; a product-area figure or general weather description cannot establish collection volume or performance in every storm.

When a pergola can feed a garden tank
Yes, a garden tank can collect water from a pergola, but only if the roof’s drainage directs runoff to an outlet that can be connected to the tank. Rain landing on slats, louvres or a cover does not automatically reach a controlled outlet, and a visible channel does not prove that all water is captured. Water that simply runs off the perimeter or onto the ground is not collected until a designed connection catches it. Treat the pergola, connection and tank as one system: water has to reach the inlet, the tank must accept the flow, and excess water must leave through a planned route. If any link is uncertain, the collection plan is uncertain too.
Separate weather performance from rainwater-harvesting suitability. A model-specific drainage diagram may show where water is intended to travel, while weather documents and controlled observations apply only to their stated model and conditions. They are not a universal promise that every pergola is watertight or handles every storm. A structure may shed some rain without providing a convenient or approved connection for storage. Ask whether the exact roof and enclosure configuration has a defined outlet and which instructions cover it; notes for one roof position should not be applied to another. Do not treat a product photo as proof of a rainwater system. The intended route should be clear before you select a tank.
Trace the roof drainage to its outlet
Begin with the drainage diagram for the exact model and selected configuration. Trace the path from each roof surface through any channel or gutter to the outlet shown, noting where water enters, which side it exits and whether more than one outlet is involved. Check that the drawing applies to the selected size and options; a generic illustration may show a different setup. Record the outlet side and height, since those details affect where the tank can sit. Do not infer an internal route from a post’s appearance or a product photo. The Bloomcabin Wall-Mounted Pergola page can help identify the product you are reviewing, but it is not a substitute for a model-specific drainage drawing. If no diagram is available, request one before planning pipework or tank position.
Then compare the drawing with the proposed installation: outlet orientation, nearby walls, paving, doors and access for a collector. A wall-mounted structure beside a house does not mean its rainwater route is connected to the home’s eavestrough; treat the two systems separately unless the manufacturer’s instructions explicitly show otherwise. Work out whether water can be carried from the shown outlet to the tank without crossing an awkward route or interfering with access. Check that the final tank position will leave the outlet reachable for inspection, not just convenient at first. If the structure differs from the drawing, ask for clarification rather than designing around an assumed route.
Check the roof position and enclosure configuration
Roof operation can alter the route. With a fixed cover, find out where its drainage channel discharges; with a louvred or otherwise adjustable roof, confirm whether collection depends on the roof position and which positions are allowed in rain. Open and closed settings should not be assumed to send water into the same channel. If rain can bypass a channel in one position, it may miss the tank altogether; confirm the outcome in the product documentation. Also check whether adjustment during rainfall is permitted while the collection system is connected. Follow operating instructions rather than leaving a roof in an unapproved position just to collect more runoff. If drainage changes with operation, the tank plan must match a documented setting.
Check the exact enclosure combination too. Screens, panels or other side elements may change exposure to wind-driven rain, but do not assume they make runoff more controlled or that a drawing for a bare frame still applies. Request documentation for the pergola and enclosure together; the effect on drainage is product-specific. Confirm that any screens or panels will not make the channel or outlet difficult to inspect. When reviewing the Bloomcabin Pergola product page, note the configuration you intend to buy so you can ask about drainage and maintenance access for that arrangement.
Size the tank for likely supply and garden demand
Size the tank by balancing likely supply against garden demand. Supply depends on effective catchment area, local rainfall during collection periods and how the specific roof channels water; advertised floor or frame area may not match the area that sheds into an outlet. Demand depends on how much you plan to water, how often and how long dry spells may last. For seasonal irrigation, focus on the months when demand peaks; annual rainfall totals can hide a dry interval. Account for water diverted before it reaches the tank and how much you can draw down between rain events. A small tank may fill quickly, while a much larger one can be underused if garden demand and runoff are limited. Use actual roof dimensions and locally relevant rainfall for a credible estimate.
The Bloomcabin Bioclimatic Pergola listing shows an area range from 9 to 24 m²; that figure alone does not tell you catchment area, litres collected or tank size. Ask what the area describes and compare it with the effective roof surface and documented outlet route. Do not turn a catalogue area into a storage recommendation without checking how the model drains. If the setup includes a first-flush device or other diversion, account for that when estimating usable storage. Choose a tank for usable capacity and your watering pattern, while allowing for periods when incoming rain exceeds the available space. A supplier or qualified installer can apply local data without promising a fixed yield; actual results vary with rainfall, drainage and use.

Match the pergola outlet to the tank inlet
Once the outlet is known, compare its shape, dimensions and location with the tank’s inlet or collection device. Check whether the pergola outlet is round or rectangular, its size, how many outlets are used, and whether the manufacturer approves a particular adapter or diverter. Confirm the tank inlet’s dimensions and any screen or filter requirements as well. Ask whether a filter or diverter changes the connector size or access needs, and whether fittings can be removed for inspection without damage. A connector that looks close is not necessarily a dependable fit; a poor match can leak, loosen or interfere with intended drainage. If you are considering the wall-mounted Bloomcabin model, include these connection details in your questions to the supplier.
Measure the proposed route only after those details are confirmed: the distance to the tank, the height of the outlet and inlet, and any turns or obstructions can determine whether the connection is practical. Ask whether a gravity-fed route works or a purpose-designed collection device is needed. Clarify where water will go if the tank inlet is obstructed, flow is temporarily restricted or the connector is removed. The pergola’s normal drainage must not depend on a tank accepting every drop. Do not drill a channel, post or structural member or force a fitting into place to make it work; have any non-standard connection approved by the supplier and installed by a qualified professional.
Choose a suitable tank location and support
Choose the tank site with the inlet, overflow and maintenance access in mind. It should be close enough for a practical connection, yet leave room to inspect the inlet screen, reach the outlet and service the tank. Leave space to open a lid or remove a filter without moving the tank or stepping over a hose. If an approved removable connector or shut-off is part of the setup, allow room to reach it. Keep connections out of door swings and main walkways, where a leak or hose could create an obstruction. Include the overflow route in the site sketch now rather than trying to find room after the tank is full. If a pergola is beside a house, do not assume the wall or nearby paving is an acceptable support or discharge point.
A full tank is much heavier than an empty one, so follow the tank manufacturer’s requirements for a level base and support; have a qualified professional assess the surface, any raised platform and anchoring where needed. Do not size a platform by guesswork. If you are planning a tank beside the regular Bloomcabin Pergola model, confirm the outlet location before fixing the tank position. A small change in outlet side or height can affect the proposed route. Consider clearance for both the connection and routine maintenance when assessing the site. Keep stored items from concealing a leak or blocking overflow access, and keep the instructions accessible for future maintenance.
Plan the overflow route
An overflow is part of the system, not an emergency detail. Every tank will eventually be full if inflow continues, and incoming water may exceed the space remaining, especially after rainfall when the tank has not been emptied. Ask the tank supplier where overflow leaves, how the opening is protected and whether its arrangement will remain clear and accessible. Ask how water moves if the inlet screen or filter is blocked, and do not cap or alter the tank’s overflow. The route should be straightforward to inspect. It must not block, seal or force water back into the pergola’s drainage outlet. A separate discharge route helps prevent a full tank from sending water over an unintended edge or back toward the connection.
Decide where that discharge will go before installing the tank. Avoid routing it onto a walkway, against a building or onto a surface where pooling could cause problems; slope and site conditions affect what is suitable. Consider overflow even when the tank is normally drawn down: storage capacity is not a guarantee against overflow during heavy rainfall. If the outlet needs to connect to another drainage feature, have an installer check the route and any local requirements rather than assuming a hose or buried pipe is acceptable. When considering the model shown on the bioclimatic model’s product page, include both the pergola outlet and the tank overflow in your site plan. Each needs a clearly identified discharge route.
Decide how the collected water will be used
Choose the intended use before deciding how much filtration and handling are appropriate. Rainwater can pick up dust, pollen, leaves, bird droppings and material from the roof surface, so use a covered tank and a suitable inlet screen or filter maintained as its maker directs. Quality may also change if debris accumulates or the tank is not maintained. Use water only in ways the tank and collection equipment are designed to support. A screen can keep larger debris out, but it does not make water potable. Do not use pergola runoff for drinking or cooking unless it has been assessed and treated under guidance from qualified water-treatment and public-health professionals. A clear-looking tank is not evidence of safe drinking water.
For landscape irrigation, check whether the roof finish, surroundings and intended plants are compatible with that use. Food gardens need extra care: water quality, how it contacts edible parts and whether produce is eaten raw all matter. Get local public-health or agricultural guidance rather than assuming that roof runoff is suitable for every crop. A first-flush device may be considered to divert initial wash-off, but it needs a correctly planned route and routine maintenance; it is not a substitute for water-quality advice or treatment. Keep filtration or treatment recommendations tied to the actual roof surface and intended use, rather than relying on general advice for a different collection system.

Plan maintenance and winter care
After the collection route is installed, make a safe visual check during ordinary rainfall: look from ground level to see whether water reaches the documented outlet and tank inlet without obvious leakage or water backing up. A first-use check can reveal misalignment, but does not verify performance in extreme weather. Check screens, accessible joints and the overflow path regularly, especially after leaves or other debris could have accumulated. Clean filters and tank components at intervals specified by their manufacturers. Repeat the visual check after maintenance or a connector change. Do not climb onto a wet pergola or reach into moving roof mechanisms to investigate drainage; if an outlet is hidden or performance is unclear, ask an installer to inspect it safely.
Where winter temperatures can freeze water, plan seasonal care for the tank, exposed hoses and any collection device. Water left in components can freeze, so follow the pergola and tank manufacturers’ instructions for winter operation, draining or disconnecting accessories; one manual may not cover the other component. Seasonal disconnection should not leave the pergola outlet without its intended drainage route. Store or reconnect parts only as the instructions specify, and do not operate a frozen mechanism or force a stuck connection. If you choose the model on Bloomcabin’s regular pergola listing, keep its seasonal instructions alongside those for the tank and collection device. Resume collection only when the equipment is ready according to those instructions.
Confirm the system details before purchase
Before choosing a tank, ask the pergola supplier for the drainage diagram and weather-performance documents for the exact model, size and roof or enclosure configuration. Have the outlet location, shape and dimensions, intended roof position during rain, and any approved connector confirmed in writing. Ask the tank supplier for inlet compatibility, filter requirements, overflow details and seasonal instructions. Request the drawing itself rather than relying on a verbal statement that rainwater runs through a post or channel. Ask which operating limits or configuration exclusions apply. If either supplier cannot confirm a connection, do not assume a generic adapter will bridge the gap. The two sets of instructions must describe components that can work together, not merely products that fit in the same garden.
Have a qualified installer review the proposed route, capacity estimate, base and overflow before purchase if a dimension or drainage point is uncertain. Share the same drawing with both suppliers, and state what the collected water will be used for so filtration and maintenance fit the plan. Record the exact model, roof configuration, outlet, tank inlet and overflow destination; that makes substitutions easier to spot. If you are choosing from Bloomcabin’s wall-mounted pergola listing, use the selected model as the reference for this record. If a component changes, recheck the connection and overflow rather than assuming earlier measurements still apply. Keep the product documents with the tank instructions for later maintenance.
Frequently asked questions
Will any pergola outlet connect to a rain barrel?
No. Outlet position, shape and size need to match the tank inlet or a compatible collection device. Check the pergola and tank instructions for approved fittings, and plan a separate overflow route.
How do I choose a tank size for pergola runoff?
Balance the effective roof catchment and local rainfall against how much water your garden uses and when it needs it. A pergola’s listed area alone does not establish water yield or a suitable tank capacity.
Can I collect water with a louvred pergola roof?
Only if the drainage documents show how water reaches an outlet in the relevant roof position. Check the exact model’s operating instructions; open and closed positions may not collect water in the same way.
Is collected pergola water safe for vegetables?
That depends on the roof surface, surroundings and how the water contacts the crop. Ask local public-health or agricultural authorities for guidance, especially for produce eaten raw. Do not assume the water is potable.
What happens when the garden tank is full?
Water needs a planned overflow route that remains clear and does not back up into the pergola outlet. Decide where it will discharge before installing the tank, and check the route for the site.
A garden tank can be part of a pergola rainwater plan when the documented outlet, compatible inlet, realistic storage and overflow route work together. Choose the intended use before settling on filtration and maintenance, and follow the instructions for both products. If the drainage path or roof configuration is unclear, resolve that first; the tank should collect from the pergola’s intended drainage route, not replace it.
