
Including a Pergola in a Wildlife-Friendly Garden
Garden design guide
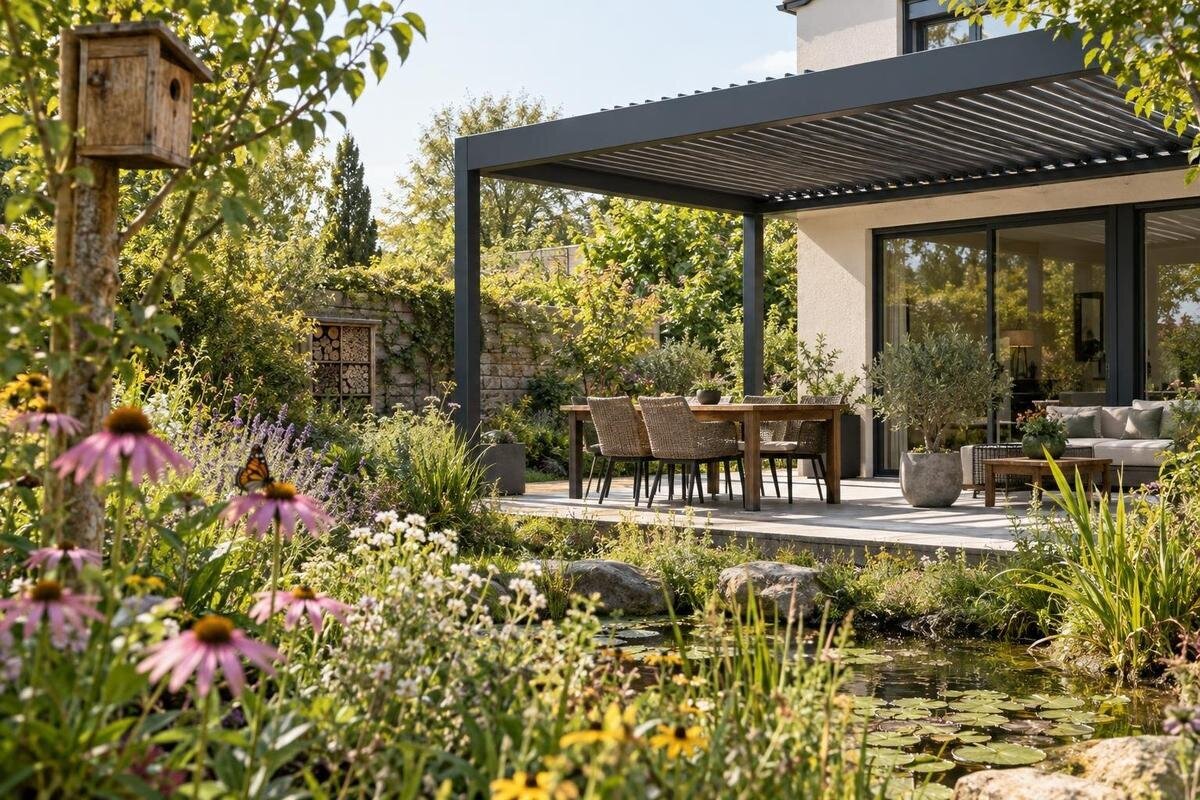
A pergola is only one part of a wildlife-minded garden plan. Its footprint can overlap planting space, change the light below it, create new edges for paths, and determine where people need access for watering and care. Planning the structure alongside those relationships helps keep the seating area usable without treating the rest of the garden as leftover space. The practical aim is not to promise that a pergola will attract particular wildlife, but to make deliberate choices about existing habitat, region-appropriate planting, light after dark, and routine maintenance.

01
Map existing habitat before choosing a site
Begin with a simple base plan of the property, not a pergola sketch. Mark trees and shrubs you expect to retain, existing beds, hedge lines, water features, rough ground, and areas you deliberately manage less intensively. Note the routes people use and places where water collects after rain, as well as which parts receive sun or shade at different times. Revisiting the garden in more than one season can reveal changes a sunny-day survey misses, such as dormant plant structure or wet patches. The aim is to record existing conditions, not assign habitat value from appearance alone.
Keep observations non-invasive: photograph the same views, note repeated wildlife activity from a distance, and flag uncertain areas for local advice rather than clearing them to simplify the design. Species and habitat needs vary by place, so check plant ideas with a local native-plant organization, public garden, or extension service. Confirm both regional suitability and fit with the garden's soil, moisture, and light. A wildlife-friendly label describes an intention, not a guarantee; outcomes depend on existing conditions, plant choices, lighting, and ongoing care. This inventory gives you a reference when comparing possible locations.
Position the pergola around retained planting
Decide how the pergola relates to the house, garden, and retained planting before choosing its exact position. Put the full proposed outline on the base plan and mark support locations from the relevant drawings, routes around the structure, and paths from doors to seating and garden work areas. Keep a way to reach beds without stepping through them, and leave room to tend planting beside supports. A wall-mounted and a freestanding layout have different connections and support arrangements, so compare them against the same garden plan rather than treating them as interchangeable shapes. A temporary outline on the ground can help you judge movement and sightlines without disturbing beds.
For a house-side concept, include the Bloomcabin Wall-Mounted Pergola in the comparison, but do not treat its model name as proof that a particular wall or location is suitable. Request the exact dimensioned drawing, including the connection and support positions, and have a qualified professional review the proposed attachment where needed. Plot supports for a freestanding option in the same way. Check doors, windows, existing downspouts, planting, and circulation together before settling on a position; a pleasing view from the patio does not reveal every conflict at ground level.
02
Check the complete footprint, not only the coverage
The product listing for Bloomcabin Pergola gives a coverage range of 9 to 24 m². Use that as an initial comparison, not as a complete site footprint: the area alone does not show the shape of a particular configuration, support positions, access space, or ground requirements. Request the dimensioned drawing for the option being considered, and confirm which dimensions apply. Do not assume the minimum or maximum describes every version, or that the covered area includes the room needed around it for circulation and care.
On a scaled plan, draw the projected overhead outline and each support point, then add the furniture arrangement, door swings, steps, path edges, and planned beds. A narrow strip and a compact square can have the same area yet affect routes and planting differently. Check the tightest gaps rather than judging only from an overhead image. Add mature plant spreads, not just the size of new pots, and reserve access for watering, pruning, or cleaning. Try the layout with chairs in their intended positions too. This exposes conflicts while the plan can still change without disturbing established planting.
Choose planting for light, soil, and mature size
Build the planting plan around actual light, soil, moisture, and mature plant size rather than an attractive list of species. Where conditions allow, low-growing plants, taller flowering plants, and shrubs or small trees can create different layers, but not every garden needs all three. Plant structure and flowering or fruiting times vary, so check which locally appropriate species suit the conditions rather than assuming any native plant will thrive in a shaded bed. Record expected height and spread so choices do not block doors, paths, sightlines, or maintenance access as they mature. Grouping plants with similar moisture needs can also make routine care easier.
A pergola can alter the light reaching plants beneath and around its footprint; the effect depends on its configuration, orientation, and nearby buildings or trees. Compare seasonal sun observations with the actual product drawing before assigning plants to a shaded strip. If reviewing the Bloomcabin Bioclimatic Pergola, use product-specific information to understand its arrangement; the model name alone does not establish a bed's shade pattern or suitability. Also verify whether the selected design changes how rain reaches adjacent ground. Do not assume that an open-looking structure provides rain shelter or manages runoff in a particular way.

03
Plan paths for garden work as well as seating
Draw a clear sequence from the house and gate to seating, then to the garden tasks people actually do: watering, pruning, moving tools, or taking waste out. Note what must pass along each route, such as a hose, wheelbarrow, or mobility device, and size the path for those users rather than choosing a width by habit. Distinguish the main route from access to individual beds. If maintenance would otherwise require walking through planting, show a stepping route or another workable approach on the plan; do not expect new plants to withstand repeated trampling.
For a wall-mounted layout, plot the structure's edges and the routes around it using the dimensions for the option you are considering. Consult the wall-mounted model listing as part of that comparison, then use the corresponding drawing to check the space left for paths. Place furniture at its real footprint, include open doors and routes needed for garden care, and test the narrowest points. Choose a path surface to suit intended users, local conditions, and maintenance. A surface that looks permeable is not automatically right for every site, and an attractive route may still be awkward for watering or moving equipment. Confirm accessible-design needs with a qualified designer when they apply.
Limit and direct outdoor lighting
List the outdoor lights needed for a specific task or route, then locate each fixture on the plan rather than illuminating every bed by default. Artificial light at night may affect some wildlife, but sensitivity varies among species and settings; no single fixture choice guarantees no effect. Identify where light is genuinely useful, note nearby planting or water, and direct the beam only to intended surfaces. Avoid aiming across a hedge, into a tree canopy, or towards a neighbouring property when that spill serves no purpose. This makes lighting part of the landscape design rather than a last-minute addition.
Choose shielding, aiming, controls, and operating times according to the task, and check where the light lands after dark from several positions in the garden. A timer, sensor, or manual switch may help limit operating hours, but the right control depends on how the area is used. Do not judge environmental effects by a colour label or by whether a lamp appears small. If you cannot tell where the beam goes, have a lighting professional review the proposed fixture and placement. The goal is useful visibility with unnecessary spill reduced, not a claim that the garden can be made completely dark.
04
Treat climbing plants as a separate design choice
Climbing plants can visually connect a pergola with nearby beds, but plan their support separately from the planting itself. Decide where the plant will grow, how its stems will be trained, and how you will reach it for pruning. Appearance alone does not show whether a pergola accommodates plant growth or attachments; those details need to be checked for the selected model. Choose plants for local suitability and note their mature growth habit, not just the look of a young specimen. Check that stems and leaves will not obstruct routes, lighting, or any moving parts specified for the model.
If considering the regular pergola model, request documented planting requirements and dimensions for its exact configuration before planning to train a plant over it. A separate support beside the seating area may keep a climber independent of the pergola, but it still needs a suitable location and must not obstruct paths or intended planting. Include pruning, fallen leaves, and access to the structure in the yearly care plan. A plant should not be selected only for how it looks in a new installation: mature spread and the time required to manage it are part of the layout.
Protect soil and drainage during installation
Show the intended work area, not only the finished pergola outline, on the landscape plan. Mark planting to protect, access routes, soil areas, and known drainage paths; agree with the installer where materials and excavated soil may be placed. Construction access can compact soil or damage beds, so plan how people and materials will reach the site without treating planting as a storage area. Do not excavate near tree roots, utilities, drains, or a building connection on the basis of a sketch. If any of these overlap the proposed work, ask a qualified professional to assess the location and details before finalizing the plan.
Drainage deserves a separate check. Note where water already collects or leaves the property, and ask how the selected pergola and its supports relate to existing drainage; do not infer water handling from a style name or illustration. If comparing the Bloomcabin Bioclimatic Pergola, use documentation for the exact model to discuss support positions and water management with the designer or installer. Show how nearby beds will be protected and how any change in water flow will be assessed. This avoids assuming that a new structure automatically improves or worsens conditions elsewhere in the garden.

05
Leave room for seasonal maintenance
Maintenance needs should influence where the pergola sits. Keep a practical route to beds for weeding, watering, pruning, and other care, and confirm how the chosen product must be reached for any manufacturer-directed checks. Do not place planting so close to a connection, support, or service point that access becomes an afterthought. Where care requires tools or temporary equipment, show the space needed to use them, not just a person-sized path. If a maintenance task crosses a planted area, decide in advance how that access will work and whether the plant layout can be adjusted.
Separate the seasonal plant-care list from the product's own care instructions. Record which beds need attention, the local guidance behind pruning times, and where leaves or stems must be cleared from paths. When comparing the Bloomcabin Pergola model with other candidates, use each option's care instructions to identify the access it requires. Mark any specified component access on the plan and check whether nearby planting would obstruct it at mature size. Keep this information alongside the garden-care list so both sets of tasks are accounted for. Clear routes make it easier to maintain the garden and structure without repeatedly walking through planted areas.
Bring the garden plan and product drawings together
Bring the garden and product information into one dimensioned drawing. Include the house, retained plants and their expected mature spreads, beds, paths, seating, support positions from the chosen product drawing, known drainage, proposed lights and their beam direction, and routes for routine maintenance. Add observations of seasonal sun and label anything not yet confirmed. A simple plant schedule can record species, site conditions, mature size, and the reason each selection suits the location, using local sources. This shared plan makes compromises visible: a support in a valued bed, a path pinched by furniture, or a lamp facing vegetation can be addressed before work begins.
Compare shortlisted models on that same plan rather than comparing catalogue images in isolation. If the Bloomcabin Wall-Mounted Pergola model is one option, include its proposed dimensions and connection information alongside any freestanding alternative. Record how each layout affects retained beds, circulation, lighting positions, and maintenance access so the comparison reflects the whole garden. Ask the designer or installer to identify unresolved questions about the wall, ground, drainage, planting, and access, with the relevant qualified professional reviewing them where needed. Keep those questions marked on the drawing as the layout develops rather than letting an attractive catalogue view stand in for a resolved plan.
Frequently asked questions
Does adding a pergola make a garden wildlife-friendly?
No single structure can guarantee that outcome. The existing garden, locally suitable planting, lighting, and the way the space is maintained all matter. Treat the pergola as one element in a wider plan: note what you want to retain, identify where people need to move and work, and consider how the structure changes light and access before choosing its location.
Can I grow a vine over any pergola?
Do not assume that every model is intended to support climbing plants or attachments. Check the product-specific planting requirements and instructions before planning to train a vine over it. If those details do not support the idea, consider a separately designed plant support nearby. In either case, account for mature growth, pruning, fallen leaves, and access to the structure.
How much clearance should I leave around a pergola?
There is no single clearance that works for every garden. Use the dimensioned drawing for the option you are considering, then add supports, furniture, open doors, paths, mature plant growth, and the space needed for routine care. Check the narrowest points and consider who will use the routes and what equipment needs to pass through them.
What garden lighting is least disruptive to wildlife?
There is no fixture choice that guarantees no effect in every setting. Begin by identifying where light is genuinely needed, direct it towards those tasks or routes, and limit spill into planting and beyond the property. Check the result after dark from several garden locations. The possible effects of light vary with wildlife and the setting.
Does a coverage range of 9 to 24 m² tell me whether a pergola will fit?
It gives a coverage reference for the Bloomcabin Pergola listing, not a complete site footprint. It does not show the layout of a particular option, support positions, route clearances, or ground requirements. Request the dimensioned drawing for the configuration you are considering, then place it on a scaled garden plan with planting, furniture, and paths.
A wildlife-minded pergola plan makes its trade-offs explicit. The structure occupies ground, changes conditions around it, and needs ongoing access; the surrounding layout determines how well those demands fit with retained planting and garden routines. A site plan that accounts for paths, directed lighting, locally suitable plants, and maintenance gives you a more realistic basis for choosing than a style image or plant list alone. Keep the garden drawing and the product information together as the layout develops. Wildlife-friendly intent comes from the decisions made around the structure, not from its label.
