
How long does window replacement take, and how disruptive is it?

Planning a window replacement
Window replacement starts well before the first sash is removed. A workable sequence considers which openings belong together, when the new units will be available, how rooms will be protected and how the household can function while work is underway. Disruption is normally concentrated in the room being worked on: furniture may need moving, routes can be blocked, and there may be noise, dust and temporary drafts. The overall project timeline is different from the active time at one window. Measuring, approval, production, delivery, removal, connection work and handover all need to align. Reviewing window styles, opening directions and access early makes it easier to choose a sequence that suits the household, the season and other trades.
Pre-purchase checks 1
Keep installation time separate from project time
There are two answers to a question about timing. One is the time an installation crew spends at the property. The other runs from the initial site measurement to a completed, inspected opening. Between those points are decisions that should not be rushed: dimensions and connection details are agreed, opening directions checked, units ordered and delivery arranged. Delivery takes 4–6 weeks, subject to order confirmation. That does not indicate how many hours work will take in a particular room. A plan should therefore show the delivery window, installation start, room order and possible follow-up work separately.
Product selection also affects the sequence. A single-sash inward-opening window needs different room clearance than fixed glazing or a door opening. Large, multi-part or unusually shaped units often require more coordination for transport, handling and connections. That is not a reason to rule out the design you want; it is a reason to make it visible in the schedule. Record whether each position is a standard opening, special shape, fixed glazing, door or roof opening. This helps identify which tasks can run in parallel and which must wait until an access route is cleared.
What really shapes removal on site
The number of windows is only a rough guide. Access, floor level, furnishings, the condition of reveals, existing trim, exterior work and whether the old construction can be removed without surprises all matter. A ground-floor window with clear access is different from an opening above a crowded exterior area or behind fitted kitchen cabinetry. It also matters whether interior and exterior follow-up work is planned. Consider not only the route to the window, but also the route for removed units, packaging, tools and new components. Tight stair turns or a lack of staging space can affect the whole day.
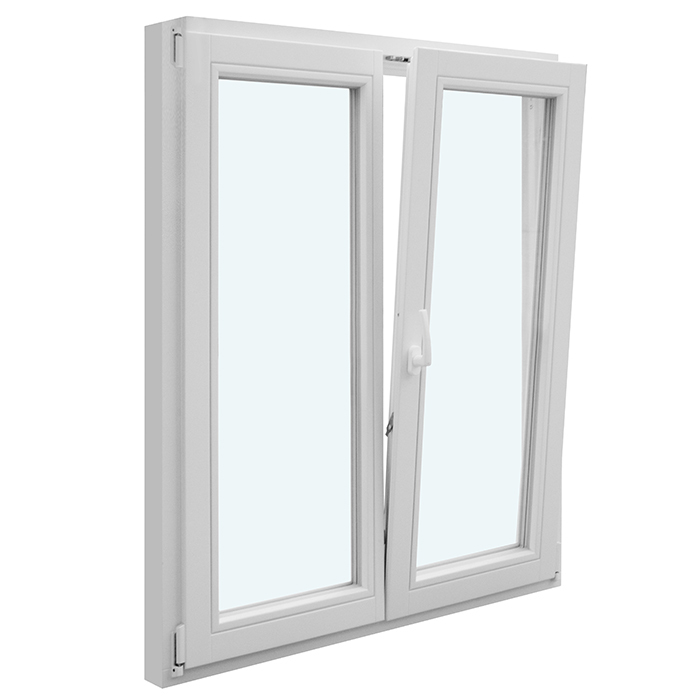
For a two-sash inward-opening window discuss sash swing, curtains, radiator covers and furniture before measuring. The name describes a configuration, not the conditions in your building. Ask specific questions: Which rooms must be clear for installation? Where will materials be placed? Is exterior access needed? How will floors, stairs and passageways be protected? Who decides on site if a reveal differs from expectations? Written answers do not eliminate disruption, but they help prevent practical obstacles from stopping work on installation day.
Pre-purchase checks 2
Choose a sensible sequence for an occupied home
In an occupied home, the best order is rarely simply top to bottom. It can make sense to begin with rooms that can be left unused for a few hours or a day, then move to bedrooms or work areas. A bathroom with no alternative, a child’s bedroom at bedtime or a regularly used home office needs more deliberate scheduling. Confirm whether a room can be fully put back in order once finished or whether follow-up work will require access again. Plan separately for pets: open routes, unfamiliar people and noise are significant factors.
A room list with three categories can help: essential to keep usable, temporarily available, and accessible only by arrangement. It produces a realistic daily plan rather than a vague promise that everything will be quick. Note when residents need to take calls, sleep or work without interruption. Installers can accommodate those constraints only when they know them in advance. For a larger project, it may be easier to designate one area for temporary storage and keep other rooms cleaner. That prevents disruption from spreading through the home.
Plan honestly for dust, noise and weather
Removing older windows may involve dust, debris and noise from loosening materials, cutting, drilling or finishing work, depending on the existing construction. Protective coverings help contain the mess, but the room still needs preparation. Take down nearby pictures and move books, sensitive electronics, plants and loose décor away from the work area. Give the crew adequate working space rather than merely shifting furniture slightly. Cover or remove textiles because they collect dust. Confirm in advance whether window sills, curtains, roller shutters, indoor blinds or trim will be removed and put back, and who will handle each task.
While an opening is being worked on, the room may temporarily be cooler, louder and unsuitable for normal use. Weather and season should therefore be part of the planning discussion without creating blanket promises. Ask how an open opening will be secured during an interruption and which positions might be postponed in unfavourable conditions. Letting neighbours know the expected work period is considerate, particularly in multi-unit buildings. You do not need to manage the technical worksite; clear contacts, open access and a named person for questions are useful.

Pre-purchase checks 3
Accurate measuring and approval protect the schedule
A reliable sequence depends on the ordered units fitting the actual openings and connections. Site measurement is therefore not a formality. Discuss not only width and height, but also opening direction, handles, divisions, existing finishes and future use. A fixed-glazed window is a different use decision from an opening sash: it changes operation and cleaning planning. Whether it suits the project depends on location, ventilation planning and accessibility. Do not rely solely on a drawing that does not yet reflect real use. Instead, assess every room from the future user’s perspective: What will stand in front of the window, which side provides access, and which opening will actually be used for ventilation? Note if handles need to be readily reachable for particular residents. These details do not replace technical review, but they reveal when a visually suitable option may be impractical in everyday use and support clear approval for each position.
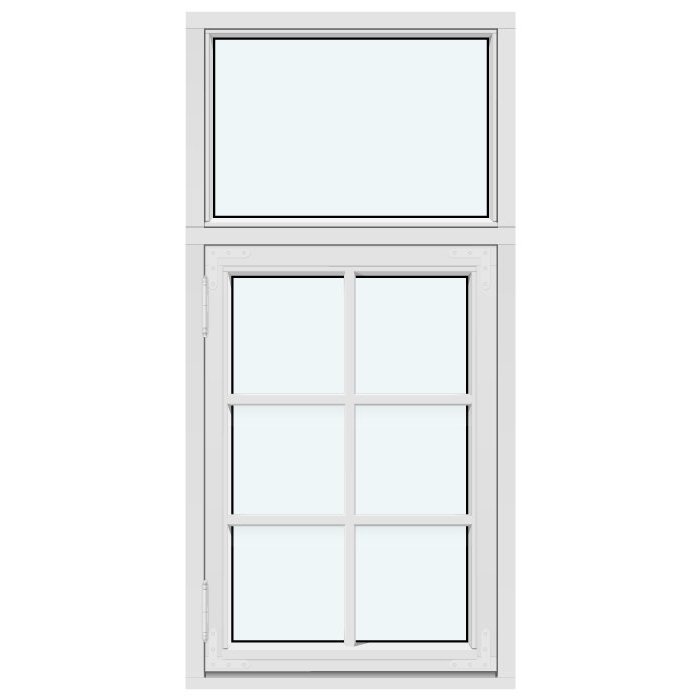
Before ordering, carry out an approval check for each position. Do the room name, number of sashes, handing, view, bar layout, fixed or opening section and visible special features match? For glazing bars, distinguish clearly between decorative bars, glass-dividing bars and no bars; the appearance can change substantially. Also ask which dimensions were measured from the existing opening and which apply to the ordered unit. Raising these questions only after delivery creates unnecessary risk. A clearly documented approval step is often the best protection against avoidable delays.
Handle special formats and large openings separately
A long glazed wall or unusual shape should not be treated as part of the same planning bundle as several small standard windows. With large units, the delivery route, carrying route, turns, stairs, exterior area and order of lifting or installation operations all matter. Describe obstacles accurately: gate widths, slopes, planting beds, balcony railings, parked vehicles or narrow passages. The team can then assess the required logistics. Also plan where vehicles may park and whether driveway or corridor access must be coordinated with other users. The benefit of this preparation is a calmer installation day, not an artificial short time estimate.
With Patio Life lift-and-slide doors the product name first identifies a lift-and-slide door configuration; confirm other properties for the particular project. At a frequently used patio opening, it is especially important to know whether the route will be unavailable during work and whether another route to the yard is available. Agree whether the other windows or this central opening will be handled first. If exterior paving, awnings or furniture are affected, include them in the pre-install discussion. Photos of the existing situation from both sides make it easier to identify details without relying on incomplete recollections. Also confirm whether the large unit can arrive and be stored with the other components or must go directly to its installation point. An agreed staging area must not block the house entrance or transport route for other positions. For that day, establish which alternative exit remains usable and who can provide access to locked exterior areas. This treats the key opening as its own work stage rather than letting it quietly determine the whole schedule.
Pre-purchase checks 4
Roof, upper-floor and unusual geometry considerations
Roof windows bring their own access and protection issues. The work area is often above furnishings, and the route to it may pass through narrow stairs or across vulnerable flooring. For a pivot roof window clarify interior access, clear space beneath the opening, protection for furnishings and the desired operation. Check whether scaffolding, exterior work or other roofing activity is planned for the same period; coordinated planning can avoid repeated disturbance. A qualified professional should assess the specific installation and requirements for your building.
Angled, triangular and round units also need an individual position review. A fixed-glazed triangular or angled window combines a special shape with fixed glazing, but does not by itself establish the connection details or installation situation. Photos showing the surrounding area are particularly useful for these openings. Request a sketch that clearly identifies the interior and exterior views. Confirm which existing finishes should remain, be removed or be renewed. This will not prevent every surprise in an existing building, but it keeps special issues from being lost among numerous ordinary window positions.
Prepare without taking on unnecessary work
As the customer, you do not need to carry out installation work in advance. Your key role is to make the work area accessible, orderly and safe to use. Clear window sills, secure fragile items and provide a clear route from the entrance to affected rooms. Identify alarm contacts, sensors, cables, air-conditioning equipment or built-ins at the window. Record unusual details rather than explaining them for the first time on the day. If furniture cannot be moved, say so early. The room may then need to be worked on later, protected differently or approached another way. A few days ahead, check each planned transport route with doors open rather than only using the normal walking path. Remove loose rugs, narrow consoles and items behind doors where it is safe to do so. Ask the contractor which power, staging space or access is actually needed instead of making technical preparations yourself. Photograph sensitive areas before work begins. This provides a shared baseline and helps discuss protection without taking responsibility for installation.
Household communication is also part of preparation. Decide who will supervise children, where pets will stay and which room can serve as a retreat. Keep chargers, work materials and medication from disappearing beneath protective coverings. In multi-unit buildings, property management, neighbours and shared spaces may require additional coordination; broad statements about local requirements are not reliable without checking. Contact the relevant authority or qualified professionals where common areas, heritage considerations or structural changes may be involved. This separates practical organization from matters requiring professional or legal review. Appoint one person to answer short-notice organizational questions on installation day. That person should have the room list, position plan and contact details ready, but should not approve technical changes without understanding their consequences. Agree how questions will be recorded and who can be reached if the purchaser is temporarily absent. Tell everyone in the household which routes must remain clear and which rooms may be used again. A short communication chain prevents conflicting information and repeated unnecessary moving.
Pre-purchase checks 5
Treat doors as a critical interruption
Windows can often be replaced room by room. Exterior doors are different because they affect access, security and normal entry and exit. A single-sash inward-opening patio door needs clear interior swing space, but the title does not establish suitability for your existing building. Discuss a workable alternative route for every exterior door, especially where the main entrance or access to a yard, basement or work area is affected. Agree when the old door will be removed and how the area will be secured during an interruption. This is a specific question for the installing contractor, not merely an item on a wish list.
Interior doors, passage doors and stairwells also influence logistics. Where transport must pass through a narrow hall, shoes, coat storage or strollers can slow the work. Do not mark routes with tape on delicate surfaces if you do not know whether it is compatible; clearing the route and coordinating with the team are usually better. Consider the day’s routine: How will residents leave the home, where can ventilation occur, and which rooms remain accessible? A short morning briefing can answer remaining questions, but should supplement rather than replace earlier planning.
Organize handover and follow-up work deliberately
Replacement is not finished simply when the last new unit is in place. Allow time for a joint, position-by-position review. Open and close operable parts, check the agreed opening direction, inspect visible surfaces and compare units with the order. Record concerns with the room, position and a photo rather than describing them generally as a bedroom window. Ask what work remains: cleaning, removing protective coverings, interior or exterior connections, trim or disposal. Everyone can then understand whether the room may be fully set up again.
With a sliding door the joint review should pay particular attention to everyday operation: the future user should be shown the intended use and ask questions immediately. Do not confirm that work is fully complete when agreed tasks or clearly documented matters remain outstanding. Conversely, a factual deficiency list is more useful to the contractor than an unclear report weeks later. Keep the order, measuring documents, handover record and care instructions together. Bloomcabin windows and doors have a 5-year warranty. It does not replace careful handover, but it gives a clear reason to maintain organized records and communication from the outset.
Frequently asked questions
Can I stay home during window replacement?
That depends on the scope, room sequence and your own tolerance for disruption. A household can often remain partly operational, but active rooms may be noisy, dusty, drafty or inaccessible. Plan a retreat space, alternative work location and care for children or pets if several rooms are affected at once.
Should all windows be replaced in one appointment?
One appointment can consolidate travel, protection measures and coordination. Staging the project may be more comfortable where certain rooms are needed continuously or logistics are complex. There is no universal rule; the chosen sequence should suit access, delivery availability, follow-up work and your daily routine.
When can furniture go back beside the windows?
Only after the particular room is complete and jointly reviewed. Ask specifically whether connection, trim or cleaning work is still to come. Keep clearance around operable sashes, handles and potential maintenance areas. The installation team should confirm when the room can be set up again.
What if unexpected damage becomes visible during removal?
Hidden details can become apparent only after removal in an existing building. Agree beforehand who documents the finding, who makes decisions and how additional work is approved. Ask for photos and a clear explanation of the options. Work should not continue solely because of time pressure when an important decision is unresolved.
Should I address funding or permit questions before ordering?
If your project raises those issues, check them before placing a binding order and beginning work with the relevant authorities and qualified professionals. Requirements can depend on the particular building, location and scope. Canadian model codes do not create one nationwide approval rule; confirm the applicable provincial or territorial code and municipal requirements for the project. Without current, relevant official evidence, no general claim about permits, funding eligibility or technical requirements can be made.
Next step
How disruptive window replacement feels depends less on a universal hourly estimate than on preparation and sequence. Divide the project into manageable steps: document the existing conditions, approve configurations, confirm access, prepare rooms, schedule installation and review each position. Allow for the 4–6 week delivery period, subject to order confirmation, without treating it as a fixed installation date. A useful quotation addresses not only what will be supplied, but also how the route from vehicle to completed opening will be organized. With a room list, photographs and clear contacts, a demanding project becomes easier to manage.
