


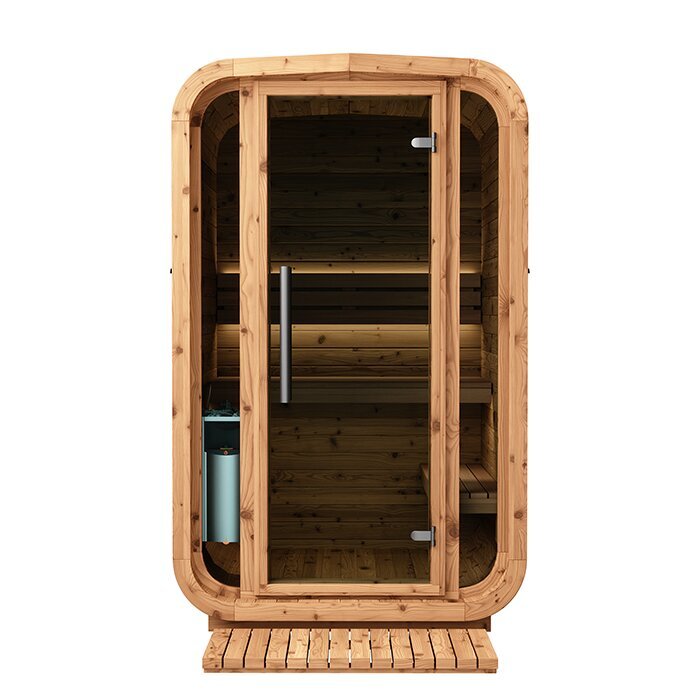
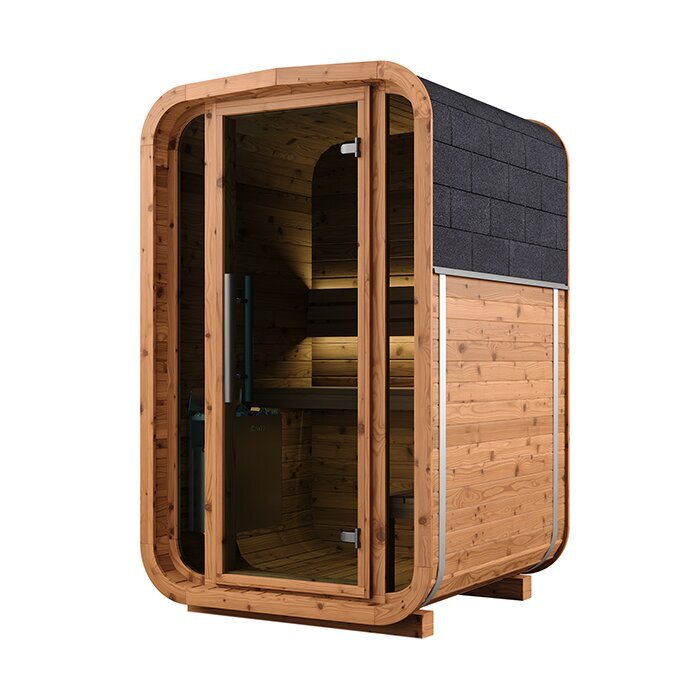


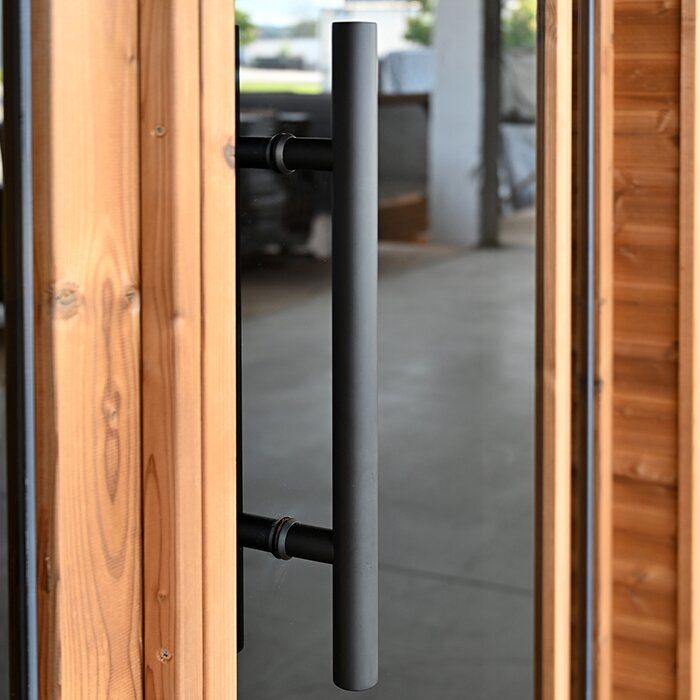


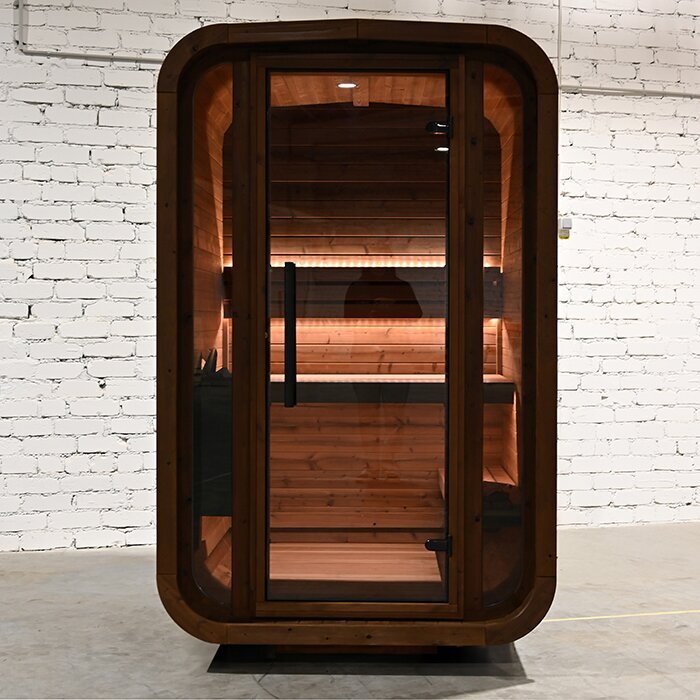
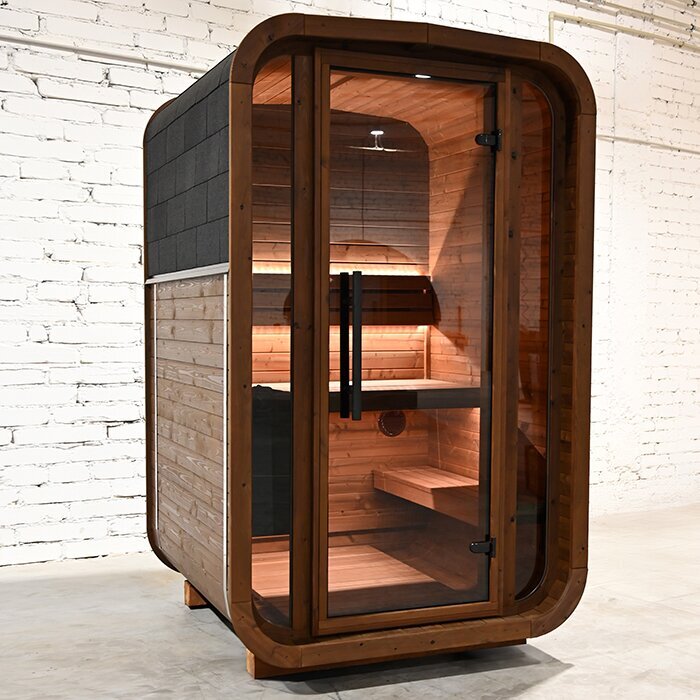





Compact outdoor sauna for one person
S 140 – compact Thermowood garden sauna with approx. 195 cm interior height
The Bloomcabin S 140 is made for outdoor spaces where a conventional barrel sauna would take up too much room. Its interior is deliberately designed as a seated sauna for one person, making it a practical choice for small patios, urban gardens and other limited spaces. Planning involves more than the cabin footprint: allow for door clearance, assembly access, ventilation, room to maintain the wood, and the route from the delivery point to the final location.
This page helps you assess whether the size, intended use and technical requirements suit your site. Explore other designs in the Bloomcabin sauna range.
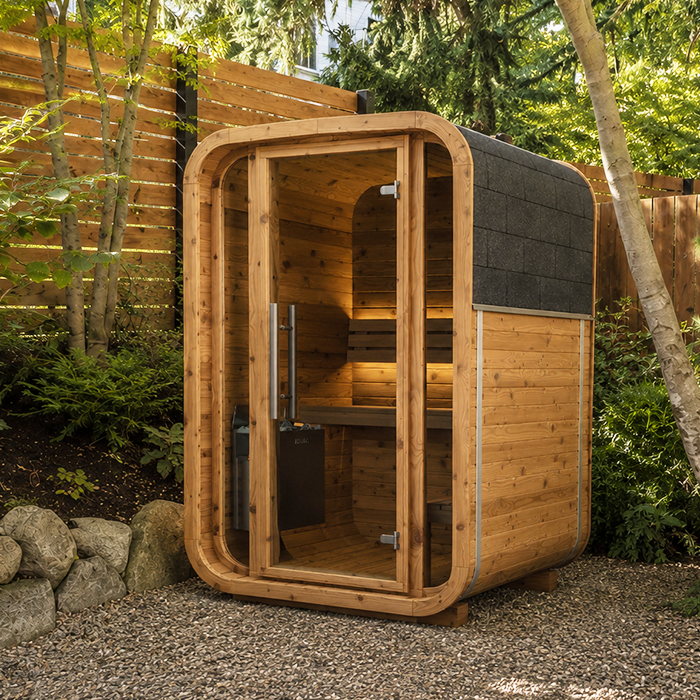
Everyday use
An outdoor sauna for places where every square metre matters
The S 140 is intended for people who mainly sauna alone and want to use very little patio or garden space. Its interior is planned for seated sessions. The approx. 121 cm bench is therefore not comparable with the lying space in a larger cabin. Choose a roomier model if you regularly want to stretch out or sauna with another person. For individual use, however, this clear purpose makes it easier to decide before purchase whether the layout matches your routine.
Its narrow exterior width can suit slim patios, compact city gardens, courtyards or side-yard locations. It should not be pressed tightly into a recess, though. You need space in front of the door, while accessible exterior sides make assembly and later care easier. Check whether eavestroughs, railings, wall projections, roof overhangs or plants reduce the usable area. A scaled drawing showing the cabin, door zone and fixed obstacles is more reliable than a rough estimate.
At about 195 cm, the interior height gives this small-footprint cabin an upright feel. Your height, sitting position and planned heater arrangement also affect how it feels in use. Leave sufficient clear space above the sauna for installation and servicing; branches, canopies and other construction elements must not obstruct it. On a covered patio, keep the cabin accessible and allow air to circulate around the timber structure.
Key points at a glance
What makes this model distinctive
Dimensions, interior layout and intended use matter more than price alone.
Approx. 145 × 133 × 221 cm
These exterior dimensions create a footprint of about 1.93 m².
Approx. 195 cm interior height
The upright design provides comfortable headroom despite the small footprint.
Approx. 121 cm bench
Designed for relaxed sitting and solo sauna sessions.
Approx. 5 m³ interior volume
This compact cabin volume calls for an electric heater suitable for the model.
Material and construction
Thermowood gives the compact S 140 its natural character
The sauna is built from FSC®-certified, heat-treated timber. Heat treatment reduces moisture uptake and helps the material remain more stable through changing outdoor conditions. Thermowood is still a natural product: grain, colour variation and small visual differences are part of its character, rather than the uniform finish of an industrial material. A sound, well-drained base and airflow around the cabin help protect the wood from prolonged standing moisture.
Its warm timber tone works with contemporary decking as well as natural stone, gravel or planted gardens. Do not let landscaping restrict practical access. Plants should not keep wet leaves or irrigation water against the wood, and loose materials must not interfere with stable footing or the door area. If the sauna stands beside a house wall, avoid directing roof runoff onto it. This keeps the setting attractive without making cleaning, inspection and maintenance unnecessarily difficult.
To retain the original timber colour for as long as possible, use only care products suitable for Thermowood and the particular application. Follow the instructions and test first in an inconspicuous area. Exposed exterior surfaces have different requirements from interior surfaces that contact skin, heat and humidity during sauna use. A surface treatment does not compensate for poor drainage: water must still drain reliably away from the installation area and timber structure.
Heating concept
Choosing the right electric heater for the S 140
The S 140 is intended exclusively for a suitable electric sauna heater. No firewood storage or chimney is needed, but the electrical supply must be planned early. Follow the technical requirements for the sauna, chosen heater and its controls. This connection is not comparable to an ordinary outdoor receptacle. Cable routing, protection, switching equipment and required safeguards must be planned and completed by a qualified electrical contractor. Ideally, confirm the cable route before the foundation or patio finish is complete.
With an interior volume of about 5 m³, heater output must meet the S 140 technical requirements. More output is not automatically better, and an undersized heater is unsuitable too. In addition to cabin volume, consider the permitted installation arrangement, specified position and required clearances from combustible components. Use only a heater-and-control combination specified as suitable for this model, and do not alter the heater position yourself. Keep towels, robes and all other items away from the heater at all times.
Provide the selected heater and control documentation to the electrical contractor well before installation. This helps identify differences between the prepared electrical work and delivered equipment before assembly. Use the system only after professional installation, inspection and commissioning. Then follow the sauna, heater and control instructions for operation, temperature selection and shutdown.
Before assembly and installation
Prepare the compact S 140 site carefully
Before ordering, mark the exterior outline and door-swing area on the ground. You can then confirm that the door opens freely and daily entry and exit will be comfortable. Walk the route from the house to the sauna as well. Garden furniture, planters, railings or narrow passages can restrict use more than the footprint suggests. Route the planned electrical supply so it neither creates a trip hazard nor crosses the future cool-down area.
The base must be level, load-bearing and suitable for the lasting weight of the sauna, heater and users. Rainwater and cleaning water should drain away rather than collect beneath the timber construction. For an existing patio, assess the surface, build-up and supporting structure together. Settled slabs or flexible boards are not a dependable base, even for a small cabin. Where load capacity, fixing or drainage is uncertain, have the specific construction assessed professionally before scheduling work.
Measure the complete route from the unloading point to the prepared site. In addition to gate and doorway widths, consider clear heights, stair landings, tight turns, slopes and overhead obstacles. Prefabricated panels can help access smaller properties, but still need adequate room for safe carrying, turning and temporary storage. Keep a firm, clean work area available on assembly day and protect components from dirt and precipitation. If the route crosses shared areas, arrange temporary access in advance.
Typical use
Where the S 140 can be especially useful
The right sauna depends on how it will actually be used and by whom.
Urban garden
The compact form suits restricted plots.
Solo sauna use
Designed for regular sauna sessions by one person.
Narrow patio
For sites with very limited available width.
Cottage
A space-saving option where one person will mainly use the cottage sauna.
Model comparison
S 140 or HC150 – which interior layout suits you better?
The S 140 combines an especially small footprint with about 195 cm of interior height and a bench for personal sauna sessions. It is particularly worth considering where available width is the deciding factor and one person will use the sauna most of the time. Do not decide on exterior dimensions alone. Consider whether you prefer comfortable seated sauna use or need a longer bench for stretching out. The compact design is the right choice when it suits your real habits.
The HC150 offers more width and is designed for two people, but its interior height is only about 175 cm. The models differ in both footprint and interior feel: the HC150 gives couples an additional seat, while the taller, narrower S 140 is tailored to one person. For either option, also allow space for assembly, door movement and future access to exterior surfaces.
Compare the dimensions with your preferred sitting position and the height of everyone who will use the sauna regularly. A compact footprint is beneficial only if the bench length and movement space work day to day. If several household members will use the sauna, discuss their expectations for seating comfort and shared sessions before buying. Prioritize the most common use, not the occasional exception.
Model-specific tip
Make the area around the S 140 work well
An outdoor shower, seating and a sheltered place for towels can make the sauna area more useful. Position these only after the door route, electrical zone and cabin access are established. A bench directly in front of the door obstructs exit, while loose items can become trip hazards in low light. Separating a dry storage or rest area from the wet cool-down zone is practical. Shoes and textiles stay better protected from splash water, and the limited space remains easy to use.
In a confined area, start with the essentials and add to the sauna setting only after you have tested the final arrangement. Movable seating and storage adapt more readily to walking routes and the cool-down area than permanently installed solutions. Choose items that are easy to clean and move aside when not in use. This keeps the layout flexible if your need for storage or resting space changes over time.
Outdoor sauna throughout the year
Plan access, cool-down space and weather protection for every season
For year-round use, the route between the house and S 140 should be short, well lit and safe under wet conditions. Lighting should reveal steps, edges and the doorway without unnecessarily reducing privacy. Assess surfaces in rain, leaf fall and winter moisture. Hoses, extension cords and loose objects do not belong in the walkway. A quick check before a sauna session is particularly worthwhile when weather or ground conditions have changed since the previous use.
If you plan an outdoor shower, plunge tub or small pool, include water supply, drainage and frost protection in the overall design. Cool-down water must not run beneath the sauna or toward the electrical installation. Provide a suitable transition between the cabin and wet area. Pipes and fittings must suit their location and remain accessible for maintenance. Even without a fixed water connection, decide in advance where used water can drain in a controlled way.
A weather-protected place for robes, towels and shoes keeps the small interior uncluttered. Dry damp textiles outside the cabin after sauna use. A covered seat can serve as a resting area if access and airflow around the sauna remain open. Store loose items so they cannot enter the door or heater zone. Drinks are safer on a stable surface outside the hot cabin; breakable containers are unsuitable for barefoot areas.
Caring for Thermowood properly
Inspect and maintain Thermowood and components regularly
Thermowood suits changing outdoor conditions but remains a natural material. Sunlight, precipitation and temperature shifts can alter its colour and appearance over time. Different sides may weather differently: a protected surface below an overhang develops differently from a fully exposed exterior face. Distinguish these normal visual changes from issues caused by standing water or insufficient ventilation. Regular visual checks help you understand the timber’s normal development and notice unusual changes early.
Check timber surfaces, barrel bands, screw connections, the door and seals regularly, as well as after unusual stresses. Look for loose connections, rubbing components, restricted door movement and locations where water remains. After sauna use, the interior must be able to air out and dry in accordance with the product and heater guidance. Remove damp pads and textiles. Do not repair visible issues with electrical components yourself; have them checked by a qualified professional.
For interior cleaning, use material-compatible products with soft cloths or suitable brushes. Remove residue sparingly without soaking the wood unnecessarily. Aggressive cleaners, unsuitable solvents and pressure washers can roughen, discolour or damage surfaces. For every care product, verify whether it is intended for the sauna interior or only for weather-exposed exterior surfaces. Clean the cooled, switched-off sauna and let all surfaces dry completely before heating it again. Follow the relevant manufacturer instructions for the heater and controls.
Check before ordering
Clarify delivery contents, transport and site requirements early
Do not rely on product images alone when ordering; use the details for the selected configuration. Confirm whether the electric heater, controls, sauna stones and necessary protective components are included, and identify work that must be arranged on site. This may include base preparation, electrical supply or assembly support. Compare this list with the order confirmation so the supplied equipment matches the prepared connections.
Before the delivery date, share dimensions and photos of gates, stairs, turns and other critical passages with the supplier or assembly team. This allows the transport route to be assessed before components arrive. Also decide where delivery will be received and laid out in order on a clean, load-bearing surface. Remove movable obstacles and protect sensitive surfaces. Any uncertainty about access needs to be resolved before the appointment is confirmed.
Also establish which building, zoning, setback and electrical requirements apply at the specific address. Canada’s national model codes do not by themselves determine the requirements in every province, territory or municipality, so the questions depend on the property, existing development and planned installation. Before permanent work begins, check the adopted requirements with the relevant provincial or territorial authority, municipal permit office and qualified local trades. Drainage, proximity to property lines and underground services can also affect the plan. Keep the technical documents, assembly instructions and electrical-component information together for installation and maintenance. Find additional guidance under Useful information.
Use routine and interior space
Keep the interior clear before and after sauna use
Before heating, a brief visual check is enough: the bench and area around the electric heater must be clear, the door must move freely and technical components must show no visible irregularities. Take inside only what you need for the session. Robes, shoes, spare towels and care products are better kept in a dry place outside the cabin. This creates room to move and helps prevent items from accidentally reaching the heater area.
After sauna use, switch the system off according to the operating instructions. Air out the cabin and remove moisture from heavily used surfaces where the product directions call for it. Seat covers can reduce direct sweat on the wood, but must dry outside the cabin afterwards. In the small S 140, just a few forgotten items take up considerable usable space. Before closing the sauna for a longer period, ensure the interior is dry and fully cleared.
At a cottage or in a shared garden, agree clearly who keeps the technical documents, dries the cabin after use and carries out regular checks. All users need a short introduction to operating the controls, keeping the heater zone clear and ventilating properly after sauna use. This keeps routines consistent when different people use the S 140. Anyone unable to operate the system safely must not have unsupervised access to the controls or hot heater.
Make the most of a small footprint
Position the S 140 thoughtfully in limited space
Compare several S 140 orientations on a site plan instead of drawing only one possible position. Mark the exterior dimensions, door movement, house wall, property lines and fixed elements, as well as downspouts, exterior lights, water connections and existing electrical connection points. Favour the option with direct access and reachable exterior surfaces. This reveals which location works with existing features without improvised electrical routing or walking paths.
When positioning near the house, windows, doors, shutters, downspouts and service panels must remain fully accessible and usable. Check whether a roof overhang restricts air circulation or directs rainwater onto the sauna. Access to property boundaries and existing paths must not be blocked either. If utilities run underground or fixing to existing structures is planned, establish their exact location before work begins. A recess that fits on paper is not automatically a suitable installation site.
Observe the proposed location at different times of day and in varying weather where possible. This can reveal whether rainwater runs toward the sauna, wet leaves collect on one side or access becomes impractical in poor weather. Include lawn irrigation and roof drainage, which may add to exposure on exterior surfaces. At the same time, routes to dry storage and the cool-down area should stay short and obvious. A suitable position improves both space use and ongoing sauna operation.
S 140 and privacy
Create privacy while keeping the sauna accessible
Because the S 140 is often located near a patio, home or property line, review sightlines early. The view of the door area when entering and leaving the cabin is especially important. Look at the site from nearby seating, paths and windows too. Simply changing the sauna orientation can often improve privacy without adding structures. Keep the route to sheltered storage short, so users do not have to cross exposed or wet areas unnecessarily.
A narrow privacy screen, slatted wall or carefully positioned plants can reduce views into the doorway. Leave enough distance from the sauna for free door movement and access to exterior surfaces for inspection and care. Solid cladding directly against the timber can trap moisture. With plants, allow for future growth, leaf fall and watering. Mobile elements must stand securely and be fixed so they cannot shift or strike the sauna.
For a calm overall look, it is usually enough to echo the materials and lines of the existing patio. A clear route, useful storage surface and well-placed privacy screen address the essentials. Avoid excessive decorative elements in a small site and keep the ground easy to see. This makes water accumulation, dirt and changes in the construction easier to spot. Exterior lighting should support access without dazzling users or unnecessarily shining onto neighbouring properties.
Frequently asked questions
FAQ – Bloomcabin S 140
Can the S 140 be installed flush in a narrow recess?
No. The recess must provide more than the exterior dimensions. The door needs to move freely, and accessible exterior sides are required for assembly, airflow, inspection and timber care. Also check for obstacles above the cabin.
How can I tell whether an existing patio is suitable?
The surface and supporting structure must be level, load-bearing and suitable for long-term use, while water must drain reliably. If boards flex, slabs have settled or the patio construction is unclear, have it professionally assessed before assembly.
How does the S 140 interior differ from the HC150?
With its approx. 121 cm bench and about 195 cm interior height, the S 140 is designed for one seated person. The wider HC150 is designed for two people but offers less interior height at approximately 175 cm.
Are the electric heater, controls and sauna stones always included?
Not necessarily. Included components depend on the selected configuration. Check the electric heater, controls, sauna stones and required protective components individually in the product description before arranging electrical installation.
How can the original Thermowood colour be retained longer?
Use only care products expressly suitable for Thermowood and the relevant interior or exterior surface. Test the product first in an inconspicuous location. Even with surface care, avoid standing water and persistently wet leaves.
How should I prepare the S 140 for a longer break in use?
Switch the system off as instructed, remove all textiles and let the interior dry completely. Then inspect the bench, door, heater surroundings and visible connections. Close the cabin for the break only once it is dry and completely tidy.
What should be prepared at the site before delivery?
Confirm the load-bearing, drained base, a sufficiently wide transport route and a clear assembly area. Also establish in good time what electrical preparation is required and which components will arrive with the selected configuration.
Bloomcabin S 140
Is the S 140 the right garden sauna for you?
The S 140 suits you if you are looking for a particularly compact electric garden sauna for mainly solo, seated sauna use and can prepare an accessible, load-bearing site. In addition to the footprint, you need unobstructed door clearance, effective drainage, a professionally planned electrical supply and access for future care. If these conditions fit your property and sauna habits, you can create a dedicated sauna area using less space than a larger cabin.
If needed, compare other Bloomcabin outdoor saunas and barrel saunas.
Planning checklist
✓ Exterior dimensions, door area and maintenance access measured
✓ Confirmed that a one-person seated sauna suits your habits
✓ Checked for a level, load-bearing and well-drained base
✓ Confirmed a suitable electric heater and professional connection
✓ Checked the selected configuration and included components individually
✓ Clarified the transport route and site requirements in advance
View the S 140