
Designing a Pergola for More Accessible Dining
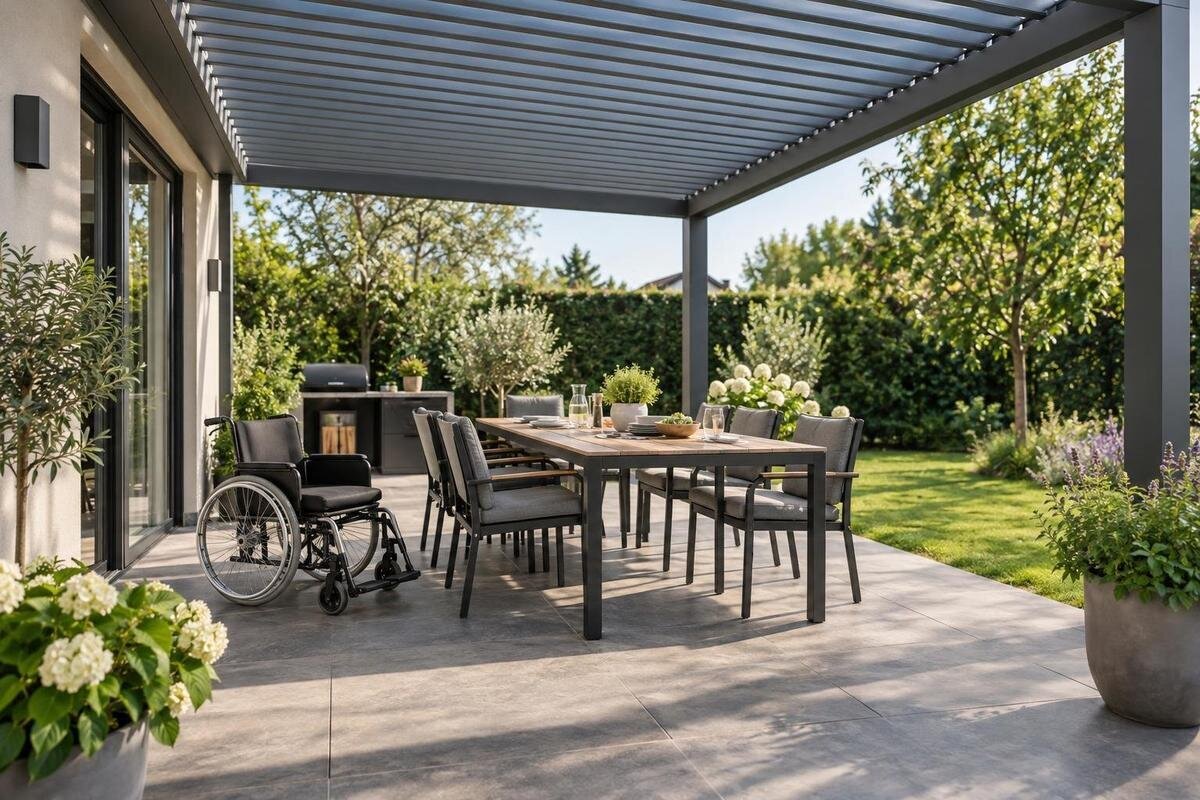
Pergola planning
An outdoor dining area is easier to share when the route from the house, the space around the table and the place to sit are planned together. A pergola can define the dining zone, but its stated footprint does not show whether someone can approach a seat, turn, pull out a chair or pass a server. Start with the people and furniture, map the journey and test the arrangement on the actual terrace. This is practical comfort planning, not an assessment of compliance with accessibility rules.

Trace the route from the house to the table
Begin at the door people will use most often, rather than at the centre of the proposed pergola. Follow the whole trip to the dining place: the threshold, patio or garden path, gate if relevant, and final approach to a chosen seat. Mark each point where the surface changes, the route narrows, a door swings out or people naturally pause. A route can look open on paper yet be blocked in daily use by a barbecue, planter, hose reel or chair left beside the door. Note those items as part of the layout, not as later additions. If there are two possible exits, identify the one most guests will use, and mark a gate's swing as well as its opening.
Walk or wheel the route in both directions, considering someone carrying a plate, using a mobility aid or opening the door behind them. An arrangement that requires the dining table to be moved whenever someone arrives is inconvenient for everyone. If people cross another busy area, such as a path to the garden, make that crossing visible and uncluttered. Draw the route as a continuous band and note where someone may need to stop or turn. Set its width and turning needs from the actual users and equipment, not an assumed standard. If two people commonly travel together, test whether one can wait or pass without blocking the entrance.
Measure the table, chairs and occupied space
Use the actual table and chairs where possible, rather than a catalogue photograph. Measure the table top, its base or legs, and each chair, including its arms; note how far a chair moves back when someone sits down or stands up. Record the space occupied with chairs tucked in, with diners seated and with chairs pulled back to leave the table. Include any chair normally kept nearby, a high chair if relevant, or mobility equipment that needs to remain close. A table may fit under the proposed pergola while the occupied arrangement leaves too little room to move. Draw the items to scale, or use tape to mark their outlines on the patio before deciding where the supports should go.
Think about who uses each place and how they approach it. One person may need to come in end-on, another may prefer a side approach, and a companion may need a seat close by. Keep a flexible place at a table edge rather than relying on a chair being removed for every meal. If the table extends for larger gatherings, record both arrangements and check that the everyday route remains usable. Once you have the furniture footprint, compare it with the regular Bloomcabin Pergola listing; a product model is a starting reference, not a drawing of your clear dining space.
Check the approach to the table
Being able to reach the table is not the same as being able to sit comfortably at it. Look underneath: a deep apron, stretcher or central base may limit where knees or footrests can go. Test the real table with the person's usual mobility equipment and seating position. Try approaching from the front and from the side, and notice whether a footrest, armrest or walking aid catches on a leg. Check whether the table edge is close enough for a comfortable seated reach, without assuming every wheelchair user needs the same arrangement. The person who will use the space is the best guide to that practical fit.
Place settings and serving items count too. Bowls in the centre, a vase or a table extension can take away the edge space needed for reaching and settling. If someone needs a regular place, keep it available without routine furniture lifting or moving another guest. When the layout changes for a larger meal, mark that version as well and see whether the clear route still works. Keep the Bloomcabin Bioclimatic Pergola listing beside the measured table plan during a product comparison: neither the model name nor the listed area confirms that a particular approach will fit.
Map door swings and pergola supports
Plot doors, gates, windows opening onto the patio and fixed garden features before positioning the frame. A hinged door needs its actual opening arc; a sliding door needs a clear landing and a route that continues beyond it. A support can pinch a turn or make a seat difficult to reach even when the terrace has plenty of total area. Use the drawing for the selected pergola configuration and overlay it on a measured site plan. Do not estimate support positions from a product photograph or the name of a style. Include doors and gates that people may need to use while others are seated.
For a dining area beside the house, compare the opening and route with the Bloomcabin Wall-Mounted Pergola, rather than treating a wall-mounted format as an automatic shortcut. Check the dimensions of the configuration being considered, and clarify any support positions that are not shown. Include downpipes, outdoor taps, external lights and existing fittings in the same drawing. That makes it easier to resolve a clash before it forces the table, doorway or clear route into an awkward position; questions about site-specific fixings also need a suitable professional.

Plan turning and passing space
A turning place is needed where someone changes direction, approaches a seat or backs away from the table, not just in an empty corner. Try the movement with the person and mobility equipment in the space, allowing for a companion to pass or help if needed. Check tight corners beside supports, table legs and walls, where a turn can be harder than in the centre of the terrace. Include the movement back towards the door, not only arrival at the table. If the route changes direction, test each turn with the actual setup instead of counting all open floor area as equally usable.
Passing space matters when someone carries food or clears plates. Decide whether a person can pass behind seated diners without asking them to move each time, or whether a separate route around the dining zone is more practical. Test with chairs pulled out, not just tucked under the table, and with doors in their normal open position. When considering the Bloomcabin Pergola product page, mark the support positions against the turning and passing paths. Overall area and usable clearance are different things, so base the test on the actual configuration rather than the total area alone.
Make the route step-free and predictable
Inspect the whole approach surface, not just the floor beneath the dining table. Loose gravel, uneven paving, raised edging and changes between patio materials can catch small wheels or make a route harder to use. Wet leaves or food spills may also make a familiar surface less predictable. Check paving joints and edges and identify where chairs will move, so the route does not end at a lip or drainage channel. A practical plan favours a continuous, firm and even surface that is straightforward to keep clear. Think about the area outside the pergola too; an easy dining zone is of little use if the path to it is difficult.
Step-free access is not achieved simply by placing the pergola and table on one level. Check the house threshold, changes between patio and garden, and the join between different surfaces. If a level change cannot be avoided, do not improvise a steep or unstable transition; ask a suitably qualified access or building professional to assess an appropriate solution for the site and the people using it. Consider drainage at the same time, so an adjustment intended to improve the route does not introduce standing water or another obstacle. The right approach depends on the existing surface and site.
Plan flexible seating and table orientation
Compare table orientations using the furniture footprint you have already measured. Turning the table changes which seats face the house, which are closest to the entrance and where people approach from the garden. Check the preferred dining place in each arrangement, including space for a companion nearby. A support beside that place may obstruct an armrest or make a chair awkward to pull out, even if the main route stays clear. Include other furniture intended to remain in position, so rotating the table does not simply move a conflict elsewhere. Once the seating and circulation work together, views, shade preferences and appearance can help you choose between the arrangements.
Decide how the seating will change between an everyday meal and a larger gathering. A useful flexible place should be easy to prepare without lifting heavy furniture or asking several guests to stand. Identify where a spare dining chair will go when it is not needed, rather than leaving it beside the entrance or in a turning space. For a table beside the house, compare these arrangements with the wall-mounted pergola model, keeping the doorway and proposed supports on the plan. Choose an orientation that leaves the preferred seat accessible in both versions. If the extra seating blocks that approach, reconsider the seating arrangement before treating the larger gathering as a workable layout.
Keep serving and storage out of the route
Outdoor meals involve more movement than guests travelling to their seats. People bring dishes from the kitchen, collect cutlery, refill drinks and carry waste away. Trace these trips on the sketch and see whether they cross the arrival route or pass behind occupied chairs. Put everyday items where they can be reached without blocking a turn, and avoid storing cushions, folding chairs or a serving trolley in the one clear area. If people use a route temporarily for serving, decide how it will be cleared afterwards; do not rely on a permanent squeeze between furniture and the frame. Include the path to any regularly used storage or waste point.
Consider where a helper will stand when passing a dish or clearing the table, without assuming one person will always do those tasks. A sideboard, storage box or planter can become an obstacle if it sits at the end of a route; show it on the plan and include the space its doors or lid need. The regular Bloomcabin Pergola page can sit alongside a measured plan when checking the overall footprint. Arrange the furniture and serving area first, then see whether the selected configuration leaves the planned routes clear.

Test the layout with a real meal
A sketch is a starting point, so test it with the furniture and people who will use the space. Mark the table, chair positions, route and proposed supports with tape, cardboard boxes or temporary objects. Try approaching each intended place, pulling chairs out, turning and passing at realistic times. Repeat with the door open, the table set and everyday items in position. Ask the person using the route what feels awkward; a clear line on paper may still put a chair back, planter or door handle in the way. Testing from the garden path as well as from the doorway can reveal a different pinch point.
Try ordinary variations, not just an ideal quiet lunch: a guest arrives while someone is seated, a chair is left out or two people carry plates in opposite directions. Decide which objects can move and who will move them, then keep essential circulation independent of that routine. If you expect to dine after dark, check that the route and table remain easy to see in the lighting you plan to use. Include the bioclimatic pergola model in the comparison by marking its proposed footprint and support positions for the same test. Record where each arrangement works or causes a conflict, and label the sketch as a concept when sharing it.
Compare model sizes with the measured plan
Shortlist a size only after the furniture, route and turning points are drawn. Compare the outer footprint and support positions for the actual configuration with the measured site, along with door openings and any proposed additions. A larger nominal area does not automatically make a clearer route if a support sits beside the table or the only useful turning place. The listed Bloomcabin options include the Wall-Mounted Pergola, Bloomcabin Pergola and Bioclimatic Pergola, each shown from 9 to 24 m². That range is a useful first filter, not a site plan or a promise that a particular furniture layout will fit.
Use Bloomcabin's wall-mounted option as one named model to compare with the drawing, alongside whichever other configuration you are considering. Keep the same furniture arrangement on each comparison plan so you can see whether differences in the footprint or support positions affect the entrance, preferred seat or serving route. Where a dimension or support location is unclear, identify that specific point before making your choice; a rendered image cannot resolve it. If the project must meet a formal accessibility requirement, ask a qualified access professional or relevant authority to review the proposal. Practical comfort planning can identify conflicts, but it does not establish compliance.
Frequently asked questions
What should I measure before choosing a pergola?
Measure the route from the house, thresholds and doors, the space available for the table and chairs, and the positions of any fixed features. Include chairs pulled out and the turning points people will actually use. Then compare that drawing with the dimensions and support positions of the pergola configuration you are considering.
How can I check the wheelchair approach to a dining table?
Test the actual table with the wheelchair and seating position used by the person who will dine there. Check whether its base or apron limits the approach, whether the chosen table edge is reachable, and whether nearby chairs or supports get in the way. A different table or wheelchair may produce a different result.
Is a step-free route enough for comfortable outdoor dining?
No. A level route is only one part of the layout. Someone also needs to reach a suitable place at the table, turn where needed and move around chairs, doors and other people. Check the route and dining arrangement together, including the surface and any changes in level.
Should I choose a larger pergola to make room for turning?
Not automatically. The overall area does not show where supports sit or how much clear space remains beside the table. Draw the furniture, route and turning places first, then compare the measured arrangement with the actual footprint and support positions of each option.
Does this layout confirm compliance with accessibility requirements?
No. This is practical planning guidance, not a compliance assessment, and it does not set out local code dimensions. If a formal accessibility requirement applies to your project, ask a qualified access professional or relevant authority to review the proposed layout.
A useful dining layout accounts for the ordinary movements around a meal: entering, reaching a seat, turning and moving while others eat. Measure with the furniture and people who will use the space, then test that arrangement before settling the pergola position. This gives you a clearer basis for comparing footprints and support layouts, while keeping practical comfort separate from any formal accessibility assessment.
