
To improve the quality of the content of this website and to adapt it to the needs of users, cookies are used - including third-party cookies. By continuing to use this website, you agree to the use of cookies and to possible communication when you enter your contact information in one of the forms on the site.

Bloomcabin Wall-Mounted Pergola

  • Wall-mounted to the house
  • A practical addition to the patio
  • Design tailored to you
The greater the purchase, the bigger discounts you get.
Estimated delivery:
We offer the opportunity to CHOOSE A SUITABLE DELIVERY WEEK, which you will find in the last step of the shopping cart.
The greater the purchase, the bigger discounts you get.
Personal Bloomcabin consultation
Personal consultation?
We are happy to help with questions about models, prices and delivery.
+49 152 28196712

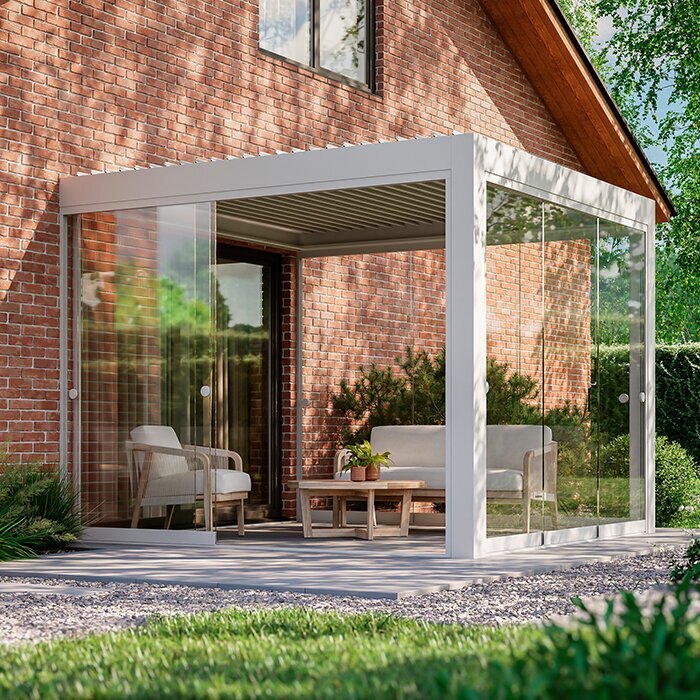
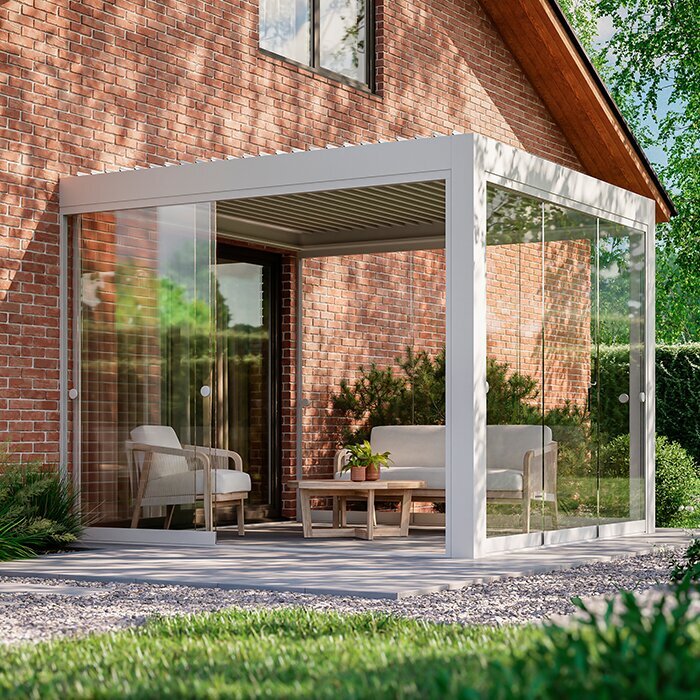
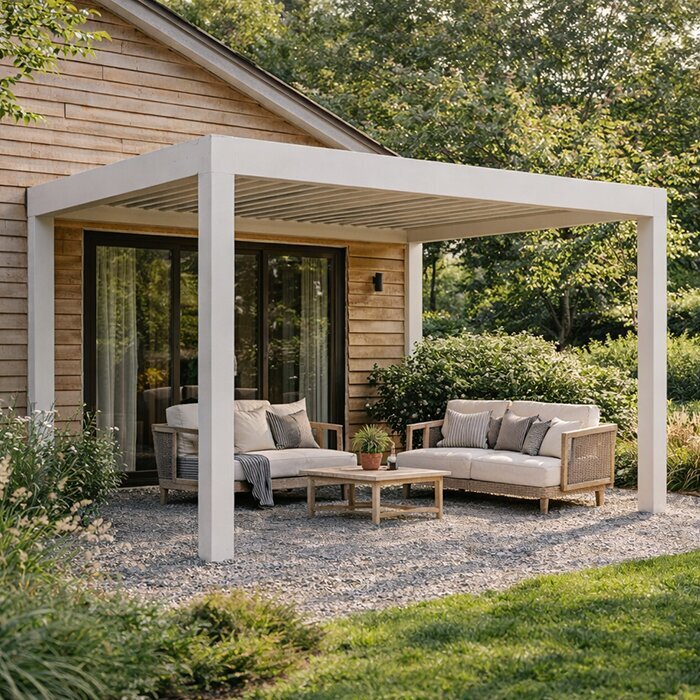
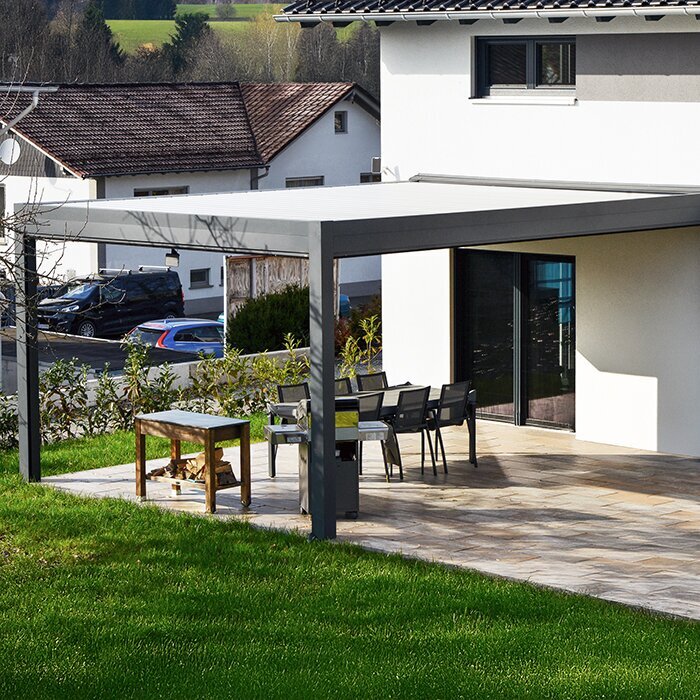
A Bloomcabin lean-to pergola extends a practical, elegant outdoor living area directly beside the house. Modern styling, carefully considered construction and quality aluminium profiles combine to provide everyday comfort while allowing the pergola to complement the home's architectural character.

Reasons to choose a Bloomcabin wall pergola

Secure façade attachment
Secure fixing to the façade provides firm support and uses the space beside the building efficiently. The arrangement works well for patios, balconies and relaxation areas immediately outside the home.

Useful shelter over the patio
Welcome shade and a sheltered spot are created without sacrificing the area's open, airy character. It offers a comfortable place for everyday relaxation, outdoor meals and quiet time on the patio.

Sizes for different spaces
Bloomcabin offers this wall-attached pergola in multiple formats, with areas ranging from 9 to 24 m² so there is a suitable option for smaller patios as well as generous terraces.

Premium materials
Aluminium forms the structure, requires little routine care and keeps an attractive finish for years. Its qualities support long service life and the steadiness needed for regular enjoyment.

Colours to suit your setting
Choose from several RAL colours so the wall pergola's finish can sit comfortably alongside the building façade, the garden and its broader setting.

The pergola comes fitted with an integrated gutter and rainwater drainage system that directs run-off efficiently without interrupting the crisp, architecturally balanced appearance.

Precision engineering helps make the Bloomcabin wall-mounted pergola simple to assemble. This practical, visually considered investment improves patio comfort and can add to the property's overall value.

Customer feedback 

“Beside our home, the wall pergola perfectly complements both the patio and façade. It is sturdy, exceptionally elegant and extremely useful in everyday life.”
— Thomas Schneider

“We chose a wall pergola to roof the patio beside our house, and the finished result looks genuinely well made and thoughtfully planned.”
— Julia Wagner

“The build quality and styling have left me very satisfied. The pergola does its job exceptionally well while also presenting a thoroughly modern appearance.”
— Markus Weber

Place your order today for a premium wall-attached pergola designed to bring comfort, practicality and visual harmony to the outdoor space alongside your home.
More information
SPECIFICATION

Dimensions:
9–24 m²

Height:
Overall: 250 cm

Material:
High-quality aluminium profiles

Key features:

  • Robust, stable profiles create a secure structure

  • Integrated guttering for efficient water drainage

Warranty:
12-year extended warranty

Key benefits:

  • Durability: Aluminium construction for dependable long-term use.

  • Functionality: Integrated guttering for drainage.

  • Adaptability: Sizes from 9–24 m²; colours from the RAL chart.

  • Design: Modern pergola with clean lines.

Bloomcabin Wall Pergola

Contemporary patio shelter secured to the home's exterior wall

The Bloomcabin Wall Pergola attaches to an exterior wall and is intended for a patio or another open-air space immediately beside the building. It frames the area along the façade and creates a visual link between indoors and the garden while leaving the patio open. This arrangement suits homes where the principal place for eating or sitting is just beyond the kitchen, dining area or lounge.

The current version covers 9–24 m² with its total height measuring 255 cm Premium aluminium profiles form the structure. Built-in gutters and internal drainage channels carry water through it. A choice of RAL colours lets the exposed framework complement the windows, doors, façade and other lasting features around the property.

Plan in stages. Begin by asking a competent professional to assess the wall construction, secure anchoring area, supporting ground and gradient. Next, reconcile the patio depth with openings, furniture and circulation. Settle on a configuration after locating the discharge point and ensuring that cleaning areas can be reached. Bloomcabin.

Bloomcabin Wall Pergola on a patio
Connect home and patio

A clearly arranged outdoor area beside the house

This format is useful where a frequently used patio adjoins the main rooms of the home. With cooking, eating or living areas close by, meals, crockery and cushions can be carried outside without a long route through the garden.

Anchoring the pergola at the building creates a defined edge to the patio. It does not turn the space into an enclosed extension, so garden views and access along the sides of the property remain open.

The frame will be seen beside the façade and its openings throughout the year, making proportion important to the home's appearance. Its width can echo the arrangement of glazing and doorways, but its depth must serve the planned activity. Select colour, post locations and furniture as one composition.

Direct wall connection

For patios directly beside living areas

Open transition

The home and garden retain an easy, open connection

RAL colour selection

Frame colour to suit façade, windows or doors

Integrated drainage

Guttering and drainage system within the structure

Plan the patio practically

Furniture, door openings and routes determine the right pergola size

Do not size the pergola from the vacant paving alone. First decide what you want to do beneath it and allow enough circulation for that activity. A compact place to sit needs a different layout from a dining arrangement that also accommodates serving and passage into the garden.

Allow people to rise from occupied dining chairs and walk behind them. For lounge furniture, leave workable gaps among the sofa, chairs and table. Posts and furnishings must stay clear of outward-swinging doors, sliding panels and paths used regularly.

Taking cues from the home's geometry can make a wall pergola feel settled in place. Glazing, entrances and the patio boundary offer possible alignments, provided the chosen arrangement still functions properly and permits a secure, professionally specified attachment.

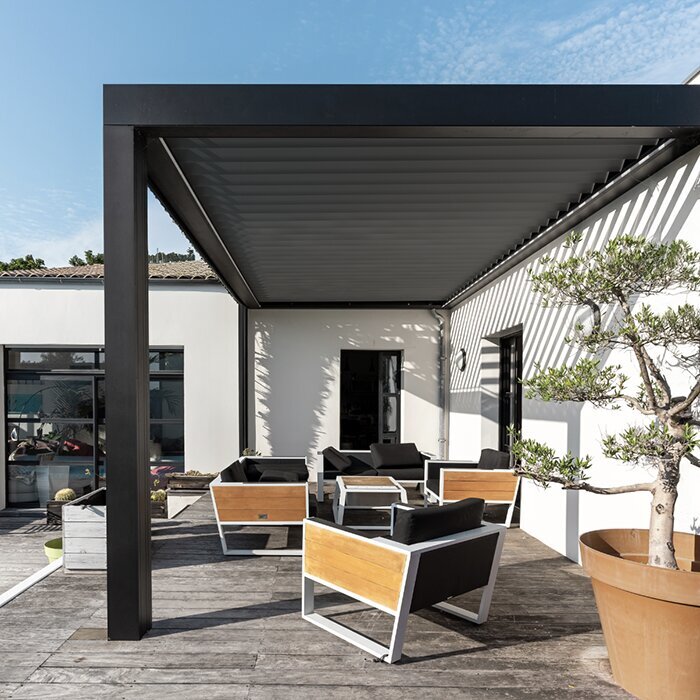
Bloomcabin Wall Pergola above a patio
Before choosing size

Four points provide the basis for planning and installation

Draw each potential configuration at a consistent scale. Show where furniture can stand, reserve unobstructed space at every doorway and plot the intended supports. Placing the drawings side by side reveals which arrangement uses the patio efficiently while protecting essential routes.

01

Wall position

Ask a specialist to examine the anchor line, sound substrate, wall layers, insulation, openings and façade features.

02

Furnishing

Plot the dining set, lounge furniture, planters and chair clearance to scale on the patio plan.

03

Movement

Preserve clear lines of travel linking the home, seating, garden and side exits.

04

Drainage

Match the outlet, patio gradient and downstream drainage so runoff travels away from the house.

Key technical details

A concise view of dimensions, build and fitting

Size range

9–24 m²

Choose according to usable furnished space rather than relying solely on the patio's outer measurements

Overall height

255 cm

Coordinate the design around doors, windows and permanent details on the façade

Construction and strength

High-quality aluminium profiles

Straight aluminium framework designed to meet the house

Installation

Directly on a suitable building wall

Ask a competent professional to assess the wall construction, anchor area and appropriate fixings beforehand

Water management

Integrated guttering and drainage system

Define the outlet and subsequent water route before installation

Warranty

12 years

Integrated drainage on the Bloomcabin Wall Pergola
Material and care

Aluminium combines crisp design with straightforward care

These quality aluminium sections give the attached frame a restrained outline that remains visually prominent. Its pared-back form can accompany either modern or modest architecture. Judge the finish and support locations against the strongest horizontal and vertical features already present on the elevation.

Gutters and drainage passages are concealed within the pergola's framework. Performance depends on a suitable link to the drainage available at the property. That arrangement must fit the patio and leave inspection and cleaning points easy to reach.

Record the chosen RAL designation in the project documents. This makes later coordination with other permanently installed elements or façade repair work easier. The selected shade itself is decisive, rather than a possibly different appearance on screen.

Use and design

Four ways to use a house-side patio

01

Covered dining area

Placing the dining zone close to food-preparation areas reduces carrying distances. The plan must include chair space in use and a practical route for serving.

02

Garden-view lounge

Combine a sofa, chairs and a low table for an unhurried seating zone. Keeping one edge open preserves garden views and convenient passage.

03

Space for guests

When visitors arrive, indoor and patio areas can be used together. Keep the doorway and connection between seating groups clear.

04

Façade design

Using the rhythm of glazing or the patio boundary can settle the aluminium frame into the architecture and bring an orderly composition to that elevation.

Location and house connection

Attachment to the building separates this design technically from a freestanding pergola. Anchors act through the wall, while the forward supports carry forces into the patio foundation. The wall fabric, anchoring location, base and drainage therefore require coordinated design; appearance alone cannot confirm suitability.

Wall construction and anchor zone

Brick-faced elevations, render and insulated wall systems have very different layers. Where external insulation is present, the outer finish cannot be assumed to provide structural support. Select anchors and junction details for the actual wall assembly so that the pergola is held securely without compromising the weatherproof envelope.

Survey roller-shutter housings, sills, canopies, fittings, downpipes, vents and exposed services before setting the attachment line. Features lying just beyond the proposed footprint may still limit tool access, connection work or later maintenance.

Have both the structurally sound anchoring area and the supporting base confirmed before committing to a size. Discovering an unsuitable location at this point leaves room to revise the scheme. Alterations become considerably harder once the patio works are complete or the fitting date is close.

Sun position and existing shade

Aspect governs the hours when sunshine reaches the paving, wall and furniture. Nearby buildings, trees, eaves and the shape of the house alter this further. As Irish conditions vary by location and season, inspect the spot at the hours when you expect to use it most.

Pale walls and paving may increase glare on a bright patio, whereas darker materials retain warmth. Place seating with both the outlook and comfort in mind. Avoid leaving delicate planting or fabrics permanently in a position exposed to prolonged, strong sunshine.

A larger canopy is not always the more comfortable choice. Careful placement of a table or lounge within the covered portion may work better while keeping a generous opening towards the garden. Mapping the sun across the day gives a more reliable test of the furniture plan.

Patio base and front posts

Each support requires a stable load-bearing base. Slabs and boards show only the surface; support comes from the layers below. Footings, kerbs, cavities, buried services and drainage pieces may restrict where posts can stand.

On an established patio, investigate the construction below every intended support and determine whether preparatory work is needed. For a new patio, agree those locations with the contractor from the outset. The finished surface can then be detailed tidily around the posts without reopening completed work.

Account for the patio gradient as well. It must carry runoff clear of the building while still permitting correct installation at each support. Measure changes in level, steps and outer edges rather than judging by eye, because a surface that looks flat may vary across its width.

Patio use and comfort

Good zoning supports comfort: dining, seating, door clearance, serving and garden circulation each require their own space. Bring any proposed lighting or power into the early design. Use appropriately qualified expertise for planning and completing outdoor electrical work.

Everyday life between house and garden

A small landing surface near the doorway helps when setting out meals, provided it does not constrict movement. Rehearse access with all chairs occupied. Someone holding plates or a tray should have a straightforward passage without weaving between diners and the entrance.

Keep every patio door completely operational. Beyond its opening arc or sliding path, allow room for a person to pause, carry items and move aside. Pay close attention to thresholds, steps and pinch points, where circulation and furniture can easily clash.

Route everyday garden traffic along a simple line rather than through the most confined part of the furniture arrangement. Where the house has two exits, designate one for regular passage and relate the other to dining or lounging. This protects a restful seating area without impeding access outdoors.

Lighting and technical preparation

Evening comfort generally benefits from ambient illumination paired with task light over the table, rather than one intense fitting. A wall light can emphasise the attachment, while lower sources define furniture. Aim each fitting carefully so it does not produce intrusive glare inside the home or towards neighbours.

Choose the positions of controls, sockets and wiring before fitting begins. Identify the supply points at the house and consider which cable runs might be exposed. Retrofitted surface wiring may detract from the finish or obstruct access to joints and gutters.

Keep electrical fittings and wiring clear of anchors and drainage passages. Specify equipment for its precise outdoor location and use competent installation expertise. Even when fixed lighting is planned for later, the initial project can make provision through suitable sleeves or prepared supply points.

Furnishing for the intended use

A dining plan begins with the table, chair widths and clearance for occupied seats. Lounge planning instead centres on sofa depth, outlook and convenient reach to the coffee table. If both activities share the canopy, prioritise one rather than squeezing in two compromised arrangements.

Early plans often omit barbecues, bulky pots and storage units. Give them proper standing room without hiding drains or locations that need inspection around the supports and house wall. Items that can be moved make it easier to reconfigure the patio when guests visit.

A drawing with every chair pushed in does not provide a realistic test. Simulate diners seated, another person serving and the patio door moving through its full travel. Before purchase, tape out the furniture footprint or represent it with portable objects on the actual paving.

Side access and low-threshold routes

Side routes matter when bins, bicycle storage, a garden shed or beds behind the patio need to be reached. A post in the wrong place can narrow what was once an easy passage. Consider not only use at the table, but also items transported regularly.

A low-threshold route relies on careful coordination of the door sill, paving level and drainage. Adding a pergola does not change the necessary door junction. Retain existing heights and, during patio renewal, align them with the building's waterproofing details.

A pram, serving trolley or bulky item of garden furniture demands more turning and passing room than a pedestrian. Represent these movements before fixing posts or permanent containers. One generous everyday passage generally functions better than a collection of narrow gaps.

Drainage, care and long-term planning

Size and finish are only part of planning for lasting use. Locate the built-in drainage outlet, then reserve access for cleaning and routine observation. The frame is permanent, while pots and movable furnishings can be rearranged as household routines evolve.

Choosing colour alongside the home's exterior

Colour can make the attached pergola recede into the elevation or read as a deliberate architectural accent. Repeating a window or door finish tends to unify the composition. A contrasting frame is useful when a stronger visual boundary around the patio is preferred.

Look beyond paintwork to the eaves, base course, paving and fixed balustrades. An excess of competing finishes can make a compact elevation appear busy. Take direction from durable building materials, not cushions and planting that may change with the season.

Whenever practical, hold a sample of the intended RAL finish beside the property in natural light. Render, masonry texture and reflective glass all change colour perception. Some shades reveal pollen, dust or water marks more readily, an important practical point on a busy patio.

Outlet of the integrated system

Provide a definite junction between the pergola's gutters and the drainage beyond them. Before fitting starts, identify the discharge location and a safe course for runoff clear of the property. Without this planning, uncontrolled discharge at an edge could leave standing water and splash marks.

A suitable existing downpipe, infiltration area or rainwater store may form part of the scheme if site conditions and competent detailing permit. Avoid makeshift junctions. Where the answer is uncertain, consult the patio contractor or an appropriately experienced specialist.

Resolve drainage before laying fresh paving or starting other ground works. Doing so lets pipes and junctions sit within the supporting layers, avoiding later channels or cuts across finished surfaces. On an established patio, confirm that the proposed discharge location is physically reachable.

Cleaning and regular visual checks

A house-side frame attracts pollen, leaves, dust and general debris. Inspect the gutters and discharge locations at sensible intervals, with added attention where trees overhang. Clear deposits before they restrict flow or become firmly attached to exposed finishes.

Clean aluminium with a mild method approved for its particular finish. Scouring agents and harsh chemicals may harm the coating. Consult the model's care information before treating a broad area and try any cleaning product on a discreet section first when advised.

Use cleaning time to look over seals, exposed anchors, the building junction and drainage passages. If anything has shifted or deteriorated, seek a competent assessment rather than hiding the change. Do not let furnishings or containers prevent entry to these locations.

Adaptable layout

The pergola will commonly outlast a particular furniture arrangement or household routine. Today's generous dining setting might eventually be replaced by lounge furniture or a compact table. Keeping useful margins and sensibly located passages allows that transition without altering the fixed structure.

Permanent cupboards, weighty troughs and fixed accessories reduce adaptability. Keep them outside discharge, service and principal walking zones. Storage on wheels and portable containers simplify both washing and future rearrangement.

Review the composition from inside adjoining rooms too. The supports and furnishings form part of that outlook in every season, including periods when nobody is outdoors. Balanced placement keeps views through to planting and prevents tall pieces from dominating a window.

Prepare installation sensibly

Check the existing site and prepare the work area

Confirm measurements, wall layers, base conditions, levels and the discharge location before work starts. Take portable furnishings and pots elsewhere, and maintain an unobstructed path between unloading and the patio. Shield vulnerable wall finishes and flooring in a manner appropriate to the work.

Check in advance for exposed services, lamps and rainwater pipes within the work zone, including anything that must remain reachable. Arrange household entry so occupants can avoid the fitting area. A designated lay-down space for parts, tools and wrapping also helps work proceed neatly.

Once fitting is complete, examine the building junction, support locations and intended drainage path. Wait until that check is finished before replacing all furniture. Important details then remain visible, and bulky pieces need to be moved only once.

Choosing between options

Comparing wall-mounted, freestanding and bioclimatic pergolas

Wall pergola

This version anchors to an appropriate exterior wall and defines the adjoining patio. Design decisions are closely tied to the wall construction, nearby openings and the available method of handling rainwater.

Freestanding pergola

This type relies on its own supports rather than the house and can establish a distinct garden seating zone. It requires independent decisions about siting and foundations, with no structural attachment at the building.

Bioclimatic pergola

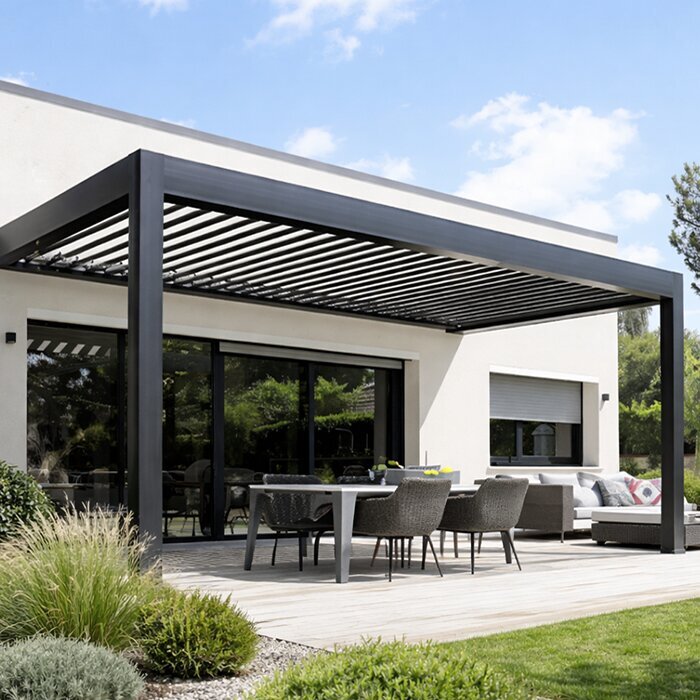
The term bioclimatic describes a pergola whose moveable roof provides adjustable control over airflow and daylight. Decide whether that capability serves the proposed activities. Consider the roof function separately from the choice between an attached structure and one standing independently.

Specific questions before choosing

FAQ – Bloomcabin Wall Pergola

How much space should I allow for dining or relaxing?

Set out the table or lounge accurately on a scaled drawing. Include occupied-chair clearance, walking lines, every door in its open position and access into the garden. Use that complete layout to select an area from the stated range.

Which door, window and shutter details need checking?

Relate the model's stated height to window tops, shutter housings, eaves, lighting and every other feature on the wall. After the pergola is fitted, all windows and doors must retain their complete range of movement and operation.

What care do the aluminium profiles require?

Lift away dust and residue using a mild cleaning method approved for the finish. Do not use harsh chemicals or abrasives, and consult the care instructions for the particular product.

Which checks are needed ahead of wall attachment?

Ask a competent specialist to assess the wall construction, secure anchoring area and correct attachment method. The review should also cover insulation, shutter housings, services, lighting and rainwater pipes.

What helps when choosing the RAL finish?

Take cues from long-term features: glazing frames, entrance doors, balustrades and the building's base course. Where practical, view the preferred finish in daylight beside both the wall and paving.

What is the best way to arrange drainage?

Before fitting, establish the junction between the internal gutter system and drainage at the property. Plan a controlled course that carries runoff clear of the house, and ensure the junction can still be reached whenever it needs inspection or cleaning.

Is installation possible on a patio that is already in place?

Feasibility is governed by the supporting layers below the proposed posts, together with gradient, changes of level, buried services and drainage. The presence of paving slabs or boards does not by itself confirm adequate structural support underneath.

What needs to stay reachable for maintenance and checks?

Maintain access to gutters, discharge locations, exposed attachments, the building junction and post bases. Keep bulky pots, storage units and weighty furniture far enough away to permit straightforward examination and care.

Complete your selection

Plan the Bloomcabin Wall Pergola to suit house and patio

Make the final decision after combining an assessment of the building's suitability with a practical plan for use. The chosen arrangement can then respond accurately to the conditions at that particular property.

Bloomcabin

Planning checklist

✓ Identify the main activity, then choose an area within the stated size range

✓ Verify the sound wall area, patio depth and support below each front post

✓ Set out the proposed footprint on the patio and physically check every door swing

✓ View the RAL shade beside the façade, glazing and patio surface

✓ Decide the discharge point and how runoff will continue clear of the house

✓ Provide clear fitting access and leave service points reachable

Close x
10 year warranty
Bloomcabin is proud of its high-quality products and maintains these standards every day through a range of manufacturing and quality control processes. This is backed by a 20-year warranty against wood rot in timber structures and a 10-year warranty against functional defects.
GET A 45% BETTER PRICE WHEN YOU BUY ONLINE
Shopping online is convenient and cost-effective
Ask us!
Get in touch
Email:
This email address is being protected from spambots. You need JavaScript enabled to view it.
Reg. No.:
38944924
Address:
Thriges Plads 6, 5000 Odense C, Denmark
Social media
Follow us on Instagram, Facebook and Twitter to find out about news and offers from Bloomcabin:
X
Have questions and want us to call you back?
+353
−
✖