
Can You Take Down and Reinstall an Aluminium Pergola?
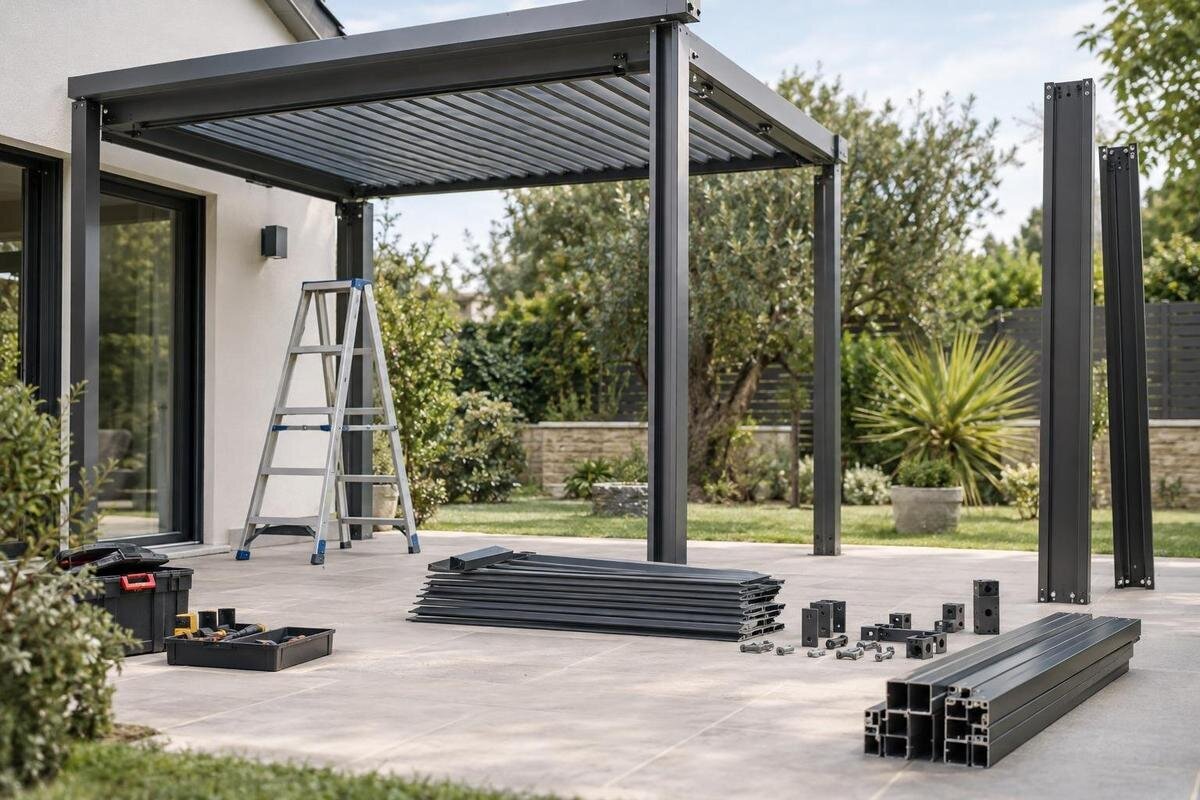
Pergola relocation
An aluminium pergola may be dismantled and installed again, but the answer depends on its exact model, condition, connections and destination. Being able to undo an assembly does not prove that its parts are suitable for a second installation. You also need to identify compatible fixings, check the new base or wall connection and plan safe handling. Start with the original instructions and a condition assessment; then decide whether reuse, repair or replacement is the sounder option. Have a qualified installer assess structural work and a qualified service professional deal with electrical components.

01
When a pergola can be moved
An aluminium pergola can be dismantled and installed again only if its particular design, joints and condition allow it. There is no safe general rule that a frame can be taken apart simply because it arrived in separate pieces, or that it will go back together in the same way after several seasons outdoors. Follow the instructions for the exact model: a different generation or an undocumented alteration may change what can be removed and what needs replacing. If the manual is missing, ask the original supplier or a qualified installer to identify the assembly before any fixings are disturbed. A similar-looking pergola in a photograph is not proof that the dismantling method is the same.
Separate the decision into three checks: can the unit be dismantled in line with its instructions; are the frame, moving parts and compatible fixings still usable; and can the destination support the intended arrangement? A positive answer to the first question does not settle the other two. Establish what you intend to move before comparing costs: the existing pergola in its original arrangement, a repaired version, or a replacement. If a new regular model is also an option, include the Bloomcabin Pergola in your comparison without assuming it matches the existing frame. Include lifting, transport, replacement parts and work at the new location when deciding whether relocation is worthwhile. Dismantling is only one stage of the project, so a quote for taking the structure down should not be treated as the total cost of moving it.
Find the exact model and installation documents
Start with the identity of the pergola, not a guess based on its appearance. Find the model name and, where available, the order or serial number, purchase date, invoice, assembly manual and technical drawing. Note whether the unit has been altered, repaired, extended or fitted with optional parts since installation. Photograph any labels and take clear overall pictures before dismantling. A record of the original orientation and attachment points can also help, particularly if the old layout needs to be recreated at another address. If a document is missing, request the exact version rather than relying on generic instructions for aluminium pergolas.
Keep model identification separate from parts compatibility. A current product page may confirm a product name, but it cannot establish the age or specification of an older unit. If your paperwork describes a bioclimatic model, the Bloomcabin Bioclimatic Pergola product page offers a starting point for identifying the name, rather than instructions for dismantling your unit. Ask the original supplier or manufacturer for the relevant instructions and parts information, giving the identifiers you have found. Explain whether you need guidance for removal, reassembly or both, and mention any alterations recorded in the first installation. Keep the response with your project records so the installer can work from the same documentation. Where more than one drawing or manual is supplied, note which version relates to your pergola; do not mix details from different versions simply because the illustrations look alike.
02
Identify how the pergola is supported
Record whether the pergola stands on its own supports or is attached to a building. Also note its roof type and any side or moving components, but only where these are present. This basic description helps you explain what is being moved and identify which connections need review. Do not assume that two pergolas with a similar outline share the same assembly, or that a freestanding layout can be changed to a wall-mounted one without a separate design assessment.
A wall-mounted model relies on a connection to a building, while a freestanding arrangement has its own support points. The old attachment position is not automatically suitable at the new site, even if the pergola itself appears unchanged. When comparing these arrangements, the Bloomcabin Wall-Mounted Pergola provides a wall-mounted product reference, not confirmation that your existing unit can be converted. Record the original arrangement and have the proposed one assessed before removal. A simple annotated photograph can show which supports stand on the base, which connections meet the building and where additional components are attached. Keep this record descriptive: it helps explain the existing layout but does not establish how much support any connection provides. If you want to change the arrangement during the move, make that clear at the outset so the installer is assessing the intended installation, not merely recreating the old one.
Assess the frame before dismantling
Before any parts are loosened, look over the accessible frame and take dated photographs. Note visibly bent or distorted members, cracks around connection areas, missing or damaged fasteners, worn finishes and any parts that no longer move as expected. If the pergola has roof components, seals, tracks or drainage parts, record their condition too. This is an inventory, not a structural diagnosis: a mark or change in appearance may need closer assessment, and a clean-looking surface does not prove that a component is sound.
Make a list of faults and previous repairs, and show it to the installer before work is scheduled. Do not force a sticking part, straighten a member or remove a connection simply to see what is behind it. If the frame moves unexpectedly, looks unstable or has a connection that is unclear, stop and ask a qualified professional to assess it. Finding a problem before removal is useful: it gives you a chance to decide whether repair, replacement parts or a different plan is needed before transport is arranged.

03
Reassess old fixings and foundations
A fixing that comes out cleanly is not automatically suitable for reuse. Its thread, shape and condition matter, and a fixing that has been outdoors or embedded in an old base may be difficult to assess by appearance alone. Record what was used and where it was fitted, if you have that information, but do not substitute a similar-looking item without checking compatibility. Removal can also affect the old surface or connection. Ask the installer how those areas should be assessed and made safe once the pergola is gone.
Treat the new base as a separate site question. Paving, decking, concrete and ground do not prove, by themselves, that the new location is suitable for the exact model. The installer needs to check the product instructions and the condition of the proposed surface before deciding what work is required. Distinguish the visible finish from the base being assessed: describing a location as a paved patio is not enough to settle the fixing question. Record what you know about the proposed base and identify anything that remains uncertain. If substantial changes are needed, compare that work as part of the relocation cost rather than as an incidental extra. The regular pergola product page is useful when considering a replacement alongside the move, but either option still needs a suitable base. Also clarify whether the estimate includes making good the old fixing positions, so that removal and new-site preparation are accounted for separately.
Measure and review the new site
Measure the intended position rather than relying on the dimensions or appearance of the old patio. Account for the full footprint and the space above it, including nearby doors, windows, eaves, boundaries, trees and other obstructions. Mark where the supports would sit and check that there is room to assemble the structure and reach it later for maintenance. Also consider how people and equipment will get to the site; a clear final position may still be awkward to access during delivery or installation.
Check the surface, levels, drainage and surroundings with the installer, and confirm that existing routes and openings remain usable. Where the pergola has drainage components, plan how they will work in the new position rather than assuming the old arrangement will suit. Record the proposed orientation on a sketch, including the support positions and nearby doors or windows. This gives everyone a common layout to discuss and helps distinguish a measurement from an assumption. If you are considering a different product type, compare the bioclimatic pergola option using its exact documentation for dimensions and clearances, not its name alone. Keep the proposed layout separate from the access plan: room for the completed pergola does not necessarily mean there is convenient space to bring in and handle its components. Do not commit to transport until the layout and site requirements have been reviewed, including any work that must be completed before the frame arrives.
04
Check a wall-mounted pergola's new connection
For a wall-mounted pergola, the destination wall and the proposed attachment point need their own assessment. A new wall may differ in construction, condition, openings and available fixing positions from the original one. Even on the same property, a different position can change what is behind the surface and how the connection can be made. Do not assume that the old brackets, holes or fixing pattern can simply be transferred because the pergola is the same width.
Ask a qualified installer to review the building connection against the exact product instructions and the proposed location. They can identify whether further professional input is needed before any drilling or other work begins. If you are also considering a replacement, the wall-mounted pergola product listing gives you a product to discuss, but the building assessment remains specific to the chosen model and position. Keep two separate records: one for the condition of the pergola and its connection components, and another for the destination wall and proposed attachment. A satisfactory frame assessment does not resolve a question about the wall, and a suitable wall does not establish that old brackets can be reused. Ask the installer to distinguish work on the building from work on the pergola in the estimate. This makes it easier to compare relocation with replacement without overlooking an unresolved attachment question.
Decide which components can be reused
Assess components individually rather than labelling the whole pergola reusable or unusable. Depending on the model, the frame, connectors, roof parts, seals, drainage pieces, tracks or controls may have different condition and compatibility questions. Mark each item as apparently sound, in need of professional assessment, or damaged or missing. Do not assume a component is reusable just because it looks intact, particularly where its role or connection is not obvious. The exact manual can help identify what each part is called and where it belongs.
Before ordering replacements, match the model and version to the part information. Parts that look similar, or come from a product with the same broad name, may not be interchangeable. Send the supplier the model details, relevant labels and clear photographs of both the full pergola and the part in question. Explain where the part belongs and whether it is damaged, missing or being considered for replacement during the move. For a missing item, use the relevant drawing or manual reference where available rather than guessing from a current product photograph. The Bloomcabin Bioclimatic Pergola listing can help identify the product name, but it is not a spare-parts catalogue. Keep each enquiry tied to your component list, and record the supplier's response against the correct item. Get compatibility confirmation before ordering, then check that all required replacements are accounted for before agreeing a date for reassembly.

05
Plan dismantling, transport and reassembly
Agree the work sequence with someone familiar with the exact model before dismantling begins. Follow the relevant manual, record the order and orientation of parts with photographs, and keep fasteners and small components labelled with their location. Plan how the frame will be supported and handled as connections are released; do not improvise a lifting method or remove parts in an order that is not understood. If the structure is attached to a building or any stage appears unstable, leave the work to a qualified installer.
Transport and storage need planning too. Protect surfaces from rubbing and keep components organised so that parts are not lost or mixed up. Choose a suitable place to store them if installation at the new site will not happen straight away, and check the inventory before the delivery vehicle or installer leaves. Agree who will pack, load, transport and receive the components, especially where different people are handling each stage. Keep labelled small parts with the corresponding inventory rather than leaving their identity to memory. Record any visible damage found on arrival and distinguish it from the condition noted before dismantling. Motors, controls, wiring or other electrical components, if fitted, should be inspected and serviced by an appropriately qualified professional. Arrange for the installer to check the parts and site before reassembly, rather than discovering a missing item once work is under way. If components are stored between removal and installation, keep the records accessible so the eventual installer can identify what has been retained and what still needs attention.
Compare relocation with repair or replacement
Ask for a clear estimate that separates dismantling, transport, storage, replacement parts, work on the new base or wall and reinstallation. Include any professional service needed for electrical components, as well as removal or disposal if the pergola cannot be reused. Compare the full scope of work rather than the dismantling cost alone. Before authorising changes, check the original paperwork for any relevant warranty terms and ask how a repair or relocation may affect them; do not assume that a warranty automatically continues unchanged.
Relocation is more promising when the exact instructions are available, the components can be confirmed as reusable or replaced, and the new site has been assessed. Repair may make sense if an issue is limited and compatible parts are available. If the model is unknown, the frame is significantly damaged or the new layout does not suit it, compare replacement as well. You can include the current Bloomcabin Pergola option in that comparison without assuming its footprint, fixings or parts match your existing pergola. Compare estimates for the same intended layout and completed work, so that one option is not cheaper simply because it leaves out transport, site preparation or reinstallation. Note which costs are confirmed and which depend on an unresolved condition or compatibility check. Base the decision on the specific unit and site, with a clear understanding of what each option includes before the existing frame is taken apart.
Frequently asked questions
Can I reuse the same bolts and anchors?
Do not assume so. Removal can damage or expose wear on a fixing, and the fixing may not suit the new base or wall. Have a qualified installer check the type and condition against the exact product instructions before reusing or replacing it.
Will the pergola fit the same space at a new address?
Not necessarily. Measure the full footprint and check the space above and around it, including doors, windows, boundaries and access routes. The new surface and attachment points also need assessment; a similar-looking space does not guarantee a suitable installation.
Can I dismantle the pergola myself?
Only consider it if the exact instructions cover dismantling and you can work safely. Do not improvise where the assembly is unclear, unstable or attached to a building. Arrange qualified help for structural work, heavy handling or any electrical components.
What information should I send when asking about spare parts?
Provide the model name and any order, serial or part numbers you can find, along with the manual or drawing if available. Clear photos of the whole pergola, labels and the part in question help identify it. Note any changes or repairs.
Does a matching product name mean the parts are compatible?
No. Similar names or appearances do not confirm that parts from different versions will fit or work together. Ask the manufacturer or supplier to check compatibility using the exact model details and part identification before ordering.
An aluminium pergola may be worth relocating when its components remain usable and the new location suits the intended installation. The useful comparison is the cost and scope of a completed move, not dismantling alone. Keep any unresolved questions about parts, fixings or the destination separate from confirmed work. Once those questions are settled, you can choose between relocation, repair and replacement without committing to removal before you know how the pergola will be installed again.
