
Can an Existing Patio Slab Be Used to Anchor a Pergola?
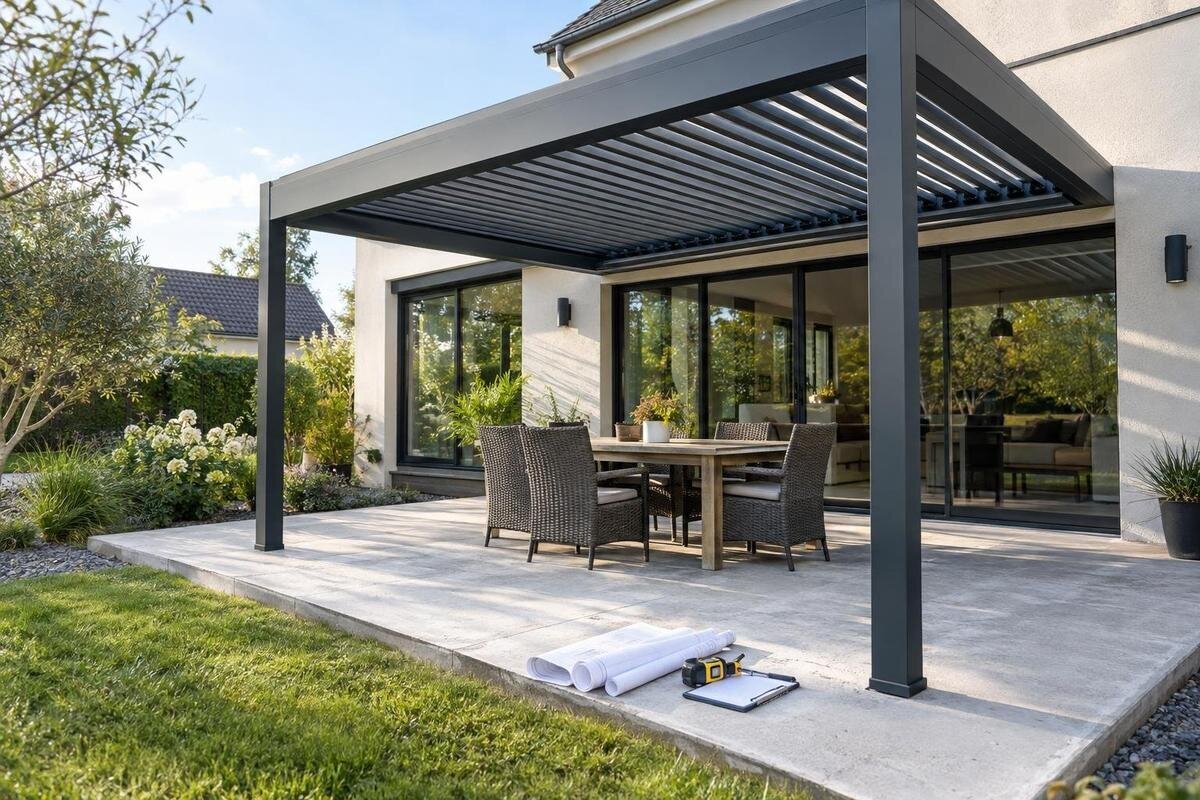
Pergola foundations
A patio that looks level and solid can still be unsuitable for pergola fixings. The surface may be individual paving flags over bedding, a thin topping, or a concrete slab whose depth, reinforcement and support are unknown. Whether it can anchor posts depends on the actual substrate and the anchoring detail approved for the chosen pergola, not on appearance alone. This guide explains what to identify, what should be assessed and what alternatives to consider before drilling.

A patio slab is not automatically a pergola foundation
An existing patio can sometimes support pergola posts, but a patio is a finished outdoor surface, not a structural specification. A fixing has to transfer forces from the post, through its base plate and anchors, into suitable material and ultimately into the ground or another structure designed to carry them. A surface that feels firm underfoot may sit on loose bedding, a thin topping or a cracked slab. Its age, level appearance and ability to support garden furniture do not show that it can resist the different forces acting on a pergola. A base plate can spread contact, but it cannot make weak or unsupported material into a foundation.
Wind can push and pull on the frame; the forces at each support depend on the pergola’s design, dimensions, roof arrangement, post positions and exposure at the site. Those factors have to be considered alongside the anchor pattern and the construction beneath each post. A slab laid only as a patio surface may not have been designed to perform as a foundation for fixed posts, even if it is sound for ordinary foot traffic. There is no universal thickness or visual test that makes every patio suitable. The Bloomcabin Pergola listing can identify a model to discuss, but the product name does not confirm that your patio will accept its fixings. Treat the slab as unverified until the exact layout, approved anchors and supporting construction have been assessed together.
Identify the patio’s construction
First establish whether the patio is a continuous concrete slab or separate paving units. Flags, porcelain pavers and block paving are often laid individually over bedding, so the joints between units are not anchor points in a concrete foundation. Even if a continuous layer lies below, its depth, condition and relationship to the paving need to be known. A concrete-looking finish could be a thin screed or topping rather than the main slab. Grout, mortar or a neat-looking joint does not make separate units act as one structural base. A change from the original paving to a later extension can also hide a change in construction beneath the surface.
Look for construction drawings, invoices or renovation notes, and ask who installed the patio and what was placed beneath it. An exposed edge or existing access point may help an assessor identify the build-up, but arrange an assessment and establish service routes before lifting paving or making exploratory holes. Note any later repairs, extensions or different paving materials, especially where a proposed post would land. If records are incomplete, say so rather than guessing. If you are considering the Bloomcabin Bioclimatic Pergola, include that model in your enquiry and request its applicable foundation and anchoring drawings. The assessor can then compare the patio construction with the requirements for the product you intend to buy.
Check slab thickness, condition and support
Thickness matters because a specified anchor needs to engage enough suitable concrete while leaving adequate material around and below its embedment. There is no single minimum slab depth for every pergola: the answer depends on the approved fixing, the concrete and its condition, the post layout and the supporting build-up. A measurement at one exposed edge may not represent a step, repair or raised section elsewhere. Do not infer depth from a loose paving flag, kerb, drain cover or visible finish. Ask the assessor to distinguish the structural slab from any screed or bedding, and to assess the actual post locations rather than relying on a convenient measurement taken elsewhere.
Condition needs the same scrutiny. Record visible cracks, spalling, crumbling corners, settlement, rocking paving, patched areas and places where water regularly sits. None of these signs by itself proves the slab is unusable, and a sound-looking surface does not rule out a hidden weakness; a qualified professional must interpret them in context. Consider the support beneath the slab as well: local settlement, a void or a separated layer can affect a fixing even when most of the patio looks intact. Provide clear photographs and mark the proposed post positions. If an anchor would fall beside a crack, repair or damaged edge, pause until the designer confirms whether the layout remains acceptable.
Set out post positions against edges and joints
Before judging edge clearance, plot the pergola’s exact post centres on the patio and compare them with the base plates and anchor holes in the approved drawing. The anchors need specified distances from one another, slab edges and corners, as well as from joints or openings; these clearances depend on the design and substrate and are not a rule to estimate by eye. A post that looks comfortably inside the patio can still put an anchor near a hidden edge, a narrow concrete strip or a joint between paving areas. Measure the actual slab boundary, not just the visible paving outline, and note where the surface changes level.
Include walls, steps, channels and changes in level in the set-out. An edge beside a wall may still be the slab edge, while a paving joint above a continuous slab may not be; construction evidence resolves the difference. Do not move one post slightly to avoid a crack or joint unless the revised geometry is approved for the whole frame. Shifting a leg can alter alignment and make the supplied anchor layout unusable. When considering the Bloomcabin Wall-Mounted Pergola, request the post layout for the exact configuration before marking holes. Compare it with the measured slab boundaries and check the working space needed to place and secure each base.

Locate reinforcement and buried services
Reinforcement, service pipes and electrical conduits may be hidden within or below concrete, and the surface will not tell you where they run. If a proposed anchor meets a bar, mesh or buried service, drilling can damage the patio, interrupt a service or compromise the intended fixing. Gather construction and utility plans where available, and have concealed items located by a competent person using suitable methods before fixing positions are finalised. A plan is useful evidence, but older alterations may not appear on it, so report any uncertainty rather than treating a blank drawing as proof that an area is clear. Keep a record of the locations identified during the assessment, and clear furniture or planters from the proposed post positions so they can be inspected.
Reinforcement is not, by itself, proof that the slab was designed for pergola loads, and a bar or mesh should not be cut or moved to suit a convenient bolt position. The anchoring designer needs to consider the reinforcement, concrete depth and proposed anchor geometry together. If they conflict, an approved alternative may involve a revised post position or a different foundation detail; it should be documented and checked against the pergola design. Locate drains, water pipes and cables before work, especially near walls, outlets and service covers. Leave the technical decision to a qualified structural professional or an installer working to the approved design, rather than adapting the hardware on site.
Use the approved anchoring detail for the chosen model
Once the substrate is identified, match it to the anchoring detail for the exact pergola model and configuration. The approved drawing should identify the post locations, base-plate arrangement and specified anchors, and state the required embedment and clearances for the relevant substrate. The design also has to account for the pergola and site conditions, not simply the diameter or length of a bolt. A general-purpose anchor chart or a fixing selected without reference to the approved detail cannot establish that the complete assembly is suitable. Ask for current drawings and installation instructions for the model and version being supplied, rather than relying on an illustration for a similar-looking structure.
Keep that detail with the site assessment and compare it with the actual slab before ordering fixings or booking drilling. If the drawing assumes a particular concrete condition, slab depth or reinforcement position, ask the assessor to confirm whether the patio meets it; an unknown is not a pass. For the listed Bloomcabin pergola model, make sure the fixing schedule and drawings refer to the version you intend to order. Pay attention to the substrate description: concrete, masonry and paving are not interchangeable in a fixing schedule. Any departure from the specified anchor type, count, position or installation method needs approval from the manufacturer or qualified designer before work proceeds.
A wall-mounted layout still needs a slab assessment
A wall-mounted arrangement does not remove the need to assess the patio; it changes the load path. The building connection and any ground-supported posts must be considered together. Where the chosen design includes posts on the patio, each base still needs a suitable substrate and approved anchors. Do not assume that the wall takes all the force, or that the patio carries none, simply because one side is attached to a building. The actual division of support depends on the product and its installation design. Construction can also vary along an elevation, so a sound-looking patch of wall is not enough evidence.
Check what the wall is made of and what lies behind its finish. Cladding, render or insulation is not automatically a structural fixing point, and the fixing detail must suit the actual supporting construction. The wall-side positions and patio post positions have to match the approved drawings; a doorway, service route or patio edge may constrain either. If the building has been altered or the wall’s construction is unknown, include that uncertainty in the site brief. Obtain a revised design rather than combining generic wall-mounted and freestanding instructions. If you are comparing options on the wall-mounted pergola page, request the support and fixing information for your chosen version so both the building connection and the patio bases can be assessed together.
Keep drainage and water protection in the plan
Water management belongs in the slab assessment because post bases and drilled openings are part of an outdoor surface that has to shed rain. Record the direction of falls, channels, gullies, downpipes and places where water ponds, and identify any waterproofing layer or concealed build-up. An anchor route through a protected layer may require a specific detail; a bead of sealant is not automatically an approved substitute. Likewise, do not place a base plate where it blocks a drain, hides a service cover or prevents access for cleaning and maintenance. If the patio already drains poorly, flag that before the pergola position is fixed.
When assessing a layout for the bioclimatic pergola listed here, compare the proposed post positions with the patio’s drainage and the model’s approved details. Keep outlets and service covers accessible, and ensure work does not divert water towards a building or leave an opening unprotected where the design calls for sealing. Ask how fixing locations and any required sealing are addressed in the technical instructions, and have the installer record agreed changes before work begins. If paving is cut or relaid around a post, agree the finished level and drainage route in advance. The reinstated surface needs to work with the fixing position; a neat cut cannot compensate for a poorly placed structural fixing.

Options if the slab is unsuitable
If an assessment finds the slab unsuitable, stop rather than adding extra bolts, larger anchors or a concrete collar without a design. Possible routes include moving the pergola to a verified part of the patio, rebuilding an area to a designed specification, or using separate engineered foundations that pass through the paving and bear on suitable ground. The right option depends on the site, the pergola and the existing construction. No single footing size or depth applies to every garden, and a new pad placed on top of a weak slab does not automatically bypass the problem. A small isolated repair may also fail to provide the intended support for the complete arrangement.
Plan any remedy as one coordinated job. A foundation through finished paving may involve cutting, removal and reinstatement; revised post positions can affect doors, paths, drainage and the usable space beneath the pergola. Confirm the design, finished levels, service locations and anchor detail before the paving is altered, and make sure the paving contractor and installer are working from the same set-out. If moving the posts, have the full frame geometry reviewed rather than treating each support independently. If you are also considering the model on Bloomcabin’s wall-mounted pergola page, include its drawings in the comparison of possible layouts. Assess the proposed wall connection and patio supports together rather than assuming that changing model type resolves the slab problem.
Gather the evidence before ordering or drilling
Put the evidence together before ordering or drilling: the exact pergola model and chosen layout, approved anchoring drawings, site assessment, and records establishing the slab’s depth, construction, condition, reinforcement and services. Mark and photograph slab edges, joints, cracks, repairs, drains and each proposed post location. Distinguish confirmed facts from assumptions, and record any areas that could not be inspected. This gives the supplier, installer and structural professional a shared basis for resolving conflicts between the drawings and the actual patio, rather than relying on verbal recollection on installation day. Include any change in the patio layers at an extension or repaired section.
Ask who is responsible for confirming the substrate and who can approve a change to the anchoring detail. If a critical feature cannot be verified, agree how it will be investigated before irreversible work begins. Keep the final drawings and written decisions with the installation record; a changed post position or different anchor is not a minor substitution unless the design says so. Check that the documents refer to the model and layout actually being installed. If your enquiry concerns the product on the Bloomcabin Bioclimatic Pergola page, identify the chosen configuration and include the patio assessment with your request. A useful confirmation should identify the layout and substrate assessed, not simply say that patio slabs are suitable in general.
Frequently asked questions
Can I bolt a pergola directly into paving flags?
Not on the strength of the flags alone. Individual paving units and their bedding are not automatically a suitable anchor base. The approved fixing needs to engage a suitable underlying slab or a separately designed foundation, so establish what is beneath each post position before work begins.
How thick does a concrete patio slab need to be?
There is no single thickness that suits every pergola and site. The required depth depends on the approved anchor detail, the concrete, the post layout and the slab’s support. Have the actual construction checked against the design rather than relying on a general rule or the visible surface.
Does a crack mean the patio cannot be used?
Not necessarily. A crack’s position and condition need to be interpreted alongside the slab and the proposed anchor layout. Photograph it and mark the nearest post position. Do not move a post to avoid it unless the revised layout is approved for the complete pergola.
Can an installer drill through reinforcement?
Do not assume that reinforcement can be cut or moved to suit a fixing. Locate reinforcement and buried services before finalising anchor positions. If there is a clash, ask the qualified designer to approve a revised position or foundation detail before drilling.
What if the slab is unsuitable?
Pause and consider a revised location, a designed reconstruction of part of the patio or separate engineered foundations through the paving. The right approach depends on the site and pergola design; adding anchors or placing a small pad on top of a weak slab is not an automatic remedy.
An existing patio is suitable for pergola anchoring only when the material beneath each post and its condition meet the approved design. The key checks are the patio build-up and depth, concrete condition, reinforcement and service locations, edge clearances and drainage, all compared with the model-specific anchor layout. If any of those remain unknown, do not treat the patio’s appearance as evidence that it can carry the posts. A site assessment and matching drawings can establish whether to use it, revise the layout or design another foundation.
