
Choosing a Position for Your Pergola Heater
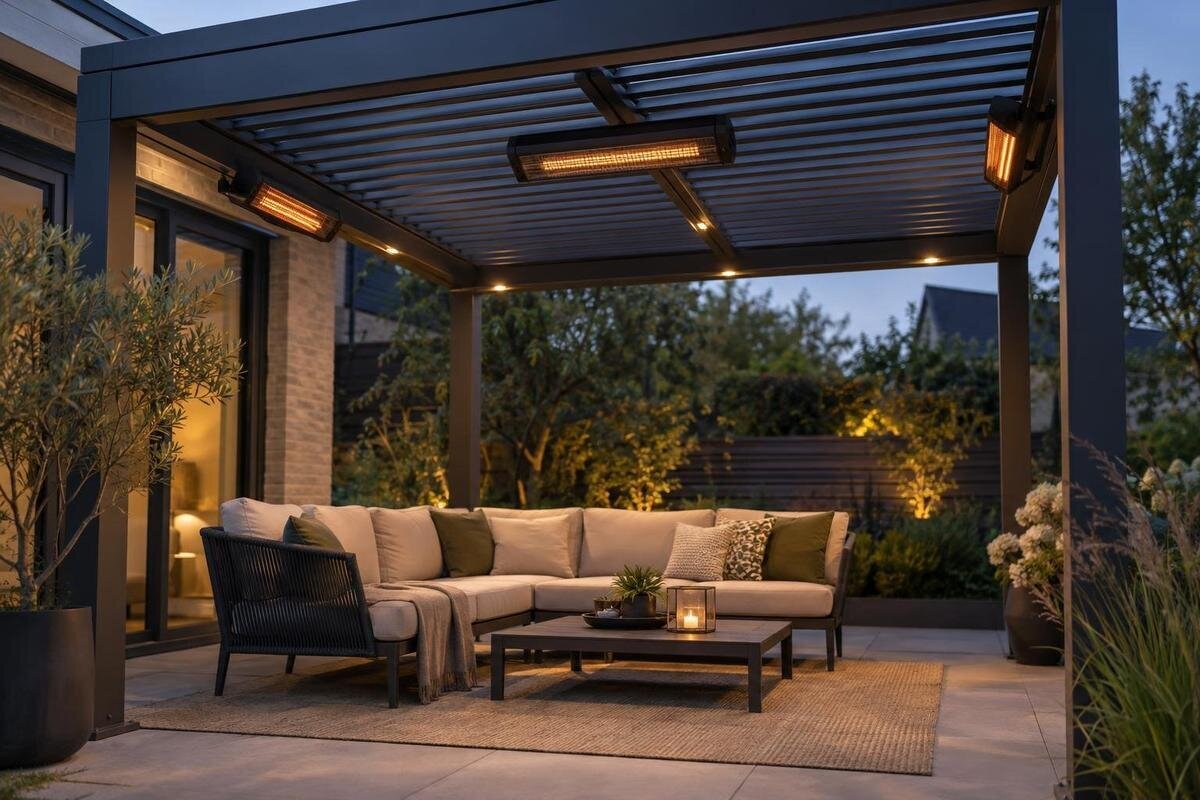
Pergola heating
Choose a pergola heater position around the seating layout: first decide which seats need warmth, then check the heater’s direction of heat, specified clearances and the exact frame’s approved mounting points. A spot that looks centred may still direct heat away from people, conflict with moving parts or lack an approved fixing point. Treat the seating plan as the start of the decision, not permission to fit the appliance.

Map the seating before choosing a mounting point
Draw the pergola as people actually use it, rather than placing a heater at the geometric centre. Mark the usual chairs, bench positions and dining seats, and note where occupants sit for most of the evening. Include the distance between people and the heater, which way each chair faces, and whether a table, planter or other fixed object sits between them. A heater may direct warmth towards one area rather than the whole space, so a symmetrical roof does not guarantee even comfort. Make the drawing with furniture in its normal arrangement, and add a second layout if chairs are regularly moved. Start with the seats that matter most; empty circulation space need not dictate the first position.
Also mark routes to the house and garden, door swings, and furniture that is moved regularly. This helps show where a heater might suit a settled dining group but interfere with people entering, leaving or rearranging the area. A simple plan is a useful comparison tool, not evidence that a frame member can carry an appliance. If you are considering the Bloomcabin Pergola, identify the model on the sketch so an enquiry about mounting points can be tied to the structure you intend to buy. Keep an alternative seating layout on the drawing: an approved fixing point elsewhere may make a different furniture arrangement worth considering.
Direct the heat towards the occupied seats
Read the heater instructions for its intended direction and permitted orientation before choosing a spot. For a directional radiant heater, where warmth is aimed matters more than whether the unit sits at the exact centre. On your drawing, mark the direction specified by the manufacturer and check which occupied seats it serves. Consider how people sit, not just the point on the floor directly below the proposed fitting: someone at the end of a table may be oriented differently from someone opposite. This check can reveal a position that directs warmth towards an empty part of the terrace or beyond the seating group. It is a way to compare layouts, not a substitute for the appliance’s stated coverage or performance information.
Check whether the instructions permit any change of angle and whether they specify a mounting height or orientation. Do not plan to tilt or turn a heater to compensate for a poor layout if the manual does not allow it. Note any obstruction in the intended direction and check the requirements around screens, roof members or other objects. If you are comparing the Bloomcabin Bioclimatic Pergola, include the proposed heater orientation in your mounting enquiry. That gives the supplier a clearer question than simply asking whether a heater can be fitted. Take forward only a position that suits the seats and can be checked against both sets of documentation.
Decide whether the seating needs one heat zone or several
Separate the layout into places where people sit at the same time. A dining table, a line of lounge chairs and a bench at the far end may form distinct groups, especially if occupants face different directions. A single position can look central on a plan yet leave one group outside the heater’s intended direction or bring another too close to the appliance. Note which group is the priority and whether the furniture can be arranged to bring people together. Do not assume that a more powerful unit or an additional heater will suit the space: output, spacing and permitted combinations depend on the specific equipment and its instructions.
If several groups need warmth, compare proposed heater positions with an alternative layout that gathers seats into one area. Record the intended direction and relevant distances for each proposed unit, then ask the supplier or installer to review the arrangement using the actual manuals. Do not assume that separate heaters can be placed together unless their instructions support the proposed combination. When considering a Bloomcabin Wall-Mounted Pergola, include the number of seating groups and proposed heaters in that review. It may be more useful to prioritise the group that uses the pergola longest than to try to serve every seat equally.
Use the heater manual to set clearance limits
Use the instructions for the exact heater and installation orientation to establish the required distances from the roof, sides, furnishings and other objects. Figures for one unit or mounting position cannot automatically be applied to another. Do not replace a stated clearance with a guess based on the pergola’s size or on how small the fitting looks. Put the required dimensions on your plan and include objects that might be added later, such as blinds, outdoor curtains, parasols, storage or seasonal decorations. Check the manual’s diagrams against the same orientation and type of mounting that is being proposed. If the specified space cannot be maintained at the preferred seat-facing point, ask whether the manufacturer permits an alternative arrangement before treating that location as viable.
Check more than the nearest edge of the roof. The instructions may set requirements above or around the heater, or in its operating direction; the exact details depend on the product. Account for chair backs, cushions, raised table edges and anything that can be moved into the area. Normal use should not routinely bring objects within a required clearance, and any extra space you allow must be in addition to the manufacturer’s minimum distances. For the Bloomcabin Bioclimatic Pergola model, record these dimensions alongside the proposed fixing point. This lets the reviewer assess the mounting location and surrounding space together, rather than treating them as separate questions.

Check the roof and screens throughout their movement
Check the proposed position against every roof or screen position the structure can take in normal operation. A louvre roof, sliding panel, retractable covering or side screen can occupy different space when open and closed, and may change the area around the heater. Compare the heater’s proposed position with the moving component’s full path using the documents for the specific pergola, not just a photograph showing one setting. If a bracket, heater or proposed cable route could meet a moving part, pause and request a model-specific review. Do not assume that leaving a roof in one position makes an otherwise unapproved installation acceptable. Include seasonal screens or blinds if they are part of the planned use.
Note the fixed features around the proposed location, including boundaries, gutters or wall-side details where they affect the layout. The person assessing the arrangement needs to know how the pergola will be used, not just how it looks in one moment. For a wall-mounted pergola model, show nearby doors and wall features alongside any moving roof or screen components. Ask for confirmation that the chosen heater and its orientation are compatible with the pergola’s normal operating positions. If the documents do not explain how a moving part interacts with the proposed heater, keep the location provisional rather than planning to restrict the roof or screen’s use.
Use only a mounting point approved for the exact frame
Do not select an attachment point solely because it looks straight, solid or conveniently placed above a seat. Use the pergola maker’s documentation or written confirmation to establish whether that exact frame section is approved for the particular heater and mounting method. Appearance does not establish suitability. Roof slats, decorative trims, covers and other frame pieces serve different purposes; their existing function does not make them suitable heater supports. Ask for information that identifies the pergola model, heater model, permitted location and mounting arrangement. If the answer is unclear, do not let a fitter improvise by drilling or adding a bracket at an unapproved point. Ask whether the approved arrangement requires a specific mounting component before planning around it.
Keep the approval with the project record rather than relying on a general statement that a pergola is sturdy or suitable for outdoor use. If the structure is bespoke, modified, fitted with accessories or different from the configuration being considered, ask whether that affects the approved points. Identify the exact Bloomcabin Pergola configuration in any enquiry so the response can relate to the frame actually planned; a product listing’s size range is not evidence of a heater fixing. If the proposed point is not approved, consider another documented point that also meets the heater’s clearances and orientation. The seating plan may need to adapt to the mounting approval, not the other way around.
Electrical supply and access to heater controls
Agree the provisional heater position with a qualified electrician before treating the layout as final. The supply and controls may affect which locations are practical, but a general article cannot determine the electrical arrangements for a particular installation. Give the electrician the exact heater instructions, pergola model information and a sketch showing the seats, clearances, proposed mounting point and moving parts. Ask them to assess the outdoor installation and the supply arrangements for the selected equipment. A position that suits the seating but cannot be served in the approved way is not a workable choice. Flag any proposed route that crosses a walkway or moving component for review rather than trying to resolve it on site.
Discuss where the user can reach the controls without leaning over the heater, blocking a route or reaching into a restricted area, while following the unit’s instructions. This is a practical part of the layout as well as an electrical consideration: the person operating the heater should be able to use its controls as designed. If the pergola has other powered features, show them on the same drawing so the electrician can consider the whole proposal. Include the Bioclimatic Pergola product page as a model reference alongside the equipment instructions. If the control method is not clear, ask how it affects the proposed position before the plan is finalised.
Match the heater’s outdoor rating to the actual exposure
Assess the exposure at the proposed mounting point: how open the sides are, whether wind can drive rain towards the fitting, and whether water can collect or run from an overhead feature nearby. A description of a heater as suitable for outdoor use does not, by itself, show that every position or orientation is permitted. Check the rating and installation conditions in the exact heater instructions, and have a qualified installer consider the site. Do not assume that a roof makes the space fully protected, or that a screen creates a permanently sheltered area. Conditions can vary across one pergola, so describe the proposed location rather than simply saying that the heater will be used outdoors.
Think about ordinary changes in the weather and how the area will be used through the year. A position near a boundary may be exposed differently when screens are raised, while a sheltered spot on a calm day may be more open at another time. Confirm that the heater instructions cover its intended operating conditions, including any stated limits on moisture or wind. If the wording is unclear, ask the manufacturer or installer. When considering the Bloomcabin Wall-Mounted Pergola listing, note the proposed heater’s location relative to the wall and open sides on your site sketch. This gives the installer a description of the actual exposure to assess.

Allow space for access and everyday terrace use
Review the proposed position from standing height as well as from the seats. Check that the heater and any supporting parts do not obstruct a door, a route between the house and garden, access to a chair or a place where people stand to serve food. The heater instructions govern its required clearances; the plan should also reflect how the terrace works when chairs are pulled out and people pass behind them. Pay attention to low projections and the space someone needs when standing up from a chair. If a location makes a normal route awkward, moving the table or considering another documented mounting point may be more practical than accepting a permanent obstacle.
Consider other overhead items and changes to the space, such as hanging lights, plants, a shade or an umbrella brought out in summer. These may conflict with a required clearance or the heater’s intended direction. Do not plan a future accessory near the heater without checking the relevant manufacturers’ instructions. If the terrace serves different purposes, sketch its main arrangements: everyday dining, a larger gathering and furniture put away. Comparing them on paper is not a substitute for technical clearances, but it helps avoid choosing a point that works only in an idealised layout. The position should make sense for the terrace’s ordinary use, not just for a single photograph or furniture arrangement.
Record the proposal before installation
Put the proposal into a short written brief before anyone proceeds. Include the pergola model and configuration, heater model, intended seats, direction of heat, permitted mounting orientation, required clearances, approved fixing point, outdoor exposure and control position. Add a plan or annotated photograph showing fixed and moving parts, doors and the furniture in its usual arrangement. Attach the current manuals, along with written manufacturer confirmation for any point not clearly covered in them. A drawing without the relevant documents remains a proposal; instructions for a different heater or pergola should not be treated as approval. This record helps the electrician, supplier and installer discuss the same location and identify any question that still needs an answer.
Use the brief to compare possible positions, not to force approval of a favourite one. If a location fails a clearance, lacks an approved frame point, conflicts with a moving roof or does not meet the site’s exposure conditions, remove it from consideration and review another documented option. Where no arrangement is confirmed, ask the pergola supplier, heater manufacturer and qualified installer which combinations are supported. The answer may involve changing the heater, seating layout or configuration rather than adding an unapproved bracket. A final position is one where the intended seats, heater instructions, pergola documentation and professional electrical review agree. Record any unresolved point as unresolved rather than assuming it will be settled during fitting.
Frequently asked questions
Should a pergola heater go in the centre?
Not necessarily. The centre of the roof may not line up with the seats or the heater’s intended direction. Map the occupied areas first, then compare the proposed position with the heater’s instructions, required clearances and the pergola’s approved fixing points.
Can I attach a heater to a pergola beam or roof slat?
Only if the documentation for the exact pergola and heater approves that point and mounting method. A part that looks solid is not proof that it is suitable for a heater. Do not drill or add a bracket at an unapproved location.
How high should a pergola heater be mounted?
There is no universal height that applies to every heater and pergola. Use the mounting height and clearances specified for the exact heater and orientation. If those requirements cannot be met at the proposed point, ask the manufacturer or a qualified installer to review another option.
Can I choose the heater position before the pergola is installed?
You can plan a provisional position from the seating layout, but confirm it against the exact pergola model, heater instructions and approved fixing points before installation. Include roof or screen movement and the electrical assessment in that final review.
What if the best position for the seats is not an approved fixing point?
Do not improvise a mounting point. Consider rearranging the seats or ask the pergola supplier, heater manufacturer and qualified installer to assess another documented location or configuration. The proposed position needs to meet the appliance instructions as well as the pergola’s mounting approval.
A suitable heater position is more than a point above a table. It must serve the seats people use, respect the appliance’s instructions, remain clear of moving parts and use a fixing point approved for the exact pergola. Planning those details together gives the supplier, electrician and installer a clear proposal to assess—and makes it easier to revise the layout before installation if one part does not fit.
