
Creating a Coherent Minimalist Garden with a Pergola
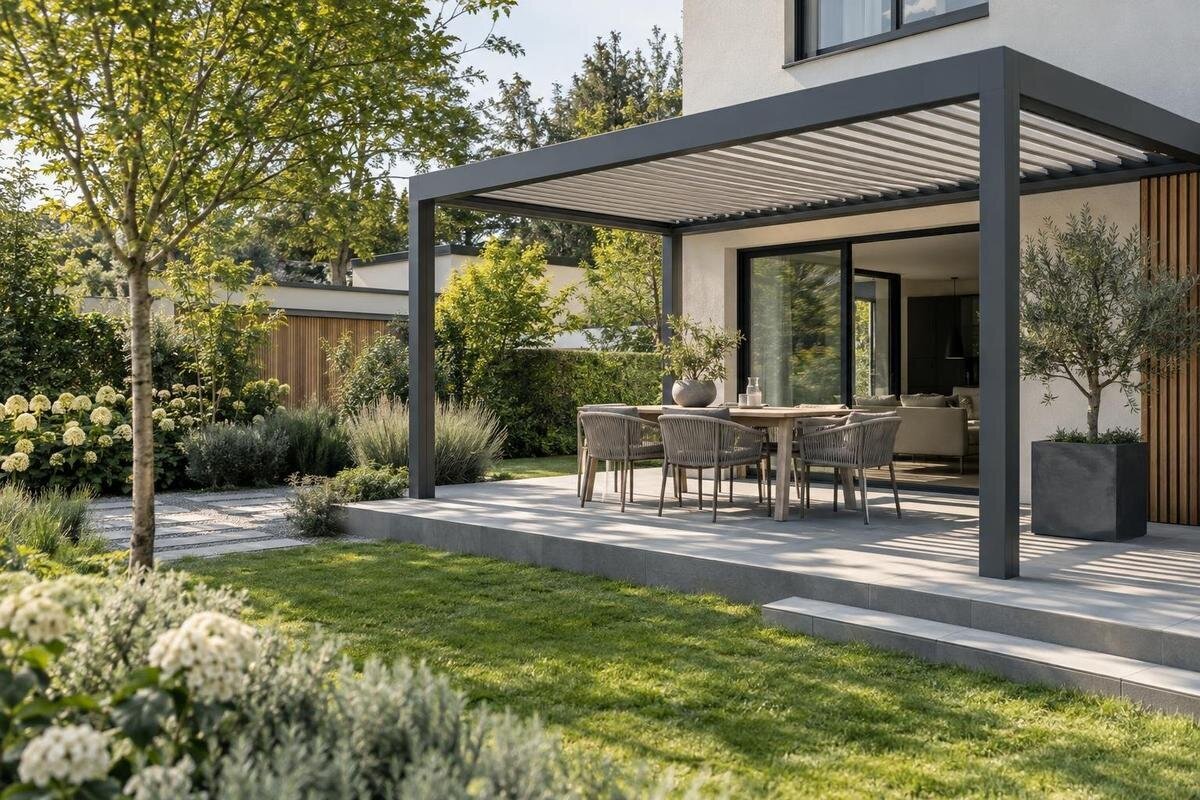
Pergolas in garden design
In a minimalist garden, a pergola should belong to the whole layout rather than look like a separate purchase placed on finished paving. Begin with one clear composition: the main view, the route through the garden and the area the structure is meant to frame. Then coordinate its footprint with paving lines, planting and boundaries. A limited palette helps, but the result depends just as much on measured proportions and well-resolved junctions.

Before choosing a pergola 1
The garden’s main view and layout
Choose the view that will organise the design: it may be from the kitchen, the garden entrance or the seating area. Mark the house, boundaries and existing trees or other fixed features, then draw the everyday route and the place where people will sit. This shows whether the pergola should frame a destination, sit beside the house or mark a transition between the patio and a planted area. Note what already draws the eye, such as an established tree, a change of level or a doorway. The structure should complement that focal point rather than create a second, unrelated centre. If the view matters from indoors, include what appears immediately beyond the window or doorway as well as the far end of the garden.
Give the garden a clear hierarchy instead of filling every part of the drawing. Let the pergola footprint, principal paved area, main planting bed and route carry the composition; quieter open ground helps these elements stand out. Choose one dominant direction or shape and let smaller elements follow it, allowing a purposeful offset where access requires one. Mark what should remain open for movement and what is intended as a place to pause. Minimalism does not mean removing all planting or furniture; it means each visible element has a role in use, movement or the view. Open space belongs in the design rather than automatically needing another feature.
Place the pergola on the measured plan
Measure the site from fixed points before choosing a position. Record the house wall, door and window openings, garden boundaries, changes in level and visible services such as drains or downpipes. Then draw the pergola’s full proposed footprint, not just a shaded rectangle, and show support positions only when they have been confirmed in a dimensioned drawing for the chosen model. This lets you see whether the structure leaves a useful route from the house to the rest of the garden and whether the paved area extends naturally into the planting. Plot a wall-mounted option against the house line to compare its position with the openings and patio edges. Keep the scale consistent across the drawing.
Compare a wall-mounted layout with a freestanding arrangement on the same measured plan. A wall-mounted design needs to be considered alongside openings and details of the building; a freestanding one should form part of the garden composition rather than look like an object pushed to one side. For either arrangement, mark routes, door access, boundary gates and any features that need ongoing access. If the site is awkward, do not resolve it by shifting the structure by eye: revise the dimensions on the drawing and check the new position from the main viewpoints. Compare how each arrangement divides the space between seating, planting and circulation, rather than letting product imagery dictate the layout.
Before choosing a pergola 2
Check scale against the house and garden
Judge scale from measured width, projection, height and support locations, not from the area figure or a photograph. The Bloomcabin Bioclimatic Pergola is listed with an area range of 9–24 m²; that range is not a fit test for a particular garden. For the exact size being considered, consult a dimensioned drawing or obtain the necessary dimensions, then place them on the site plan. Compare the outline with the house elevation, available paved space and remaining open area. Also note whether the supports land where the paving and routes can accommodate them. This makes it clearer whether the structure will feel proportionate or dominate the view.
Look at the proposed scale from both indoors and outdoors. A plan view shows the footprint, but an elevation or simple drawn view helps compare the top line with nearby openings, boundary features and the height of planting. Include the furniture you expect to use, drawn to scale, and mark the space needed to move around it. Avoid changing several dimensions at once: first test the location, then the footprint, then the relationship to seating and circulation. If one arrangement looks crowded on paper, simplify the surrounding layout before assuming another model will solve the whole composition. Check the view from the garden entrance as well as the house; a structure that feels balanced from one direction may interrupt another sightline.
Keep the material palette restrained
Choose a limited palette by giving each material a clear job. One main surface can carry the patio and its route; a second finish may mark an edge or threshold, while the house, pergola and planting contribute their existing tones and textures. Repeating a finish in more than one part of the garden can make separate areas feel related. The aim is not to make every surface identical, but to avoid introducing a new colour or texture for every feature. Before committing, compare physical samples outdoors against the house and planting, rather than selecting finishes from isolated catalogue images. A short list is more useful than an arbitrary rule about how many materials to use.
Keep a short record of the palette on the plan: name the proposed surface, boundary treatment and any accent, and note where each changes. When considering the Bloomcabin Pergola, rely on confirmed product details for its finish rather than assuming anything from the model name. Then check whether the other materials support it or compete with it. A restrained scheme can still have contrast; use it at a deliberate point such as a boundary or threshold instead of repeating accents in every planter, edge and item of furniture. Viewing the whole palette together can reveal a mismatch that separate samples do not.

Before choosing a pergola 3
Align paving lines with the pergola
Set out the paving pattern in relation to the pergola footprint before work begins. A joint line that meets a support neatly can look intentional, but only if the selected paving format and confirmed support positions allow it. Draw the perimeter, principal joint directions and any border on the same plan as the pergola. Where perfect alignment would create narrow cuts or awkward pieces, use a clear border or change the pattern at a deliberate boundary rather than forcing every joint to line up. The design is about an orderly relationship, not mathematical alignment at any cost. Keep the chosen paving pattern simple enough to continue beyond the pergola without an abrupt stop.
Give particular attention to where paving meets planting, lawn, a step or the house threshold. Decide which edge forms the main line and how corners, returns and transitions will be finished. Account for practical features within the paved area too: access covers and existing drainage features should be marked rather than overlooked in the new layout. Agree the set-out with the landscape or paving professional using final dimensions, and coordinate the sequence with the pergola installer. If supports are positioned after the paving grid is fixed, there may be little room to achieve the intended cuts or border detail. Keep any necessary changes of level in the drawing for the relevant professional to resolve; a visual sketch cannot establish how they should be built.
The house wall, doorways and thresholds
At the house, check every opening and threshold that shares the area. Draw door swings, steps and the route to the garden, then record downpipes, vents, drain covers and other fixed features that affect the composition or need ongoing access. A neat line on the plan is not useful if it leaves a door awkward to use or places a paving change where people naturally walk. Keep the transition between indoor floor, threshold and outdoor surface legible, and confirm any level change on site. This is where a small adjustment to the layout can prevent a visually tidy design from becoming inconvenient. Include how people carrying chairs or garden tools will pass through the same area.
If you are considering the Bloomcabin Wall-Mounted Pergola, include the proposed position on a measured drawing and have the building connection assessed by a suitably qualified professional. The product name does not establish that a particular wall, opening or threshold is suitable. If a wall-mounted layout does not work with the existing façade, compare a freestanding arrangement, allowing for its support positions and the route around them. In either case, keep services and maintenance access visible on the plan; do not let a desire for a seamless line remove practical access to parts of the house. Draw the relationship clearly enough that a designer and installer can review the same proposal.
Before choosing a pergola 4
Plan planting for its mature form
Planting gives a restrained garden depth, but it should be planned at mature size rather than as a row of small plants on installation day. Choose a limited group of forms and repeat them where the plan needs continuity; vary height or texture only where it helps mark an edge, soften a boundary or frame a view. For each proposed plant, record its mature width and height and its documented requirements for the site. This lets you set bed widths and spacing realistically, instead of filling leftover strips with plants that will quickly crowd the path or each other. Consider how much ongoing pruning or replacement the scheme requires, as well as its first-year appearance.
Plot the planting beds around the Bloomcabin bioclimatic model on the landscape plan, keeping access to the structure distinct from the space allocated to mature plants. Check where repeated plant groups frame the seating and where they might eventually obscure a route or view. A planting schedule should identify what is being planted and the requirements that inform its position; a sketch of green shapes is not enough for coordinated installation. Use the schedule to show how the planting groups relate to the bed edges and pergola supports. Seek suitable planting advice where site requirements are uncertain. Repeated groups can give the garden continuity without filling every available strip.
Boundaries, corners and edge details
Treat the garden boundary as part of the composition, not as a line left outside it. Existing fences, walls and changes of level can make a strong visual edge; decide whether the pergola should align with them, follow a deliberately different angle or draw the eye towards another feature. There is no universal rule that every line must run parallel. What matters is that a change in direction looks intentional on the plan and from the main viewing points. Show the relationship between the structure, boundary and paved edge, including any gap needed for access or maintenance, rather than relying on a perspective image to explain it. Mark gates and routes to sheds or other parts of the garden as well.
Repeat edge details consistently. If planting meets paving with a defined border in one part of the garden, avoid adding a different edging treatment elsewhere without a clear reason. Draw corners, returns and any change in surface so the installer can see how the design continues around the whole area. When plotting the Bloomcabin pergola model, examine the spaces between its supports, the paved perimeter and the boundary. These junctions should follow the same design approach as the more prominent patio edges. A dimensioned plan makes it easier to distinguish a deliberate offset from an accidental mismatch, and to spot small strips that would be hard to plant or maintain.

Before choosing a pergola 5
Furniture and clear routes
Plan the area for how it will actually be used before choosing decorative details. Draw the table, chairs or other main furniture at their real dimensions, then show where a chair moves and how people pass between the house, pergola and garden. The usable route may need to bend around the seating, but it should remain clear on the plan rather than becoming whatever space is left over. If several activities compete for the same footprint, decide which one matters most and give it priority. This avoids filling a compact composition with furniture that looks tidy in a photograph but is awkward to move around. Include space for carrying items in and out, so daily use does not depend on shifting everything first.
Test that furniture arrangement beneath the wall-mounted pergola as well as any alternative you are considering; the relationship to the house can change where routes and seating make sense. Keep loose accessories and planters to a small, deliberate group, and place storage where it will not break the main line of travel. If lighting or other services are part of the brief, mark their proposed locations on the drawing and have technical work assessed by qualified people. Do not leave them as late additions that cut across paving, planting or the intended uncluttered view. Consider these smaller elements together with the furniture, rather than treating each as a separate decorative purchase.
A coordinated landscape drawing
Before ordering or scheduling work, assemble a dimensioned landscape drawing that shows the site, selected pergola footprint, support locations, paving pattern, boundaries, thresholds, routes and proposed planting. Add elevations where they help explain height relationships, and include the documented planting requirements so positions can be reviewed against mature sizes. For your bioclimatic pergola selection, record the exact model and dimensions used in the drawing; do not substitute an illustrative image or a general area range. Share the plan with the relevant supplier, landscape designer and installer so any clash is found before details are fixed. A revision date and a note of unresolved questions help everyone work from the same version.
Review the plan from the key viewpoints and ask three practical questions: can people move through the garden naturally, do the main lines meet cleanly, and does every visible material or plant have a reason to be there? Separate visual decisions from unresolved technical matters. A restrained appearance cannot establish structural suitability, connection details, drainage or site-specific planting performance; those need reliable product information and, where appropriate, qualified assessment. A design consultation can help coordinate measurements, preferences and practical requirements. Record any resulting changes on the shared drawing so that the paving, planting and pergola proposals remain consistent rather than developing separately.
Frequently asked questions
How should I choose between a wall-mounted and a freestanding pergola?
Compare both arrangements on the same measured plan. A wall-mounted option needs to be assessed in relation to the house and proposed connection; a freestanding one needs a position that works with routes and boundaries. Have the building connection and site-specific requirements checked by a qualified professional rather than deciding from the style alone.
What should the garden plan show before I choose a pergola?
Include the house, boundaries, openings, fixed features and changes in level, along with the proposed pergola footprint and confirmed support positions. Add routes, paving lines, planting beds and furniture footprints. A dimensioned drawing makes it easier to spot clashes before the layout is fixed.
How can paving and pergola supports look coordinated?
Draw the paving pattern and confirmed support positions together before work begins. Decide whether joint lines should meet the supports or whether a border will make a cleaner transition. Agree the final set-out with the relevant landscape or paving professional.
How many materials should I use in a minimalist garden?
There is no fixed number. Give each material a clear role, repeat finishes where areas connect, and reserve contrast for deliberate points such as an edge or threshold. Compare samples together outdoors rather than choosing each finish in isolation.
How do I keep minimalist planting from looking bare?
Use a small group of plant forms and repeat them to give the layout continuity. Plan bed sizes around mature height, width and documented site requirements, rather than filling every gap with a different plant. Open space can remain part of the composition.
A coherent minimalist garden does not rely on the pergola alone to create its identity. It comes from a measured footprint, a clear route, repeated lines, a limited palette and planting that has room to mature. When the house threshold, paving edges, supports and boundary details are drawn together, the structure reads as part of the garden rather than an isolated feature. The calm appearance is the visible result of decisions made in the plan.
