
Designing Raised Planters Around a Pergola
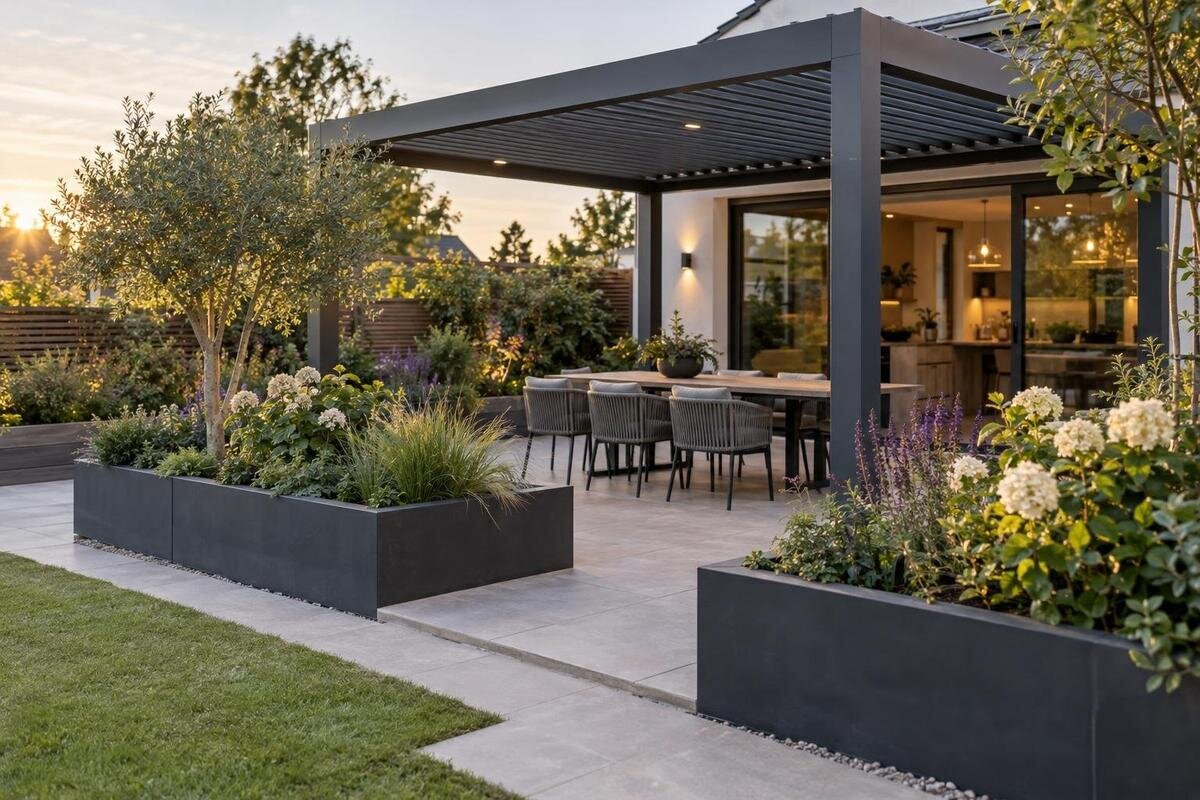
Pergola and garden planning
Raised planters can bring greenery close to pergola seating, but their footprint, root space and maintenance needs are separate from those of the frame. Draw the pergola, its posts and each planter on the same scaled plan, while keeping their dimensions distinct. Size the growing volume for the plants you intend to grow, then decide where excess water will go and how you will reach the paving and frame for routine care. This avoids a neat-looking border that leaves too little room for roots, chairs or cleaning once the garden is in use.

01
Draw the pergola and planter footprints separately
Begin with a measured site plan rather than placing boxes around a finished frame. Mark the pergola's outside dimensions, each post, nearby walls, paving edges, steps and existing drains or inspection covers. Add the route used to reach the pergola, not just its seating footprint. The Bloomcabin Pergola listing gives a stated area range of 9–24 m², but that is not a drawing of post positions or the clear space available for planters. Obtain the exact dimensions for the model being considered before setting out the garden.
Draw each planter's outside edge, including any projecting rim or cap, and show the internal planting area separately. A line representing only the soil surface hides the space taken by the walls and makes the finished layout look roomier than it is. Add furniture in its normal position and in use, door swings, gates, drain covers and access routes to the same scaled plan. Note the finished paving level and any planter edge that could narrow a route. This also shows whether a long bed can be reached from one side only, and whether the gap between outlines will admit a person with the cleaning tool intended for upkeep.
Keep planters separate from the pergola frame
A raised planter should not be treated as a footing, brace or casing for the pergola. Avoid enclosing a post or concealing its base and any area that needs inspection unless the supplier and installer have approved a specific detail. Keeping the two elements separate allows the planter dimensions to respond to root needs without changing the frame layout. On the drawing, distinguish the planter wall, the soil inside it and the gap beside the post: these are three different parts of the layout. Do not describe them all as a planting border, as that leaves their relationship unclear. This separation also means that future planting or soil work does not depend on moving, digging around or altering a structural part of the pergola.
For the Bloomcabin Wall-Mounted Pergola, plot the wall-facing part of the frame separately from the planter line and ask the supplier or installer to identify any areas that must stay accessible. Keep vents, downpipes, drains and relevant building junctions visible on the plan. A bed can sit near a wall or post only when the proposed gap works for the actual installation and ongoing access; appearance alone is not a reliable guide to that clearance.
02
Usable soil depth and growing volume
Size the growing space for the intended plants, using the planter's internal dimensions rather than its external measurements. Wall thickness and any space below the growing medium reduce the volume available to roots. For a rectangular planter, multiply internal length by internal width by the intended fill depth, using consistent units, to estimate the volume. Record the fill depth separately from the planter's overall height, and identify any part of the interior that will not contain growing medium. This makes it clear which measurements describe the container and which describe the space the plants can use. When considering the Bloomcabin Bioclimatic Pergola, keep these planting measurements separate from the frame dimensions; its stated area range does not indicate planter capacity, soil depth or root space.
Check the recommended root depth and growing volume for each plant from reliable horticultural guidance, then note those requirements in a planting schedule. Depth matters as well as total volume: a broad but shallow box may not suit a plant that needs deeper soil. Include the proposed number of plants alongside their requirements, so the schedule describes the whole bed rather than a single specimen. If a bed will contain several kinds of plant, allow for those that need the most room rather than choosing dimensions around the smallest ones. Where the proposed planting does not fit, reconsider the plant numbers or selection as well as the container size. Grouping plants with compatible root and watering needs can make the available space easier to use.
Choose plants and planter shapes together
Decide what the planter will contain before choosing its length and width. Record the number of plants, their expected mature spread and height, root habits, watering needs and pruning requirements. The small size of a plant at purchase does not show how much room it will need later. Check how the conditions in the intended position suit the chosen plants, including the light available beneath or beside the pergola, rather than assuming every spot alongside a frame offers the same growing conditions. Note which parts of the bed are beside the seating, along a path or near a doorway. Use those positions when reviewing mature plant size: the planting should fit its immediate surroundings as well as the container. This gives the planting schedule a clear relationship to the garden layout.
Planter shape affects how easily you can reach the plants as well as how much soil it holds. A long bed accessed from one side may be awkward to tend in the centre, while a bed with access on two sides can be arranged differently. Put the approach path on the drawing and check that you can reach the intended planting area without leaning across furniture or stepping into the bed. Show the proposed plant positions within that outline, not just a list of species beside it. This helps you judge whether plants needing regular attention can be reached from the available working side. Match planting density to horticultural advice so mature growth does not spill into the route or crowd the seating.

03
Plan where excess water will go
Decide where water leaving each planter will go before settling on its position. Keep any drainage outlet accessible and consider how excess water from rainfall and watering will disperse without collecting against a wall, post or walking surface. On paving, note existing falls and drains rather than assuming water will pass through the surface. On a soil area, consider the ground and the place where water can disperse. If the site is heavily paved or the route is uncertain, ask a landscape or drainage professional to assess it.
When comparing the Bloomcabin Bioclimatic Pergola model, plot the frame using information for that specific model and design the planter's drainage route separately. Choose a planter system with a clear drainage arrangement and follow its guidance; do not block its outlets with the surrounding surface or planting. Trace the proposed water route from the planter outlet to the dispersal or collection point on the drawing. Identify where it passes near a threshold, seating area or path, rather than marking only the outlet itself. Keep water away from places where people sit or walk, and make sure the route remains accessible for maintenance. This also gives anyone assessing the drainage a clear layout to work from.
Leave room for cleaning and inspection
Mark the working gaps needed to sweep leaves, clean the paving and reach the parts of the frame that need routine inspection. A gap that admits a hand may not be wide enough for the brush or other tool you intend to use. There is no universal clearance that suits every layout, so base it on the selected pergola's guidance and the actual care tasks. For a wall-mounted pergola option, include the wall-side area and nearby building details in the plan; do not let a planter hide a downpipe, vent, drain or area that needs access.
Walk through the maintenance routine before fixing the planter positions. Can you water every plant, remove dead material and tend the bed without climbing over the edge or shifting furniture? Consider where a hose or watering can will pass and whether you can clear debris between the planter and frame. Access from one side may be enough for some arrangements but not others, especially where plants need regular attention. Keep the intended working gap visible on the final plan so it does not gradually become storage or extra planting space.
04
Keep seating and garden routes clear
Show chairs, tables and the route between the house and garden on the plan, allowing for furniture in use rather than only when it is pushed in. A chair needs room to move back, and a door or gate needs its opening space. Check whether planter corners narrow the route or create an awkward turn around the seating area. Instead of relying on a generic clearance figure, compare the drawing with how people will actually move through the space, carrying food, tools or other items.
A path for people and access for tending plants are related but not identical. A narrow route may be usable for walking yet difficult for carrying compost or reaching a bed with a watering can. Mark the approach to each planter and identify which side is intended for routine care. Temporary markers on the ground can help you test the outlines with furniture in place before committing to a fixed bed. If the route feels obstructed during that test, adjust the planter position or length rather than relying on a gap that only works on paper.
Check the surface beneath each planter
Record the planter's full external size and the shape of its base, then compare it with the surface beneath it. A filled planter is much heavier than an empty one, particularly when the growing medium is wet. If it will sit on a raised deck, balcony or other structure, ask a qualified professional to check that the surface can support the proposed load. The regular pergola model and its stated area range do not establish the capacity of a deck or the suitability of a planter position.
At ground level, check the finished surface and nearby edges before choosing between a freestanding container and a built-in bed. A planter should not conceal a drain or inspection cover, block access needed for paving repairs, or create an awkward change at a doorway. A planter set on a hard surface needs a drainage arrangement that works with that surface; for a bed placed over soil, the ground beneath it needs to be considered separately. Record which arrangement you intend rather than leaving the base detail undecided. Note any uneven areas or existing water routes and have uncertain site conditions assessed before finalising a permanent position. Where the planter meets the edge of paving, show both outlines clearly so the person assessing the site can see the proposed relationship between the bed, the finished surface and the adjoining ground.

05
Coordinate the pergola and planting work
Share the site plan between the people specifying the pergola and the people planning the planting before work begins. The frame layout, planter dimensions and drainage route need to fit together, but each has its own requirements. If you are considering the Bioclimatic Pergola listing, ask the supplier for the information needed to position that exact model and discuss access with the installer. Give the person designing the planting the same plan, including the intended soil depth and the actual space available inside each planter. Discuss the order of work as well: identify which positions are agreed, which details remain open and what access is needed while each part is completed. A proposed bed should be clearly distinguished from one whose dimensions have been settled, so nobody works from an outline that is still being revised.
Think about future work as well as the first planting. Decide how you will reach the bed to replace a plant, renew growing medium or clear a drainage outlet, and whether tools or materials can be brought to it without crossing the seating area. A permanent enclosure can make later changes difficult if its dimensions or access have not been settled. If a planter is described as modular or movable, do not assume it can be shifted once filled; confirm how it is intended to be used and plan the maintenance route before choosing its position.
Put the key dimensions on one drawing
The final drawing should show the pergola's outside dimensions and posts, each planter's outside and internal dimensions, its intended fill depth and the clear routes around it. Add furniture, door openings, existing drains and covers, the proposed water route and any space reserved for cleaning or inspection. Label dimensions so it is clear whether they refer to an outside edge, an internal planting space or a gap between elements. Include a planting schedule with the plants' documented requirements, so the internal volume is linked to a real plan rather than a general idea of greenery. Keep the drawing and schedule together when revising the layout: changing a planter's width or length should prompt a review of the planting it is intended to hold. Showing these items together makes conflicts between roots, movement and upkeep easier to spot.
Use the Bloomcabin Pergola product page to identify the frame model under consideration, then obtain the relevant dimensions and access information from the supplier or installer. Keep the planting requirements and drainage decisions on the same site plan, but confirm them with the appropriate horticultural or landscape professional. If the two sets of needs do not fit, revise the planter footprint, planting list or layout before ordering. A single clear drawing gives everyone involved the same reference for the frame, growing space and practical access.
Frequently asked questions
How much clearance should I leave around a pergola post?
There is no single clearance that suits every frame and planter layout. Use the dimensions and access guidance for the selected pergola, then allow enough room for the cleaning and inspection tasks you need to carry out. Measure from the planter's outside edge, not from the soil surface.
How deep should a raised planter be?
Choose a usable soil depth to suit the root requirements of the plants you intend to grow. Check reliable horticultural guidance for those species and account for the planter's internal dimensions and any space that will not contain growing medium. A planter's overall height is not the same as its root depth.
Can I build a planter around a pergola post?
Do not assume that a planter can serve as a base or surround a post. It may conceal areas that need to remain accessible, so keep the frame and planter separate unless the pergola supplier and installer approve a specific arrangement.
Where should water from a planter drain?
Plan for it to reach a suitable dispersal or collection point without pooling on a path or against a wall or post. On a paved site, check the existing falls and drains before choosing the planter position. Ask a landscape or drainage professional if the route is unclear.
Can I place a filled planter on a deck?
A filled planter can weigh substantially more than an empty one, particularly when its growing medium is wet. Have a qualified professional check that a raised deck or other structure can support the proposed load; do not judge this from the planter's empty weight.
A well-planned planter feels integrated because its plants have room to grow and its edges do not make ordinary tasks awkward. That comes from treating the pergola footprint, root zone, water route and working clearances as separate parts of one design. If they compete for space, adjust the bed or planting plan before construction rather than hiding a post or blocking a route. The result is greenery around the seating that remains practical to water, tend and clean.
