
How to Diagnose an Overflowing Pergola Gutter
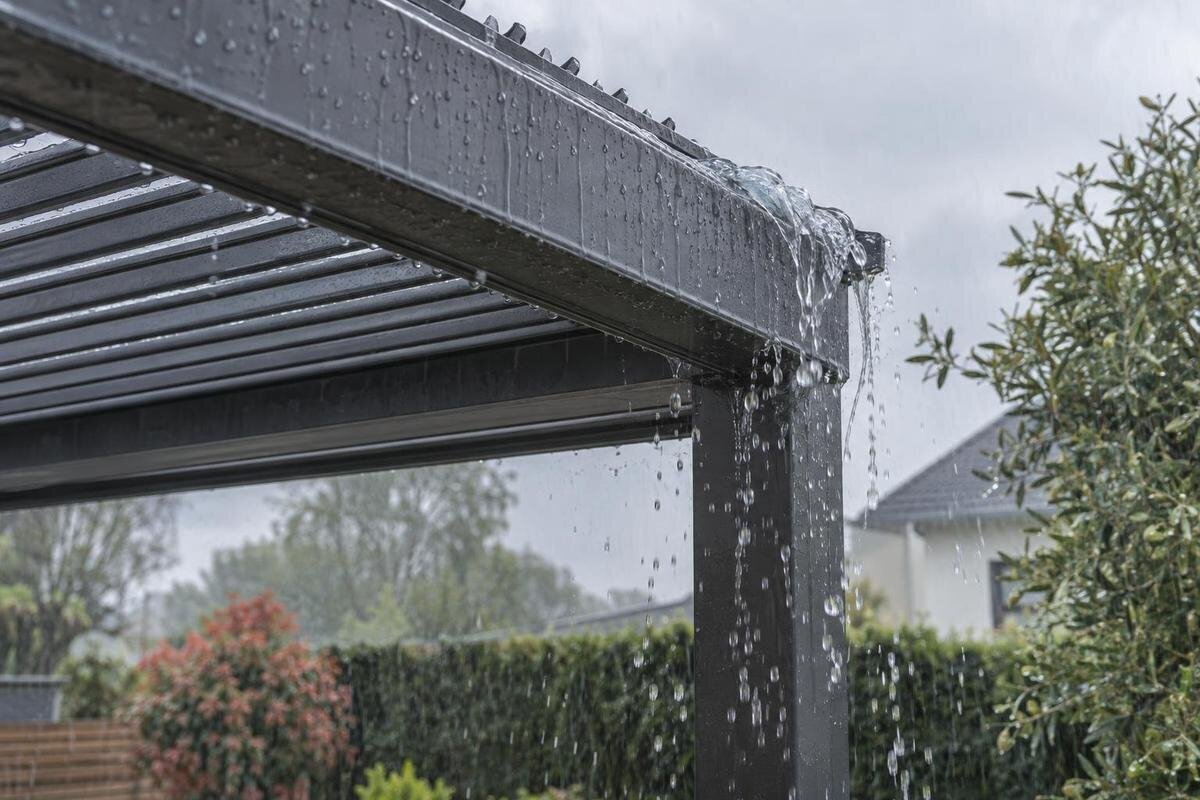
Pergola drainage
When a pergola gutter overflows, the visible spill is a symptom rather than a diagnosis. Leaves or other debris may obstruct the route, an outlet or downpipe may be restricted, a connection may have shifted, or the particular arrangement may be struggling under the conditions observed. Follow the water from the roof to its discharge point and identify where it first leaves its intended path. That helps distinguish a local blockage from a downstream or model-specific issue without assuming that every pergola has the same gutter layout or rain capacity.

Find the first point where water escapes
Watch the pergola from a safe position during rain and identify the first place water leaves its intended route. Water spilling over a visible gutter edge is different from water appearing at a joint, an outlet connection or the bottom of a downpipe, where one is fitted. Runoff may also splash from the roof edge rather than come from a gutter that has filled. These patterns can look alike from a distance, so do not name the fault from a wet patch alone. Focus on where the flow first departs from the drainage path.
Note which side or corner is affected, whether the spill is continuous or comes in bursts, and where it travels afterwards. A puddle beside a post, a wet stripe on a wall or damp paving is useful evidence, but it does not necessarily identify the source: water can run along a frame before falling elsewhere. Distinguish water emerging from the gutter itself from water arriving from above or blowing across an exposed edge. If you cannot see the route safely, record where the wet area begins and leave the components alone. The first escape point is more informative than the largest puddle.
Record the rain and roof conditions
Before attempting any check, write down when the spill starts, whether rain is steady or arriving in a brief heavy burst, whether wind is pushing it from one side, and how long rain has fallen. Note the roof position if it can be adjusted, following the product instructions, and record any recent repair, alteration or installation work. A note such as 'overflowed in heavy rain' is difficult to compare with later observations. 'The west corner spilled after several minutes during a steady shower, with the roof in the recorded position' gives an installer more useful context without pretending to measure the pergola's capacity.
Take a photo or video from a stable place at ground level; include enough of the frame to show where the flow starts and where it goes. Do not climb a ladder, walk on the roof or remove covers in wet or windy weather. Avoid reaching into channels, near moving roof parts or into a wet electrical area. If anything is loose, visibly distorted or close to electrics, keep clear and arrange an assessment by an appropriate qualified professional. The aim is to observe the fault, not to reproduce it by taking risks or dismantling the system.
Trace the drainage route for the exact model
Follow the route from the roof surface towards the outlet, rather than assuming that the most obvious edge is the only collection point. Depending on the design, water may be guided by a visible gutter or by channels that are not obvious from outside. Check the product instructions or drainage diagram to identify the intended collection edges, outlet positions and any downpipe or discharge connection. Do not remove a cover or reach into a channel just to confirm what is inside. If the diagram is unclear, mark the parts you can identify and ask the installer to explain the rest.
Match the paperwork to the pergola actually installed, including any configuration details or later changes. If the pergola is a Bloomcabin model, the Bloomcabin Pergola range can help you match its name; use the installation documents to confirm the exact drainage route and configuration. A product name alone is not a drainage diagram, and layouts should not be assumed to match across different models. This first map matters because a blockage in a hidden channel can look like a fault in the visible gutter, while a clear channel cannot rule out a restriction further along the route.
Look for a visible obstruction in the gutter
Once you know where water is meant to travel, look for material that could be narrowing or damming that route. Leaves, twigs or compacted debris may collect at a corner, near an outlet or along an accessible section. One obstructed point can be more relevant than a light scattering elsewhere, so note exactly where material is visible and whether it sits across the flow path. This is fault-finding, not a seasonal cleaning schedule: the question is whether an obstruction is present at the location where water backs up or escapes during this event.
Only remove loose material if the area is safely accessible and the product instructions permit access. Do not climb in wet conditions, force a rod through a hidden channel, remove an unfamiliar cover or use a pressure washer or drain chemical unless the manufacturer specifically allows it. Those approaches can push debris further in or affect components, and they may conceal the original cause. For a Bloomcabin Bioclimatic Pergola, check which channels the exact model's instructions allow you to access. Record where any material was removed, rather than describing the whole system as cleared when you have only reached one section. If the obstruction is out of reach, arrange an inspection rather than improvising.

Check the outlet and downpipe separately
A gutter can look clear along its length while water is restricted at the outlet or in a downpipe. From the ground, look for visible debris at the opening, a disconnected joint, a dented section or an obvious obstruction where a pipe begins. Make a note of whether water is escaping before it reaches the outlet or backing up around it. A visible opening does not prove that the whole pipe is clear; part of the route may be hidden or may continue into a separate drain.
During ordinary rain, observe a visible discharge point from a safe place, if the route can be followed without entering a wet or restricted area. No visible flow at ground level is not conclusive if the pipe connects to a concealed drain or another outlet. Do not pour water into the gutter or direct a hose at it to force a test; that does not reliably reproduce rainfall and may add more water than the system can handle in that moment. For a Bloomcabin Wall-Mounted Pergola, confirm the designed outlet route from its documents rather than infer it from the wall position. Note whether you can actually see the discharge or only the pipe leading towards it.
Follow the water beyond the pergola
Trace the route as far as it can be followed safely after water leaves the pergola. The discharge may end at the ground, connect to a site drain or feed another part of the property's rainwater system. Look for signs that water is backing up at a connection, escaping from a joint or collecting where it should not. If the gutter itself is not overflowing but water appears around a downstream connection, the source may be beyond the pergola. A wet patch under the frame can be where water ends up, not where the restriction begins.
Do not assume that a pipe has cleared simply because its visible upper section looks open. If the route disappears below ground or joins a separate drainage system, use site records to identify it and have a qualified drainage professional assess it if the problem persists. Avoid opening an unfamiliar inspection point or altering a pipe to see whether the symptom changes. For an existing Bloomcabin installation, the Bloomcabin Pergola listing may help identify the product family; it cannot show whether a separate drain at the property is backing up.
Separate a restriction from a drainage limit
If you find no visible blockage, consider whether the overflow occurs only in particular conditions. Rainfall intensity and duration, wind direction, roof position and the exact configuration can all affect what you observe. A short, intense shower may produce a different symptom from steady rain, but that alone does not prove that the system has reached a design limit. Nor does overflow in severe weather establish that the drainage route is clear. Treat the conditions as evidence to compare, not as a diagnosis by themselves.
Check the weather and drainage guidance for the exact model and configuration before drawing conclusions. Do not apply a capacity figure or storm threshold from another pergola, and do not assume that a particular roof position is suitable in every condition. For a Bloomcabin bioclimatic pergola model, make sure the guidance applies to the installed configuration, including any later changes. Describe the conditions you observed separately from your interpretation: a spill during a heavy shower is an observation, while a drainage limit is a possible explanation. If overflow occurs repeatedly in ordinary conditions and the route appears clear, ask the installer or manufacturer to assess the system rather than attempting to enlarge or alter the drainage yourself.
Look for movement, damage or an altered connection
Inspect visible parts from the ground for a gap at a joint, a loose-looking connection, a crack or a section that appears bent or displaced. Compare with earlier photos if available, especially if the symptom began after building work, an impact or a period of severe weather. These signs can point to a change in the route, but they do not reveal why it happened or whether another component is affected. Water remaining in a section after rain is not, by itself, proof that the gutter is misaligned; check the instructions before treating it as a fault.
Where the pergola meets a building, distinguish water escaping from the gutter from water appearing at the wall or another junction. The visible wet area may be downstream of the first escape point, so record both locations and show their relationship in a wider photo where possible. Do not tighten parts, apply sealant, alter brackets or adjust the roof to test a theory. For a wall-mounted Bloomcabin pergola, the site-specific installation record and an inspection are needed to assess whether a connection has shifted. Explain what appears different from earlier photos, if you have them, without assuming that the nearest wet joint is the source.

Compare observations without forcing a water test
If the cause is not clear, compare what happens during ordinary rain rather than trying to create an artificial test. Record the first escape point, the time rain began, the roof position and whether the same section overflows again. If a visible obstruction has been removed safely in line with the instructions, note whether the next observation changes; do not assume that one dry interval proves the problem is resolved. Avoid drawing conclusions from a single isolated puddle when wind or runoff may have carried water from another part of the pergola.
A short log and a video taken from the same safe position can make patterns easier to discuss with an installer. Include a wide view of the water route as well as a closer view of the outlet, if both are visible without climbing. Keep each recording with its corresponding notes, so the assessor can compare the same corner or connection across separate showers. Label the record with the exact model name; the bioclimatic pergola product page can help identify the named model. Note any work already carried out and which visible sections were checked, so a change in the symptom is not confused with a change in the installation.
Decide what to report and who should inspect it
A visible obstruction in a safely accessible area may be dealt with according to the product instructions. A hidden blockage, recurring overflow, damaged-looking connection or uncertain roof channel needs assessment by the installer or manufacturer. If the evidence points to a separate concealed pipe or site drain, a qualified drainage professional is better placed to examine that part of the route. Keep clear of loose or visibly damaged components, and do not drill, seal or redirect water as a trial. The useful next step depends on where the first escape occurs, not simply on how large the puddle becomes.
When reporting an issue with a Bloomcabin Pergola installation, provide the model name, installation details if available, photos or video, the first escape point, the observed rain and roof position, and the route the water takes afterwards. Explain whether the problem has happened more than once and what, if anything, was changed. Identify any part of the route you could not see, rather than treating it as clear. Ask which drainage diagram applies, which parts are intended to be accessed, and whether the visible symptom is coming from the pergola or a downstream connection. This gives the assessor a clear account of what you observed and what still needs examination.
Frequently asked questions
Should I clean the whole gutter first?
Not as the first diagnostic step. Record where water escapes and trace its route to the outlet: visible debris, a restricted downpipe and overflow under particular conditions may need different responses. Remove material only if it is safely accessible and the product instructions allow it.
How can I tell whether the downpipe is blocked?
Water backing up near an outlet can suggest a restriction, but it is not proof. Check visible sections and connections from the ground, and follow the route to its discharge point where you can do so safely. A concealed pipe may need assessment by a drainage professional.
Can I test the pergola gutter with a garden hose?
Do not use a hose or pour in buckets unless the product instructions or a qualified professional specifically recommend that test. It may introduce water differently from rainfall and can make the problem worse. Observe the system during ordinary rain instead.
Does overflow mean the pergola has reached its drainage limit?
Not necessarily. Debris, a restricted outlet, a downstream blockage or a shifted connection can cause a similar symptom. If the route looks clear, compare the observed rain and roof position with guidance for the exact model; there is no universal rainfall threshold for every pergola.
When should I ask a professional to inspect it?
Ask for help if the obstruction is hidden or inaccessible, overflow keeps returning, a connection looks damaged, or water is affecting a wall or electrical area. The installer or manufacturer can advise on the pergola system; a drainage professional can assess a separate or concealed pipe.
A useful diagnosis is more specific than 'the pergola gutter overflows'. It identifies the first point where water leaves its route, whether a restriction is visible, what happens at the outlet and discharge, and the rain and roof conditions at the time. That evidence helps separate an accessible obstruction from a concealed blockage, a shifted connection or a question about the exact system's documented limits. When the cause is not visible or the overflow returns, a model-specific inspection is safer and more reliable than changing the drainage by guesswork.
