
Planning a Garden Courtyard Around a Pergola
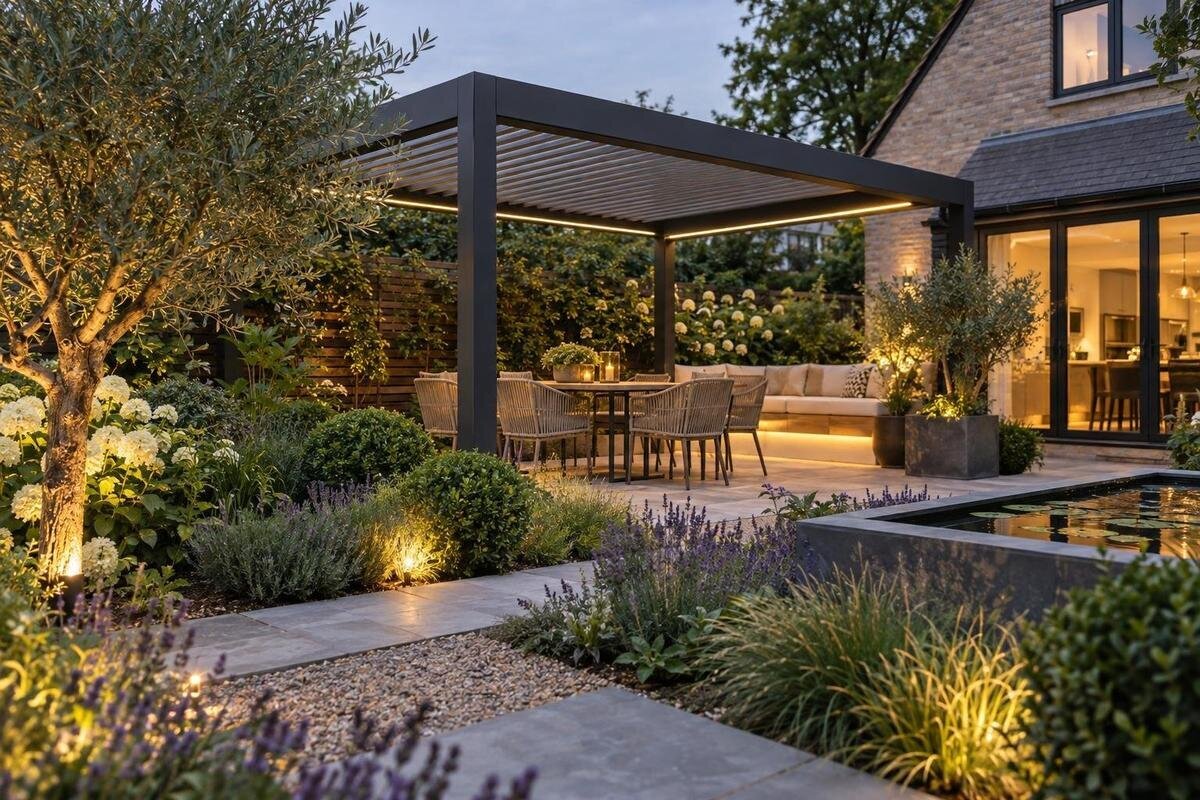
Garden courtyard planning
A pergola can give a garden courtyard a clear centre, but the feeling of an outdoor room comes from the ground and edges around it. Paving, planting, boundaries, furniture and paths need to work together: the space should feel defined without cutting off routes through the garden or obstructing water flow. Before ordering materials, draw the pergola footprint and the wider courtyard on the same measured plan. This makes it easier to see whether a paved edge crowds a door, whether a planted border leaves room to move, and where rainwater can go. The aim is a coherent garden room that still belongs to the whole garden.

Survey the garden before drawing the courtyard
Begin with a measured sketch of the whole area that could be affected, rather than a close-up of the proposed patio. Mark house thresholds and doors, downpipes, drains and access covers, existing paving, gates, sheds, boundary fences and established trees. Add the routes you already use to reach the lawn, storage, bins or a side gate. A courtyard plan that omits one of these everyday connections can look tidy on paper and prove inconvenient once its edges are built. Record dimensions on site rather than estimating from photographs, and note which features are fixed, movable or likely to change.
Visit the area during ordinary use and after rain. Notice where people naturally walk, where chairs are already set down, which views you value and where water gathers; record these as observations rather than guessing why they happen. Decide whether the courtyard is mainly for sitting, eating or a mix, and list what must remain reachable, such as a gate or outdoor tap. Look at the proposed courtyard from the rooms overlooking it as well as from the garden. Mark the views you want to retain and any features you would prefer to screen, so the layout accounts for both. This gives the drawing a practical test: each edge should define the outdoor room, preserve a route or respond to a feature of the site. If an inconvenience recurs, mark it before planning a fix.
Separate the pergola footprint from the usable room
On the drawing, use one outline for the pergola and another for the area you expect to use beneath and beside it. The frame footprint is not the full room: chairs need space to move, and a route around a table or to a garden door may sit outside the posts. Start with a dimensioned drawing of the model and configuration under consideration. Mark post positions and any parts that project beyond them only where the supplier’s drawing confirms them. If you have not selected a structure, show a provisional envelope and label it as such rather than treating an approximate rectangle as a final setting-out plan.
For a concrete catalogue reference, the Bloomcabin Bioclimatic Pergola listing gives an area range from 9 to 24 m². Treat that as a broad size reference, not a calculation of how much space remains for chairs, paths or planting. Keep the structure outline and the complete courtyard footprint separate, including the space needed to move around the posts. Where exact dimensions are not yet available, leave the layout provisional. A scale drawing makes these different measurements visible to everyone reviewing the scheme and helps avoid setting paving or planting against an assumed post position.
Use paving to define the courtyard
Make hard-surface lines follow a purpose. A paved area can anchor seating and create a clear transition from a door, while a planted strip or lawn can keep the courtyard visually connected to the garden. Use a change in paving direction, edging or material only where it marks a real boundary, such as between the main sitting area and an open garden route. Draw the shape rather than extending the surface by habit. From the house, check whether it creates a useful foreground; from the garden, see whether the edge feels intentional instead of like a leftover slab.
Choose finishes for everyday use, maintenance and the surfaces they will meet, not on a colour sample alone. Compare samples against the house wall, soil, lawn and existing paths, then consider how the paving edge will meet a bed or grass. If you are considering the Bloomcabin Pergola, use the selected configuration’s confirmed dimensions to check how the paving pattern meets the posts. Sketch the main joints and borders rather than deciding their position during installation. Pay particular attention to corners where a path joins the courtyard: the surface should read as a planned connection, not an extension squeezed around a bed. Decide whether existing paving will remain visible and how old and new areas will meet. This helps you compare finishes as part of the whole courtyard and identify narrow strips or awkward edges before ordering materials.
Plan surface water before hard landscaping
Drainage belongs on the same plan as paving. After rain, note where water travels from existing surfaces, where it slows or pools, and which gullies or drains need to stay reachable. Adding more hard surface can change the route water takes, so do not draw the courtyard as a sealed shape without considering where surface water can go. Keep access covers clear and avoid a raised edge that could hold water against a building. These are issues to resolve in the plan before construction, not problems to hide beneath a finished border.
A pergola’s roof or covering may affect where rain lands or is directed, depending on the selected design. Do not assume that water is collected, carried through posts or discharged on a particular side. Ask the supplier or installer for the chosen configuration’s water-management details and show any discharge points on the landscape drawing. If the existing outlet or ground conditions make the route unclear, ask a qualified drainage or landscape professional to assess it. Keep the drawing available to whoever sets the paving levels, so the finished surface does not undermine the intended drainage route.

Set planting beds back from the pergola and paths
Use planting to soften the perimeter and connect the pergola visually to the wider garden, but draw the bed depth before choosing plants. Check mature width and height, light and soil needs from a reliable plant reference; a young plant’s current pot size is not a long-term allowance. Combine height and leaf texture deliberately rather than planting a continuous screen by default. A lower edge may preserve views across the garden, while taller planting can mark a boundary where that is wanted. Choose the effect first, then check that the plants suit the site conditions.
Leave room for pruning, replacing plants and clearing leaves from paving. Avoid a bed that narrows a route or covers an access point, and check the expected root spread near hard surfaces. When comparing possible footprints, the bioclimatic pergola listing is one model reference to include in the plan. Set the planting line using the chosen structure’s confirmed dimensions alongside each plant’s mature spread and maintenance needs. Show mature plant outlines on the drawing, including any growth expected to extend over the paving, rather than marking only planting positions. Consider where you would stand to tend the back of a border and how you would reach it without moving the main furniture. Keep the planting plan selective: identify what each group contributes, whether that is a low edge, a backdrop or a view into the garden. There is no universal setback for every combination; seek landscape advice where the relationship remains uncertain.
Choose courtyard edges that retain views
A clear boundary can make an outdoor room feel defined without fully enclosing it. An existing hedge, fence, wall or change in planting may provide a backdrop; repeating a material or line in more than one place can help the courtyard read as a coherent space. Leave an opening where the main route enters and decide which views should remain open. A partly open edge can connect seating to lawn or beds, while a more private boundary can screen a specific view. Build that purpose into the plan rather than adding height everywhere by default.
Where the courtyard meets the house, include door openings, downpipes, vents, outdoor taps and windows that need to remain usable. Bloomcabin Wall-Mounted Pergola is a clearly identified wall-mounted option, so include the house elevation and proposed position in the same review rather than treating the wall as a blank backdrop. The product name cannot establish that a particular wall is suitable or specify a connection. Ask a qualified professional to assess the site and confirm the relevant details, and keep access to openings and maintenance points in the courtyard plan.
Keep a clear route through the outdoor room
Plan the main route from the house through the courtyard to the rest of the garden before placing furniture or planting. Mark the line to a gate, lawn, shed or outdoor tap, then check whether a person can follow it without cutting between chairs or stepping through a bed. Consider how doors open and whether a route remains usable when furniture is occupied or moved. A courtyard can have a strong boundary and still allow people to pass through it; the path should be part of the composition, not whatever space remains.
If a route runs beside a wall, assess the wall-mounted model in relation to door openings, downpipes and the passage from the house to the garden. Use its confirmed outline rather than judging the fit from the product name. Test the route for ordinary tasks as well as a walk to the seating area: carrying shopping from a side gate, bringing out a tray or moving garden equipment to storage. Mark where those movements cross the courtyard and where people need to pause or turn. Keep temporary obstacles in mind too, such as a chair pulled out or a watering can left beside a tap. Where possible, arrange the layout so these tasks do not require moving furniture each time. If a household has specific access needs, measure and test the route for those needs and get suitable design advice rather than relying on a generic sketch.
Plan furniture and everyday use
Draw the furniture you expect to use at its actual size before setting the courtyard’s final limits. Include the table or seating footprint, the space needed to move chairs and any side table or storage that is likely to stay outside. An empty pergola outline can look generous, while real furniture may interrupt a route or leave no comfortable space to pass. Decide which items are essential and which are occasional; that distinction can prevent a courtyard from being paved for furniture that is rarely used.
Try the arrangement with temporary markers, chairs or cardboard templates on the ground. Walk through it and move the chairs rather than judging from a plan alone. Allow for where cushions or garden items will be stored so they do not become permanent obstacles. The Bloomcabin Pergola model can be assessed alongside the furniture you actually intend to use; compare the chosen configuration’s dimensions with the test layout before committing to the paved area. A successful arrangement should work on an ordinary day, not only when every chair is neatly tucked away.

Compare pergola formats against the garden plan
Choose a format according to how the courtyard relates to the house and garden edges, not because one silhouette seems to solve every problem. For a freestanding layout, show the confirmed support positions in relation to paving, planting and routes. For a wall-mounted layout, consider the house line, openings and access alongside the proposed surface. These are layout consequences, not a claim that either format is inherently easier or suitable for every site. Compare how much open edge each arrangement leaves and how the courtyard connects visually and physically to the wider garden.
Include Bloomcabin’s Bioclimatic Pergola among the models you compare against the measured plan, using the chosen configuration’s confirmed dimensions and post positions. Keep the courtyard requirements the same when comparing alternatives: the same furniture, routes, planting areas and views. Otherwise, one option may appear to fit better simply because its drawing leaves out a chair or reduces a border. Note what each arrangement would require you to change, such as moving the seating, reshaping a bed or altering the paved edge. Separate changes you would welcome from compromises you would accept only to accommodate the structure. Product images can help you consider appearance, but they should not replace the dimensioned comparison. This gives you a useful shortlist based on the whole outdoor room, rather than choosing a model first and repeatedly adjusting the garden around it.
Coordinate the final courtyard plan
Once the layout works on paper and on the ground, prepare one coordinated drawing with the pergola outline, paving edges, paths, planting beds, doors, drains and access covers. Add dimensions and label what is existing, proposed or still provisional. Keep a separate planting note with the selected plants’ mature sizes and site requirements, so the border is not designed around nursery-sized specimens. A clear drawing gives installers and landscape professionals the same reference and makes it easier to spot a conflict between a post position, a path or a drain before work begins.
Review the actual set-out against the drawing before committing to fixed surfaces. If Bloomcabin’s wall-mounted pergola is on the shortlist, include its confirmed position, relevant wall information, drains and door openings in that review. Agree with the people carrying out the work which details must be settled before paving or planting begins, and record any changes on the shared drawing. If a post position or paving edge moves, check the neighbouring path and bed rather than treating the change in isolation. Identify who will finish the junctions between the structure, paving and planting so those edges are not left undecided. Keep unresolved points clearly labelled instead of allowing a provisional sketch to become the working plan. Ask a qualified installer or landscape professional to resolve structural and drainage questions that cannot be answered by a garden sketch.
Frequently asked questions
How much space should I allow around a pergola?
There is no single allowance that suits every courtyard. Draw the chosen model’s confirmed outline, then add the space needed for furniture, routes and maintenance. Try the layout with temporary markers on the ground before ordering paving. A product’s stated area is not the same as the total area needed for the courtyard.
Can I plant close to pergola posts?
That depends on the plant’s mature spread, root growth and maintenance needs, as well as the structure’s confirmed layout. Check plant information and the chosen model’s requirements, then show both on your plan. Leave room to tend the planting and keep paths, drains and access points clear.
How can I keep a paved courtyard well drained?
Note where water travels or gathers after rain, keep drains and access covers reachable, and plan the new surface in relation to existing drainage. Ask the supplier or installer how the selected pergola handles water, if applicable. If the route is unclear, get advice from a qualified drainage or landscape professional.
Does the whole area around a pergola need to be paved?
No. Pave the areas that need a hard surface for the planned use, and consider lawn or planting at the edges to keep the courtyard connected to the garden. Draw the boundary before work begins so the remaining routes and drainage are accounted for, rather than leaving narrow, awkward strips by accident.
Can a wall-mounted pergola be part of a garden courtyard?
It can be considered as one layout option, but the product name does not confirm that a particular wall or position is suitable. Keep doors, drainage points and routes in the plan, and ask a qualified professional to assess the site and confirm the details needed for the chosen structure.
A well-planned courtyard brings the pergola, seating, paths and planted edges together as one part of the garden. The structure’s footprint provides a starting point, while furniture, views and mature planting determine how the surrounding space will be used. Keep the routes you rely on, resolve water flow before fixing levels, and avoid paving areas that have no clear purpose. When those relationships work together, the pergola becomes part of a comfortable outdoor room rather than a structure placed on an unrelated patio.
