
Grow Ginger Successfully in a Greenhouse
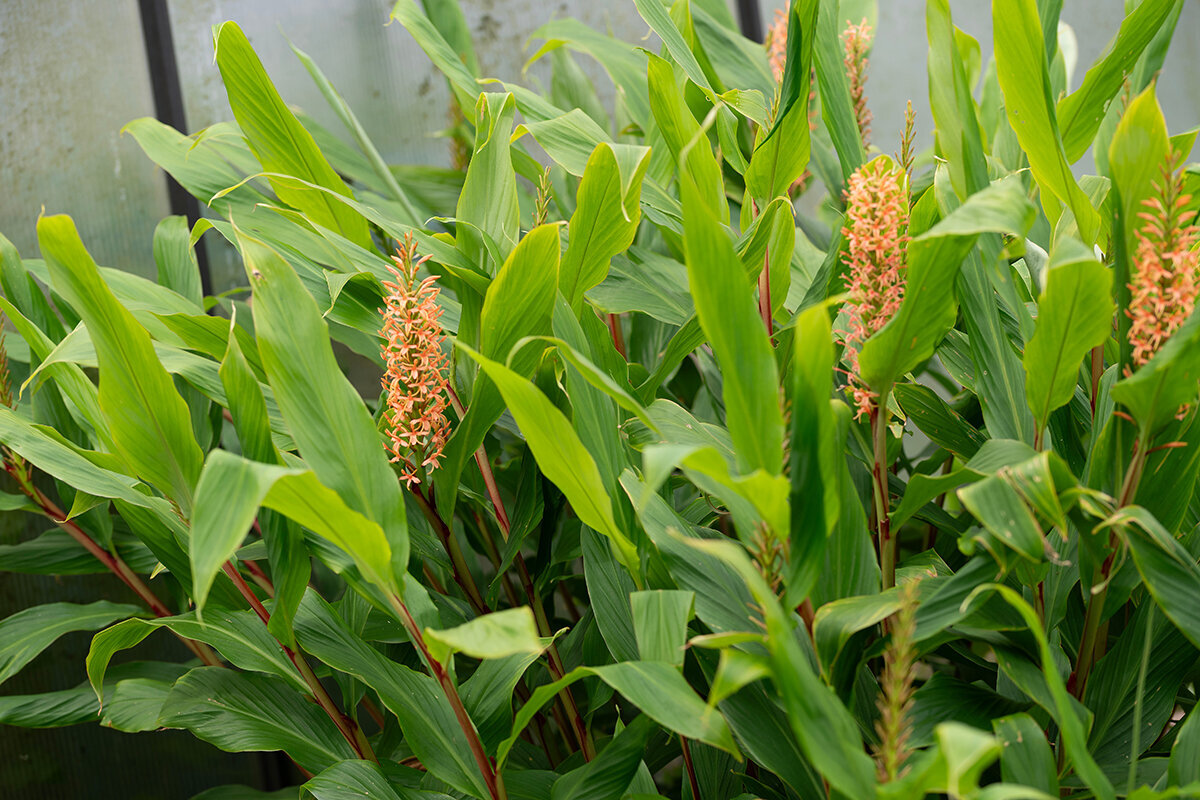
Classic aluminium greenhouseGreenhouse growing guide · Ireland
Stored warmth / steady growth / aromatic harvest
Successful ginger growing
under glass
Ginger does not need tropical theatre, but a long season with dependable warmth, gentle humidity and patience for its sideways-growing rhizome.
Why cover helps
For ginger, glazing is chiefly a means of extending summer warmth.
Edible ginger is a heat-loving rhizome plant. In much of Ireland, an unprotected season can be too cool and changeable for strong, well-branched rhizomes. A greenhouse offers more than occasional hot days: it gives plants a sheltered start, steadier root-zone temperatures and a gentler transition into cooler autumn nights.
A steady regime matters because the useful crop forms beneath the compost. Ginger struggles when cold growing media, saturation and abrupt drying alternate. Give it a wide planting zone with rapid drainage, reliable warmth and even moisture without sogginess. Starting the rhizome warmly and avoiding lengthy pauses afterwards offers the soundest route to continuous development.
Coastal and Atlantic gardens Start indoors or with gentle heat; cool, windy nights make protected early growth especially useful.
Inland and upland gardens Allow for late cold spells, then ventilate early to prevent summer heat build-up.
Warm, sheltered locations Ventilate early in hot weather, shade when needed and monitor container moisture closely.
Exposed or elevated sites A greenhouse supplies the lasting warmth that cool nights can otherwise take away.
01 / Underground architecture comes first
Treat rhizome choice as the season’s foundation.
The crop really does depend on it. Ginger comes from divided rhizomes, not seed. Seek very fresh, sound planting stock from a reputable horticultural supplier. Pieces sold for cooking sometimes shoot, but their health is uncertain and sprouting may have been inhibited. Soft, damaged or questionable material is a poor starting point for a carefully tended protected crop.
Choose
Firm, plump, alive
- Smooth, full skin
- One or two clear buds
- Clean, dry cut faces
- Good weight and a fresh scent
Reject
Soft tissue is a warning.
- Mould or a sour, fermenting odour
- Dark cavities or pulpy joints
- Severe shrivelling
- Undersized or feeble sections
For domestic cultivation, Bavaria’s LWG advises pieces weighing approximately 30 to 40 g and carrying two shoot buds apiece. Cut larger hands apart with a sanitised knife. Before any section touches damp propagation compost, allow its new cut to callus completely somewhere clean, airy and dry. Sound flesh, hygienic equipment and good air circulation across the wound provide straightforward protection against decay.
02 / The hidden beginning
Pre-sprouting follows a warmth calendar, not impatience.
Ginger can appear motionless for several weeks while the rhizome wakes and makes its first roots. Use a shallow container with drainage holes, lightly moist coir or loose seed compost. A heat mat or consistently warm indoor spot at about 22 to 26 °C provides good conditions; around 24 °C is a useful guide.
Day 1–2Cuts healDry and airy.
Week 1–2Warm restMoist, never wet.
Week 3–4Roots and shootsWatch for green.
Week 4–6Plant with momentumProtect, then transplant.
Maintain gentle moisture in the propagation mix without saturating it. Let its top lose a little dampness, then add water cautiously instead of soaking the whole tray. If a cover is fitted, lift it daily so stale, clammy air can disperse. Prepare the final growing place once robust shoots appear and delicate roots have formed. Crowded sections left together too long develop tangled roots that are easily torn during transfer.
03 / Wide room for sideways growth
Plant shallowly, point buds up, leave space for earthing up.
Because ginger expands sideways, width matters more than excessive pot depth. For each starter section, provide about 25 to 35 litres of volume and no less than 30 to 35 cm of compost. In a wide trough or bed, set several plants roughly 30 cm apart. Use multiple generous drainage openings and raise pots slightly so surplus water leaves freely. Preserve access for irrigation, inspection and adding compost later.
Bud upwards
The growing point faces the surface.
The growing point faces the surface.
Cover lightly
Only 3–5 cm at first.
Only 3–5 cm at first.
Drainage below
Loose compost, clear outlets.
Loose compost, clear outlets.
Choose a good peat-free potting mix, then incorporate mature compost and an open mineral ingredient—for example perlite, pumice or fine expanded clay. Dense loamy garden earth packs down in a pot, sheds water slowly and makes moisture levels harder to judge. Lay the rhizome so its buds point towards the surface, apply a shallow cover and give one careful watering. Avoid continuous saturation thereafter. When fresh rhizome ends approach the surface during summer, top them with 2 to 4 cm of friable growing mix or mature compost. This excludes light from the new branches without deeply covering the base of the stems.
04 / Climate management, not tropical scenery
Combine atmospheric humidity with well-aerated roots and a clear escape route for excess heat.
Protected ginger is sometimes assumed to demand unbroken wet conditions. In fact, it favours warm air with comfortable humidity and compost that remains consistently moist. Its rhizome still requires oxygen, quick drainage and intervals when the upper layer can breathe. Think of an active, warm growing space rather than a shut room filled with steam.
Warmth
Root zone first.
Around 25–30 °C in active growth
StartHigh summerMaturity
Moisture and air
Fresh below, never airless.
Water compost, ventilate consistently.
Light
Bright, filtered, adaptable.
Protect leaves from heat stress.
Warmth
A range of 22 to 26 °C serves the pre-sprouting stage well. Once planted on, aim to keep the root zone at 20 °C or warmer during active development; summer growth is often productive between 25 and 30 °C. Check the temperature inside the compost, not merely in the air. Sunshine can heat March glazing while the night remains cold. Chilled potting mix may delay an otherwise healthy rhizome for weeks.
Moisture and ventilation
Apply enough water for moisture to penetrate the entire rooting depth. Before the next application, check that the upper 3 to 5 cm feels drier while the layer below is still faintly moist. A drip line or a slow pour onto the compost avoids repeatedly soaking foliage. Air the house in the morning ahead of rising heat, with another afternoon airing in muggy conditions. Persistent moisture on glazing, leaves or containers calls for less frequent irrigation and stronger air circulation.
Managing brightness and summer heat
Filtered brightness suits ginger, although permanent shade produces weak growth. Use a well-lit position but shield foliage from fierce midday rays magnified by glazing. In a sustained hot spell, external shade cloth rated around 30 to 40 percent may be worthwhile. Coordinate doors with high-level vents before temperatures climb so air travels across the house. Shading supports good ventilation; it cannot compensate for stagnant heat.
Used thoughtfully, a classic aluminium greenhouse gives spring crops an earlier protected start, permits useful airing in warmth and helps keep tall ginger foliage apart from shorter plants that prefer stronger sun.
05 / A growing-season journal
Care for ginger with small, repeatable routines.
Healthy ginger appears unhurried above the compost, with straight green stems and unblemished foliage rather than striking changes from one day to the next. That steadiness reflects modest, timely care—not rushed intervention after visible stress has taken hold.
Watering routine
Feel first, then water slowly.
Probe the upper 3 to 5 cm with a finger. When that layer feels dry but slight moisture remains lower down, irrigation is due soon. Pour slowly around the stems until surplus emerges beneath the pot, then drain the saucer. For bed-grown plants, gentle deep watering or a drip line carries moisture into the rhizome layer without making pools. Bright, warm conditions may require this every one to three days, whereas overcast periods need far less.
Feeding routine
Feed without salting the container.
Mature compost supports early development, but the crop occupies its space for a long time. After sturdy shoots establish, offer a dilute organic liquid feed at two- to three-week intervals, or use a balanced slow-release product as directed on its label. Moderate nutrition, including enough potassium, is appropriate. Although pallor can suggest shortage, inspect warmth, drainage and root condition before adding more. Nutrients remain inaccessible when the compost is chilled or saturated.
Earthing-up routine
Cover rhizomes, keep the base clear.
Where enlarging rhizomes rise towards the top, place 2 to 4 cm of fresh friable compost or mature compost over them. Do this only when required, commonly one to three times in summer. A light covering made from chopped foliage, straw or untreated hemp fibre can moderate water loss and temperature swings. Leave a small gap around each stem so its vulnerable base remains ventilated.
Maintain a brief greenhouse log, recording the planting date, first emergence, hot weather, feeding and the onset of autumn yellowing. A long season makes recollection unreliable. A handful of exact notes clarifies whether a change reflects ordinary maturity or trouble. Plan suitable floor space, approaches and ventilation routes from the beginning; a classic aluminium greenhouse can provide a dependable setting.
06 / Local seasons set the rhythm
Let Irish conditions shape the schedule rather than chasing an imagined tropical climate.
Cool spring starts
Start during late winter or the opening part of spring in a warm room, over a heat mat or inside a greenhouse supplied with gentle heat. Move to a permanently unheated structure only after nights have become reliably milder and potting compost holds well above 15 °C. A root-zone temperature close to 20 °C helps initiate vigorous development. This early warmth is particularly valuable in coastal, elevated and frost-prone Irish gardens, where site conditions affect the available cropping season.
Warm inland spells
In a hot spell, inspect dark-coloured pots and areas near floor level as well as the surrounding air. Where compost stays markedly above 30 °C, begin airing sooner, add shade if required and apply water carefully. Flooding a heated container will not undo temperature stress and may drive oxygen from the rhizome zone.
Wet, rainy locations
Extra atmospheric moisture is seldom needed in these gardens; the greater risk is that containers dry too slowly. Lift pots just above the floor, keep saucers free of standing water and maintain open space around them for circulation. Coordinate the door and upper vents. Whenever surfaces remain damp for extended periods, cut back the watering schedule instead of introducing further moisture.
Long, mild autumn
Keep providing measured care while the leaves look sound and green. Extra weeks of warmth allow later rhizomes to become larger and more pungent. Begin tapering irrigation only after declining day length, cooler nights and uniform yellowing indicate that growth is naturally easing. A yellow leaf alone is not sufficient reason to add feed.
Good proportions make seasonal adjustments simpler. Explore the classic aluminium greenhouse when planning wide potting areas, unobstructed paths and sensibly arranged doors and windows for warmth-loving plants. The also offers ideas for a durable garden structure.
07 / Read warning signs before treating
Symptoms point the way; they are not a blanket diagnosis.
First examine the growing medium and root area, then note how symptoms are distributed over the plant. Uniform yellowing in October carries a different message from a green stem that collapses suddenly during high summer. If decay is suspected, move the pot away from the crop. Avoid transferring its compost or drainage water to healthy plants on hands or equipment.
Autumn yellowing
Possible seasonal maturity
Browning at leaf tips
Strong sun, heat or dry growing mix
Growth has paused
Chilling, poor nutrition or compressed compost
Speckles or webbing
Check for spider mites
Wilting or soft rhizomes
Act quickly; suspect rot
Follow the clue
Even yellowing at season’s end: This commonly accompanies natural maturity. Taper the water supply, discontinue strong feeds and judge whether to lift the crop now or allow the rhizomes another short period to finish developing.
Brown tips or pale leaf areas: Look for direct rays through the glazing, dry compost or excessive warmth around the roots. Soften midday light, make watering more even and strengthen ventilation. Constantly soaking the pot is not a suitable remedy.
Weak growth and slowly yellowing lower leaves: Review warmth in the growing mix, open drainage outlets, compaction and the feeding already supplied. Restricted container volume may also slow development. Alter one likely constraint at a time so any response remains easy to interpret.
Fine speckles, webbing or dull foliage: Inspect the undersides of leaves for mites, concentrating on warm, parched corners where ventilation is weak. Move an affected plant apart if necessary, rinse its foliage thoroughly and physically remove a light early infestation. Correct the poor circulation at the same time.
Green stems collapsing suddenly, softened flesh or foul, darkened rhizomes: Respond immediately to suspected root injury or severe decay. Lift the affected plant away with its growing medium; infected waste should stay out of home compost. Wash pots and implements carefully, then review drainage and irrigation beside neighbouring plants. Never retain diseased rhizomes for propagation. Healthy starter stock, uncontaminated growing media and a lengthy crop rotation give better protection than attempting a late recovery.
08 / From moist growth to harvest
Time the lifting to suit how you intend to use the crop.
There are two particularly useful stages. Young ginger has juicy, delicate flesh beneath a fine pale skin. A fully developed crop becomes firmer and more pungent and keeps for somewhat longer. Protection under glass leaves both possibilities open instead of forcing the season to finish as soon as the first cold night arrives.
Young ginger
Delicate for immediate use
- Lift while foliage remains green
- Wash with care
- Use without delay
Fully mature ginger
Firm for brief storage
- Lift after natural yellowing
- Dry with airflow, away from sun
- Reserve perfect sections for replanting
Baby ginger
According to LWG guidance, fresh ginger can be harvested after as little as three to four months. Choose a strong plant and carefully lift an outer rhizome section or empty the entire container. Its pale skin is tender, with juicy, less fibrous flesh. Baby ginger is especially good for tea, syrup, delicate dishes and pickling. Use it promptly after rinsing or store it cool for a short time. During partial harvesting, disturb the main rhizome branches as little as possible.
Mature ginger
To obtain firmer rhizomes with a stronger flavour, keep the crop growing until its foliage naturally declines. Gradually reduce irrigation once most leaves have yellowed and the nights are cooler. Choose settled, dry weather for lifting. Tip out a container with care; in a bed, ease the soil apart using a digging fork rather than tugging the stems. Cut away stem remnants, gently remove loose material with a brush and place the harvest in moving air for several hours.
Do not leave newly lifted rhizomes to shrivel in fierce sunshine or seal them together while damp. For short storage, place sound pieces somewhere frost-protected with low humidity and cool temperatures, checking their condition frequently. Keep especially firm, intact sections with obvious buds apart as next year’s planting material. Dispose of questionable compost after the crop, then clean pots, tools and drainage channels. This orderly hygiene is the first step towards another successful season.
Queries from the growing bench
Answers about protected ginger
Is year-round greenhouse cropping possible?
Yes, but only with consistently dependable heat. For most Irish home growers, edible ginger makes more sense as an extended seasonal crop with substantial warmth needs. An unheated structure in winter cannot maintain suitable compost temperatures and growth may cease altogether. A practical sequence is to wake the rhizomes warmly towards the end of winter, cultivate them beneath glazing through summer, then plan the lifting for autumn.
What level of sunlight suits protected ginger?
Good brightness is valuable, yet powerful summer rays passing through glazing may overheat both leaves and compost. Give the pots ample light and soften midday exposure during lasting heat. Read the foliage, check moisture within the root ball and measure its temperature; those observations are more useful than prescribing a rigid daily total of sunshine.
Will ginger thrive in a raised greenhouse bed?
Yes, provided the mix drains freely, remains open in texture and has gained sufficient spring warmth. Allow about 30 cm between planting points and retain space for topping up around rhizomes that later appear. Pots are still easier where individual plants may need isolation, closer moisture control or relocation during an abrupt return of cold weather.
What prevents a ginger rhizome from shooting?
Possible explanations include dormant or growth-inhibited stock, insufficient warmth around the rhizome, saturated propagation compost or simply an early inspection. Confirm that the section remains solid, with no darkened soft patches. Maintain slight, even dampness and a temperature of about 22 to 26 °C. Even healthy stock may sit for several weeks before its first shoot becomes visible.
Does ginger require daily misting?
No; mist cannot replace correct watering around the rhizome. A fine spray may occasionally help while shoots are being started or when indoor air is exceptionally dry. Trouble is more likely if leaves stay wet, a cover remains shut and air stagnates. Concentrate instead on evenly moist compost, unobstructed drainage, foliage that dries before night and dependable ventilation.
What greenhouse layout suits ginger?
A large floor area is unnecessary, though ginger appreciates broad pots, warmth near ground level and circulation around its tall foliage. A classic aluminium greenhouse works well when one side accommodates a roomy bed or pot zone and unobstructed paths simplify watering, topping up compost, inspection and lifting.
Research behind this guide
Practical references for this lengthy crop cycle.
The specialist material below informs the temperature, starting, compost, irrigation, health and harvesting guidance. Its recommendations have been interpreted for practical quantities in a domestic garden and for greenhouse seasons in Ireland.
More from Bloomcabin: Planning greenhouse space, crops and routine care · Classic aluminium greenhouse overview · Bloomcabin aluminium greenhouse FAQs
- LWG Bavaria – advice on raising ginger at home
- LWG PDF – crop notes and cultivation advice for ginger
- FiBL PDF – protected-cropping manual for ginger
- Illinois Extension PDF – irrigation and soil-moisture advice for ginger
- Illinois Extension – pre-sprouting fresh ginger rhizomes
- Florida IFAS Extension PDF – producing ginger, galangal and turmeric
- LWG Bavaria – practical experience of ginger cultivation
