
Can a Pergola Fit Beneath Eaves or Overhangs?
Pergola planning
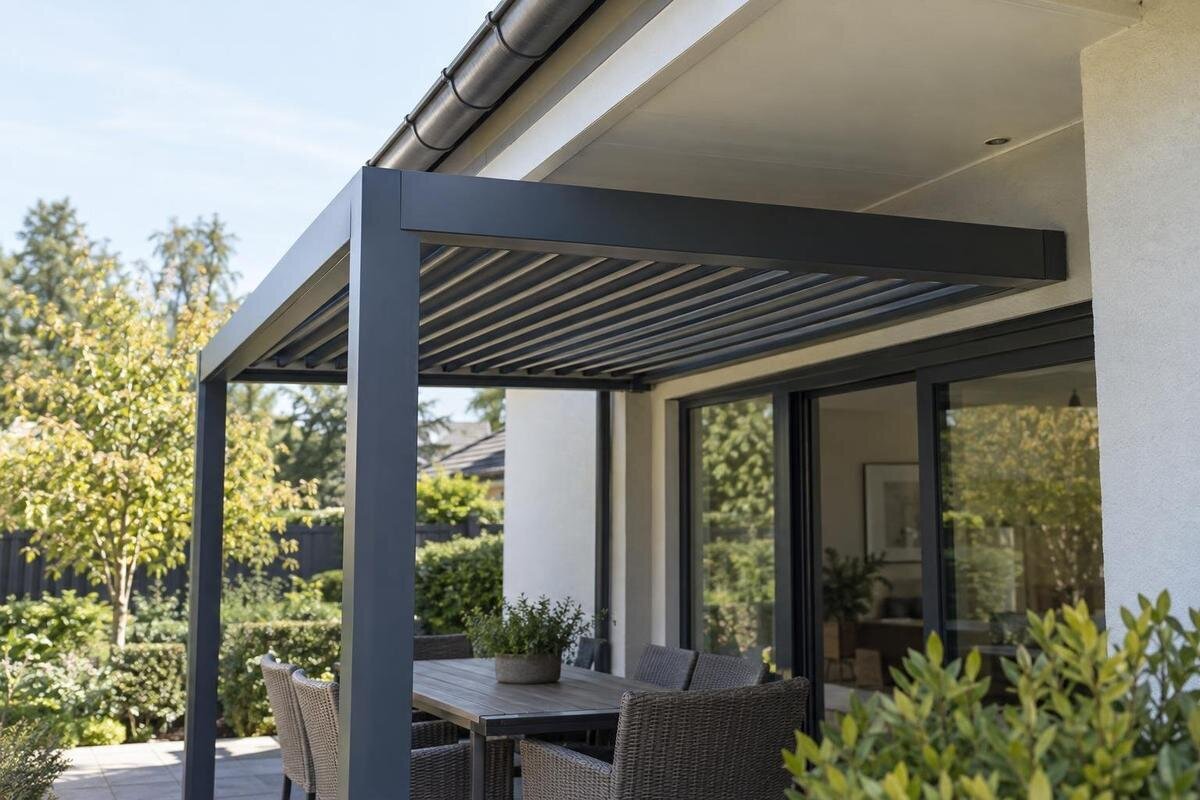
Yes, a pergola can sometimes fit beneath low eaves or a roof overhang, but a clear patch of wall is not enough to prove it. Available height, the overhang’s projection, roof movement, support, drainage and future gutter access all need to work together. A measured site plan and the exact model drawing are more useful than a judgement based on a product photograph.

01
Measure from the finished surface to the lowest obstruction
Begin at the surface the pergola will actually stand on, not at the current lawn or an unfinished patio. Measure vertically to the underside of the lowest obstruction at several points. That may be the soffit, fascia, gutter, a bracket or a projecting downpipe, rather than the visible roof edge. Record the shortest distance above each proposed post and across the area the top frame would occupy. Eaves and paving are not always level, so one measurement at the wall can miss a low corner. If paving or a threshold is still to change, mark the intended finished level and measure against that.
Sketch a side view and write down the exact endpoints of each measurement, so the figure is not confused with a wall height or a gap measured to the roof tiles. A product’s nominal height may be defined differently from the clear space beneath its frame; check what the model drawing measures and ask about any installation tolerances. If the option under review is the Bloomcabin Pergola, request the drawing for that exact model and configuration. Do not estimate a safe fit from a photograph. Any allowance for assembly or uneven surfaces should be confirmed for the proposed installation, rather than chosen as a standard figure.
Map the overhang in plan as well as in elevation
Height is only one part of the check. An eave projects out from the wall, and the gutter, brackets and downpipe add further obstructions. Mark their edges on a plan view, then draw in the proposed pergola roof perimeter and post positions. A side elevation can show how high each feature sits, but a top-down sketch reveals where the roof edge might pass beneath the gutter or beside a bracket. Check the whole footprint, including corners and the far end of the structure; a clear measurement at the centre of the wall does not establish clearance across the rest of the pergola.
Compare the drawings to see whether the building’s overhang occupies any part of the pergola’s intended space. The relationship can change if the structure is moved towards or away from the wall, so record its proposed position rather than measuring only the eave. Ask the installer what separation is needed for fitting and for the completed structure, including any movement described in the model documentation. Do not make a plan depend on removing a gutter bracket, trimming the roof edge or shifting a downpipe as an informal adjustment. If the fit looks close, have the installer mark the relevant edges on the measured sketch before you commit.
02
Include the full movement of an adjustable roof
A roof that changes position needs clearance throughout its movement, not just when it is resting in one position. Depending on the design, roof sections may tilt, slide or fold, and parts can travel beyond the outline they make when stationary. The actual movement varies by model, so do not infer it from a product name or an image. Ask for the clearance envelope or drawing that shows the roof’s path, then compare it with the eaves, gutter, wall and any nearby opening. Check the full length of the moving parts, including their ends, rather than looking only at the point nearest the wall.
If you are considering the Bloomcabin Bioclimatic Pergola, ask for the drawing for the exact configuration and confirm what space its roof movement requires above and beside the frame. The model name alone does not establish its operating path or the clearance available at your site. Include any changes to the layout, such as shifting the pergola closer to the house, in that check. If the roof would meet an obstruction at any point, get the position or configuration reviewed rather than assuming that leaving it in one position will resolve the conflict.
Wall fixings beneath the eaves
A pergola beside a house and a pergola attached to it have different support requirements. Being close to the eaves does not make the eaves a fixing point, and a fascia, soffit or gutter should not be assumed to carry the structure. Roof trim can conceal the construction behind it; a neat exterior finish is not evidence of what lies beneath. Decide whether the proposed layout is freestanding or wall-mounted before choosing a position, because that affects which parts of the building need to be assessed and where the connection would sit.
For a wall-mounted layout, a qualified installer or structural professional needs to assess the actual wall, the substrate and the proposed fixing positions. The anchoring information should match the model and the building rather than relying on a general assumption about wall type. Request the relevant anchoring drawing and evidence about the substrate before any fixing method is agreed. When enquiring about the Bloomcabin Wall-Mounted Pergola, describe the proposed wall connection and its position beneath the eaves. The model name does not establish that a particular wall, fascia or overhang is suitable for attachment.

03
Keep the house and pergola drainage routes clear
Consider water from the house roof and water from the pergola as separate routes. Mark the gutter outlets and downpipe positions, then note where water is intended to go from each roof. A pergola beneath an eave might sit close to a gutter outlet or beneath a section that already sheds water; the layout should not hide a leak, block an outlet or make existing drainage harder to inspect. Equally, do not assume that the pergola can collect or carry runoff from the house roof. Its drainage arrangement, where applicable, needs to be confirmed from information for the specific model.
For the bioclimatic pergola option, ask what the model documentation says about its own water route and where discharge is directed in the proposed orientation. Check that this does not conflict with a house downpipe, a door or the intended route across the patio. If the proposal involves changing existing rainwater goods, get advice from the relevant installer before fixing the pergola layout. A clear drawing of both systems helps show where runoff could cross a maintenance access route or interfere with the other roof’s drainage. Record the proposed discharge points on that drawing so they can be compared with the existing outlets.
Leave practical access to gutters and roof edges
A gutter may be visible from the patio yet difficult to clean or inspect once a pergola is in place. Consider how someone will reach the gutter, its joints and its outlet using the usual maintenance method for the house. The required access depends on the building and the work involved, so ask the person who maintains the gutter or roof whether the proposed space is workable. Do not assume the pergola roof is a platform or a suitable place to stand. Also consider access to the fascia and roof edge for inspection or repair, not just an occasional gutter clean.
Include maintenance access on the site sketch and confirm whether equipment can be positioned without striking or resting on the pergola. Think about the whole length of the gutter, including the downpipe connection and any section hidden behind the proposed roof. Plot the regular pergola model on the site sketch alongside the space needed to reach the gutter and position maintenance equipment. If future cleaning would depend on removing part of the pergola, establish whether that is intended and practical before ordering. A layout that preserves access can avoid turning a routine maintenance job into a separate installation problem.
04
Allow for paving levels and nearby openings
The final patio level can change the available headroom. A new paving layer, step, ramp or altered threshold may raise the surface beneath one or more posts, while a sloping patio means the distance to the eaves can differ across the footprint. Mark the intended finished surface at each post and compare it with the model drawing. If groundworks are not complete, state the planned levels clearly and confirm the measurements again when they are. Do not compensate for a tight fit by changing post heights or support details unless the model instructions and a qualified installer confirm that change.
Check how the pergola’s position relates to doors, windows and other openings along the wall. A frame may clear the roof overhang but still interfere with a door’s swing, access to a handle or the route people use to enter the house. Note visible vents and other features that need to remain accessible, and ask the installer before placing a post or roof edge in front of them. Plot the Bloomcabin regular pergola on the same plan as the openings and the finished patio, using its exact dimensions. This makes it easier to see whether the layout works for everyday access as well as for overhead clearance.
Confirm overall dimensions and roof movement
A footprint or stated floor area does not tell you whether a pergola fits beneath an overhang. Ask for a model-specific drawing that identifies the overall height, the top of the frame, the position of posts and any parts that project beyond it. Check how the stated dimensions are defined and whether they apply to the configuration you intend to buy. If the roof moves, the drawing or accompanying information should also explain its movement envelope. Make sure you are comparing like with like: a drawing for a different size, orientation or configuration may not answer the question for your site.
For Bloomcabin’s bioclimatic model, request the relevant drawing and written clarification for the exact version under consideration. Use the information to compare the model with your measured elevation and plan, not as proof that it will fit every eave arrangement. If a drawing leaves a dimension or movement detail unclear, ask before placing an order. A product page or image can help identify which model you mean, but it cannot replace the dimensions and installation information needed to assess the actual clearance. Keep the drawing with the site measurements so the installer can review the same proposed layout.

05
Have the support and installation plan assessed
A tight space can affect installation as well as the finished position. Long frame members may need to be manoeuvred into place, and workers may need access to the wall or posts while assembling the structure. Ask the installer to review how the frame will be brought into position and whether the eaves or gutter restrict access to the fixing points. A layout that looks clear on a finished elevation may still be difficult to assemble in practice. Raise those constraints before ordering, while the position can still be reconsidered.
The proposed support needs a site-specific assessment, with anchoring details that suit the actual substrate and layout. Ask for the relevant structural assessment, approved anchoring drawings and evidence about the substrate, rather than assuming one footing size or fixing method applies everywhere. For the wall-mounted model, confirmation should cover the actual supporting wall and proposed fixing positions; the eaves themselves do not demonstrate that an anchor is suitable. Keep the assessment linked to the model drawing and measured site plan, so any changed position is reviewed against the correct information. A qualified professional should resolve uncertainties before installation details are agreed.
Change the position if the clearances do not work
If the measurements show a conflict, consider whether the pergola can be moved away from the wall or shifted so its roof edge clears the eaves and gutter. A different position may also restore access for maintenance or keep a doorway clear. Any revised layout still needs to be checked against the model’s dimensions, roof movement, drainage and support requirements. Do not plan to cut back the eaves, remove a gutter or alter the pergola’s frame to make an unsuitable position appear to fit. Changes to the building or product should be assessed by the appropriate professional.
A useful decision is not simply whether the frame can be placed in the available space. The whole proposal needs to leave the roof clear in every relevant position, provide a suitable support arrangement and preserve a workable route for water and future maintenance. Write down any unanswered questions and have the installer or relevant professional address them before you settle on the layout. If no position beneath the overhang satisfies those checks, choosing another location is more straightforward than relying on an unconfirmed adjustment. That measured, model-specific comparison is what turns a possible fit into a practical one.
Frequently asked questions
Can a pergola touch the eaves or gutter?
Plan for the pergola to sit clear of the eaves, gutter and other building features. The clearance needed depends on the model, its assembly and any roof movement, so confirm it from the relevant drawing and with the installer rather than relying on a universal gap.
Can I fix a pergola to the fascia or soffit?
Do not assume that fascia, soffit or guttering can support a pergola. A wall connection needs a suitable structural substrate, fixing positions and anchoring details confirmed for the actual building and model by a qualified professional.
Does the house gutter need to drain over the pergola?
Do not plan on the pergola receiving or carrying water from the house roof unless the model documentation and installation plan specifically support that arrangement. Map both drainage routes and make sure the existing gutter remains accessible.
How do I check clearance for an adjustable roof?
Ask for the model-specific clearance envelope and check it in every operating position, not only when the roof is closed or at rest. Include any parts that move beyond the main frame, and compare their path with the eaves, gutter and wall.
What if there is not enough room beneath the overhang?
Consider moving the pergola away from the wall or changing the layout, then assess the revised position against the model drawing. Do not cut back roof features, alter fixings or change support levels to force a fit without professional advice.
A pergola can sit beneath an overhang only when the measured space suits the complete model, the pergola has suitable support and the building remains accessible for maintenance. Compare the finished ground levels and roof edge with the model drawing, then check movement, wall connections, water routes and gutter access as one layout. If any of those details conflict, revising the position before installation is better than trying to make a tight fit work on site.
