
Planning Pergola Drainage That Respects Neighbours
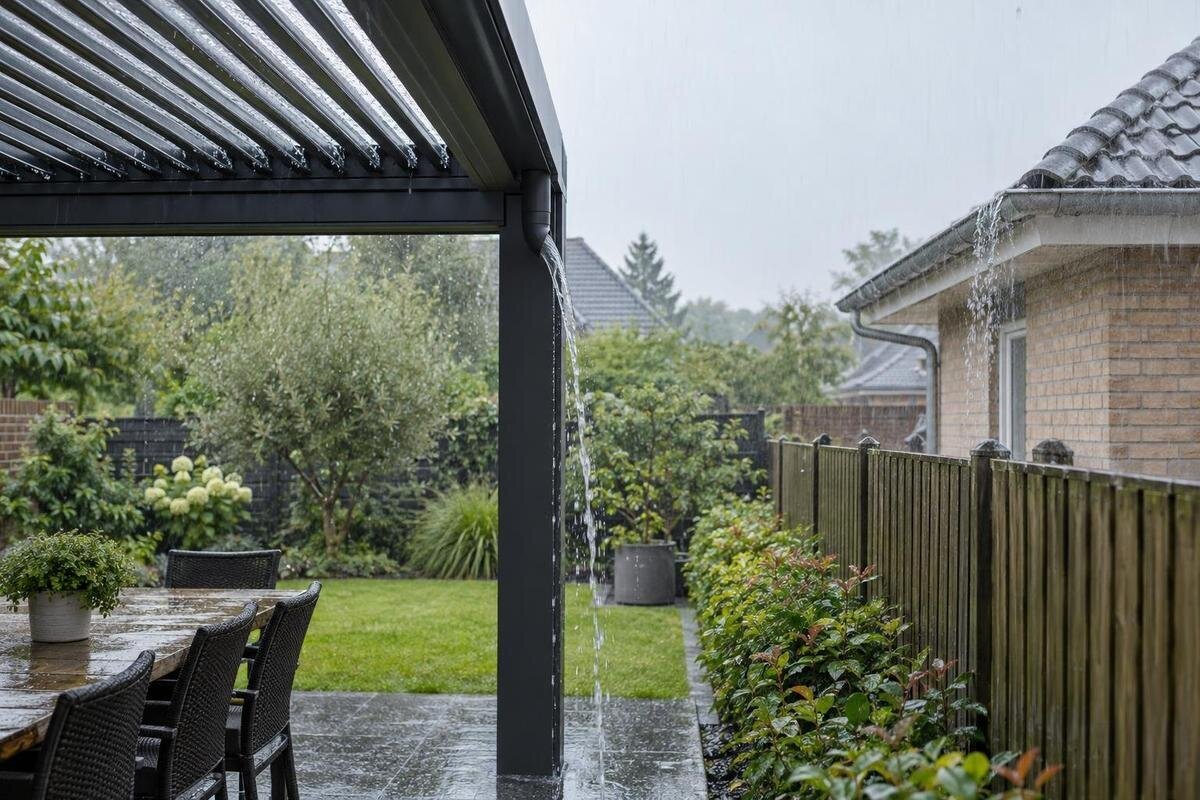
Pergola drainage
Rainwater planning for a pergola does not end at the outlet. A well-positioned outlet can still leave water running across a path, collecting in a low patch or heading towards a neighbouring garden if the route beyond it has not been considered. The useful question is not just where the pergola releases water, but where that water goes next, including during heavier rain and when the intended destination cannot receive it. Map the site, identify every outlet and check the route against ground levels and local requirements before finalising the layout.

Trace every outlet to its final destination
Treat each outlet as the beginning of a route, not as the drainage plan itself. On a site sketch, mark the pergola footprint and orientation, then add every outlet shown for the proposed model and configuration. From each point, trace the water’s intended route to its final destination: a downpipe, pipe inlet or splash area is only an intermediate point if water continues from there. Mark boundaries, doors, paths, existing drains, planted areas and low spots. If any section depends on water flowing over open ground, draw that route too. This makes it easier to see whether an outlet would send concentrated water across a walkway, towards a neighbour or into a place that already holds water.
Confirm outlet positions from the drawings for the exact pergola, rather than estimating them from a garden photograph or a generic plan. Models and configurations can differ, and the proposed orientation may put an outlet on a different side from the one you expected. A Bloomcabin Bioclimatic Pergola product listing identifies the model you are considering; it does not establish the outlet position or a suitable route for your garden. Ask for the relevant drainage drawing and confirm the chosen configuration with the supplier or installer before deciding where the frame will sit. If the outlet location is not clear, treat it as an unanswered design question, not a detail to resolve once installation is under way.
Survey levels and existing water flow
Levels shape the route water can take, and a lawn that looks level may still contain a slight fall or a shallow hollow. Walk the proposed area after rain, if practical, and note which direction surface water travels, where it slows and where puddles remain. Add higher and lower points, retaining edges, steps and changes between paving and soil to the sketch; photographs taken from several sides can help explain what is difficult to see on a plan. Also note runoff arriving from elsewhere, such as a higher part of the garden or a house downpipe. The aim is not to diagnose the site’s drainage by eye, but to give an installer or drainage professional a realistic picture to check.
For a Bloomcabin Wall-Mounted Pergola, include the wall and the ground immediately beside it in the survey, along with existing gutters, downpipes, paving falls and thresholds. Check whether water from the house already crosses the proposed area and whether paving slopes towards the wall, a doorway or the boundary. Ask the installer to mark the exact outlet locations on the site plan, then have the route assessed against the recorded levels. Pay particular attention to a narrow strip between the wall and a boundary: show where water would enter this strip, how it would travel through it and where it would leave. Both the route and its destination need to be workable.
Confirm outlet positions for the chosen configuration
Do not choose an outlet direction from the pergola’s appearance alone. Roof style, span and orientation, as well as the configuration being ordered, can affect where water is collected and released; exact details belong to the model-specific drawing. Check whether the drawing covers the actual options selected, including any side panels or other enclosure elements you intend to use, rather than a similar-looking arrangement. Ask the supplier to identify the intended outlet points on a marked plan. Then compare each one with the real garden: an outlet facing a boundary may still be manageable if a suitable route is designed, while one facing the house is not automatically suitable simply because a drain is nearby. Assess the complete route and destination in either case.
Distinguish the pergola’s footprint from the roof area that collects rainfall. Depending on the design, a roof can concentrate water at an outlet, so the ground directly beneath the structure is not necessarily where all of that water will land. Check whether the receiving area is paved, planted, sloped or already served by a drain, and whether the outlet can be connected to the planned route using the specified fittings. When considering the Bloomcabin Pergola, use the exact technical drawing to establish its outlet arrangement. Ask the installer how that arrangement fits the chosen orientation. Do not assume that outlets are interchangeable or can be moved to whichever side best suits the garden.
Choose a suitable destination for collected water
Choose the destination before deciding that an outlet position works. Depending on the property, a suitably assessed option might be a rainwater tank with an overflow route, an appropriate on-site drainage feature or a connection confirmed as suitable for the purpose. These are possibilities to investigate, not interchangeable answers: soil, existing drainage, available space and the receiving system all matter. A tank still needs a considered overflow route when it is full. Identify the destination and the route to it on the plan, including what happens if the destination is blocked or temporarily unable to receive water. Have a qualified drainage professional confirm the technical solution rather than choosing one from appearance alone.
If you are comparing the Bloomcabin Bioclimatic Pergola listing with other models, show the proposed drainage destination alongside each layout. This allows you to compare how the confirmed outlet positions would connect to the same receiving point, rather than considering the pergola’s position in isolation. Give the relevant model-specific drainage information to the professional assessing that destination. If more than one outlet is shown, account for each one rather than assuming a single pipe or route will serve them all. Keep the route to the receiving point within your own site, and identify any unresolved connection before settling on a layout.

Keep the planned route away from neighbouring land
Make the property boundary visible on every sketch. A short open run that appears harmless when the ground is dry can carry concentrated water towards a lower neighbouring garden during rain. Do not use the boundary itself as a discharge point, or make adjoining land, a shared boundary or a gap beneath a fence part of the intended route. Plan for the water to be contained and directed to a suitable destination on your own site, unless a qualified professional confirms another arrangement is appropriate and any necessary agreement or approval is in place. A hedge or fence is not a drainage barrier: water can pass beneath it, collect along it or spill through an opening. The plan should show the water path, not just the visible boundary line.
When considering a Bloomcabin wall-mounted pergola, mark its proposed position in relation to the house, boundary and intended discharge route before deciding on its orientation. Ask the installer to identify each outlet and the point where water would enter the chosen drainage arrangement. This makes it clear whether the proposal provides a complete route or simply releases water near the boundary. If the only apparent route would cross a neighbour’s land, obtain professional advice on another destination; do not assume that the water will soak away or that the neighbour will accept it. Check any requirements for connections or discharge with the relevant local authority or a qualified professional.
Account for runoff from the rest of the garden
Rain falling beyond the pergola can affect the same part of the garden. Look for runoff from a house roof, shed, higher paved area, driveway or raised bed that already travels towards the proposed location. At the same time, avoid assuming that the pergola will intercept all water within its footprint: wind-driven rain and surface flow do not follow a neat roof outline. Mark existing downpipes and their known destinations separately from the pergola outlets, so one system is not accidentally treated as a spare route for another. A drainage professional can assess the combined flows and whether they need separate routes. This whole-site view helps distinguish water associated with the new arrangement from water already moving through the garden.
Before fixing the location of a bioclimatic pergola model from Bloomcabin, share the whole-site plan with the installer and ask how its exact roof arrangement affects collection and discharge. Check the applicable technical information and weather limits rather than inferring storm capacity from the model name or an image. The site’s rainfall exposure, the area collecting water, existing runoff routes and the receiving system need to be considered together by the appropriate professional. Keep these existing flows visible on the drawing when comparing positions. If the pergola’s position or orientation changes, update its outlet routes rather than carrying forward an earlier arrangement that may no longer align with them.
Assess the ground at the discharge point
Where water emerges at ground level, examine the receiving patch as carefully as the pipe. A gravel strip, lawn or flower bed may look permeable, but its actual ability to take water depends on site conditions and cannot be assumed from its surface finish. Look for existing puddling, compacted soil, slopes towards buildings, exposed soil that could wash out and paths where water would become a nuisance. A discharge that spreads onto paving may travel farther than expected, while one directed at a planting bed may cut a channel through it. Ask a qualified professional to assess the ground and determine whether the proposed outlet arrangement is appropriate; a small splash area alone does not show that the whole route is suitable.
For a Bloomcabin Wall-Mounted Pergola model, mark the exact point where each outlet meets the proposed ground-level route, not just the structure’s position beside the house. Check that downpipes and channels will remain accessible for inspection and clearing. Do not direct water towards a doorway, foundation, neighbouring boundary or a surface that slopes out of sight without having the route assessed. Where the receiving patch is close to the house, include the nearby thresholds and paving levels in that assessment. If the route needs to pass below paving or connect to existing drainage, the installer or drainage professional should confirm that approach for the property.
Recheck drainage when the layout changes
A drainage plan can become outdated when other parts of the garden change. Adding paving, a deck, a raised bed, a screen or an enclosed side may alter where water can travel, block a channel or create a new low point. Even without changing the pergola, a new fence or landscaping can redirect surface flow. Before agreeing an enclosure configuration, ask whether it changes the relevant drainage details and whether gutters, outlets and inspection points will remain accessible. If a later project changes the ground levels, update the plan and have the route checked again rather than assuming the old discharge point still works. This is useful where the pergola is close to a boundary or several surfaces meet in a small space.
When reviewing the Bloomcabin Pergola model, ask the supplier or installer to relate the drainage information to the configuration you intend to buy, not simply the model family. Confirm the planned roof orientation and chosen side elements against the outlet drawing, and make sure the marked route still reaches the identified destination. Record any changes to the layout on the same plan so that an earlier version is not mistaken for the agreed arrangement. If the installation proposal does not say which outlet goes where, request clarification before site work is scheduled. Keep the final plan with the installation documents so future changes to paving or screens can be assessed against the original route.

Confirm project requirements and technical details
Check local requirements for the actual project rather than inferring them from general online advice. Questions may concern where water can be discharged, whether an existing drainage connection can be used, or whether the proposed work needs a particular approval or professional design. The applicable answer depends on the property and intended destination; this guide cannot establish it. Ask the local authority or a suitably qualified drainage professional which requirements apply, and do so before committing to a route that depends on an existing drain or a particular discharge. Keep any advice or approval with the site plan, especially where the route runs close to a boundary or connects with another drainage system.
Ask the supplier for the drawings and instructions that apply to the exact pergola model and options, including the locations and intended operation of drainage features where provided. Confirm any model-specific weather limits, and do not treat a statement about rain performance as a guarantee for every storm, enclosure or site. The drainage professional should be able to see the pergola’s catchment and outlet arrangement, your ground-level sketch, the destination and the route between them. They can advise whether the receiving system and site levels are suitable and whether further assessment is needed. Do not substitute a generic diagram, a neighbour’s installation or a calculation copied from another property for project-specific advice.
Record the agreed route before installation
Before installation, consolidate the decisions on one clear site plan. Show the pergola footprint and orientation, exact outlet points, each route, the final destination, boundaries, relevant existing downpipes, paths and known low spots. Add notes from the site survey and mark any details checked by an installer or drainage professional; distinguish confirmed information from assumptions. Attach the relevant model drawing and record which configuration it covers. The plan does not replace a technical design, but it lets everyone compare the same proposed arrangement and spot gaps before work starts. If there is more than one outlet, draw each route separately so it is clear where flows meet and who has confirmed that junction.
Agree how the finished route will be inspected and kept clear, and who is responsible for checking it after work is completed. Confirm that access to visible outlets, channels or inspection points remains possible; hiding a drainage element behind a planter or fixed surface can make a problem harder to spot. Observe the route in ordinary rain when safe to do so, noting ponding, overflow or erosion, and ask the installer or drainage professional to investigate anything that differs from the plan. An observation is not proof of performance in every weather condition, but it can reveal a mismatch between the drawing and the site. Revisit the plan if landscaping, paving or the pergola configuration changes.
Frequently asked questions
Where should a pergola outlet discharge?
Choose a destination only after checking the outlet position, ground levels, existing drainage and the route water will take. The outlet should lead to a suitable destination confirmed for the property, rather than leaving rainwater to run towards a boundary or across a path.
Can I let pergola rainwater flow over a neighbouring boundary?
Do not plan a route that relies on water flowing onto a neighbour’s land. Look for a suitable route and destination on your own site, or ask a qualified professional and the relevant local authority to confirm whether another arrangement is appropriate.
Do all pergolas have the same outlet positions?
No. Outlet locations and drainage details depend on the model and the configuration being considered. Ask for the drawing that applies to the exact pergola and options, then compare its outlet points with your site plan.
Can I connect the pergola outlet to an existing garden drain?
Do not assume that a nearby drain is suitable. A drainage professional should confirm what it serves, whether it can accept the additional water and whether the proposed connection meets the requirements for your project.
What information should I give the installer or drainage professional?
Provide the pergola model and proposed configuration, a site sketch showing boundaries and levels, existing drains and downpipes, and the intended route and destination for each outlet. Photos of the garden after rain can help explain where water currently collects or flows.
A considerate drainage plan connects each outlet to an identified destination, accounts for water already moving through the garden and avoids leaving the route to end at a boundary by accident. Mark the proposed path before the pergola’s position is final, then have the exact configuration and any local requirements checked. For every outlet, you should be able to trace the full route and know where the water will go if its intended destination cannot accept it. If that route is still uncertain, resolve it before the layout is fixed.
