
Can You Build Pergola Foundations Now and Add the Roof Later?
Pergola project planning
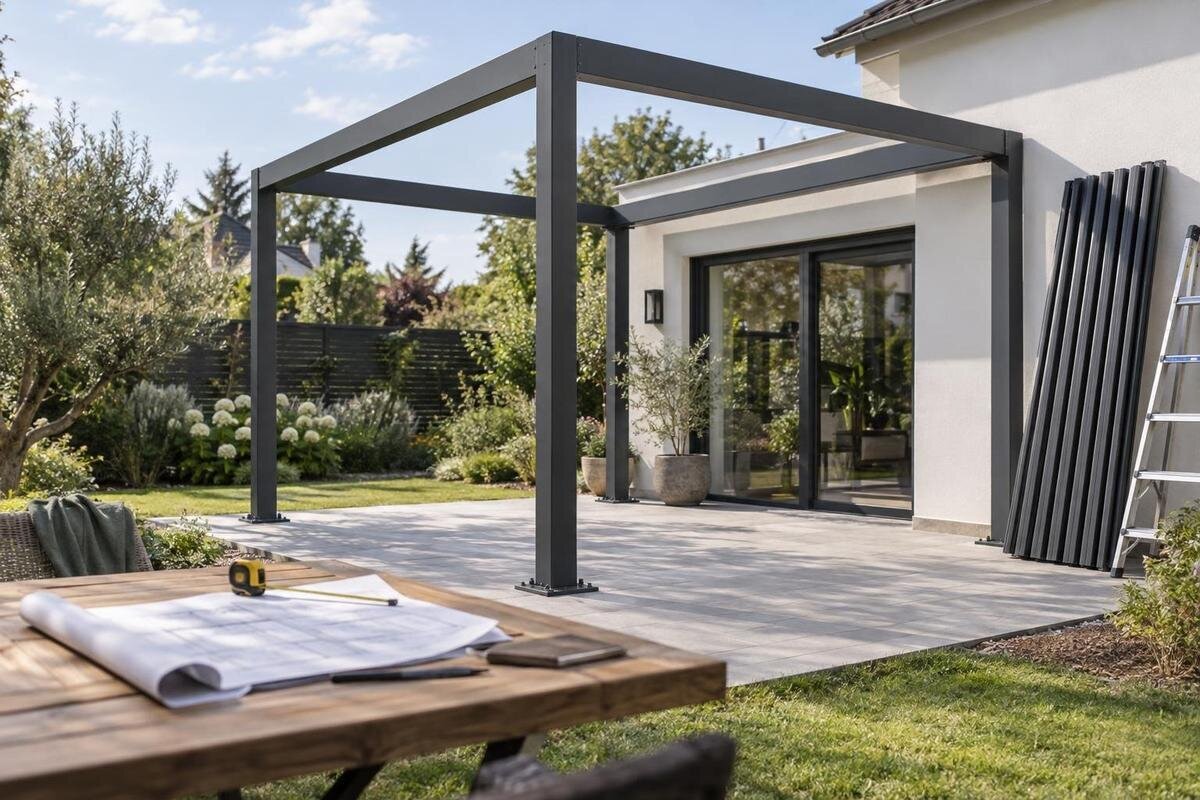
Yes, a pergola project can be split into stages, but the foundations should be planned for a specific finished structure rather than treated as a generic first job. Post positions, fixing details, finished levels and the roof configuration can affect what must be built below. Agree these while you are selecting the model; a later change can leave supports in the wrong place even when the revised design looks similar. With current drawings, clear responsibility between trades and a plan for protecting the unfinished site, phasing may be workable. If the design is still open, site preparation may be the sensible first stage, not permanent foundations.

Before you commit to foundations 1
When can a pergola project be phased?
Yes, potentially, but define what “foundations now” means in the contract. A site survey or removal of old paving is not the same as installing concrete bases with final connection points, and neither is automatically the same scope as a complete foundation designed for a particular pergola. The groundworks contractor needs to know what later components will connect to the base; the pergola installer needs to know what has already been built. Agree the stage boundary, inspection point and handover condition before either party starts. Ask precisely what is postponed: roof components only, or posts, beams and the full assembly as well. Do not assume a roof can be fitted as a separate later add-on unless the supplier confirms that sequence for the named system. A pergola is a specified structure, not simply a roof that can be attached to any convenient slab.
Phasing is most workable when one selected model and configuration govern both stages. Use Bloomcabin’s pergola product listing to identify the item in early correspondence, then make sure the quote, plan and installation information describe the same size, support arrangement and intended components. This gives the groundworks contractor a defined layout to follow and the later installer a clear basis for checking the completed work. If details remain open, ask which preparatory tasks can be completed without fixing the support layout; do not assume pouring a generic set of pads is a harmless placeholder.
Choose the model and configuration first
Before groundworks, settle the product and configuration far enough to identify what the foundation must support. Record the model, overall size, whether it is freestanding or attached to a wall, the roof configuration, post arrangement and its position relative to the house and patio. Add the orientation and any nearby doors, paths or fixed items that constrain the layout. Note any side elements or other accessories you hope to add, and ask whether they change the approved structure or foundation details; options are not automatically interchangeable. If Bloomcabin Bioclimatic Pergola is the model under discussion, use its exact name and chosen configuration in your enquiry rather than relying on a broad category label.
Treat a change to any of those choices as a review trigger. A different footprint, support arrangement or attachment point can move posts, alter clearances or change what must connect to the base. Even if a revised design looks close on a plan, take dimensions from the current manufacturer or installer drawing, not by scaling an image. If a path or other site constraint forces an adjustment, get an updated drawing rather than asking a crew to improvise. Keep the approved version with the order and give the same revision to the groundworks team. If the final choice is not confirmed, mark it as provisional in the programme; a draft sketch is not authority to set permanent fixing points.
Before you commit to foundations 2
Wall-mounted and freestanding designs need different checks
A wall-mounted pergola and a freestanding one may look similar in a garden photograph, but they have different support arrangements. A wall-mounted design uses the building at its attachment side, so the position and suitability of that wall become part of the project; the ground support layout cannot be inferred from a freestanding example. If you are considering the Bloomcabin Wall-Mounted Pergola, use that exact model name when requesting drawings and ask how its attachment is meant to meet the proposed site. The product listing identifies an option; it does not establish that a particular house wall is suitable.
Have a suitably qualified professional assess the actual wall, its construction, condition and finishes alongside the supplier or installer’s fixing requirements. Share relevant details such as cladding, insulation, openings, services and planned external work; an intact-looking surface does not prove what is behind it. The project documents should make the attachment location clear and show how it relates to the eventual finished surfaces. Keep confirmation of the wall assessment and fixing information with the same drawing revision as the foundation plan. If the wall or proposed fixing cannot be confirmed, resolve the design before fixing the other supports, rather than trying to adapt the base later.
Ask for the exact foundation and setting-out drawings
Request current, model-specific foundation and setting-out information before installation. The plan should let the trades identify intended positions from reliable site references and show the relevant offsets or spacing; the accompanying detail should explain the approved interface to the pergola supports. Ask what each dimension is measured to, such as a support centre or outer edge, and which site reference is being used. Confirm the required finished ground level, any stated dimensional tolerances and that the document applies to the exact size and roof configuration in the quote. For a wall-attached proposal, include the building connection detail as well as the ground points. Include Bloomcabin’s wall-mounted pergola page in the request to identify the model, alongside the proposed configuration and site details.
Check the drawing revision and have the supplier or installer explain any missing dimension, fixing detail or tolerance before the groundworks contractor sets out. A competent local professional should also assess the site: existing paving, slopes, retaining features, buried services and ground conditions may affect the appropriate foundation design. Do not copy spacing from another pergola or infer it from a product photograph. If the supplied detail needs to be adapted to suit the site, have the responsible professional document the change and obtain agreement from the relevant parties before irreversible work begins. Keep superseded drawings clearly marked so the crew does not rely on an older version.

Before you commit to foundations 3
Agree the handover between the two teams
Write down the division of work between the foundation contractor and the later pergola installer. Who sets out the positions, supplies or installs any template and connection hardware, confirms levels and alignment, checks the base before it is covered, and confirms it is ready for the next phase? Which party must report or correct a mismatch? These responsibilities can fall between two contracts unless the handover is explicit. Share one drawing revision with both teams and ask each to confirm that the proposed sequence fits its scope. If the later installer has not been appointed, ask how the completed base will be checked before the handover is considered complete.
Compare quotations by inclusions, exclusions and assumptions, not by the word “installation” alone. A foundation quotation may not include pergola assembly; an assembly quotation may assume a prepared base, suitable access or work completed by someone else. Confirm separately the number of visits, site access, timing, storage, inspection and any work after the foundations are in place. The Bloomcabin Pergola product page can identify the selected item in an enquiry, but the written quote must state what is supplied and who completes each phase. Record changes to scope, dates and responsibility in writing.
Set finished levels and rainwater routes together
Show the intended finished surface in the project section, not just the ground as it looks today. If paving, a deck or another surface will be added later, its final level can affect where the base sits, how exposed the support is and how the patio meets the house. Mark thresholds, edges and fixed routes across the space, then agree who is responsible for leaving the foundation at the level the pergola installer expects. Decide whether the surface is being laid before or after pergola installation, as this can affect access to inspect the base and who finishes around it. Check the layout against current drawings for the selected model; an overall footprint alone may not settle the post positions or finished-surface relationship.
Plan rainwater behaviour as part of the completed roof and patio, even if the roof is installed later. Ask the supplier or installer to show where water is intended to go for the chosen configuration, whether any collection or discharge components are included, and what the site must provide around them. Do not assume runoff can be directed onto a path or connected to an existing drain; have any proposed drainage connection checked by the responsible professional. If the selected product is Bloomcabin’s bioclimatic pergola model, include its exact configuration in that discussion. The answer needs to come from drawings for the actual design and the professional responsible for site drainage.
Before you commit to foundations 4
Protect and document the unfinished stage
Once the first phase is complete, treat the area as an unfinished work site rather than a ready-to-use pergola base. Ask the contractor to specify temporary protection for exposed fixing points, edges, openings or reinforcement, and how the area should be kept safe during the pause. Keep vehicles, skips and later paving work away from the relevant positions unless the responsible professional says otherwise. Agree how access will be controlled while the work is incomplete, particularly if the patio remains in use. Avoid temporary covers or alterations that could conceal damage, trap water or interfere with the final connection. Assign someone to inspect and maintain the protection during the gap.
Make a handover record while the work is visible. Keep the final drawing revision, any agreed site changes, completion notes and clear photographs tied to fixed points on the property; record anything that will be concealed by paving or another finish. Label photographs with a date and viewpoint, and give the information to the later installer rather than keeping it only in a household file. If pergola components are delivered before they are needed, ask the supplier for handling and storage instructions instead of assuming they can remain outside. Photos are useful records, but they do not replace the drawing or any required measurements.
Check compatibility across a long pause
The longer the gap, the more important it is to confirm that the quoted model, drawings and components will still match at installation. Ask the supplier in writing whether the specification is tied to a particular model or version, what remains subject to change, and whether a later order would use the same approved interface. Ask whether a substitution could affect dimensions, fixing points, water handling or assembly information. A current catalogue page or quotation is not, by itself, a promise of future availability or unchanged components. If you use the Bloomcabin bioclimatic model listing as a reference, record the exact product name and configuration in your enquiry and ask what can be confirmed for the planned sequence.
Agree what happens if the product changes, an option is no longer available or the installer identifies a mismatch after the base is complete. The response may require a design review, a revised programme or a change to the scope; do not assume the foundation can be adapted without professional approval. Check any quotation’s validity, payment milestones and stated exclusions, and whether the first phase commits you to a particular supplier or installer. Record who will arrange and pay for a review or extra visit if a change is required. These are commercial as well as technical questions, so settle them before authorising work whose usefulness depends on a later order.

Before you commit to foundations 5
Verify consent, insurance and responsibility locally
Check consent and insurance against the complete proposal and actual site, not just the fact that foundations are being built first. If planning permission or another approval may be relevant, ask the appropriate local authority or a qualified adviser before the stage in question; requirements depend on individual circumstances and are not established by this guide. Give your insurer an accurate description of the pergola, installation method, contractors and gap between stages, then ask whether notification or temporary arrangements are needed. Make these checks before work begins and revisit them if the design changes. Do not assume that an unfinished base, kit or stored components are automatically covered.
Make responsibility during the gap explicit in the contracts and any advice you receive. Ask who controls access, maintains temporary protection, handles accidental damage and records the site condition before the next contractor arrives. If an insurer, landlord, management company or another relevant party asks for information, keep its response with the current plan and drawings, and note which stage it concerns. A verbal answer about foundations alone may not resolve questions about the completed structure, installation stage or materials on site. Confirm uncertainties directly with the organisation concerned rather than relying on a contractor’s assumptions.
Decide whether the foundations are ready to proceed
Proceed with the foundations only when the model and layout are fixed enough for the supplier or installer to issue the right details, a competent professional has checked the site-specific work, and both trades agree on the handover requirements. The finished surface, rainwater route, temporary protection, inspection and responsibility for changes should also be settled. If the footprint, wall connection, ground level, fixing interface or choice of components for the later stage remains undecided, pause before irreversible work. Some site preparation may still be useful, but agree its scope separately instead of treating it as a finished base. Resolve outstanding technical questions in writing rather than proceeding on a verbal assurance that everything should fit.
For a quote or configuration discussion, name the exact model and say that the project is staged; for example, Bloomcabin’s wall-mounted pergola listing identifies the option you mean. Send the supplier or installer the site measurements, photographs or drawings they request, and ask for the current foundation information, trade boundaries and assumptions in writing. Make clear which phase you want quoted, so the response does not assume immediate full installation. Take that information to the person responsible for the groundworks before confirming the date. This does not replace a site-specific professional check; it gives that person a defined design to assess.
Frequently asked questions
Can I pour the foundations before placing the pergola order?
Only after the final model and configuration are confirmed, the current foundation details are available, and a competent professional has assessed the site-specific work. If those points are unresolved, ask which preparation can be done without fixing the support layout. Do not pour generic bases and assume they will suit a future model.
How long can the foundations remain unused?
There is no universal period that suits every project. Timing and protection depend on the specified work, materials and exposure. Ask the contractor responsible for the foundations and the later installer to agree when the base can be used, what needs inspection and how it should be protected during the gap.
Can a different pergola go on the same base later?
Possibly, but compatibility should not be assumed. A different footprint, support arrangement or fixing interface may not match the existing base. Have the supplier, installer or another suitably qualified professional review the proposed change before using or altering the foundations.
Who should supply and install the fixings?
That depends on the approved detail and the agreed scope. The contracts should say who supplies and installs any fixing hardware or template, who checks the base before it is covered, and who confirms it is ready for the next phase. Do not choose generic fixings on site.
Do local permissions or insurance change if I build in stages?
There is no universal answer. Ask the relevant local authority or a qualified adviser about the actual project, and tell your insurer about the unfinished period, contractors and any materials on site. Confirm directly whether any notification or temporary arrangements are needed.
Foundations now and the roof later can be a practical programme when the base is designed, checked and recorded as part of the chosen pergola system. The useful dividing line is not the length of the pause; it is whether the first phase has an agreed drawing, a site-specific professional check, safe protection and a clear handover for the installer. If the model or connection remains uncertain, settle those details before authorising work that is difficult to reverse.
