
Planning a Pergola for Outdoor Exercise
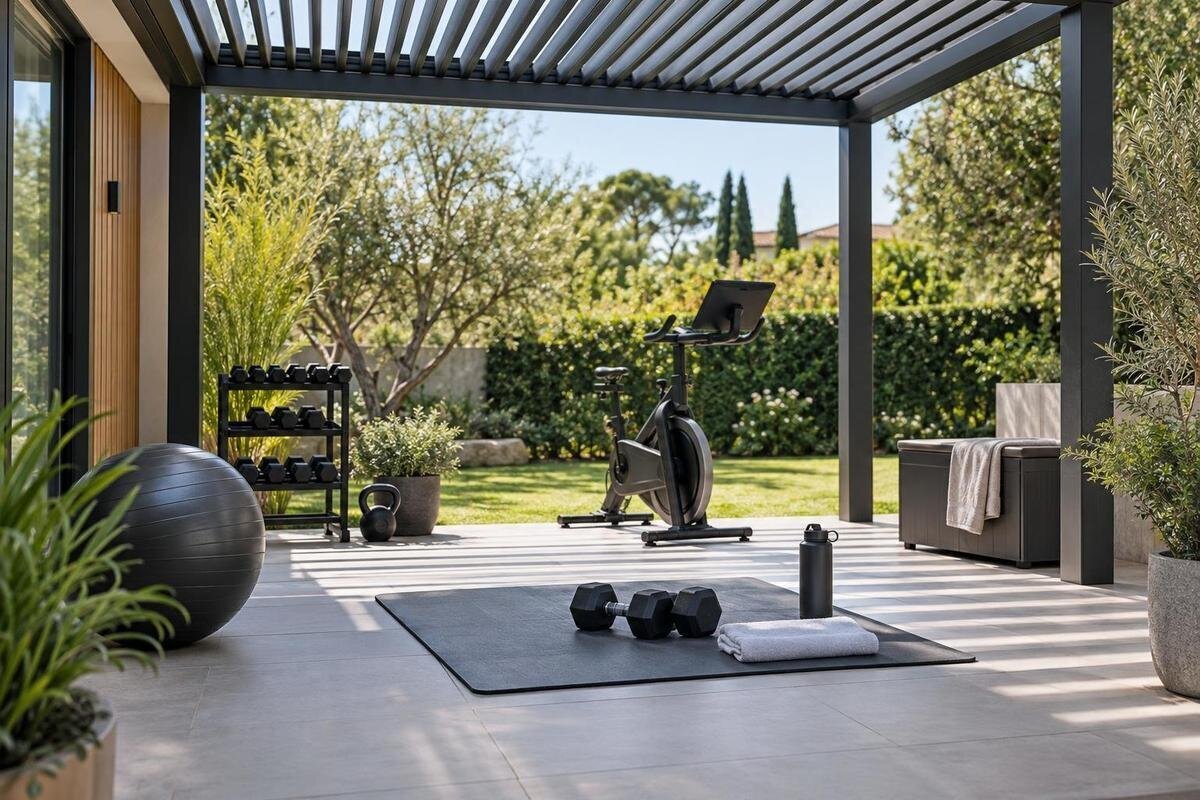
Outdoor exercise
An exercise area beneath a pergola works best when it is planned around the movements you make, not just the footprint of a mat or bench. Measure the space each activity needs, allow for access and equipment, and think about how the floor changes when damp. A pergola is not automatically suitable as an exercise anchor: equipment suspended from it needs approval for the exact structure and setup.

Activities, equipment and usable floor area
List the activities you actually plan to do and note the equipment each needs. A mat-based routine has a different footprint from an exercise bike or bench; skipping and wide side-to-side steps need extra clear space around the person. Record whether equipment remains in place between sessions or must be brought out and put away each time. Include the largest movement you intend to make, the direction it faces and whether anyone else will exercise at the same time. If the routine varies, plan for the activity with the broadest movement area rather than an average session. This helps avoid sizing the space around one item of kit and finding later that ordinary movement has nowhere to go.
Separate the overall pergola footprint from the usable workout zone. Posts, stored gear, access paths and furniture can all take up floor area, so a stated area alone cannot confirm that an activity fits. The Bloomcabin Pergola size listing gives a range from 9 to 24 m²; treat that as a product comparison point, not as the clear area available for exercise. Draw a simple concept plan with the intended routine, equipment and route marked. For any model under consideration, confirm its exact dimensions and support-post positions from product information before deciding where your clear zone can sit. If a listing does not make clear how its area is measured, ask before comparing it with your plan.
Measure each movement area
For every activity, mark the complete movement area, not just the space occupied by equipment. Include reaching, turning, stepping out to either side and moving an item into position. Leave a buffer beyond the largest planned reach so the movement does not end at a post, wall, chair or garden edge. The amount depends on the activity and the person; there is no single clearance figure that suits every routine. If you use a mat, mark its actual dimensions and the extra space beyond its edges, rather than treating the mat outline as the boundary of movement. Include the space needed to enter and leave without crossing another person's activity area.
Check overhead clearance and the position of beams, lights, fans or other fittings, if present; a ground plan will not show whether raised arms or equipment might reach them. Where two users may overlap, draw their movement areas at the same time and keep their routes separate. When reviewing the Bloomcabin Bioclimatic Pergola listing, check the selected configuration's usable height as well as its floor dimensions. Show any overhead fittings on your plan so they are not overlooked when assessing a movement. If the necessary height measurements are missing, ask for them before including activities that involve raised arms or lifting equipment overhead.
Choose a floor with reliable grip
Reliable footing matters when you are moving. Look for a surface that feels stable underfoot and offers grip in the conditions in which you expect to use it. A pergola does not guarantee a dry floor: wind-driven rain, splashes, damp leaves or dirt can affect traction. Check the area before each session, and do not use a patch that is visibly wet, slick or contaminated until it has been dealt with and the surface is suitable again. Keep an indoor-only mat or piece of equipment out of the weather unless its maker says it can be used outdoors.
Inspect transitions as carefully as the centre of the workout area. A raised threshold, uneven join, loose board, shifting paving stone or curled mat edge can interrupt a step and is easy to miss when attention is on equipment. Check that mats stay flat and do not slide on the underlying surface; a mat does not fix a floor that shifts. If a deck, patio or other surface moves, pools water or seems unsuitable, ask a relevant tradesperson what needs attention before putting exercise kit there. Consider how the floor behaves when dry and when naturally damp, rather than choosing a finish by appearance alone.
Keep access routes clear
Map the way in and out from the nearest door, gate or garden path before arranging equipment. That route should stay open when a session is under way, and it should not require someone to cross the active movement area to fetch an item or get past. Include any door swing and the space needed to carry equipment into position. A clear route also lets another person pass without stepping over a mat or weights. On a narrow terrace, mark these paths before allocating a workout area; otherwise, circulation can reduce the usable floor more than expected.
Place equipment that is not in use outside the marked movement area, with enough room to pick up or put away each item without entering another person's space. Keep smaller objects, such as bottles and phones, off the line of travel but within easy reach. Do not leave weights where they could roll or be kicked. When comparing configurations in the Bloomcabin Pergola range, consider how people will pass between the posts and equipment. Check the route with a bench or other large item in its working position: access should not depend on moving it aside whenever someone needs to pass.

Include equipment storage in the plan
Decide where each item lives when it is not being used, and measure the space that storage takes up. A box or cupboard can reduce the clear floor area, while loose items left beside a mat can become obstacles. If you plan to clear the area after a session, allow room to carry equipment out without stepping across someone's movement area. Check the maker's instructions for outdoor storage; a pergola does not necessarily keep belongings dry or sheltered from wind. A defined storage position also makes it easier to see whether the workout area is genuinely clear before use.
Furniture can change the plan too, especially if the pergola area serves another purpose between sessions. Measure chairs, a table or any other items in the positions they occupy, and show both the exercise layout and the everyday arrangement. If you are considering the Bloomcabin Wall-Mounted Pergola listing, include furniture beside the house as well as items beneath the proposed structure. Decide where displaced chairs or a table would go during exercise; moving them onto the access route would simply shift the obstruction. Include storage furniture in both layouts so the change between uses does not depend on finding extra space elsewhere.
Plan for weather, shade and visibility
Treat an outdoor workout area as exposed to changing conditions rather than assuming a pergola makes every session all-weather. Rain can reach an outdoor space, and wind may carry water or leaves into it; moisture can affect footing and stored equipment. Check how water moves across the actual site and where it may collect, but leave drainage or surface changes involving construction to a qualified person. Have an alternative for conditions that leave the floor slippery, and wait until it is dry and suitable before using the area. If a mat or piece of kit has outdoor-use limits, follow its maker's instructions.
Sunlight and shade change through the day, so observe the proposed area at times when you expect to exercise. Notice glare, shadows and whether you can see the edges of equipment and other people clearly. Record which parts of the movement area are affected, rather than judging only the spot where a mat will sit. For the Bloomcabin Bioclimatic Pergola, ask what roof arrangement is included in the selected configuration and what its specifications say about shade and exposure. Compare those details with your observations on site; a product name or photograph alone does not establish the conditions you can expect beneath it.
Suspended equipment needs separate approval
Rings, suspension trainers, pull-up bars, resistance bands fixed overhead and similar equipment need a separate structural check. Repeated or moving loads can differ from ordinary use, and a fitting that looks secure does not prove that the pergola can carry them. The fact that a structure is intended for outdoor use, or has beams that appear substantial, does not mean it has been approved for body-weight exercise. Do not attach equipment to a beam, post or other part of the pergola unless the manufacturer or a suitably qualified structural professional has approved that exact model, attachment, installation and use.
Ask for model-specific confirmation that covers the proposed attachment and the movements involved. A statement about one configuration or accessory does not automatically cover another. If there is no clear approval for the intended use, do not attach the equipment. A freestanding alternative is only an option if its maker permits outdoor use and the space provides its required clearance. Keep the equipment separate from posts and avoid a layout that takes people through the workout area to reach it. This keeps the pergola's role as a shelter distinct from any use as an exercise anchor.
Measure the site as well as the pergola
Measure the ground area available, not only the outline you hope to cover. Mark boundaries, house openings, steps, drains, existing furniture and garden features, along with the routes people use to reach the area. A workout zone may appear to fit but be impractical if it sits across a door, narrows a path or leaves too little usable floor between support points. Record the dimensions on a plan and confirm whether a quoted pergola size refers to the outside footprint or another measure; do not substitute one for the other. Include access needed for the proposed installation when reviewing the site with a supplier or installer.
When considering the wall-mounted Bloomcabin model, have its exact dimensions and fixing requirements checked against the building and proposed activity area by the supplier and a qualified installer. The model name alone does not establish whether a particular wall or site is suitable. Show the installer the positions of nearby openings and the access route, rather than supplying only the width of the available wall. If the proposed post positions obstruct a doorway or reduce the clear floor, revise the layout before settling on the exercise position. Keep the site plan distinct from the movement plan so both can be reviewed together.

Test the plan at full scale
Before committing to a layout, reproduce the proposed positions on the terrace or in the garden at full scale, using removable markers that do not make the floor slippery. Mark the pergola outline and any known post locations, then place the equipment footprint and clear movement boundaries. Walk the access route with the kit in position and check whether it crosses the exercise area. If you cannot mark the site, draw a measured plan with the same information. Label an illustrative drawing as a concept: it is a planning aid, not a confirmed product or installation drawing.
Check the marked layout against each activity on your list, including the largest reach, equipment retrieval and any shared use. Use the selected configuration's dimensions from the Bloomcabin Pergola product page or information supplied by the retailer to place the outline and posts accurately. Then look for conflicts that are less obvious on paper: a route that crosses a mat, storage that blocks equipment retrieval, or furniture with no clear place to go. Make a second version if furniture needs to return after exercise. Comparing the two arrangements at full scale helps show what must move and whether the change is practical.
Check product dimensions before choosing
Ask for a dimensioned drawing of the precise configuration and size under consideration. Useful details include the outside footprint, clear internal measurements, post positions and usable height, as well as any roof arrangement relevant to your intended use. When comparing options in the Bloomcabin Bioclimatic Pergola size range, use the drawing for the particular configuration rather than relying on its nominal area. Bring together the floor, overhead and access measurements from your plan, and mark any remaining conflicts. If a dimension is unavailable or unclear, identify the specific measurement you need and leave the decision open rather than filling the gap with an estimate.
Before ordering, check that the exact model and layout leave room for movement, access and equipment storage together. Confirm that the site measurements and any requirements for the proposed installation have been reviewed by the relevant supplier or installer. For suspended equipment, obtain separate confirmation for the exact exercise use. Keep the plan, measurements and answers together so the arrangement can be reviewed if furniture or routine changes. A useful buying decision is more than a square-metre figure: it shows where you can move, where equipment goes and how you will reach it without crossing the workout area.
Frequently asked questions
How much space do I need under a pergola for exercise?
Measure the largest movement area your routine needs, then add equipment in use, access and storage. Compare that plan with the exact internal dimensions and post positions of a specific pergola configuration. A listed area range is only an early comparison; it does not show how much uninterrupted floor remains. Mark the layout at full size if possible.
Can I hang a suspension trainer or rings from a pergola?
Only if the manufacturer or a suitably qualified structural professional approves the exact pergola, attachment and exercise use. A beam or post that looks sturdy is not proof that it is suitable for moving or body-weight loads. Without specific approval, use a freestanding alternative only if its maker permits outdoor use.
Will a pergola keep the workout floor dry?
Do not assume that it will. Wind can carry rain into an outdoor area, and leaves or dirt may affect grip. Check the actual floor in the conditions you expect, and wait until it is dry and suitable before using it if it has become slippery.
What is the best floor for exercise under a pergola?
There is no single best finish for every site. Look for a stable surface with reliable grip, and check transitions, loose sections and mat edges. Consider how the surface behaves when naturally damp as well as when dry; avoid using it if it is slippery or shifting.
Does a wall-mounted pergola mean I can attach exercise equipment to it?
No. A wall-mounted model name does not confirm that the wall, pergola or a particular attachment can carry exercise loads. Check the exact structure and proposed use with the manufacturer or a suitably qualified structural professional before attaching any equipment.
A useful pergola exercise plan leaves room for the full routine, equipment in use and anyone passing nearby. Test the change between exercise and everyday use as carefully as the workout layout itself: furniture and stored kit need somewhere to go. The floor must remain suitable for the session, even when the layout fits. Treat any proposal to hang equipment from the structure as a separate decision requiring approval for that exact use.
