
How Terrace Falls Affect Pergola Planning
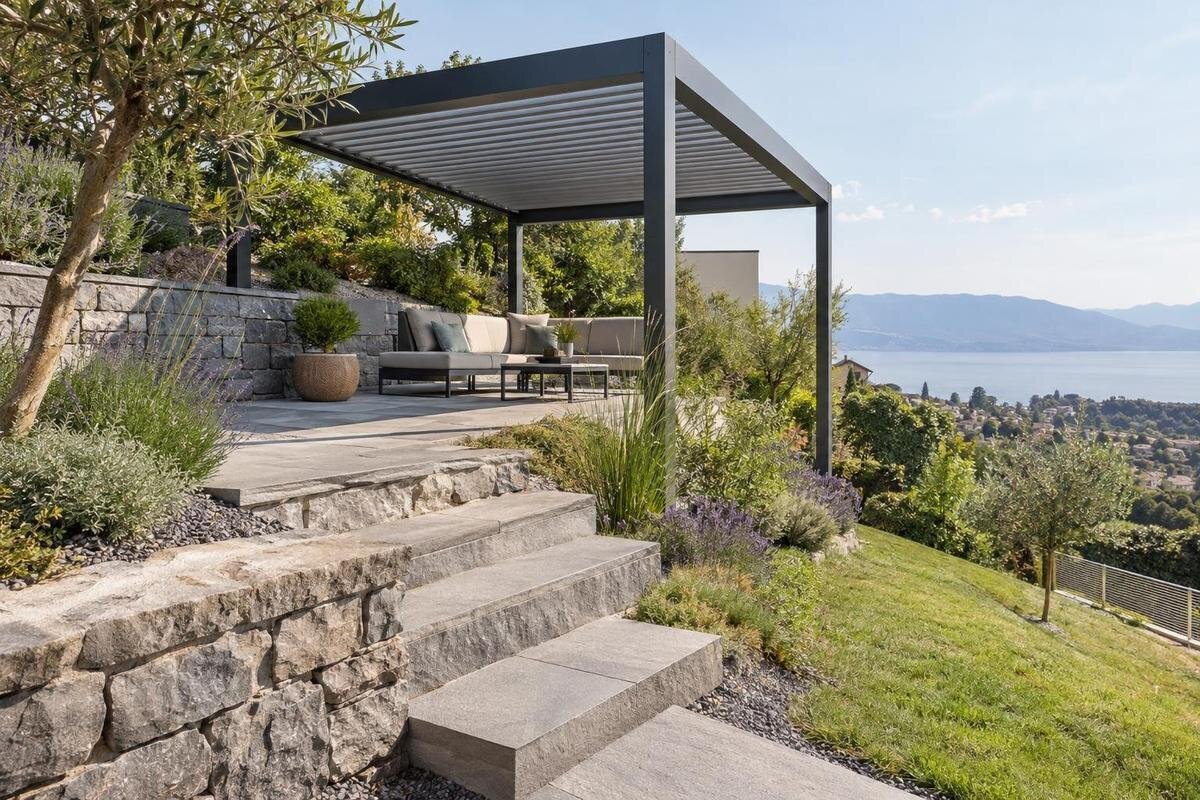
Pergola planning
A sloping terrace does not automatically rule out a pergola, but the paving's fall and the roof's intended level are separate things. The fall can guide water across the surface; the selected model has its own geometry and an approved way to place its posts. Before agreeing a layout, record how the terrace rises and falls, trace drainage routes, and have the post arrangement checked against model-specific information and the actual site.

01
The terrace fall does not set the pergola roof level
A terrace fall describes the change in height across a finished surface, and can help move water towards a drain or another intended outlet. The pergola roof is a different reference: its frame may require a level line or a specified pitch, according to the model. The paving is not a template for the roof. Following the surface gradient without checking the design can put the frame outside its approved geometry; requiring a level roof without checking how the posts meet the ground can create an equally unsuitable arrangement. Plan for surface drainage and frame geometry separately, then check that they work together.
Keep the two references separate on the first sketch. Draw the terrace as it is, with its high and low points, and show the roof line required by the model rather than copying the paving angle. A photograph cannot establish whether the roof is meant to be horizontal or inclined. If you are considering the Bloomcabin Bioclimatic Pergola, request its installation information so that the required roof line can be shown alongside the surveyed surface levels. This comparison makes the difference between the two references clear. Even a gentle-looking fall can produce different levels at the support points.
Survey the proposed footprint at finished level
Survey the actual finished surface rather than estimating its angle by eye. Use one consistent level reference and record the height at each proposed post centre, as well as relevant edges, thresholds and drainage points. A plan view shows where those locations sit; cross-sections can show how the surface rises or falls between them. This is more useful than writing down a single slope for the whole terrace, because a corner may have a local dip or change in level that is not obvious from the overall direction. If paving is not yet installed, distinguish design levels from measurements of the completed terrace. Where the surface falls in two directions, record both.
Mark which figures are measured and which remain provisional, and note the surface finish and any transitions at each support location. Check that the survey covers the whole footprint, not just its highest and lowest edges. This helps the designer or installer compare the post positions with the actual levels and spot a step, channel or irregular patch early. When assessing the Bloomcabin Pergola, use its model drawing to mark the proposed post centres on the survey, so each support can be compared with its corresponding measurement. Include planned paving thickness too: the finished surface, not an exposed base, determines the clearance at each support.
02
Trace drainage routes before placing posts
Follow the water before deciding where a post can go. Note the direction of the surface fall, where water collects after rain, and how it reaches a channel, gully or other intended outlet. Include channels and drain covers within the pergola footprint, along its edges and immediately outside it; a support should not obscure access that needs to remain clear. A visible low point is not necessarily a drain, so confirm the route rather than assuming water disappears there. If the terrace has ponding or an uncertain outlet, resolve that separately with a drainage professional before fixing the layout. Note whether a channel runs across or beside a proposed support line.
Consider the roof's water route as well as the paving's. The two paths may differ, particularly if the selected design collects or directs rainwater, so ask what the model specifies and where any discharge is intended to go. For the Bloomcabin Wall-Mounted Pergola, show the intended roof-water discharge point on the same plan as the terrace outlets. This lets the assessor consider both routes together without assuming that a wall-side layout resolves the drainage. Avoid placing a post where it makes a channel hard to inspect or restricts the existing water route. Do not assume roof water can simply be discharged onto the paving; have its route confirmed.
Set roof height in relation to doors and the house
Once the roof reference is known, check the resulting clearances around doors, windows and access routes. A frame held to one level over sloping paving will have less clearance above the higher paving and more above the lower paving. A roof with a specified pitch changes that comparison, so work from the chosen model rather than a visual mock-up. Check door and window operation, the route to the garden, existing gutters and other fixed features around the house. Compare the paving and roof levels at each relevant point, including where an opening or projecting fitting comes close to the frame. Check both ends of the footprint and the approach to them, not just the centre.
With a wall-mounted arrangement, the roof-to-wall relationship and support positions need to be considered together with the ground levels. Do not assume the house line or terrace edge is level, or that a wall connection makes the posts independent of the slope. For the wall-mounted Bloomcabin model, ask for the approved geometry and compare it with measured levels, opening clearances and existing drainage. The person responsible for the structural assessment should confirm that the proposed arrangement suits the actual building and terrace; a sketch that omits the fall cannot settle that question. Keep gutters and any access needed for maintenance visible on the same drawing.

03
Check each post against the terrace fall
Mark each proposed post centre separately on the survey. A slope changes the surface height at those points, and the difference between centres matters as much as the overall fall. Compare the points individually rather than assuming the change is uniform across the footprint; a local step or dip can affect one support more than its neighbours. Where the roof line and terrace fall do not run in parallel, the distance from paving to frame changes across the footprint. That affects usable clearance and the support geometry the model must accommodate. An edge measurement alone cannot establish whether every post position works.
Do not treat different ground heights as permission to extend, shorten, cut, pack or reposition posts. Those changes may take the frame outside the arrangement approved for the model, and the right response depends on its design. Ask the supplier or a qualified installer to identify what variation, if any, is permitted and confirm the positions on the drawing. If the layout does not fit the measured levels, changing the position or model, or revisiting the terrace design, may need consideration. Agree any option before work begins rather than assuming the slope can be resolved on site.
Match post positions to the underlying structure
The finished paving does not show what lies beneath it or where the supporting structure can take an anchor. Across a sloping terrace, proposed post points may sit near a surface edge, joint, drain or change in construction. Record those conditions instead of treating the visible finish as proof of a suitable fixing point. The assessment needs to identify the substrate at the actual positions and relate it to the anchoring arrangement approved for the exact pergola model. A uniform-looking surface can conceal different support conditions, especially where a change in level also marks a change in how the terrace was built.
Ask for the model-specific anchoring drawing and a site assessment using the same post centres and levels as your survey. A drawing for the bioclimatic pergola model can be compared with evidence of the terrace substrate; a general illustration or an assumed footing size cannot settle the question for every site. Do not infer a footing size from the slope alone. The appropriate support depends on the model and the conditions found on site. If substrate information is missing, treat it as an open item for the assessor rather than guessing from the paving's appearance.
04
Allow room for access and everyday use
A pergola should not turn a working terrace into an awkward route. Trace how people reach doors, steps, seating and garden paths, then check the route at the high and low edges of the footprint. A post beside a threshold may leave too little usable passage even if its position fits the plan, while a roof edge can affect an opening above. Preserve the access you rely on and leave room to open doors or reach drains that need maintenance. Consider how people will use the space with furniture in place, rather than assessing the pergola as a rectangle on a plan.
Access for maintenance matters as well as space for everyday use. A channel may cross the footprint, or a drain cover may sit close to a proposed base. On the layout for the regular Bloomcabin pergola, mark these features alongside the supports and planned furniture, so the installer can see where access must remain clear. Check that a cover can still be reached and that a channel can be inspected without the base obstructing it. If the paving is also being changed, show this layout to the people coordinating that work. Any change to the supports or surrounding paving should preserve the agreed water route as well as access to it.
Compare freestanding and wall-mounted layouts
A freestanding arrangement and a wall-mounted arrangement interact with a sloping terrace differently, but neither removes the need for a survey. A freestanding frame needs each post to be in a position that works with the model's approved layout and supporting substrate. A wall-mounted frame also depends on its specified relationship to the building; any ground-supported posts still need to match the measured levels. A layout change may move supports away from a drain or uneven area, but it also changes the footprint and can affect clearances. Compare complete arrangements, not just the number of supports.
Use the site plan to compare post centres, roof edges, access and drainage for each model you are considering. For the Bloomcabin wall-mounted option, include the proposed building connection as well as the ground-supported posts, so the comparison covers the whole arrangement. Request the relevant drawings and a structural review of the preferred layout. A product photograph cannot establish whether a frame can be skewed, stepped or fitted with posts at different heights. Moving posts to avoid a drain can also change their spacing, so compare the revised layout with the model drawing rather than treating the move as an isolated adjustment.

05
Coordinate the levels before installation work begins
Agree the levels while changes can still be coordinated, particularly if the terrace is being built or resurfaced. The pergola drawing, finished paving levels and drainage plan should describe the same layout; otherwise, a post position that appeared clear at design stage may land beside a channel, on an unexpected step or at a different height from the planned roof. Ask the installer and the person responsible for the terrace to confirm who will measure and mark the final post positions, and when the completed surface will be checked. If the paving build-up or finish height changes, update the level information too.
Before irreversible work, compare the real site with the approved model arrangement and resolve differences with the responsible designer or installer. If the Bloomcabin Bioclimatic model is the selected option, its drawing and the site survey should identify the same support positions. Have the site assessor confirm how the support and anchoring details relate to the measured levels and substrate. Record any agreed changes before posts or foundations are set, and obtain the relevant approval for the revised arrangement. Make sure everyone is working from the same current drawing, especially if the terrace levels or post positions have changed since the initial assessment.
Record the site information the installer needs
Give the installer a compact record rather than a verbal description of a slight slope. Include a plan showing the terrace outline, intended post centres, fall direction, high and low points, drains, thresholds, doors, nearby walls and any obstructions. Add measured finished levels at the post locations and note where measurements are still provisional. Label photographs to show surface transitions and outlets, but do not use them in place of measurements or substrate evidence. Use the same reference points in the drawing, model information and site discussion so everyone is comparing like with like.
Keep the agreed arrangement and any outstanding questions with this site record. Note the roof level or pitch required by the model, the post positions accepted for the measured fall, and the anchoring and drainage details agreed for those positions. Distinguish confirmed decisions from proposals that still need assessment; a provisional post height should not appear as a settled dimension on the installer’s copy. Record when the levels were measured and who will confirm them on site. If the layout changes, update the record so that an earlier sketch or measurement is not mistaken for the final arrangement.
Frequently asked questions
Can a pergola be installed on a sloping terrace?
Potentially, but the slope alone does not establish suitability. The chosen model's permitted post arrangement and anchoring details must match the measured finished levels, substrate and drainage route. Have these checked against model-specific drawings and site evidence before agreeing a layout.
Should the roof follow the terrace fall?
Not automatically. A model may specify a level roof reference or a designed pitch, so follow its approved geometry. Record the paving's drainage fall separately; do not infer the roof angle from a product photograph.
Can posts be different heights to compensate?
Only if the model's approved documentation allows the proposed arrangement. Do not assume posts can be cut, extended, packed or moved to compensate. Ask the supplier or a qualified installer to resolve differences against measured site levels.
Do I need to level the terrace first?
Not necessarily. The terrace fall may serve drainage. Changing it can affect outlets, thresholds and adjacent paving, so assess any alteration as a separate, coordinated design. First establish whether the existing surface and the model-approved post arrangement can work together.
What should I send for a site assessment?
Provide a plan with measured finished levels at every proposed post, the fall direction, high and low points, drains, thresholds and nearby obstructions. Add the exact model under consideration and any known information about the substrate. Mark intended or unknown levels clearly so they can be assessed rather than assumed.
Good pergola planning on a sloping terrace treats the paving fall, roof reference and post arrangement as separate but connected parts of one site plan. Measured finished levels describe the terrace surface; model-specific drawings and a professional assessment establish how the frame and anchoring details can fit that site. Where the proposed arrangement does not match the measured levels, resolve the design before installation rather than relying on unapproved adjustments to the posts or paving. The aim is a layout that accommodates the terrace fall while preserving drainage, usable clearance and access.
