
Reducing glare from pergola lights: shielding and placement
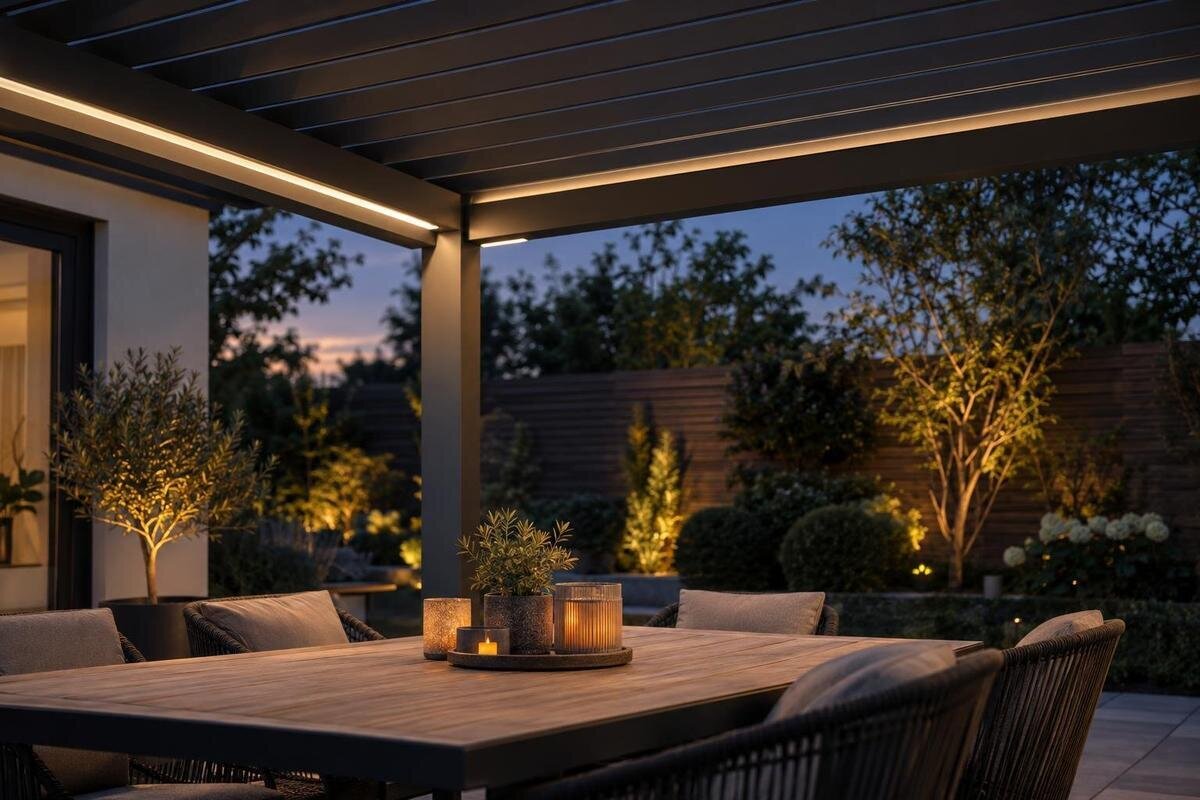
Pergola lighting
A pergola light can look unobtrusive from a standing position and still shine into someone’s eyes at a dining table. The difference is often a sightline problem, not simply a question of how many fittings there are. Map regular seats, check direct and reflected light after dark, then compare proposed positions with approved shielding and mounting options. This guide focuses on glare reduction through placement and shielding; wiring routes and general electrical preparation are covered on the separate pergola electrical-preparation information page.

Why pergola lights can cause glare when seated
Glare is not limited to a fitting that seems excessively bright when you stand beneath it. A small exposed source can catch the eye when someone sits back, leans away from the table or looks across the garden. Because a seated eye is lower and the person may face a different direction, a source hidden during a standing inspection can appear directly in view. It may stand out more once the surroundings darken; the same source can feel more prominent against a dark garden than against a nearby lit wall. The first question is not whether there are too many lights, but where the bright part of the fitting appears during ordinary use.
Separate direct glare from reflected glare. Direct glare occurs when the lamp or illuminated face of a fitting is visible from a regular seat. Reflected glare is a bright image or patch on glass, a polished table or another smooth surface. A shield may conceal the source from one chair while leaving it exposed to someone at the end of the table; a fitting that feels fine from the path tells you little about either view. Note the affected seat and direction. That gives a designer a useful description, such as ‘visible when seated by the house-facing end’, rather than the vague instruction to make the lights less bright.
Map the seats and normal viewing directions
Start with the furniture, not a catalogue of fittings. Mark every usual dining chair, bench, lounge seat and reading position, along with the routes people take through the pergola. Include how chairs are pulled back or turned during a meal; a single dot in the centre of a seat does not capture every head position. Note the direction people usually face and the directions they turn to speak, look towards the garden or enter the house. If the pergola is visible from a doorway or window, mark that viewpoint too. A fitting can be comfortable from below and still be conspicuous through the glazing. Where the space serves both dining and lounging, draw the two furniture layouts separately.
Include less obvious positions: the end chair, a seat used only when visitors arrive, or a regular spot just beyond the structure. A simple furniture sketch is enough to reveal the important sightlines; it need not be a finished installation drawing. Mark the most-used seats as priorities while keeping occasional seats in the check. If the enquiry concerns the Bloomcabin Wall-Mounted Pergola, put that model name on the sketch so the seating plan can be discussed in relation to the intended structure. The seating map helps a configurator or installer assess the layout rather than relying on a generic picture or one central seat.
Draw a plan and side view
On a top-down plan, mark each seated eye point, the direction of the person’s usual view and every proposed fitting. Draw simple lines from each seat towards the fitting, as well as towards the garden, house and other diners. This maps viewing directions across the space; the side view will show how the fitting’s height affects those sightlines. A roughly scaled drawing is more useful than a precise-looking sketch that leaves out furniture. Label candidate locations clearly, so everyone reviewing the plan is discussing the same point rather than a general area. If a chair turns during conversation, show its usual directions of view rather than drawing only straight ahead.
A side view is equally important: the fitting’s height, the seated posture and the roof line determine whether its bright face is visible above or beside a person’s usual view. Sketch the chair, seated eye position and fitting, then distinguish the mounting point from the part that emits light. The fitting may be fixed overhead while its source remains visible at an angle. Where seats differ in height, make a second side view rather than assuming one represents them all. If the enquiry concerns the Bloomcabin Pergola, include the exact model name on both views. Keep the fitting labels consistent between drawings so its mounting point and illuminated face can be compared without confusion.
Test the proposed sightlines after dark
Check the drawing at the time the pergola will actually be used: in low ambient light, after dark, or at both times if that reflects the routine. Sit in the usual positions rather than judging from the path, and look towards the table, garden and conversation partners without staring into a lamp. A fitting that disappears in daylight may be prominent once the surroundings darken. Note whether the source is directly visible, whether a bright patch appears on glass, and whether the eyes are drawn to it when someone turns their head. Record each seat separately; one walk-through cannot represent every seated angle. Note which other lights are on, as the background can affect how prominent a fitting seems.
To check geometry before installation, a non-powered marker at a safely reachable proposed point can show whether the position lies within a seated sightline. It cannot reproduce a lamp’s brightness or beam, so do not treat it as a glare test. If you need to assess an exact fitting, ask the supplier or a qualified installer how it can be reviewed safely in its intended position; do not improvise temporary wiring. When preparing a plan for the Bloomcabin Bioclimatic Pergola, identify the actual configuration and distinguish positions checked with a marker from those assessed with the intended light. This keeps a preliminary sightline check separate from an assessment of glare.

Move the source out of the main line of sight
Once the problem seats are marked, move the proposed source rather than shifting chairs around a fixed point. Where documented mounting positions allow it, moving a fitting to the side or towards an edge can take its bright face out of a direct eye line. There is no universal off-centre position: a source moved away from one chair may become more exposed to another. Recheck the whole seating map after each change, including the end seats and the route through the space. The aim is to keep the source outside normal views while still lighting the surface people use. Make one change at a time on the plan so it is clear which movement helped and whether it created another exposed view.
Do not judge placement by symmetry alone. Fittings aligned neatly along a beam can still sit above diners’ faces; a point moved too far aside can leave part of the table poorly lit or cast a distracting shadow. On the sketch, compare the source with the task surface and seated faces, and mark the direction in which light is intended to fall. If you are discussing a wall-mounted Bloomcabin pergola, provide the furniture plan and ask which fixing positions are documented for that exact configuration. Use those positions when comparing alternatives, rather than assuming every visually convenient spot is available.
Choose shielding for the viewing angles
Shielding works in relation to where people sit and where a fitting sends light. A hood, baffle or recessed source may conceal the bright face from a particular angle while allowing light to fall on the table or floor. Ask for a side view or manufacturer drawing that shows the emitter, shield and direction of light; a top-down symbol cannot show whether a seated eye can see around an edge. Check more than one chair, because a shield effective from directly below may leave the source visible from the end of a bench. Ask for a view from the most oblique seat as well as from directly below, and describe the view the shield needs to block.
A diffuser and a shield are not interchangeable. A diffuser may soften the appearance of individual points, but its illuminated surface can remain a broad bright area within the view; it does not automatically hide the source from an oblique angle. Record the exact fitting and any approved shield together rather than asking for a generic cover. The Bloomcabin Pergola model identifies the structure, not a compatible light or add-on, so confirm options against the relevant manuals and mounting approval. Do not attach a homemade shade or modify a fitting unless its manufacturer permits it.
Check glass and polished surfaces for reflections
Even when a shield hides the source, a reflection can appear directly in someone’s view. Glass doors and windows, glossy table tops, polished stone, metal and other smooth surfaces can reflect a fitting or its beam. Check the scene from each marked seat after dark, not just while standing beside the surface. If a bright patch appears, note which fitting and surface are involved; the problem may be the angle rather than the amount of light. A surface that looks matte in daylight can still show a noticeable highlight at night. The reflected image may appear in a different place from the physical fitting, so record the surface as well as the seat.
Check glazing from different seats where practical: a light may reflect in a door behind one diner or appear in a house window when viewed from outdoors. Consider where people look, not only what the lamp illuminates. A shield can cut off a direct line of sight without eliminating a reflection from glass. Moving the source or adjusting an approved shield may alter the reflection, but test the new position across every regular seat. For a layout featuring Bloomcabin’s wall-mounted model, record nearby glazing and reflective surfaces alongside the furniture. Label each observed reflection with its viewing position so it can be checked again after a proposed change.
Recheck moving parts and changed layouts
Where a pergola configuration includes moving roof elements, screens or doors, repeat the sightline check in each position people are likely to use. A panel may hide a source in one arrangement and expose it in another; changes can also redirect light towards glass or the table. Do not assume a fitting remains shaded simply because a roof or screen is in a particular position. Use actual product drawings and documented configurations, and ask the configurator or installer to confirm how the fitting, shield and moving parts interact. Write the positions you have checked beside the relevant drawing, rather than relying on a note such as ‘normal position’.
Furniture changes matter too: a new sofa, taller chair or relocated table can put a previously hidden emitter into view. Make a note of planned layout changes and test the main and alternative arrangements, rather than choosing a fitting position solely for a temporary layout. If your enquiry names the Bloomcabin Bioclimatic Pergola model, identify the exact configuration and ask which moving elements, if any, affect the proposed light. Record those elements and their positions alongside each furniture arrangement. Keeping these conditions in the drawing reduces the risk that a glare check reflects a layout you will not use.

Verify the fitting and mounting approval
Glare decisions depend on the exact fitting, not a generic icon on a sketch. Before fixing the layout, check its manual for the intended outdoor use, approved orientation, specified shielding and restrictions on mounting. Confirm that the pergola manufacturer documents the proposed fixing position and accessory compatibility. An outdoor rating by itself does not prove that a fitting suits every exposed location or can be mounted on every part of the structure. The instructions and a qualified electrician’s assessment should cover the actual combination of fitting, shield and mounting point. Check whether a proposed shield is an approved accessory and how the manufacturer says it should be maintained or replaced.
If an existing light is to be retained, note its exact model and attachment before asking about a shield or a new position. Adding a cover, drilling a new fixing point or changing the aim can affect more than the visible glare; the manufacturer’s instructions must determine what is allowed. Keep wiring, controls and supply design within the separate electrical-preparation process and have electrical work assessed by a qualified professional. The Bloomcabin pergola product page identifies the pergola, but is not a substitute for written confirmation of light and mounting compatibility.
Prepare a clear drawing for the installer
Before a consultation or installation, bring one clear plan with the main seats, movable furniture, house windows, reflective surfaces, candidate light positions, proposed shields and intended direction of light. Pair it with a side view showing seated eye positions and the roof line. Mark which views you checked, the conditions at the time and any exposed source or reflection. Add the exact fixture model or manual reference if one has been selected; otherwise mark it as provisional. A photo from each problem seat can supplement the drawing if you label the viewpoint. This prevents a sketch of the pergola alone from being mistaken for a complete lighting layout.
Ask the reviewer to consider every regular seat, not just the centre of the table: can the bright face be seen directly, can it reflect in glazing, does the shield block the relevant view, and is the fixing point approved? Note unanswered points on the drawing before equipment is ordered or installed. A useful review distinguishes a confirmed fitting and position from an option that still needs checking. The purpose is not to promise a glare-free result from a sketch; it is to expose likely trouble spots early and give a qualified professional the information needed to verify the final arrangement.
Frequently asked questions
How do I tell direct glare from a reflection?
From a normal seat, check whether the lamp or the bright face of the fitting itself is visible. If it is hidden but a bright patch appears on glass, a polished table or another smooth surface, you are seeing reflected light. Note the seat and surface, as the two problems may need different changes.
Can a diffuser alone reduce glare?
A diffuser may soften the appearance of a light source, but it can still appear as a broad bright area from a seat. It is not automatically a substitute for shielding at a particular angle. Check the exact fitting from the seats you use.
Should a pergola light be centred over the dining table?
Not automatically. A centred position may look balanced on a roof plan yet sit directly above diners’ faces or in their usual line of sight. Compare the fitting’s position and intended direction with the seated eye points, table and chairs, and confirm that the mounting point is approved.
Can I add a shield to a light I already have?
Only if the fitting’s manufacturer permits that shield and the intended mounting is documented. An unapproved cover or alteration can interfere with the fitting’s intended operation. Ask the supplier or a qualified electrician to confirm the exact fitting, shield and position.
What should I give the installer?
Provide a plan and side view showing the furniture, seated eye points, windows, reflective surfaces, candidate fittings, shields and intended direction of light. Include the exact fixture manual or model if known, and mark any views that have not been tested. Ask the qualified professional to confirm outdoor use, compatibility and mounting approval.
Comfortable pergola lighting is less about hiding every fitting than keeping its brightest part out of the views people use. A furniture map, side view and after-dark check can reveal direct sightlines, reflections and changes caused by the layout. Take those details into a consultation with the exact fitting and mounting information, and leave final electrical and compatibility checks to qualified professionals. That gives the lighting plan a clear basis before positions are fixed.
