
Buying a Pergola Before Patio Works Start
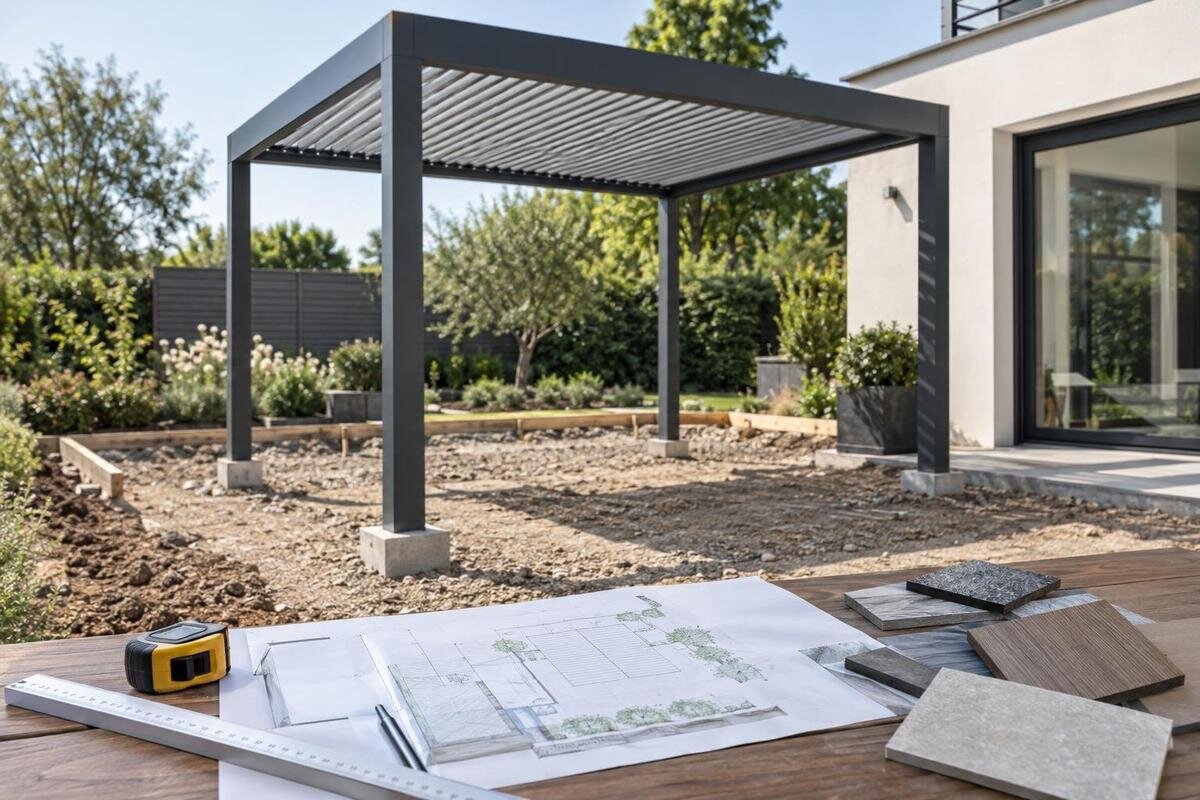
Pergola project planning
Choosing a pergola while groundworks are still at the planning stage gives the patio contractor time to account for support positions, finished levels, drainage and service routes. The aim is not to guess at foundations or order from a lifestyle image. It is to agree which drawings, site measurements and responsibilities must be settled before excavation begins and before the final paving conceals the work.

Why decide on the pergola before patio work starts?
Patio work fixes reference levels and drainage routes that later work has to respect. Once excavation, support bases or paving are complete, moving a pergola support, drain channel or service duct can mean reopening finished work and may blur which contractor is responsible. The pergola's footprint, orientation and any wall connection therefore belong on the same layout as door thresholds, paving edges and drainage, not on a separate sketch made after the patio design is approved. Decide what must stay clear for door movement, circulation and intended seating too: the structure's footprint is not the same as the usable area beneath it. Mark furniture or the main route separately so an open-looking section of paving is not mistaken for a clear passage.
Choosing early does not mean ordering before the site is measured. It means narrowing down the product type, orientation and size enough to request exact layout information while groundworks can still be changed. The Bloomcabin Pergola range is listed for areas from 9 to 24 m², which can help you shortlist sizes but does not establish outside dimensions or support positions. Review the pergola and patio plan together before work starts. Mark pending dimensions and assign someone to confirm them before the affected work is covered. If the size or orientation changes, update the drawing and send it to every affected contractor.
Put the patio and pergola on one measured plan
Prepare one measured plan for the house and the full patio, using a fixed reference such as the outside face of a wall and a stated finished-level datum. Mark doors and their opening direction, window sills, steps, changes in ground height, boundaries, downpipes, gullies, inspection covers and visible service entries. Add distances between features instead of relying on a rough sketch or photographs alone. Label each measurement with its start and end points, and distinguish existing features from proposed paving; otherwise, a precise-looking number can still be read in two ways. If the wall or paved area is not straight or level, record measurements from the agreed reference rather than assuming the edges are square. Match photographs from several positions to the plan.
Ask for dimensioned information for the configuration under consideration, then overlay its overall footprint, support centres, wall connection and clearances on the site plan. Establish whether dimensions refer to outside edges, centre lines or another reference, and use the supplier's convention. Include space for doors and other moving parts. Do not infer the layout from area or a product image. For the Bloomcabin Wall-Mounted Pergola, request the fixing line and exact support positions rather than relying on the model name. Resolve missing dimensions through a site measurement or written clarification before trades set out the work.
Set finished levels, falls and clearances
Write down the finished patio height before anyone digs. The relevant reference is the top of the finished paving, not the existing soil or a temporary base. Paving, bedding and sub-base all contribute to the build-up, so ask the patio contractor to confirm the proposed finished level against door thresholds, steps, paths, lawn and features that must remain accessible. Agree the patio's fall and the intended destination for surface water with the groundworks or drainage professional. Do not take a slope or level from one corner as the answer for the whole area. Where a threshold or existing drain constrains the design, resolve the level before excavation and show the reference on the drawing.
Use an elevation or section alongside the plan to check headroom, height at the wall, door and window openings, eaves, lights and gutters. Obtain dimensions for the exact Bloomcabin Bioclimatic Pergola configuration from the supplier. If the paving build-up changes, ask the patio contractor to review the finished levels and circulate the revision to everyone using the drawing. Check its effect on vertical clearances, paving edges and water flow before proceeding. Have a suitably qualified professional resolve any building or drainage issue outside the patio contractor's scope.
Confirm support positions and ground preparation
Support positions must come from the selected configuration and be checked against ground conditions and the patio design. Ask the supplier or installer to identify each support's centre and footprint, the fixing method, and any clearance or tolerance the site team must allow. Do not assume supports sit at the frame's outer corners or calculate their locations from overall area. Use the Bloomcabin Pergola product page to identify the model when requesting configuration-specific support and installation information. Mark base extents as well as centres, and show any existing slab, retaining edge or other feature that could affect their positions.
Before work starts, agree who will excavate, prepare any support bases, verify their positions and record the result. Do not assume finished paving can anchor the posts: the fixing and support design must be confirmed for the chosen product and site by the supplier and an appropriately qualified professional. If the proposed method passes through or sits beside paving, document how that interface is to be completed and who will do it. Check service routes against marked support positions before excavation. If the ground or set-out differs from the information supplied, ask the responsible professional to review the change. Keep supports accessible until the installer has checked them against the approved drawing; do not let them disappear under paving without that handover.

Coordinate pergola water discharge with patio drainage
Patio drainage and water discharged from a pergola are related but separate design questions. Ask whether the chosen configuration collects roof water, where any outlet sits, which direction it faces, and whether collection or outlet parts are included. Use the bioclimatic pergola details to identify the model when requesting its water-management information, before positioning paving edges, channels or gullies. If no outlet or collection route is shown, ask for clarification rather than assuming there is nothing to coordinate. Mark existing downpipes separately from any confirmed pergola outlet.
Ask the drainage or groundworks contractor to show how patio runoff and any confirmed roof discharge reach an agreed destination without creating a wet area at a doorway, on a route people use or against a neighbouring boundary. Keep gullies and outlets accessible; avoid placing them behind a support, fixed furniture or a later enclosure. Consider how an outlet can be inspected or cleared, not just where it fits on the plan. If its position or the paving level changes, recheck the route before laying the final surface. Do not connect an outlet to an existing drain or soakaway by assumption: have the site-specific route checked by the appropriate professional. Mark both the outlet location and intended destination on the drawing.
Plan service routes before the paving is laid
List existing services and those you want beside the pergola: an outdoor socket, lighting, a tap, irrigation or an electrical connection for a chosen feature. Ask the supplier which services the configuration requires, if any, and where connection points must be; do not assume power is needed or accessories are included. When comparing Bloomcabin's bioclimatic model, confirm the specification before an electrician plans a route. Identify known buried services and obtain reliable site information before excavation. Mark each proposed connection point precisely, rather than showing only the general area where it might emerge.
Have a qualified electrician or plumber specify any service route, duct, outlet or isolation point within their scope, then have the groundworks team transfer the agreed positions to the site plan. Show each route relative to supports, drains and paving edges, and name who installs, connects and checks it. If you want to leave an option for later, ask the relevant professional whether a spare route is suitable and where its ends should be recorded; do not just bury an unidentified duct. Take dated photographs with a measurement to a fixed feature before any route is covered. This record helps the next contractor locate it without guessing or disturbing the finish.
Check the wall and surrounding features
A wall-mounted layout needs a specific check at the house, not just a line on the patio plan. The wall-mounted Bloomcabin model is identified by its connection to a wall, but the product name cannot confirm whether your particular wall, finish or fixing zone is suitable. Give the supplier and installer clear measurements and photographs, including cladding or render, openings and any known concealed services. Have a qualified person assess the actual wall and proposed fixing approach. Do not assume a decorative finish, or a convenient position beside a door, is an appropriate structural fixing surface. If you know the wall build-up, record it; label anything uncertain rather than presenting a guess as a site fact.
Show eaves, gutters, downpipes, vents, exterior lights, doors and windows in an elevation to check access and operation. Flag any boundary, shared-wall or neighbouring-drainage issue before fixing the layout. Assign responsibility for assessing and completing wall penetrations, making good finishes and coordinating around existing services. If consent, insurance cover or an existing building condition could affect the work, verify the position for the address with the relevant local authority, insurer or competent professional. These site matters need separate consideration from product selection.
Agree access and the order of work
Access and sequence need checking before the patio closes off the work area. Measure the route from the likely delivery point to the installation location, including gates, narrow turns, steps and temporary obstructions. Ask the supplier or delivery contact for the package dimensions and unloading information for the chosen order; these are not established by a model name or product photograph. Agree where components may be stored, who protects them and whether access can be kept clear for the assembly team. If the route depends on crossing a finished path or lawn, decide how it will be protected and who is responsible for any reinstatement. Check the intended offloading point as well as the garden entrance; if the delivery vehicle cannot reach it, agree an alternative handling plan in advance.
Ask the pergola installer and patio contractor to agree the order of excavation, support work, concealed services, paving and assembly for this design. There is no universal answer to whether a pergola should be assembled before or after the final paving: the support detail, access and installation instructions decide it. Identify when each dimension is checked and who signs off before another trade covers or blocks it. Include enough working space for the agreed method without assuming workers can enter through the house or use a neighbour's side. Ask what surface condition the installer needs at each stage, then record access, protection and reinstatement responsibilities in the works programme so delivery and groundworks are not planned in isolation.

Assign contractor responsibilities in writing
Use the written quote or contract to separate pergola supply, site preparation, patio work and services. For each task, name who provides a drawing, marks support positions, excavates or prepares supports, installs fixings, moves or connects drainage, supplies any duct, and makes good paving or wall. State inclusions and exclusions, not only what each contractor expects to do. If an installer does not carry out groundworks, identify who supplies the accepted base information and who checks the prepared work before installation. Also record who removes excavated material, makes good cuts and protects finished work, if those tasks arise. Name who tells the next contractor when an agreed stage is ready.
Attach the same drawing revision to each scope. List open decisions, who must answer them and when they must be settled. Agree hold points before support work is poured or covered, before services are concealed and before paving is finished. Circulate changes to every affected contractor and record agreement on revised responsibilities, scope and timing. When requesting a quote or configuration review, include the site plan and explain which interface needs clarification. Keep any consent or insurance question separate from the quotation: listing it as a task does not establish that it has been resolved.
Checks before the final paving is laid
Before the final paving is laid, compare the site with the approved configuration: footprint, support or wall-fixing positions, finished level, vertical clearances, outlets, gullies and service routes. Use the Bloomcabin Pergola listing to confirm product identity, alongside the site-specific drawing used for setting out. Photograph supports and concealed routes with a measuring reference, then record their positions relative to fixed features on a dated as-built drawing. Note departures from the approved plan, who accepted them and the revised detail the installer will use. Keep the current drawing with the patio and installation documents.
Agree an explicit release point for final paving. The patio contractor, pergola installer and relevant service professional should confirm the work within their scope before it becomes hidden or inaccessible. If a position, level or route remains unconfirmed, leave the affected area open until the responsible person responds. This prevents a finishing deadline from turning a provisional measurement into a permanent one. Keep the handover record, current drawings and photographs together so the installation team can find the agreed details.
Frequently asked questions
Should I buy the pergola before the patio is built?
Not necessarily, but the intended model and configuration should be clear early enough to obtain its footprint, support or wall interface, height and any drainage or service details. If your final choice is still pending, mark relevant dimensions as provisional and agree a written hold point with the patio contractor before the affected work is covered. Do not set out the patio using guessed dimensions.
What measurements does the patio contractor need?
Provide a measured plan showing the house, thresholds, doors and their opening direction, proposed paving edges, existing levels, drains, gullies and known service routes. Add the pergola dimensions and support or wall-fixing positions from information for the chosen configuration. Label what each measurement refers to, and distinguish existing features from proposed work. Photos help explain the plan, but should not replace measurements.
Can the pergola supports be fixed through the paving?
There is no universal answer: the permitted fixing method depends on the exact product, its installation information and the site. Ask the supplier or installer to confirm the support design and have a suitably qualified professional check the site-specific approach. Agree who prepares and verifies the supports, and how the paving meets them, before the final surface is laid.
Should I install service ducts before paving?
Only after confirming what services the chosen configuration actually needs and where connection points should be. Ask the supplier about product requirements, if any, and have a qualified electrician or plumber specify the relevant route. Then record its location in the site plan and photograph it before it is covered. Do not bury an unidentified duct just in case.
Can the pergola be installed after the patio is finished?
It may be possible, but do not assume the supports can simply be fixed to any completed patio. The installation information, support design, access and agreed paving details determine the sequence. Ask the installer and patio contractor to agree whether paving should be completed first or later, and to identify any openings, support bases or routes that must be prepared beforehand.
Buying the pergola early is useful when it produces reliable site information, not simply an early product choice. Put the configured footprint, fixing positions, finished patio levels, water routes, services and contractor scopes on coordinated documents, then resolve anything that would otherwise be hidden by paving. With each interface assigned and recorded, the patio can be finished to an agreed layout, and the pergola team can work from the same information rather than discovering missing decisions during installation.
