
Adding Pergola Privacy Without Blocking the Breeze
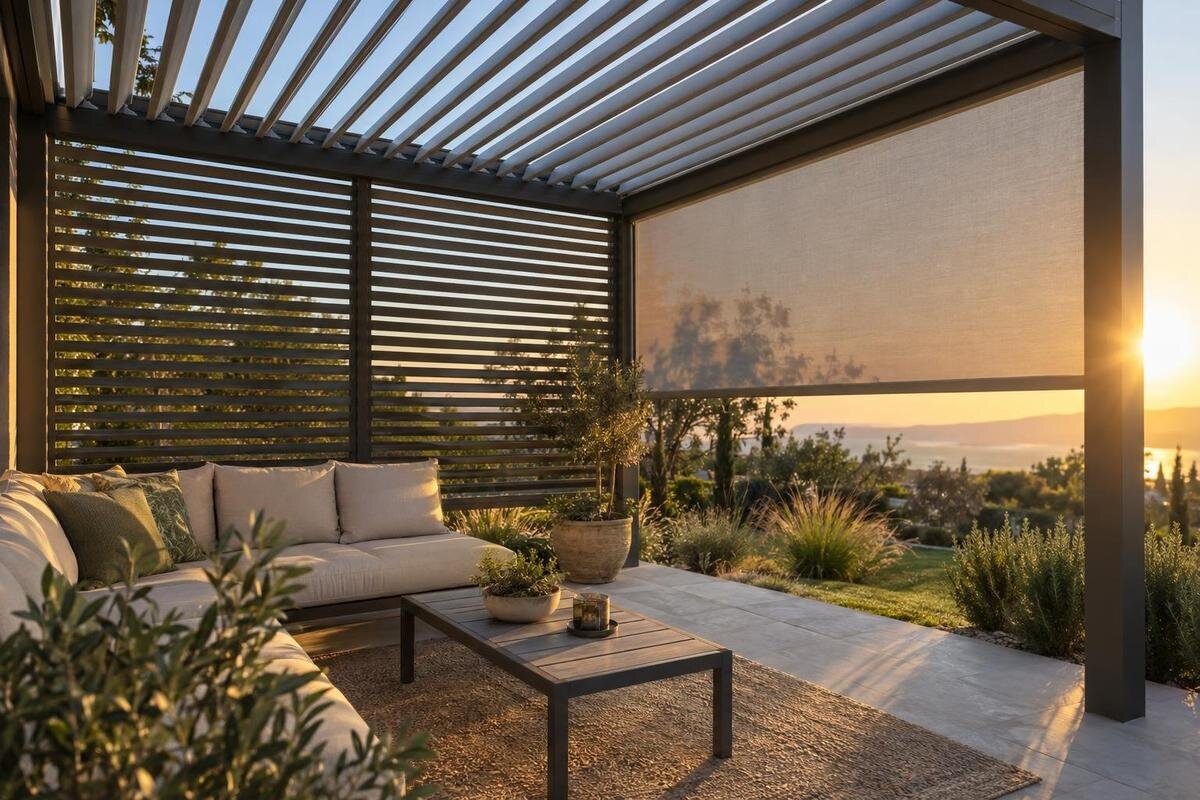
Pergola planning guide
Privacy and airflow raise two separate questions: which views need to be interrupted, and where air can pass through a pergola. A solid screen can answer the first while changing the second, so treating every side as a place for a panel is rarely the clearest approach. Begin with the seats, the views into them and the breeze routes across the terrace. Mark neighbouring windows, paths, fences and the house, then test a small number of screen positions against that sketch. The aim is not to promise a constant breeze; it is to avoid closing more of the sides than the privacy problem requires.

Sightlines from seats and boundaries
Start at the places people actually sit, rather than drawing a screen around the full perimeter. From each seat, note what can be seen: a neighbour’s patio, an upper-floor window, a shared path or a view across the garden. A seat that is screened from view may become exposed when someone stands or walks to the table. Mark these seated and standing positions separately, and note which areas need privacy only at certain times. Also show the dining table, lounge chairs and the route between them. This prevents one viewpoint or one favourite seat from dictating a layout that feels awkward elsewhere. If one particular window is the concern, label it rather than treating the whole boundary as exposed.
On a plan, draw a line from each outside observer to the part of the seating area you want to protect. Add lines from standing eye level and from likely diagonal angles; people do not always look straight across a boundary. A quick side elevation can show whether a proposed screen interrupts those lines without covering an entire side. Treat the sketch as a way to compare sightlines, not a guarantee of privacy: a changed chair position, open gate or different route through the garden can create another view. Check the approach to the pergola as well as the view from inside.
Breeze direction around the terrace
Map airflow separately. Spend time in the space when it is in use and note which way light air tends to move at seat height. A lightweight ribbon held on a temporary support can make direction easier to notice; repeat the observation on more than one day, because wind can turn or ease. Record whether it arrives from the side, diagonally across the terrace, or through an opening between the house and garden boundary. Do not rely on a single reading or a weather app alone. Local walls, planting and neighbouring buildings can redirect or shelter air before it reaches the pergola. The question is where air enters and where it can continue, not simply which side feels exposed.
Draw those observations onto the pergola footprint, with arrows showing likely entry and exit points. The Bloomcabin Bioclimatic Pergola listing gives an area range of 9 to 24 m²; use the exact dimensions of the version under consideration to place its footprint on your airflow sketch. A larger or differently positioned footprint may sit across a route you meant to preserve. Check the plan against the terrace as it is used, including open gates and the usual position of chairs. Mark uncertain directions rather than assuming the breeze will arrive from the same side every time.
An open route through the sides
Useful cross-flow needs a route across the occupied area. If air usually comes from the garden side, consider what it can pass through or leave by after reaching the seats. A clear opposite side can provide a more direct route; an adjacent opening may be more useful where the wind arrives at an angle. This is a layout principle, not a promise about airflow strength: gusts and calmer spells can follow different paths. A screen that spans the only opening facing the breeze may interrupt that route even if the other sides look open on a drawing. Show entry and exit separately, and do not count a gap hidden behind stored items as an open route. Roof ventilation is a separate question: an overhead opening or feature does not by itself solve a side sightline or guarantee a clear cross-flow route at seat height. Keep the roof and perimeter as separate considerations.
Mark the house and other solid edges before deciding which side counts as open. Where one edge sits beside a wall, that wall already limits possible entry or exit on that side; it is not a replacement for a route through the rest of the layout. When planning around the Bloomcabin Wall-Mounted Pergola, show the adjoining wall as well as the proposed screens, so you can assess the remaining openings together. Keep the main passage between the garden and seats clear of furniture. Draw the route from outside to the seating zone rather than labelling a side simply as open.
How much screening is needed?
Privacy screening can cover a whole side, part of it or only a specific band of a view. For many layouts, a targeted section is worth considering first: it may interrupt the eye-line from a window or path without turning every side into a barrier. Choose the position by following the view, not by matching panels symmetrically. A short section on the correct side can be more useful than an unbroken run placed opposite the actual observer. At the same time, even a partial screen can affect the breeze if it occupies the opening you identified as an air route. Compare the amount needed for privacy against the amount of clear side you want to retain.
Screen material and spacing matter, but there is no general rule that a lighter-looking screen will preserve enough airflow. An open weave or slatted surface leaves gaps, while a solid panel is a more complete visual obstruction; how much air passes depends on the screen itself, its area, gaps around it and the direction of the breeze. Do not infer performance from a product image or a colour description. Compare the stated specifications for any proposed accessory, and treat privacy and airflow as separate questions: a screen may soften a view yet still interrupt a direct path. If you are considering a more permeable surface, test the view through it at the times the pergola is used.

Screen position around the seating
Position a screen between the observer and the part of the pergola that needs privacy, while keeping the usual seating position on the protected side. If the unwanted view comes from the boundary behind the chairs, a panel there may be relevant; if it comes from a diagonal angle, a panel on an end may do more. Draw the seat, table and approach route before placing the screen. A panel should not force people into the remaining breeze route or leave the table exposed when someone stands. Try likely positions with the furniture shown at real scale on paper, even if the first sketch is rough. Compare the view from the edge of the garden, not only from the chairs.
The Bloomcabin Pergola model is listed with an area range of 9 to 24 m². Use the exact dimensions of the option under consideration to check how much of the seating zone a proposed screen would cover. Mark both the panel and the space around it: a screen can leave an entrance open but still stand directly across the route to the chairs. If the terrace is used for dining and lounging, compare both furniture arrangements rather than optimising for one position only. Leave enough room to move around the screen without turning the opening into a bottleneck.
Existing walls and garden boundaries
Airflow does not begin at the pergola posts. A house wall, boundary wall, tall fence, hedge or neighbouring structure can already shelter one edge or redirect air before it reaches the seating. Mark these features at their actual positions instead of treating the plot boundary as empty space. They can also provide some visual screening outside the pergola, which may mean the side nearest them needs less additional coverage. Look through gates and gaps as well: a boundary may look closed from one angle and open from another. Existing planting can change over time, so do not treat a hedge as an exact, permanent screen.
Overlay possible panel positions and compare the combined arrangement, not a panel in isolation. A screen close to an existing barrier may add little to privacy yet close a route that was carrying air along the edge. A gap between the two may still allow an unwanted view. For a layout based on the Wall-Mounted Pergola model, include the house wall and nearby boundaries in the same drawing. Keep existing openings and access points visible, and distinguish the screening already provided by the boundary from the additional coverage you want at the pergola.
Diagonal views at open corners
An open corner can preserve a route for air but also expose a diagonal view into the seating area. Draw both lines on the same plan: airflow arrows should show the breeze you observed, while sightlines run from a neighbour’s window or path towards the seat. If a view passes through a corner gap, a short return or shifted screen may interrupt it, but any added section changes the route. Check the view from outside and inside; what feels screened from the chair can look open to someone standing at the boundary. Avoid assuming that an offset automatically solves both issues. The effect depends on the gap’s position and the angle of the observer as much as on the screen’s length.
Use a plan view to compare a straight-through arrangement with a staggered one; do not assume a zig-zag guarantees a useful breeze. If the Bioclimatic Pergola model page is part of your comparison, use the exact version’s footprint when positioning the seats and proposed corner screens. Draw gaps at their actual positions and check the open route against the outside sightlines. Avoid narrow passages between panels that are awkward to walk through or blocked by stored items. Keep the amount of screening proportionate to the exposed angle instead of closing a second side simply to make the arrangement symmetrical.
Access around the seating area
Comfort also depends on how people enter and use the pergola. Leave the route from the garden or house to the seating area obvious, and consider whether a screen might hide a gate, interrupt the route used to carry food or make a corner feel closed. Check the space needed to push chairs back and to walk through with hands occupied. The most open airflow route may also be your access route, so show furniture in its usual position when assessing the gap. If guests use the space, include the route they actually take rather than assuming everyone will pass around the same edge.
Decide which activities need privacy rather than assuming one arrangement must cover every corner. A dining area may need screening from one neighbouring window while the route to the garden remains open on another side. When considering the Bloomcabin Pergola page, compare the intended footprint with both the occupied seating area and the space needed to reach it. For any proposed side element, check how it is operated and where it sits during normal use. A screen that protects the table but obstructs the usual entrance has not resolved the layout. Privacy needs to work alongside ordinary access.

Screen compatibility for the exact model
Before buying any side treatment, confirm compatibility with the exact pergola model and configuration. A visual match, a generic screen description or a photograph is not enough to show that it fits. Ask which sides can take the proposed accessory, how it attaches, and whether it changes access or the intended open route. Confirm whether the item is included or supplied separately; do not treat an accessory shown in an image as part of the pergola. If no approved option is identified, keep the plan conceptual and ask for product-specific guidance rather than adapting an unverified third-party screen. This is especially important where the screen must align with a wall, corner or existing boundary.
Use the exact reference from the Bloomcabin Wall-Mounted Pergola listing when asking about dimensions, configuration and compatible accessories. The stated area range is useful for an initial footprint comparison, but it does not establish exact post positions or screen clearances for your terrace. Bring the marked drawing into that discussion so the proposed panel, wall, corner and access gap can be considered together. The result you need is a confirmed arrangement, not a panel chosen solely because it appears to match the pergola. Keep unresolved details marked on the plan rather than treating a general category name as confirmation.
Testing the layout on site
Test the sketch on site before finalising it, using a temporary marker that can be removed without changing the structure. Mark where the proposed screen edge would sit and stand at the observed viewpoints; sit in each chair position as well. Look through the gap from outside, and walk the usual entry route. A loose ribbon or simply noting the breeze at seated height can help you compare whether the open-side route still makes sense, though it cannot predict every day’s conditions. Test the layout at more than one time and note what changes rather than relying on one calm or gusty moment. If furniture is moved seasonally, repeat the check in its usual positions.
Return to the drawing and label two outcomes for each arrangement: which sightline it blocks and which air route it leaves open. If the latter is uncertain, shift or shorten the screen on paper and test again; if privacy still fails, try a different angle rather than closing another side by default. Keep the chosen version from the Bloomcabin Bioclimatic Pergola product page alongside the final drawing so your model comparison and site observations refer to the same layout. A practical plan leaves deliberate openings while allowing for changing wind direction. That is a more realistic aim than promising that any pergola will always feel breezy.
Frequently asked questions
How do I decide which side needs a privacy screen?
Start from each seat and draw a line to the window, path or boundary from which the view comes. Check seated and standing eye levels, as well as diagonal angles. Place the screen where it interrupts the actual sightline, rather than automatically choosing the most exposed-looking side.
Will a solid screen stop the breeze?
A solid screen interrupts the direct path where it covers the perimeter, but air may approach through another opening. The effect depends on wind direction, the screen’s extent and nearby barriers, so a remaining gap should not be treated as a guarantee of a steady breeze.
Can I screen two sides and still have airflow?
Possibly, if the arrangement leaves a usable route from an entry side to another opening. Map that route alongside sightlines and furniture, and remember that a change in wind direction can make another side more important. More panels mean less open perimeter, not guaranteed privacy or airflow.
Does roof ventilation keep a screened pergola breezy?
Not necessarily. Roof ventilation and airflow through the sides are separate considerations. An overhead opening does not by itself block a view into the pergola or preserve a cross-breeze at seat height if the perimeter is screened.
Are side screens included with a pergola model?
The listed model names and area ranges do not establish that a side screen is included or compatible. Check the exact model and configuration, and do not assume a third-party screen will fit.
Good pergola privacy is selective: it blocks an identified view while preserving a clear route across the parts of the perimeter that need to stay open. Let the seats determine the sightlines and let on-site observations guide the breeze arrows. A sketch will not predict every change in weather, but it will show whether each screen solves a real privacy problem or closes an opening without a clear reason.
