
What to Plan for Pergola Footings Under Porcelain Paving
Pergola planning
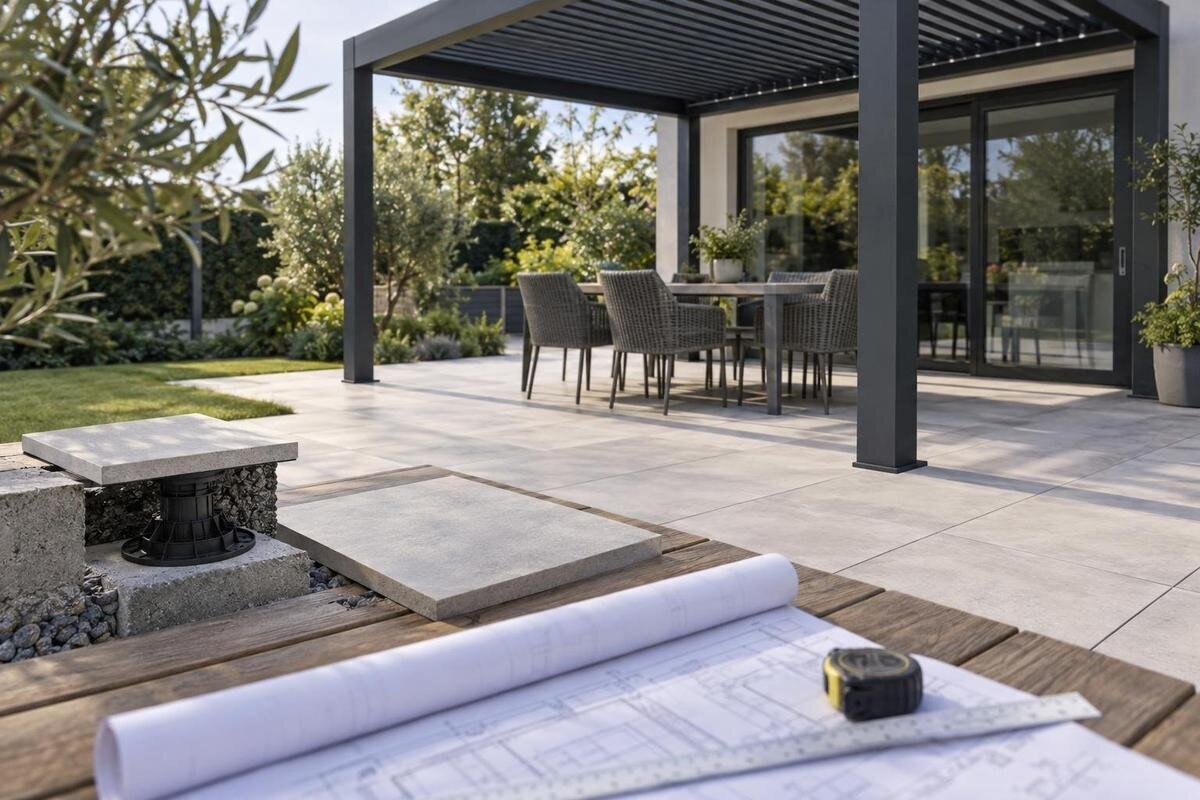
When planning a pergola on a porcelain-paved patio, the support detail has to work below the visible surface. Post positions, footings, tile cuts and finished levels need to agree before the paving is laid. Treating a tile as an anchor can damage the finish while leaving the actual load path unresolved.

What to confirm before paving 1
How pergola supports relate to porcelain paving
Porcelain paving can make a patio look like one solid platform, but the tile is the visible finish, not automatically a structural base. A pergola transfers forces through its frame and posts to supports below. Porcelain, grout and bedding are not, by themselves, designed anchoring points. Drilling through a tile and tightening a post base against it can concentrate stress at an edge or corner, potentially cracking the tile or leaving the fixing without sound support. A surface that feels firm underfoot is not evidence of an adequate foundation.
Think of the assembly in layers: the pergola and its approved connection, the footing or other designed support, the paved finish around it, and the ground or structural layer carrying that support. The route from post to ground must be continuous and suitable for the exact model and site. Some patios have a concrete layer beneath the tiles; others have different build-ups, so the surface alone cannot tell you what is available. Even a substantial-looking layer needs to be assessed before it is treated as an anchor. The aim is to bring a properly designed support through the finished paving without asking the tiles to carry the structure.
Choose the pergola before fixing post positions
Choose the exact pergola model and arrangement before anyone marks out footings. The approved anchoring drawing should identify support locations, connection details and relevant clearances; a site assessment then establishes what each support needs beneath the paving. The product listing for Bloomcabin Pergola gives a size range from 9 to 24 m², but that area range does not provide post-centre measurements, base-plate dimensions or a footing design. Nor should you scale a photograph or infer an anchor layout from a product image. The drawing must make clear what its measurements refer to, such as post centres or the outside of a support.
Ask for current drawings for the precise model and confirm which revision the installer will use. A change in configuration or orientation can affect the points that need to meet the site, so settle the layout before finalising the paving grid. The person assessing the structure needs information about actual ground and substrate conditions, not just the pergola’s nominal area. Footing dimensions are not universal figures to copy from another terrace; they must follow the approved support design and verified site evidence. Keep those decisions with the qualified professional responsible for the structural assessment.
What to confirm before paving 2
Find out what lies beneath the tiles
Establish the patio build-up and ground conditions before deciding how a footing will reach suitable support. Find out what the tiles are laid on, whether there is a structural slab below, and what lies beneath that layer. Existing drawings, photographs taken during earlier work and records of the patio construction can help, but they may not show every change made on site. Where the evidence is incomplete, a suitably qualified installer or structural professional can advise what investigation is needed before the paving is disturbed or new work begins.
Also identify buried services, drains, channels, retaining edges and any other features that could conflict with excavation or anchoring. A clear surface does not show where a pipe or cable runs, and the sound made by tapping a tile cannot prove the make-up or suitability of its base. Record what is known and flag what remains uncertain. Refer to the exact product identity, such as Bloomcabin Bioclimatic Pergola, when discussing the site so that any assessment relates to the model actually being considered, rather than to a generic pergola layout.
Set out posts against the paving layout
Transfer support positions from the approved layout to the patio using a reliable reference line or surveyed point. Mark each post centre and, once the detail is known, the footprint of its base or connection. Check the measured positions against the drawing and the actual site, including thresholds, doors, boundaries and any fixed features. For a wall-mounted option such as the Bloomcabin Wall-Mounted Pergola, include the wall-side connection in the plan as well as the support positions at paving level. Do not assume that a visual product image supplies the measurements needed for setting out.
Then compare the support marks with the proposed tile sizes, joint lines and edge cuts. A small shift in the paving grid may make the cuts around a post more balanced, but the pergola’s approved support positions take priority. Show the whole base footprint on the paving plan, rather than marking only its centre: the paving contractor needs to see how the connection relates to the surrounding tiles. Include the nearby patio edge so that an adjustment around one post does not leave an awkward cut elsewhere. If the layout would leave a narrow sliver of tile, cut through a vulnerable corner or clash with a joint, discuss changes with both the paving contractor and pergola installer before work starts. Do not move a post independently to improve the appearance of the tile pattern; a revised position needs to be confirmed against the structural design.

What to confirm before paving 3
Coordinate footing tops with the finished level
Agree a finished-level reference before the footings are made. The top of the porcelain is higher than the underlying base, so the tile, bedding and any other paving layers need to be included when setting out the final surface. Mark that level clearly on the site plan and make sure the people building the footings and laying the paving are using the same datum. Label the top of the footing and the top of the paving separately, even where the approved detail places them at the same height. This avoids a note such as ‘finished level’ being interpreted differently by the two contractors. If the patio has changes in level, record them at the pergola supports rather than relying on a single assumed height across the whole area. Use those local levels when discussing how each base will meet the tiles.
The required relationship between the footing, post base and tile surface comes from the approved anchoring detail; it is not safe to assume that concrete should finish flush with the paving. For the regular Bloomcabin pergola model, check the support detail for the exact chosen version and ask how the base will meet the finished surface. The plan should account for fitting the connection, keeping any required fixings accessible and avoiding a raised edge that catches water or creates a trip point. Do not rely on the tile itself to level or support a post base.
Tile cuts and movement joints
Agree the cut pattern once the support positions are fixed and before the paving is laid. The paving contractor needs the dimensions of each support and the required clearance around it, as well as the tile format and joint layout. A cutout should not be improvised around a post after the surface is complete: an unsuitable cut can leave a fragile piece, damage a tile or interfere with access to the anchoring connection. Discuss which tile edges will remain visible and how the finished joint will meet the support. The drawing should distinguish the opening in the paving from the outline of the post or base, so nobody mistakes the cut line for the structural position. Where several tiles meet beside a support, show the joint arrangement as well as the opening itself. If the cut pattern looks difficult, review the tile layout first and ask whether the support detail allows any change.
The tile should not be clamped against a post base or forced to act as a structural collar. The paving and pergola details need to account for movement, the edge treatment and how water is kept from collecting around the support. Any gap, flexible seal or finishing piece should suit the paving system and the approved connection, rather than being chosen as a quick fix on site. Whether the chosen option is the bioclimatic pergola model or another design, base positions should come from its approved layout before the tile cuts are finalised.
What to confirm before paving 4
Keep drainage paths clear around supports
Map the direction of the patio’s falls and the position of drains, channels, gullies and thresholds on the same plan as the pergola supports. A post or footing should not block a drainage route or create a low spot where water collects. Check how the paving will meet each base and whether nearby channels will remain accessible for cleaning. The finished surface should continue to drain as intended, without an improvised raised collar or hard edge that redirects water towards a doorway or traps it beside a support.
If the chosen pergola arrangement directs rainwater to particular points, include those points in the site plan too. Confirm where water can discharge and whether that route conflicts with a footing, drain or paved threshold. Do not assume that all models collect or direct water in the same way; ask for the detail relevant to the exact configuration. Keeping the surface falls, footing locations and any water discharge points coordinated helps avoid having to alter a finished tile layout to resolve a drainage issue later.
Coordinate the work before paving starts
The most straightforward sequence is to agree the pergola layout, site assessment, footing details and finished levels before the porcelain is laid. The footing work and paving work can then be planned together, with cut locations based on confirmed support positions rather than estimates. If Bloomcabin’s regular pergola is under consideration, identify the exact model in discussions and make sure the people involved are working from the same anchoring drawing. Agree when the support positions will be checked and when the paving contractor can proceed with the surrounding cuts. Treat these as clear handover points in the work schedule, rather than leaving each contractor to assume that the other has completed the checks. If a position or level changes, update the shared plan before the affected tiles are cut. This avoids one contractor setting out from an early plan while another is following a later revision.
Agree who is responsible for setting out the supports, checking their positions, coordinating the paving cuts and confirming the final connection. The same person or team may cover more than one task, but the handover still needs to be clear. If the patio is already finished, do not assume that drilling through the surface or cutting a small opening will solve the problem. Have the layers beneath it and the proposed anchoring route assessed first; accessing the footing may require a planned alteration and reinstatement of the paving.

What to confirm before paving 5
Allow for tolerances, access and future repairs
Once the footings are in place, check their measured positions against the approved drawing before the tile cuts are made. Record any difference between the planned and actual locations and ask the responsible installer to confirm whether it is within the design requirements. Do not force a post into position, alter an anchoring connection or enlarge a cut to hide a mismatch. If the supports are not where the drawing shows, pause and agree a suitable correction before the paving and pergola installation move on.
Think about what will need to remain reachable after the patio is complete, including fixings, drainage points and joints that may need inspection. Keep a record of the finished support positions and the paving layout, and consider retaining spare tiles for future repairs. For a wall-mounted pergola model, record the wall connection and paving-level supports together so later work does not treat them as unrelated positions. Label photographs by support location and distinguish the final arrangement from any earlier proposal. Record which parts of the connection remain accessible and which are concealed by the completed paving, rather than relying on memory. Keep these notes with the final layout so a future paving repair can be discussed in relation to the pergola supports. These details make it easier to understand the finished installation without removing tiles or guessing where the supports lie.
Put the footing requirements in writing
A useful installation enquiry includes the exact pergola model and intended arrangement, a site plan with proposed post locations, photographs of the patio and available records of its construction. Add known details of the paving build-up, finished levels, surface falls, drains and buried services. If tiles are already laid, say so and include clear photographs of the area and any information about the layers beneath them. This gives the person assessing the installation a starting point for identifying what substrate evidence or site investigation is still needed.
Ask for the structural assessment and approved anchoring drawing that apply to the selected model, along with a clear detail showing footing positions and their relationship to the finished paving. Confirm who checks the set-out and who resolves a mismatch or unforeseen obstruction before the tile work proceeds. Naming the precise option, for example Bloomcabin’s bioclimatic model, helps keep the discussion tied to the right product, but does not replace site evidence or model-specific drawings. Be cautious of a proposal based only on the tile surface, a generic footing size or a post position chosen simply to make the cuts easier.
Frequently asked questions
Can a pergola post be anchored to porcelain paving?
Porcelain tiles and grout should be treated as the finished surface, not as the pergola’s structural anchor. Any fixing has to transfer loads to a suitable, verified support beneath the tiles and follow the approved anchoring detail. Drilling through a tile does not, by itself, establish that the structure below is adequate.
Can the footings be added after the patio has been paved?
It may be possible, but the paving and the layers below it need to be investigated before work is planned. Accessing the ground or a suitable structural layer can require cutting or lifting tiles and reinstating the finish. Planning the post positions and footings before paving usually makes it easier to coordinate the cuts and levels.
Should the top of a footing be level with the tiles?
There is no universal finished level for a footing. Its position depends on the approved post-base and anchoring detail, the paving build-up and the site levels. Have the installer specify how the support meets the finished surface, including how water will drain and which fixings need to remain accessible.
How large or deep should a pergola footing be?
No single size suits every pergola and site. The required footing depends on the exact support design and verified ground or substrate conditions. Use a structural assessment and approved anchoring drawings for the chosen model rather than copying dimensions from another patio or estimating them from a product image.
How can I avoid awkward tile cuts around the posts?
Set out the approved post positions against the proposed tile format and joint pattern before laying begins. The paving layout can often be adjusted to create more workable cuts, but do not move a structural support just to align it with a tile joint unless the pergola installer confirms the revised position is approved.
A well-coordinated installation starts with a clear route from each pergola post to a suitable support, verified for the chosen model and the actual site. Set out that support before finalising the tile pattern, agree how its top meets the finished level, and keep drainage and access in the plan. When the structural detail and paving layout are resolved together, the porcelain can do its job as a finished surface without being asked to hold the pergola in place.
