
Planning a Pergola for Outdoor Cinema Nights
Outdoor living guide
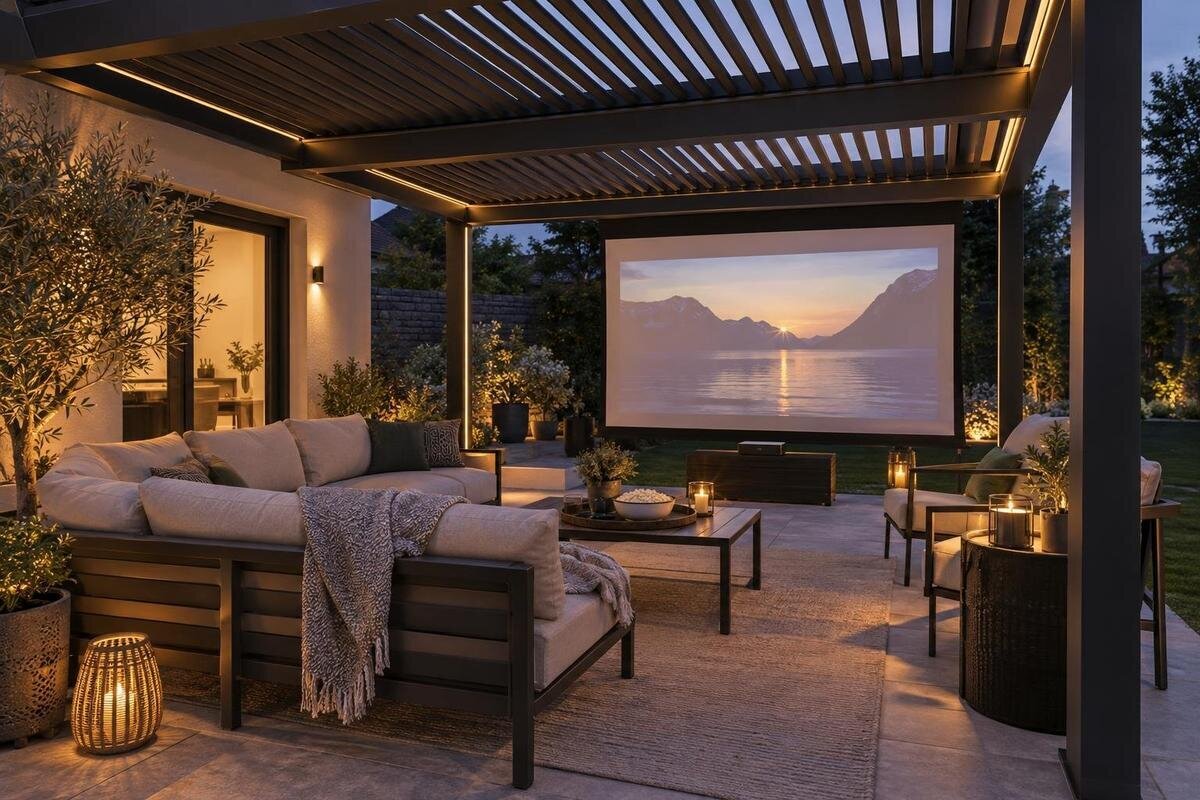
An outdoor film night can make a pergola useful after dinner, but the structure alone does not make a garden dark, quiet or weatherproof. Plan around the screen, projector and real seating first, then check sightlines at the hour you expect to watch. The aim is a layout that keeps everyday access open, keeps equipment within its makers’ limits and directs sound and light thoughtfully towards your audience.

01
Screen position and sightlines
Choose the screen position and viewing direction before deciding where the pergola or seats will go. Mark the proposed screen with a temporary panel of roughly the same width, then sit in every planned place. Check that everyone can see the full image without turning sideways, looking past a post or sitting in the route to the house. A view that looks centred from the back door may feel off-centre from the last seat, so judge it at seated eye level. Include the screen frame, feet and support space in your mock-up, not just the picture area. Have each viewer try their normal seated posture; an upright chair and a recliner can produce different sightlines. Pay particular attention to seats near the sides, where an obstruction may be easy to miss when looking from the centre.
Decide whether the screen will be freestanding or attached to a support, and follow its maker’s directions. A pergola beam, house wall or fence is not automatically a suitable fixing point; confirm what both the screen instructions and the structure documentation allow before attaching anything. Keep the projector beam clear of posts and walking routes. A movable screen lets you compare positions before settling the furniture layout. Use tape and chairs to mark out the arrangement so you can make changes before committing to permanent fittings.
Check the viewing direction at film time
Don’t choose the screen direction from a compass rule alone. The sun’s angle and sunset position change over the year, while walls, trees and neighbouring buildings alter the light in a particular garden. Visit the proposed spot at the time you expect to start a film. From the seats, check whether low sun reaches your eyes; from the screen, look for direct light on the surface; from the projector position, note glare towards its lens. Each can spoil an otherwise clear view. A fixed wall may not shade a screen once the sun gets low, so inspect the whole image as well as the seats. A sketch showing the screen, seats and sun is more useful than a photograph taken at midday.
Repeat the observation as daylight fades, ideally on more than one evening. Mark two possible screen positions with tape and, if possible, run a short test with the intended equipment; compare reflections, sightlines and what remains visible behind the screen. If the difference between two start times is decisive, a later screening or movable setup may be more practical than a fixed layout. When considering the Bloomcabin Wall-Mounted Pergola beside the house, compare possible viewing directions rather than assuming the screen should face away from the wall. Record weather conditions too, since an overcast test can conceal glare that appears on a brighter evening. A screen that avoids direct sun may still pick up reflections from glass or pale paving, so check the complete view.
02
Allow for twilight and ambient light
A pergola does not automatically create a dark room. How much daylight it shades depends on its overhead design, the sun’s angle and light entering from the sides; open sky, pale paving and nearby windows can all keep the screen hard to see. Do not judge picture visibility from daytime shade or a product photograph. Test the actual screen and intended viewing positions around the time you hope to begin. If the picture only becomes comfortable much later, decide whether that start time suits your household rather than expecting the structure to provide blackout conditions. The background behind the image matters too: a lit window or light-coloured wall can make dark scenes harder to distinguish.
Check the screen and projector makers’ guidance, then play a short test clip with both dark and bright scenes. Look for glare on the image and reflections around the screen; a blank surface can appear clear before moving pictures reveal washed-out areas. Include subtitles in the test, as their brightness and position may be noticeable against darker scenes. If the Bloomcabin Bioclimatic Pergola is on your shortlist, check the overhead design of the selected configuration when comparing how much daylight it would shade. The model name alone does not describe viewing conditions. An on-site test at the intended hour remains the useful check.
Measure seats, screen and viewing distance together
Plan for the furniture you will actually use, not a theoretical number of seats. Measure each chair or bench at its occupied width, allow space to get in and out, and draw a sightline from every seat to the visible screen. Follow the screen maker’s viewing guidance for that model rather than using one distance for every setup. With more than one row, check that people behind can see the whole picture over those in front. Test with real chairs, or mark their outlines on the ground; recliners and chairs pulled back for a better view occupy more room than their closed positions suggest. Try the arrangement with viewers of different heights, particularly in the back row. If only one arrangement fits, consider whether fewer seats or a smaller screen would preserve the view and access before increasing the pergola footprint.
Count the screen stand, projector position and speaker footprint as well as the seats. The projector may need a clear line and a particular distance from the screen, so use its instructions instead of guessing. The Bloomcabin Pergola listing states a model area range of 9 to 24 m². That is a starting point for comparison, not a seating capacity or a description of the clear space inside a specific layout. Confirm the dimensions and post positions for the configuration you are considering, along with any screen-height and projector-offset requirements, then draw the furniture and walkways to scale.

03
Keep garden access clear during the screening
Draw the routes people use: from the back door to the garden, from the seats into the house, and from a gate or side path if there is one. Keep these routes outside the screen stand, projector beam and places where chairs need to move. Someone carrying a drink should not have to step over a lead, squeeze between a post and a seat, or walk in front of the picture. Add door swings, steps and gates to the sketch; a route that looks wide with chairs pushed back can disappear when everyone is seated. Check it while someone carries a tray or folds a chair, not just by looking at an empty plan. Leave room for someone to pause or turn without blocking viewers who are already seated.
Decide whether the screen setup will stay in place between film nights or be stored after each use. If the pergola also serves as the everyday patio, make sure the screen and loose accessories can be put away without blocking a door or taking over the main path. Try the route with people arriving late or leaving before the film ends, and give the screen case or storage box a place that will not become an obstacle. When assessing the wall-mounted Bloomcabin model, use the selected configuration’s dimensions and post positions alongside your door and path measurements to judge whether access will remain clear.
Control household light without hiding the paths
List the lights that may be on during a film: kitchen and patio doors, exterior fittings, garden lamps and light from a conservatory or neighbouring windows. Reduce only sources that are unnecessary and under your control; a bright doorway behind the seats can be as distracting as a lamp near the screen. Check the picture from the back row as well as the front. Where people need to move, retain a gentle light on steps and paths, placed out of the screen’s view, rather than leaving routes difficult to see. Make sure the controls for those lights are reachable without walking through the projection area, and check that people can still find steps once the screen is on.
Watch for reflections from glazed doors, pale paving or shiny furniture once the projector is on. A lit window opposite the screen may reflect room light; changing the screen position, closing a blind where appropriate or dimming an interior lamp can help more than adding another fitting. When reviewing options on the Bioclimatic Pergola model page, distinguish the pergola’s shade from lighting you can control in the house and garden. Do not assume curtains, screens or shading accessories are included; check the selected model’s documented options. Test any proposed arrangement before treating it as a solution to glare.
04
Projector placement and cable routes
Position the projector in line with its maker’s instructions for distance, focus, ventilation and mounting, with an unobstructed route to the screen. Do not assume a position under a pergola suits every projector: headroom, posts and the path through the seats all matter. Keep vents clear and place the player, remote and other equipment where their controls can be reached without crossing the beam. If a unit has limits on humidity or operating conditions, check the manual before using it in the garden.
Map every lead from its source to the equipment before arranging chairs. Keep cables out of doorways and footpaths, and do not leave them where they can be pinched by doors or exposed to water; follow the instructions supplied with the devices and cables. For fixed outdoor sockets or wiring, ask a qualified electrician rather than improvising a permanent connection. When comparing configurations on the Bloomcabin Pergola model page, allow for the projector’s position and cable routes in your measured plan. The stated floor area alone cannot tell you whether these will fit. Test the routes again after the seats are in place.
Plan for wind and rain as well as shade
Treat protection from weather as a separate question from the pergola’s shade. Wind-driven rain, dew and gusts may reach an open-sided space, while a screen can move or catch wind according to its construction and support. Check the operating and storage limits for the screen, projector and audio equipment; if conditions are beyond those limits, postpone or move the screening indoors. Screen fabric and electronics can have different limits, so one component’s acceptable conditions do not settle the others. An overhead structure is not evidence that a particular configuration keeps equipment dry or safe to leave outside overnight. Do not leave a large freestanding screen assembled simply because the pergola remains in place; follow the screen maker’s storage advice.
For a wall-mounted layout, review the Bloomcabin Wall-Mounted Pergola listing alongside the screen’s support requirements. Any proposed attachment must be permitted by both the screen and structure documentation; a product name does not establish that a fixing is suitable. Decide in advance where equipment will be stored if the weather changes, including the space needed for the screen when packed away. A straightforward fallback is useful: bring items indoors where their instructions allow, postpone, or switch to an indoor plan rather than improvising as rain starts.

05
Keep sound and light considerate of neighbours
Place speakers so sound is directed towards the seats rather than out across the garden or at nearby windows. Begin at a low level and, if practical, ask another adult to listen from the boundary or nearest neighbouring area; sound can carry differently away from the audience. Follow the audio maker’s setup guidance and adjust according to what can be heard at the garden edges. Dialogue should remain clear without turning the soundtrack up simply to compete with outside noise. A smaller listening area or lower level is often easier to manage than trying to fill the whole garden. Check from your own house as well as the seats so you know how much carries indoors.
Give screen glow and decorative lighting the same consideration as audio. Avoid facing a bright screen towards a neighbour’s window, and keep garden lights directed down and within the area people need to use. Choose a finish time that is considerate of people nearby; for a larger or later gathering, a brief heads-up can surface concerns before seating and speakers are in place. If you lower the volume, check dialogue from every planned seat, or use captions where the programme offers them. Do not assume captions are available in every film or at every playback source, so confirm in advance rather than relying on them as the only alternative. A fence should not be treated as a sound or light barrier.
Run a full rehearsal before inviting people
Run one complete trial at the intended start time, with the planned screen, chairs, projector, speakers and normal garden lighting in place. Play enough of a test film to assess focus, image visibility, reflections and sound. Ask someone to try the least favourable seat while others sit in front, rather than judging only from beside the screen. Walk the access route with the projector on and confirm nobody needs to cross its beam. Check the playback source, remote and audio connection during the rehearsal, not when guests arrive. A daytime assembly check helps place equipment, but cannot show the picture at dusk or reveal whether house lights interfere.
Use the rehearsal to decide what should stay in place and what is better brought out for each screening. Note the actual chair positions and clearances, the time the image becomes comfortable to watch and where equipment will be stored. For a final comparison with the Bloomcabin Pergola product page, match the selected dimensions and configuration to your measured plan rather than choosing on area alone. Record the screen’s position relative to a fixed garden feature so the layout is easy to repeat, but remove tape or temporary markers that might become a trip hazard. Leave room to adapt as the season, weather or number of viewers changes.
Frequently asked questions
Which way should an outdoor cinema screen face?
There is no single best compass direction. Check the proposed screen and seats at the time you expect to watch, looking for low sun in viewers’ eyes, direct light on the screen and reflections from windows or paving. Repeat the test as the season and evening light change.
Will a pergola make a film visible before dark?
Not necessarily. The amount of shade depends on the design, sun angle and light entering from the sides, and a pergola does not automatically create blackout conditions. Test the screen with the intended projector at your planned start time; you may need to begin later.
How much space should I allow for seating and equipment?
Measure the seats, screen frame and stand, projector position, speakers and clear walking routes together. Use the screen and projector makers’ setup guidance rather than a universal viewing distance. A stated pergola floor area alone does not show whether a particular layout will fit.
Can I attach a screen to a pergola?
Do not assume a post, beam or wall is a suitable fixing point. Check that the screen instructions and the pergola documentation both permit the specific arrangement. If the fixing or structure is uncertain, seek advice from an appropriately qualified professional before attaching anything.
Does a pergola keep a projector dry?
Do not rely on the structure for weather protection unless that is explicitly confirmed for the configuration you are considering. Follow the projector and screen makers’ operating and storage instructions, and have a fallback plan for rain, dew or wind.
Treat the pergola, screen and playback equipment as parts of one layout, not as substitutes for one another. A measured seat plan, a dusk test and a rehearsed route can reveal whether you need to change the screen position, delay the start or reduce the number of seats. If the setup only works when conditions are dry and the garden is dark, build an indoor fallback into the plan. That keeps the film night straightforward while leaving the garden usable afterwards.
