
Planning Dining and Lounge Zones Under One Pergola
Pergola layout guide
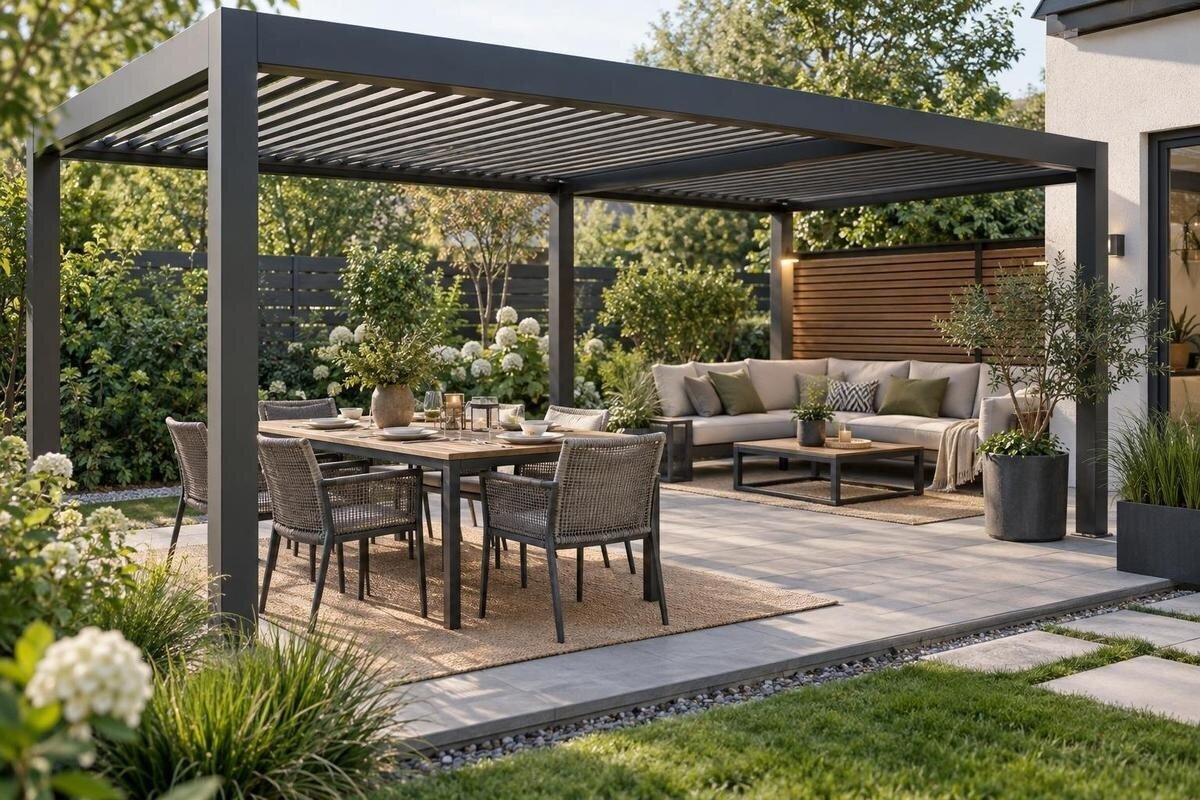
A dining set and a lounge area can share one pergola when you allow for people using both, rather than simply fitting furniture within the roof outline. The challenge is the movement between them: chairs pull back, people carry plates, doors open and a coffee table takes up floor space. Measure each group in use, plot the everyday route, then test the layout before choosing a configuration. This guide focuses on simultaneous use and circulation rather than a general pergola size calculation.

Decide how both zones will be used at the same time
Decide how you will use each area before drawing the furniture. Consider how many people normally eat outside, whether meals involve serving dishes at the table, and what the lounge is used for: conversation, reading or putting your feet up. These habits affect which pieces need to stay in place and which can be moved. A layout for a quiet coffee is not necessarily a layout for a full meal, even if the same table and chairs are used. Write down the busiest realistic combination of people and activities, rather than planning around an empty terrace. Note whether this overlap happens on ordinary evenings or only when guests visit; occasional capacity and everyday comfort are different targets. If the number of diners varies, record the usual and maximum numbers separately.
Set a simple simultaneous-use test. Someone should be able to sit at the table while another person reaches a lounge seat without either having to move every time. Serving and clearing should not turn the coffee table into a corridor, and someone leaving the house should not have to squeeze behind an occupied chair. List fixed needs such as a preferred seat, a place to put down a tray or an unobstructed route from the patio doors. Decide which pieces may be moved before a meal and which must stay ready; a plan that depends on constant rearranging may not suit daily use. Separate essentials from nice-to-haves. The sketch must work with both zones occupied, not just look balanced when nobody is sitting beneath the pergola.
Measure each furniture group in use
Measure the exact furniture you expect to use instead of relying on a typical size for a dining set or sofa. Record the table, dining chairs, lounge seats and coffee table, including arms and side tables that occupy floor space. Measure to the outer edges of each piece, not just the visible cushion. For dining chairs, note both the footprint when pushed in and how far each chair moves back when someone sits down or stands up. A chair's resting outline is not its working footprint. If a lounge seat has a footrest or reclines, mark the position it reaches in normal use. Also note whether the table can be approached from all sides or only from the ends.
Draw the pieces to scale, including their use positions, and compare them with a specific pergola layout rather than an area total. The entry for Bloomcabin Pergola states an area range from 9 to 24 m²; that does not establish the clear space inside a chosen configuration or the position of its supports. Treat the figure as a first filter, then get dimensions for the precise option you are considering. If you have not chosen furniture, use measurements from real candidate pieces rather than generic placeholders. Two layouts with a similar area can have different proportions, and a narrow side passage may decide whether both zones work. Do not shrink chairs to small symbols merely to make the drawing fit.
Draw the route before placing the seating
Mark every point people actually enter or leave: patio doors, a garden gate or an opening to another part of the terrace. Show the direction doors open and the route between those points before placing a chair or sofa. Draw the route as a band with the width your household needs, not as a thin line; carrying a plate, walking beside someone or passing a seated guest takes more room than a line on paper suggests. Give priority to the path used every time, then mark secondary routes if they matter. There is no single clearance figure that suits every furniture set and terrace. Use your measured set-up and actual movements, including the door swing, to choose the route. Do not count the same strip as both chair pull-back space and a clear passage.
Keep that route from cutting through the middle of a seating group. It may run between dining and lounge areas or along an outer edge, depending on the terrace; test it with chairs occupied and pulled out. When considering Bloomcabin Wall-Mounted Pergola, include nearby door and window positions in the plan. Check the configuration drawing before deciding that the wall side provides a suitable passage or space for furniture. If people regularly move from the house to the lounge before going to the garden, trace that route too rather than assuming one line covers every trip.
Keep food service out of the lounge route
Plan the dining area around the journey food and dishes actually take. If plates usually come from inside, look at the nearest practical door; if they come from another part of the garden, use that route instead. Putting the table near the source can shorten carrying, but it should not block a doorway or force every trip through the lounge. On the plan, trace the route to the table and back while the chairs are in use. Include the place where a person pauses to set down or collect items, rather than treating the table edge as an automatic serving station. Think about clearing as well as serving, since people may move in both directions.
Check the whole sequence: approach the table, reach a seat, serve, then leave without brushing against lounge furniture. A side surface is useful only if it has a place that does not pinch the main route; do not count an occasional gap as permanent landing space. If the best route crosses between zones, make it a deliberate passage rather than the leftover space after everything else has been placed. When comparing an option from Bloomcabin's bioclimatic pergola range, use the dimensions of the exact configuration for the tray-carrying test. Check both the outward and return journey, with the side surface and lounge furniture in their usual positions.

Allow space for chairs to move
Dining chairs need an area to move into, not just a neat ring around the table. Draw each chair pushed in, then pull it out to the point where a person can sit down and stand comfortably. Repeat the check for all seats likely to be occupied together; one open chair can overlap the path behind another. Do not rely on a guest turning sideways or pivoting a chair on the spot if that is not how the seat is normally used. If someone routinely passes behind diners, include that movement too. The aim is not an arbitrary strip of empty floor, but avoiding a layout where a guest must tuck in a chair or wait every time another person gets up.
Apply the same idea to the lounge group. Allow for approaching the sofa, pulling an armchair into conversation and reaching the coffee table without entering the space needed to move a dining chair. Include footrests and side tables; the sofa outline alone can hide the pinch point. If the spaces needed to use both groups overlap, try rotating the table, changing the chair position or separating one piece from the group, then redraw the route. When considering the regular Bloomcabin pergola, check the exact clear dimensions and support positions rather than assuming an open rectangle. Keep one test with both groups occupied; a version that works only after the lounge has been rearranged is a different use case.
Mark supports, walls and openings on the plan
Fixed features can take usable space from the centre as well as the edge. On the drawing, mark support posts and their bases, walls, thresholds and every opening people need to use. Use the measured outline of each support if available, rather than a dot at its centre; a chair back or table corner may meet the base. Treat existing planters or storage boxes as fixed if they will stay there, and show an alternate parking place if they will move. Do not assume a post can be moved to clear furniture or that the outside line describes the free area inside. Show fixed elements before testing chair movement, and tie their positions to the precise configuration under consideration.
Where a wall-mounted layout is being considered, the wall and chosen attachment side are part of the plan. Compare the wall-mounted Bloomcabin pergola with the actual wall openings and furniture route, using dimensions for the selected configuration rather than estimating them from a product photograph. Have the arrangement confirmed before treating the wall edge as clear space, and ask a qualified professional to assess technical attachment questions where necessary. That is distinct from deciding whether the seating plan is comfortable: structural suitability cannot be settled by a furniture sketch, and a suitable structure does not automatically leave enough room for two occupied zones.
Check views and light from seated positions
Check views and conversation from seated height, not only from the house. Diners usually need to see one another across the table; lounge seats may face each other, the garden or a view they use. Turn paper cut-outs or temporarily position chairs to see whether the arrangement encourages conversation or leaves one seat facing a support or the back of another chair. Keep the line between the groups open enough for people to acknowledge one another without making it the only route through the terrace. Try each seat's likely viewing direction, especially if the lounge has several chairs rather than a sofa facing one way. A small change in orientation can make the zones distinct while leaving them connected.
Light and shade can affect where each activity works best. Notice conditions at the times the table and lounge are normally used, rather than judging the layout at one convenient moment. A spot that suits a meal may put direct light in a reader's eyes; another may leave the table too shaded for its usual task. The pergola does not establish a particular light level, so assess the real terrace and exact proposed arrangement. If you plan a light source, mark the dining and reading tasks on the sketch and verify any fitting separately; do not assume a model name confirms an accessory or its installation. Observing at more than one likely use time can reveal a change that is missed in a single viewing.
Give movable furniture a proper parking place
Movable furniture can make a compact arrangement more adaptable, but only if the pieces have somewhere to go. Decide where spare dining chairs, stools, footrests and side tables sit when they are not being used. If they are parked behind a sofa or beside a support, show those positions and check that they do not narrow the route. A chair that is easy to shift in theory may stay put in everyday use, so do not count on moving furniture every time someone walks past. Be realistic about which items people will move and how often. Make the normal arrangement the one that works without constant tidying, with occasional extras kept out of the path.
Choose which items are genuinely flexible and which need a permanent footprint. A smaller side table may serve either zone, for instance, but the plan should show where it sits while dining and lounge areas are occupied together. If Bloomcabin Bioclimatic Pergola is on your shortlist, compare the selected configuration with both the parked and in-use furniture positions. Check whether a spare chair fits behind the dining group without blocking the route, and whether retrieving it would disturb someone using the lounge. Include a storage or parking place only if that space is actually available on the terrace, rather than adding it as an invisible margin around the furniture.

Test the two-zone plan at full size
Before settling on a drawing, mark out a full-size concept layout on the terrace. Include the table, chairs with seats pulled out, lounge pieces, coffee table, door swings and route. Use removable markers suited to the surface; if a full-size test is impractical, use a scaled plan with paper cut-outs to check how footprints overlap. Label each outline so it is clear which marks show furniture in use and which show its parked position. This is a concept test, not a universal clearance template or technical drawing. It lets you judge the layout against the real terrace and furniture rather than relying on a sketch that looks spacious only because it is not to scale.
For a full-size test, act out the busiest ordinary moment: someone sits at the table, another person uses the lounge, and a third carries a tray or walks through. Open doors and move the chairs as you would during a meal. Invite the people who use each zone to try it; an observer's view is not the same as sitting down or getting up. Notice where anyone hesitates, furniture needs to shift or conversation becomes awkward. Change one element at a time and repeat the test; rotating a table may solve one crossing route while moving a sofa creates another. Then compare the layout that worked with dimensions for the Bloomcabin Pergola model before treating it as a final fit.
Confirm the exact pergola configuration against the layout
Once the concept works, check it against the exact model and configuration you plan to buy. Ask for a dimensioned drawing that shows the overall footprint and the position of fixed supports, then compare those details with your measured layout. Confirm which product options are included in the configuration being discussed; do not assume a picture or model title identifies every fitting or dimension. If your plan depends on a particular opening, wall edge or support being clear, get that point confirmed. Keep a note of any dimensions or conditions that still need an answer, and record the exact model discussed. The aim is to match your furniture plan to the product drawing, not to reverse-engineer a layout from a headline area figure.
If it is on your shortlist, use the product page for Bloomcabin Bioclimatic Pergola to identify the model you are discussing. Label the dining and lounge footprints, chair movement, serving route, everyday path and fixed features on your final concept. Keep it beside the confirmed product drawing so any differences are visible. If a support or other fixed feature occupies space you had allowed for movement, revisit the affected furniture positions and repeat that part of the test. The final comparison should preserve the arrangement that worked with both areas occupied, rather than simply showing that the furniture fits beneath the roof.
Frequently asked questions
How much space should there be between the dining and lounge areas?
There is no single gap that suits every furniture set and terrace. Begin with the route people need, then include pulled-out dining chairs, access to lounge seats and the edges of tables. Mark these together and test the plan with both areas occupied. If someone has to move furniture to pass, adjust the layout.
Can a dining table and lounge seating stay set up under one pergola?
Yes, if each group fits in its in-use position and there is still a clear route between the house, the seating and the rest of the terrace. Check the largest everyday arrangement, including chairs pulled out and the coffee table in place, rather than relying on a sketch of furniture pushed neatly together.
Should the dining area be nearest the house?
It can make serving simpler if food usually comes from inside, but it is not automatically the best position. Check door openings, the route people use most and whether the table would block access to the lounge. Trace the journey in both directions, including clearing dishes, before settling on the layout.
Does a listed area of 9 to 24 m² show whether both zones will fit?
No. Bloomcabin's pergola listings state an area range from 9 to 24 m², but an area figure alone does not show the clear space or fixed support positions in a particular configuration. Compare your measured furniture plan with dimensions for the exact option, including chair movement and the route through the space.
Is a wall-mounted pergola automatically the best choice beside a house?
Not automatically. The wall, doors and windows all affect where furniture and the main route can go, and the model name does not establish the exact layout. Compare the specific configuration with your plan, and have a qualified professional assess technical attachment questions where needed.
A successful two-zone layout is not simply one where the table and lounge furniture fit on paper. It is one where the chairs can move, food can be carried and people can use either area without turning the other into a passage. If the plan still works when both groups are occupied, the zones are sharing the pergola rather than competing for its space.
