
Choosing Pergola Height: Headroom, Roof Movement and House Proportions
Pergola planning guide
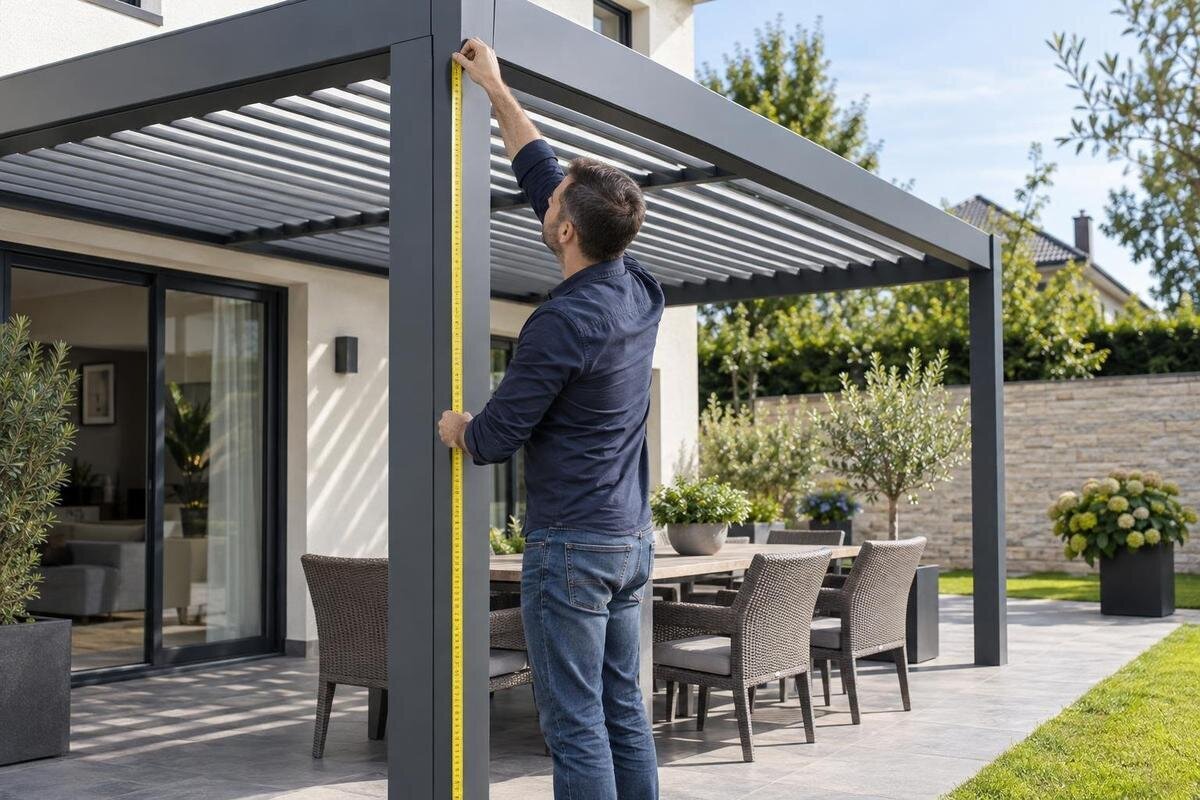
A pergola can look well sized in plan yet feel cramped beneath its beams, conflict with a moving roof or sit awkwardly against the house. Height is not a single figure: the outside top, lowest underside and usable headroom can all differ, while a new patio surface can change the clearance. A measured cross-section lets you compare these points with the finished floor and the actual façade before selecting a configuration. It is a more dependable basis for a decision than a footprint or product image alone.

Draw a section before choosing a height
Start with a section cut perpendicular to the house façade, through the wall, pergola and terrace, rather than trying to judge height from a plan view. The plan is useful for showing post positions and the footprint, but it cannot show how far the underside sits above finished paving, how the roof line relates to the eaves, or whether a moving component changes position. In the section, show the wall, nearest window or door opening, proposed frame, roof assembly, its underside and the surface people will stand on. Mark the cut direction and the main route beneath the structure. The drawing should give every height a clear reference point rather than leave separate figures to interpret.
Add separate dimensions for the highest outside point of the complete assembly and the lowest point beneath the frame; do not label both simply height. State the surface from which each is measured, and include wall-side and outer-side levels where they differ. An elevation along the façade helps compare the roof line with several windows and doors, while the section explains clearance at one cut. When a quote identifies Bloomcabin Pergola, treat that name as the model reference, not as a height figure: use a drawing for the proposed configuration to check dimensions. A brochure silhouette cannot replace a measured section, and a plan alone cannot tell you whether the overhead space will feel comfortable.
Measure from the finished patio level
A measurement taken from today’s lawn or paving can become misleading when the patio is renewed. New paving, a deck or another planned surface can alter the standing level; a threshold or step may create more than one level to consider. Decide which surface will be the finished floor beneath the pergola before comparing headroom. Ask whoever is coordinating the patio to state the planned top level, including any build-up still to be installed, and show it on the pergola drawing. Do not assume a height quoted from a post base, concrete or current ground equals the clearance above the surface people will use.
Use a clear datum, such as the top of the finished terrace, and draw the dimension from it to the underside. Where the patio changes level, record more than one level instead of relying on an average. Note the house threshold and the route from the door, as a step can affect both access and the apparent space. If reviewing Bloomcabin Wall-Mounted Pergola, ask that the drawing state which finished level its wall-side dimensions use. Keep this reference consistent with the patio drawing so the two proposals can be compared directly. Confirm the levels with the patio designer and installer before treating measurements as final, particularly if the patio work will happen later.
Distinguish overall height from headroom
Overall height is the distance to the highest outside point; headroom is the clear space below the lowest part people may pass under. The underside of a main beam can sit lower than the roof surface, and a rail, bracket, drive housing or cover can form a lower point still. Clearance may also vary across the span, particularly near a perimeter beam. Ask for the distance from the finished floor to the lowest underside at the locations that matter, not only a single maximum-height figure. If a drawing gives one number, ask which two surfaces that dimension actually measures between and whether selected fittings are included.
Map the actual use of the space on the plan: the route between house and garden, places where people stand, and positions for chairs or a table. A path near an outer beam can have less clearance than the centre, so a centre-only figure may not answer the practical question. Consider the tallest regular users and ordinary actions such as standing up beside seating or carrying items through, without assuming one universal comfortable dimension. You can mark the proposed beam underside on a nearby wall with removable tape and view it from the path and indoors. Pair that simple visual check with measured dimensions for the exact proposal.
Show the roof mechanism in motion
A roof mechanism needs space while it operates, not just in the position shown in a sales image. Depending on the design, roof elements may pivot, slide or retract, and rails, actuator housings or covers may form part of the assembly. Request a dimensioned section of the quoted arrangement in the positions that change its movement envelope, including fully open and closed where relevant. The drawing should identify the moving components and their lowest points. Do not infer the movement or clearance from a product label, a top view or the roof’s outside silhouette; those views may not show what passes beneath the frame.
Compare the distance from the finished floor to the lowest point in each position shown. Also look at where moving elements pass in relation to windows, gutters, doors, wall lights or other features; a dimension may look adequate at rest but leave a clash during operation. For Bloomcabin Bioclimatic Pergola, the model name alone does not describe the roof’s operating envelope, so ask the supplier to show the selected configuration. If an option adds a rail, casing or fitting below the frame, include its underside in the clearance check rather than treating it as an afterthought. The same drawing should make clear which options it represents.

Check the house-side clearances
At the house, record more than the eaves height. Mark the soffit, gutter, downpipes, window heads, doors, opening windows, vents and wall lights that share the proposed area. A wall-mounted structure may sit close to several of these, while a freestanding arrangement can still overlap an opening or a maintenance route. An elevation lets you see whether the proposed top line crosses windows or doors; a cross-section shows the gap where the structure meets the house. Include the opening arc of a door that swings into the space, and note access needed for cleaning gutters or servicing existing fittings.
Do not choose an attachment line just because it matches an existing horizontal feature. The appropriate support location and fixing details depend on the building and the selected design, so have a qualified installer or relevant designer confirm them; a height guide cannot establish a safe connection. For the wall-mounted Bloomcabin model, the label identifies the model category, not the height at which it may connect. Ask for the proposed wall-side level and resulting clear headroom to be shown together, with nearby openings and fittings marked. This prevents a visually tidy line from being mistaken for a workable position.
Compare the roof line with the façade
Height affects how a pergola sits against the house, even when its footprint is unchanged. A low roof line may look balanced beside a low elevation yet visually cross tall doors or windows; a higher frame can preserve more openness but may dominate the façade or leave an awkward gap below the eaves. These are visual judgements, not universal ratios. Compare the proposed beam line with the real lintels, window heads, sill lines, eaves and any adjoining extension, rather than choosing a height because it is common elsewhere. The dimensions of the house, not a general rule, determine which relationships are worth checking.
Ask for a straight-on elevation or draw one to scale using the measured house openings. Show the highest roof edge, beam underside and post locations, then inspect it from the garden and from rooms that look onto the terrace. Wall-mounted and freestanding outlines can look different because their posts and roof lines meet the façade in different places; assess the configuration you are actually considering. When considering a model on the Bloomcabin Pergola product listing, compare its proposed outline with the actual façade rather than judging proportions from a gallery view. Keep the house elevation unchanged when comparing alternative heights, so you can see exactly which relationships change.
Allow for changes in patio level
Sloping ground or an unfinished terrace can conceal a change in headroom. If the floor rises along the length of the pergola while the roof is level, clearance will differ between the ends; if the levels or support arrangement are designed differently, the section needs to show that too. Do not rely on one measurement at the high side or on the garden’s current contour. Mark the intended finished level at each post, near the house threshold, at steps and along the main walking route. Where a slope or step affects the area, include another section or a level schedule so the differences are visible.
Patio levels and water routes should be coordinated with the project designer; avoid changing the pergola height to compensate for a floor or drainage decision without checking both drawings. Agree which surfaces will be installed before measuring, and note any parts of the terrace that will remain at a different level. If the patio is phased, show the final proposed level as well as what exists now, so headroom is not approved against a surface that will later be covered. The installer can then confirm the agreed frame level against site conditions, with any adjustment shown on a revised drawing rather than left as a verbal note.
Compare quotations on the same dimensions
When comparing quotations, ask each supplier to use the same points of measurement. One may quote outside height to the roof top, while another gives clear height beneath a beam; those figures answer different questions. Note the datum, highest outer point, underside above the walking route, wall-side and outer-side levels, roof positions shown and any included fittings that reduce clearance. The comparison only works if every drawing uses the same planned patio finish. If a supplier provides a plan or an overall dimension but no section, ask for the missing view before using the figures to judge how the pergola will feel.
Keep a side-by-side record rather than trying to convert one overall-height figure into another supplier’s headroom measurement. Label each model and configuration, copy each dimension exactly as defined, and write down what remains unconfirmed. For a quotation for Bloomcabin’s bioclimatic pergola, record the drawing reference beside the quoted arrangement so you can match each measurement to the correct proposal. Keep units consistent and make sure the dimension arrows identify their start and end points. Where a figure is missing, leave it marked as unconfirmed rather than estimating it from an illustration. A short list of defined measurements and open questions is more useful than a comparison of isolated height figures.

Test the proposed height on site
Before settling on a height, test the drawing against the place. Mark the proposed underside on a nearby wall with removable tape and put temporary markers where the posts are planned; check the approach from the doorway, the main path and the view from a room. If you compare alternatives, make separate marks and label them rather than relying on memory. Photographs and perspective can make a line look higher or lower, so keep the measurements beside the visual check. The aim is not to recreate the structure, but to see whether its measured outline relates sensibly to the real openings and usable space.
Include anything that changes the space beneath or beside the roof in the same review. If the project includes lighting, a side screen or another fitting, ask whether its housing or track changes the lowest point or interferes with moving parts; do not assume an accessory shown separately fits within the measured frame. When preparing an enquiry through the Bloomcabin Pergola page, describe the fittings included in your site check alongside the proposed height. Keep a note of the marked beam level and the configuration drawing used for the test. This lets you revisit the same comparison if an option changes, rather than relying on your first impression of the space.
Record the agreed dimensions
Once a height is agreed, record it in a drawing and the written configuration, not only in a screenshot or verbal note. Identify the finished-floor datum; the topmost outside point; the lowest underside on the walking route; the wall-side and outer-side levels; and the roof positions used for the movement check. State whether the drawing includes the fittings selected for the project. Use consistent units and make dimension arrows terminate at the actual surfaces they describe. A precise drawing prevents an overall height from being mistaken for usable headroom and gives everyone a shared reference for the proposed arrangement.
Before approval, compare the drawing with the quotation and site assumptions: the same model, configuration, future terrace level and nearby openings. If the patio design, roof option or position changes, ask for affected dimensions to be revised and confirm that everyone is working from the same version. For a proposal based on the Bloomcabin Bioclimatic Pergola listing, record the model name, selected options and drawing reference together in the agreed configuration. Keep the revised drawing with the quotation so the chosen height remains tied to that arrangement. If a connection or support detail remains uncertain, resolve it with the supplier and a qualified installer before treating the height as final.
Frequently asked questions
Is a pergola’s overall height the same as its headroom?
No. Overall height usually describes the distance to the highest outside point. Headroom is the clear distance from the finished floor to the lowest part people pass beneath. Beams, rails or other components can make that clearance lower than the outside height suggests.
How much headroom should I allow?
There is no single figure that suits every house and use. Measure to the lowest fixed or moving part above the route, then consider who will use the space and how they will move through it. Check the proposed dimensions against the supplier’s drawing rather than relying on a generic minimum.
Should I measure from the existing patio or the finished surface?
Use the intended finished surface as the reference. If paving, decking or another surface will be added or changed, have its planned level shown on the drawing. Measuring from the current ground can give a misleading impression of the clearance you will have.
How do I account for a moving roof?
Ask for a dimensioned section showing the positions that change the roof’s movement envelope, such as fully open and closed. It should identify the lowest moving part and include any selected rails, covers or fittings that affect clearance.
Should the pergola roof line match the house eaves?
Not automatically. Compare the proposed line with the eaves, window heads, door openings and other façade features, then consider how it looks from the garden and the rooms facing the terrace. Have a qualified installer confirm any wall-side support details separately.
Treat height as a set of related measurements, not a single number. The most useful drawing ties the finished floor to the lowest point in each relevant roof position and places that section beside the actual façade. With those relationships clear, you can judge the available headroom, how the roof sits against windows and eaves, and how the structure meets the patio. The right choice is the configuration that suits the site and looks balanced from both the garden and the rooms overlooking it.
