
Planning a Pergola within a Wildlife-Friendly Garden
Garden design guide
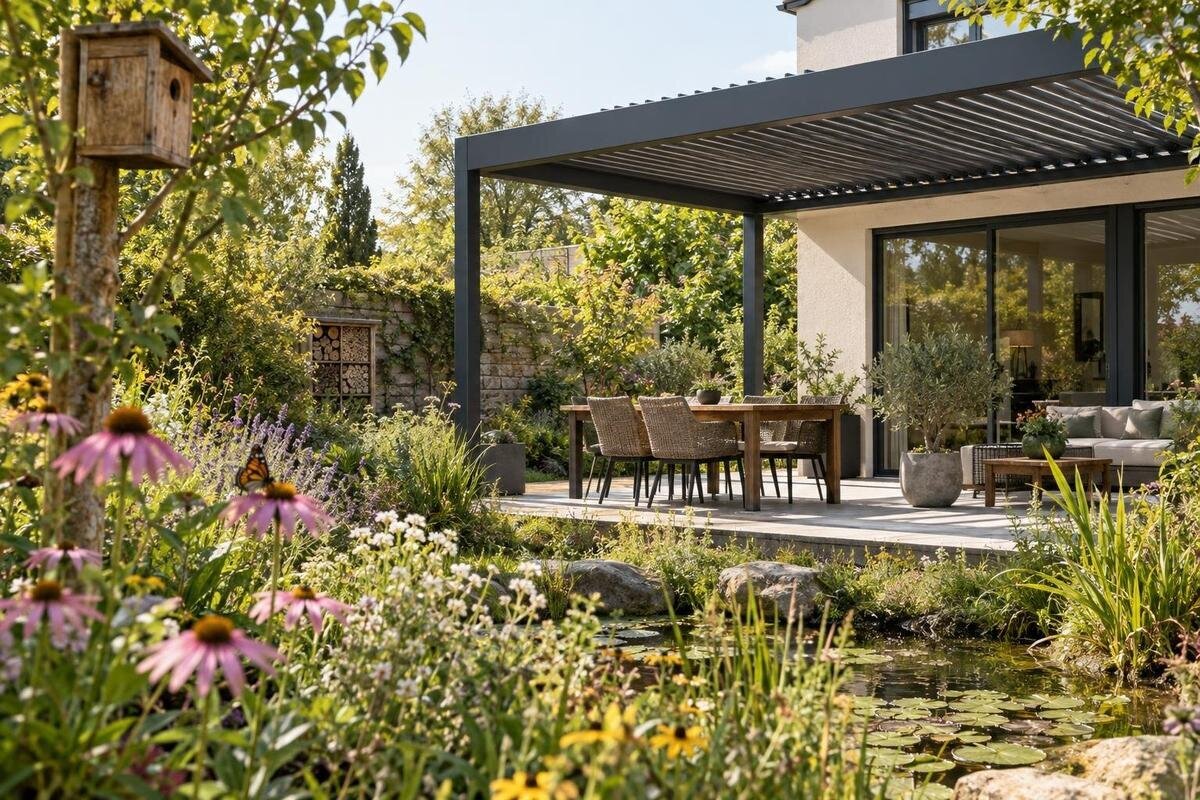
A pergola can make a garden more useful, but its footprint also affects planting, routes, light and the work needed to care for the space. In a wildlife-friendly garden, the structure is only one part of the layout. Record what is already there, then check that the seating area, planting, lighting and maintenance routes can coexist with the features you want to keep.

01
Record the garden as it is
Before choosing a footprint, sketch the garden as it is now. Mark the house, doors and windows, boundaries, mature trees and hedges, established beds, water features, gates, paths, storage and compost areas. Add any drains or services you already know about, but treat the sketch as a reminder to verify them before work, not as an accurate record of their locations. Visit at different times of day and, if possible, in more than one season. An apparently empty patch in winter may sit beneath a summer canopy or form part of a route used to reach a gate or shed. Note what is permanent, what changes and what you use regularly. Keep observations separate from proposed changes: a simple key can distinguish existing planting, areas to retain and possible pergola positions. Date any notes about shade or plant growth so you can interpret them later. Photographs taken from the house and garden entrances can also help you compare proposed positions with the features already visible from those viewpoints.
Mark the features you want to retain, including tree canopies, hedge edges, undisturbed corners and beds with flowers, seed or fruit at different points in the year. Note where you observe wildlife, while recognising that a brief visit is not a full survey. This can reveal whether the proposed pergola would replace established planting, divide a connected bed or occupy a space that is already hard-surfaced. If there is a feature you are uncertain about or a site-specific conservation concern, seek suitable local advice before changing it. The aim is to plan from the real garden rather than assume that every open-looking area is unused.
Set the pergola within the garden
Choose the position by looking at the garden as a whole. Decide whether the pergola will serve meals, relaxed seating or another regular use, then plot its footprint beside the house and existing planting. Consider what can be seen from the main rooms and how people will move between the door, seating and garden. A location that works for a table may split a planted area or narrow a route; a small change of position might preserve that connection. Mark the frame outline and furniture separately, including room to pull chairs back and pass behind them.
Compare freestanding and wall-mounted formats on the same plan. A wall-mounted pergola sits beside the house, so consider its position alongside doors, windows, existing planting and access to the wall. Include the wall-mounted pergola option in that comparison, confirming the selected model’s dimensions and attachment requirements with the relevant supplier and a competent installer. A freestanding arrangement raises different questions about routes around the structure and how it sits among beds. Compare the amount and position of planting each arrangement would retain, rather than choosing solely by the view from the house. A seating area can face a planted border without occupying it. Where two positions seem equally practical, mark what would need to move in each: furniture, a path, a bed edge or an established plant. In either case, draw the supports and edges: a broad area labelled pergola will not show whether a post lands in a path or established planting.
02
Keep routes clear around the seating area
Draw the routes that make the garden work before fitting in furniture. There should be a straightforward way from the house to the pergola and, from there, to the gates, lawn or working areas you use. Mark where people pause, where doors swing and whether the route still works when chairs are occupied. A path that looks wide on a blank plan can become awkward when table legs, pulled-out chairs or a wheelbarrow are included. Keep a main walking line distinct from planted beds so regular movement does not depend on stepping over edging or cutting across soil.
Think about everyday access as well as the route to the seating. You may need to bring garden waste or equipment through the area, or pass between the house and a side gate. Include those movements on the drawing rather than relying on a narrow gap left over after the pergola is placed. When considering the Bloomcabin Pergola product page, compare the confirmed footprint for the option you have in mind with your routes and furniture. A stated floor area alone cannot show whether the space around the seating will work.
Choose planting for the site and the seasons
Plan planting beds by their mature height and spread, not only by the size of young plants. Lower planting near a route can leave the path easy to see, while taller shrubs may fit further back, subject to the site and the plants chosen. Existing trees and hedges can remain part of the composition where they suit the layout. Consider the planting from a seated position as well as when walking through the garden. Decide where you want an open view, where planting can frame the seating and where you need to see a gate or path. Give each part of the border a clear purpose rather than filling every gap beside the frame. This also helps distinguish planting intended for privacy from beds you want to enjoy at close range. A range of heights can add structure, but it is not a formula: the aim is to fit planting around the pergola without creating a dense barrier across a route or making beds difficult to care for.
Choose plants to suit the actual conditions, including soil, light, moisture and exposure, and check their likely size and care needs with reliable local guidance. For wildlife-oriented planting, compare flowering periods, seed or fruit, and shelter through the year rather than choosing only for one display month. The result depends on the site and the plants selected; variety alone does not guarantee that a particular species will visit. The Bloomcabin Wall-Mounted Pergola can be included as a model reference on a house-side plan, where the remaining space for planting should be drawn rather than guessed.

03
Allow for plant growth and maintenance
Show the expected spread of shrubs, climbers and other plants on the plan, then consider how they will look at maturity. Growth that seems harmless beside a post can later encroach on a route or make cleaning and inspection awkward. Allow space to reach planting for pruning and routine care, and avoid relying on frequent cutting to correct a layout that is too tight. Think about how you will reach the back of a border without stepping through the plants at its front. Where a bed can only be approached from one side, its depth and planting arrangement deserve particular attention. Match the care involved to the time you expect to spend gardening, including any training or pruning needed to keep plants within their intended space. If a plant is likely to spread beyond its bed, decide in advance how that growth will be managed and whether the work is practical for you.
Do not assume a pergola is designed to carry climbing plants or that foliage can grow around any moving components. Check the instructions and maintenance requirements for the specific model before deciding what to plant beside it. If you are considering the Bloomcabin Bioclimatic Pergola listing, ask for model-specific guidance on clearances and access as part of the comparison. That keeps plant choices tied to the actual structure rather than to an assumption based on its appearance.
Direct garden lighting where it is needed
Mark lighting on the garden plan only after identifying the tasks it needs to serve. A light for a table, for example, has a different purpose from one that helps people find a path. Consider focused, shielded fittings directed towards the relevant surface, rather than lighting an entire bed or the garden boundary by default. Check the view from the seating area as well as from the house: glare can be distracting even when the light is aimed away from the main route.
Include surrounding windows, planting and darker parts of the garden when reviewing the proposed lighting positions. If you are comparing a structure beside the house, consult the wall-mounted pergola page alongside your drawing, keeping the relationship between the pergola, windows and nearby beds in view. On the plan, distinguish existing lights from proposed ones so the combined arrangement is considered, rather than each fitting in isolation. Look at where people will sit facing a light and where they will approach it along a path. A fitting concealed from one viewpoint may still be visible from another, so include views from both inside and outside the seating area. Also consider whether future plant growth will block a fitting or alter where its light falls. Leave the choice and installation of electrical equipment to a qualified electrician; the garden plan should show the intended locations and purpose, not how to wire them.
04
Control when garden lights are on
Artificial light at night changes the conditions in a dark garden, and its effects on wildlife vary with the location and species. Treat dark areas as part of the design rather than as space that needs to be lit simply because a pergola is present. Keep light to the places where it serves a purpose, check where the beam falls beyond the seating area, and avoid leaving lights on when the garden is not in use. Reducing glare alone is not enough if light still spills across planting or a boundary.
Think about controls as part of the lighting plan. A switch, timer or other suitable control can help match lighting to the way the area is used; consider whether the settings will be convenient to operate and whether they could leave lights on longer than needed. Separate the activities in your notes: eating at the table, walking back to the house and carrying out a garden task may call for different lights at different times. Consider whether the proposed controls let you use the light needed for one activity without illuminating the whole seating area. Include switching the lights off in your usual routine for leaving the garden, rather than relying on remembering an inconvenient control. Motion-activated lighting may not suit every location or pattern of use, so consider its likely effect before choosing it. The aim is a practical arrangement that makes routes and tasks visible when required while retaining unlit parts of the garden.
Make room for routine garden care
Walk through the work involved in keeping the garden in order before planting close around the pergola. Consider where you will sweep leaves, prune plants, weed beds and move garden waste. Leave a practical way to reach the areas that need attention, including the sides of the structure and any points identified in its maintenance instructions. If a ladder or tools are needed for routine care, allow working space rather than placing a dense bed directly against the area you need to reach.
Plan for seasonal changes too: leaves may collect in different places, and planting can make a route narrower as it grows. The Bloomcabin Pergola listing can serve as a model reference while you ask for the care instructions for the option under consideration. Keep the access those instructions require in view, alongside storage for tools and a route for garden waste. A maintenance plan that fits how you actually work is more useful than a planting scheme that looks tidy only when first installed.

05
Consider water and soil around the footprint
Show existing drains, planted areas and the direction water moves across the garden on your plan. Avoid designing a route that directs water through a bed you want to retain or leaves a path difficult to use. Record observations after rain, including where water collects and which routes remain usable, rather than assuming that every part of the site behaves alike. Distinguish these observations from any proposed drainage changes. If you are retaining an existing bed beside the pergola, note its current conditions before choosing plants or altering adjacent surfaces. This gives you a clearer account of what the layout needs to preserve and what requires further assessment. If the chosen pergola has roof or rainwater-management components, find out where water from that specific design will go; do not infer its drainage from the model name or appearance. Where the proposed layout affects existing drainage or surfaces, get suitable professional advice rather than relying on a sketch to resolve the details.
Also consider how installation and future garden work will affect the soil around retained planting. Identify where people, tools and materials need to pass, and try to keep repeated access out of beds where practical. If you are comparing the Bioclimatic Pergola listing, include the exact model’s water-handling information in the site plan before deciding where nearby planting belongs. That way, plant choices are based on the actual conditions rather than an assumed dry or damp area.
Check the whole layout on a scaled drawing
Bring the parts of the plan together at a consistent scale. Show the pergola footprint and supports, the furniture, mature planting, routes, lighting positions, darker areas and access for maintenance. A drawing makes conflicts easier to spot: a post may overlap a bed, a chair may narrow the main path, or a light may cross an area you intended to leave dark. Revise the position while these are still drawing decisions. If a dimension or planting requirement is not confirmed, mark it as a question rather than filling the gap with an estimate.
The product listings show pergola options with stated areas from 9 to 24 m². Use that as an initial scale comparison, not as a substitute for the dimensions and support positions of the exact option. The Bloomcabin Pergola model page can be one reference in that comparison; check the relevant product details and planning information before settling the drawing. If the footprint still compromises a route, valued planting or access, adjust the layout instead of treating those features as afterthoughts.
Frequently asked questions
What should I map before choosing a pergola site?
Record existing trees, hedges, established beds, paths, gates, water features and the routes you use every day. Note what you want to retain, then compare the pergola footprint and seating area with those features. A sketch helps organise the plan, but it is not a substitute for checking the exact site before work begins.
Can I grow climbers over a pergola?
Only if the instructions for the specific model allow it and you can maintain the plant without blocking access or interfering with any moving components. Check the plant’s mature spread as well as its growing habit. Do not assume that a pergola is designed to support climbing plants.
How can I keep garden lighting from spilling into planting?
Plan lights around a specific task or route, and consider their direction, shielding and timing together. Avoid aiming light across beds or towards neighbouring properties. An electrician can advise on appropriate fittings and controls for the garden.
How much access should I leave around the pergola?
There is no single clearance that suits every garden. Draw the routes you need for people, furniture and routine care, then check them against the exact pergola footprint. Leave practical access to the areas that need cleaning, pruning or inspection.
Does a pergola make a garden wildlife-friendly by itself?
No. A pergola is one part of the layout; it does not establish habitat or guarantee that wildlife will use the garden. Consider the existing features, planting, lighting and maintenance together, and choose a position that fits the wider garden.
A wildlife-friendly pergola plan begins with the existing garden, not with the structure in isolation. When the footprint, routes, mature planting, lighting and maintenance access are shown together, it is easier to see what should stay, what needs adjusting and where a different position would work better. The result is a seating area that belongs to the garden’s wider layout, with its planted and darker areas still considered as part of everyday use.
