
Pergola Near an Outdoor Fireplace: Separation and Heat
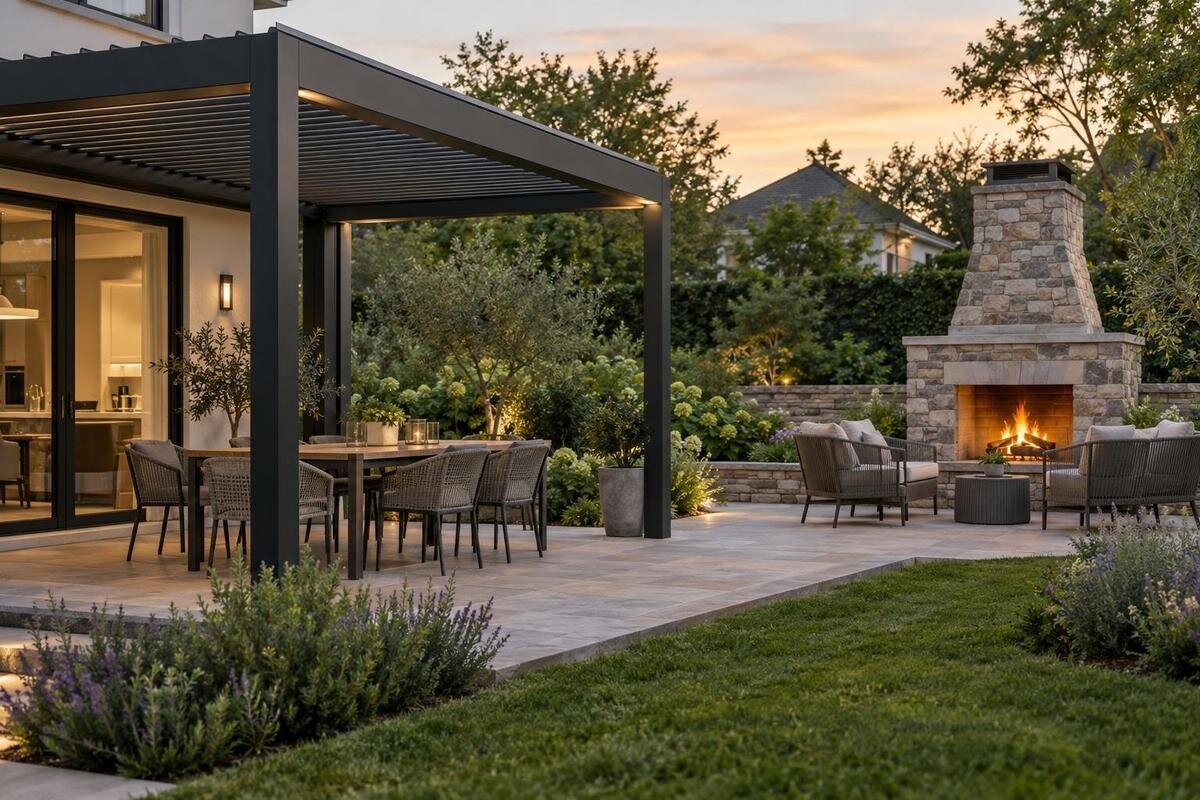
Outdoor living planning
An outdoor fireplace introduces heat, smoke and potentially embers beside a structure designed for shade. A pergola should not be assumed to act as a fireplace enclosure, chimney support or heat shield. Plan the two as separate installations first: identify the exact appliance and pergola, compare their manufacturers’ instructions, map the proposed positions and have the combined arrangement reviewed by a qualified fire professional before purchase or installation. If either manufacturer’s guidance is silent or unclear, do not treat a gap in the documents as permission to bring the structures closer.

Pergola suitability for use near a fireplace
An outdoor pergola is a garden structure, not automatically a fireplace surround, chimney support or tested heat shield. Its open appearance does not settle the question: heat can reach roof members and posts, while an appliance may also produce hot gases, sparks or a hot flue. Whether a particular arrangement is acceptable depends on the documentation for both products and how they are installed. The word ‘outdoor’ describes where an appliance may be intended for use; it does not mean that every outdoor position is suitable. The appliance’s operating configuration and any proposed screens also matter. The two products have different roles and need to be assessed together.
Use separate footprints as the starting point: show the fireplace outside the pergola area, then establish the separation from the appliance instructions and professional review. Do not assume an appliance can sit beneath a roof, pass a flue through the structure or be enclosed by screens on the strength of a general rule or a similar-looking garden. A qualified fire professional should review the actual arrangement and the conditions set by both manufacturers. If the documents are silent, ambiguous or conflicting, do not treat that uncertainty as permission. Ask the suppliers and professional to resolve it, or choose a different layout while the question remains open. Do this before the structure or flue route limits your options.
Identify the exact fireplace before measuring
Clearance guidance only helps if it belongs to the appliance being considered. Record its make and model, fuel type, installation format and any supplied flue or outlet components. Find the current installation manual and manufacturer’s drawing, not just a sales description. Note which distances are stated, the points they are measured from, and whether the instructions cover overhead surfaces, walls, screens or an enclosure. Do not assume that a side clearance also covers the roof, or that the firebox and flue use the same reference point. An inset unit, a freestanding fireplace and another type of outdoor heater are not interchangeable for planning; their documents may address different parts and operating conditions.
Ask the appliance supplier to confirm the proposed configuration if a detail is unclear. Identify the roof edge, nearest post, house wall, openings and any screen rather than describing the site simply as ‘near a pergola’; include the flue route and termination if there is one. If the manual is unavailable, request the model-specific document from the maker or supplier before drawing conclusions. A generic diagram, a clearance for another model or fuel type, or a photograph of a neighbour’s garden is not evidence for your arrangement. Keep unresolved points visible on the plan instead of filling them with an estimate, and note the manual’s model reference so the advice can be checked against the item you buy.
Put the separation on a measured plan
Draw the garden in plan and, where a roof or flue is involved, in elevation as well. Mark the appliance body, its outlet or flue, every pergola post and roof edge, the house wall, windows and doors, fences, fixed screens and usual seating area. Add dimensions between the exact points identified in the fireplace manual; do not choose a convenient point simply because it produces the largest gap. An elevation can show a roof projection or flue height that a plan view hides. A dimensioned drawing lets the relevant manufacturers and a professional assess the same arrangement rather than relying on verbal estimates. Include fixed features that already exist as well as work that is proposed.
If you are comparing structure sizes, Bloomcabin Pergola is listed with area options from 9 to 24 m². That range describes product area, not fire clearance or permission to position an appliance beneath or beside the structure. Mark the selected footprint on the site plan and keep it distinct from any separation area specified for the fireplace. Include overhangs and projections shown in the exact product drawings, rather than representing the structure only by its posts. Check the dimensions against the selected model before committing. The drawing should distinguish the space occupied by the pergola from the surrounding space needed for the proposed fireplace arrangement.
Compare freestanding and wall-mounted positions
A freestanding pergola and one attached to a building raise different layout questions; neither form is inherently safer beside a fireplace. A freestanding option can be compared in several positions on a garden plan, but its posts and roof still need to be assessed against the appliance instructions. For a wall-mounted design, include the house wall and roof edge, nearby doors, windows and vents, and the route between the house and garden. The wall may be exposed to heat or smoke at the same time as the pergola. Do not leave it out of the review simply because the fireplace is outdoors; openings and eaves belong in the same site picture.
To compare Bloomcabin Wall-Mounted Pergola with a freestanding layout, place its exact dimensions on the same measured drawing. Show the wall junction, the nearest house openings and the relationship between the attached roof and the appliance or flue. These details make the comparison more useful than simply choosing the position that leaves the most patio space. Do not assume that attaching a pergola to a wall creates a protected strip or that the building itself can act as a heat barrier. Both product manufacturers and a qualified fire professional should assess those relationships. Keep the house features visible on the drawing even if they lie outside the pergola footprint.

Assess heat at the roof, posts and nearby surfaces
Do not assess exposure by looking only at the visible flame. Radiant heat may reach a post or roof from the firebox, while a flue or another appliance surface can be a separate source. Note the nearest roof members, beams, posts, walls, fitted panels and any items normally used beneath the pergola. The assessment depends on the appliance instructions and the materials in the actual layout; appearance, colour or a surface that looks solid is not proof of heat resistance. Interpret any stated distance from the manufacturer’s reference points, not by guessing from how warm the area feels. If a component is not addressed, ask the supplier or professional to assess it.
An adjustable roof, side panel, blind or screen changes what lies between the fire and the structure; opening it or leaving it partly open is not a substitute for the required clearance. If you are comparing Bloomcabin Bioclimatic Pergola, request documentation for the exact configuration and any accessories rather than inferring heat suitability from the model name. Describe the roof and screen positions you intend to use, including positions other than your usual setting. This gives the professional a clearer basis for assessing exposure at the surrounding components. Include proposed additions at this stage, so the assessment addresses the complete arrangement rather than the frame alone.
Plan for smoke and the flue separately
Heat is only one part of siting. Smoke and combustion products may affect the seating area, doors, windows, vents or neighbouring parts of the garden; the flue outlet also needs to be considered as an endpoint, not merely as a line through the pergola. Air movement changes with weather and surrounding buildings, so an open side or gap is no proof that smoke will always clear. Show the flue route and termination, if the appliance has one, along with nearby openings and the intended seating area. Ask the appliance maker and a qualified professional to review the whole arrangement, including how changing wind conditions could alter the route of smoke.
An ordinary pergola should not be treated as a chimney support, nor should its roof be assumed suitable for a flue to pass through. Only follow an appliance design and installation instructions that explicitly cover the proposed route, with professional review of the combined arrangement. When placing the regular Bloomcabin pergola option on the drawing, show its roof outline alongside the proposed flue route and outlet. If the outlet is near a roof, wall, window or seating space, get advice on that exact relationship before choosing the final layout. Include the termination point from the outset rather than leaving it until after the pergola is positioned; the route alone does not show where combustion products will discharge.
Keep operating and access routes clear
Leave the working space required by the appliance manual for the tasks its maker describes, such as lighting, fuel handling, cleaning or servicing. That space needs to remain usable after seating, a table, covers, planters or stored fuel are added; the drawing should show ordinary use, not an empty sales layout. Keep routes to and from the appliance in view, including movement through doors and along garden paths. A tight arrangement that sends people through the appliance’s operating area should be reviewed with the installer rather than treated as a minor furniture issue. Consider access during routine maintenance as well as while the fireplace is in use.
Where a wall-mounted structure is being considered, mark the doors and access points that will still be used, then check whether the appliance’s required working space overlaps them. Add the wall-mounted Bloomcabin option to the same drawing, with furniture and garden features shown in their intended positions. Trace the route from the house to the seating area and the separate access needed for the appliance tasks described in its manual. If movable items are used regularly, account for where they will be set down instead of assuming a clear route will be maintained by habit. The plan should reflect a lived-in garden, not only installation day.
Include planting, furniture and later additions
Mark combustible or heat-sensitive items in the surrounding garden as well as components attached to the structure. Depending on the actual design, these could include curtains, shade fabric, decorative screens, cushions, seasonal covers, climbing plants, branches, lighting or furniture. Do not infer a safe distance from a material label or appearance; product instructions may impose conditions on an accessory as well as the main frame. Record planting requirements and intended maintenance, and ask whether growth or future pruning could bring leaves or branches into the reviewed area. Include any nearby storage that might be overlooked when the garden is clear.
Separate existing garden features from proposed additions on the drawing, so neither group is overlooked. If Bloomcabin’s bioclimatic pergola option is part of the proposal, identify the exact product and list any accessories alongside the planned furniture and planting. Show where curtains, covers or screens will sit when in use, rather than listing them without a position. For planting, record the intended maintenance as well as the initial location, so the review can consider the arrangement you expect to retain. An uncluttered drawing of the frame alone would not describe a garden that will also contain fabric, foliage and furniture. Bring these choices into the initial assessment rather than treating them as decoration to decide afterwards.

Ask the suppliers and a fire professional to review the plan
Before ordering, send both product suppliers the same site plan and ask direct questions. Does the fireplace manual cover an outdoor pergola in this position? Which distance applies to the nearest roof edge, post and flue, and from what point is it measured? Does the arrangement affect windows, vents, doors or the usual seating area? Are screens, canopies or accessories allowed in this specific configuration? Ask for an answer that names the exact model and relevant installation documents. If suppliers give conflicting advice or the manual does not address the arrangement, pause rather than choosing whichever answer allows a closer fit. Note any conditions attached to the guidance.
For a shortlist that includes Bloomcabin’s regular pergola model, request the exact product dimensions and installation details, then have an appropriately qualified fire professional review how the two installations relate. Keep the review tied to the products you intend to order: record both model names, the dimensioned site plan, the manuals consulted and the professional’s stated assumptions. Distinguish settled points from details that remain conditional or were not included. If either selected model changes before ordering or installation, identify that substitution explicitly rather than carrying over the earlier advice without checking. This keeps the purchasing decision aligned with the arrangement that was assessed.
Keeping the installed layout consistent with the plan
Once installed, keep the use and surroundings within the arrangement actually reviewed. Follow each maker’s operating, cleaning and inspection instructions, and keep furniture and loose objects out of any clearance area identified in the review. Do not assume that space beneath the pergola is suitable for storage or equipment simply because it is sheltered; check the product conditions that apply to the arrangement. If a screen, roof element, extension or new planting is added, have the relevant instructions checked again before relying on the original advice. The same goes for moving the fireplace, changing its fuel or replacing a flue component. Even a small change can make the documented plan inaccurate.
If the design includes the Bloomcabin Bioclimatic Pergola, retain its exact product details with the fireplace manual and the final site drawing. Anyone maintaining or altering the garden should be able to identify the models and configuration covered by the review. Where later advice changes the layout, update the drawing and keep the confirmation with it, rather than relying on an earlier version. Do not recover space by moving the appliance or placing furniture in a clearance area. If the appliance instructions and pergola documents no longer clearly agree with the proposed combination, seek confirmation from both manufacturers and a qualified fire professional before using it.
Frequently asked questions
How much space should I leave between a pergola and an outdoor fireplace?
There is no single distance that works for every appliance and pergola. Use the exact fireplace model’s stated clearances and measurement points, check the pergola manufacturer’s conditions, and have the combined layout reviewed by a qualified fire professional. Do not copy a gap from another model or decide by sight.
Can an outdoor fireplace sit beneath an ordinary pergola?
Do not assume that it can. Use a beneath-pergola position only if the exact appliance instructions and pergola documentation cover that arrangement and a qualified fire professional confirms the combined layout. If that information is absent or unclear, choose another position while you seek advice.
Can a fireplace flue pass through a pergola roof?
Do not treat an ordinary pergola as chimney support or assume a flue can pass through it. The appliance’s design and installation instructions must explicitly cover the proposed route, and a qualified fire professional should review the full arrangement. A general roof design is not evidence of compatibility.
Does opening a pergola roof make fireplace use safe?
Not by itself. An open or adjustable roof does not replace the fireplace’s stated clearances or confirm that the arrangement is suitable. The exact roof position, any screens and the flue route all need to be considered against the product documents and professional advice.
What information should I give a fire professional?
Provide the model names and manuals for both products, plus a measured plan showing the fireplace, flue, pergola posts and roof edges, house openings, seating and planned screens or planting. Ask the professional to identify the measurement points and state which exact arrangement their advice covers.
Planning a pergola beside an outdoor fireplace is about checking the exact combination, not choosing a distance by eye. Keep the installations separate unless their own instructions and a qualified fire professional support the proposed arrangement. A measured plan should show the appliance, flue, pergola, nearby openings, materials and everyday access, including any accessories and planting. If a key detail remains uncertain, do not treat an open roof or outdoor setting as the answer. Resolve it before purchase or use, so the final garden reflects an arrangement that has actually been reviewed.
