
Raising a Potato Crop Under Glass
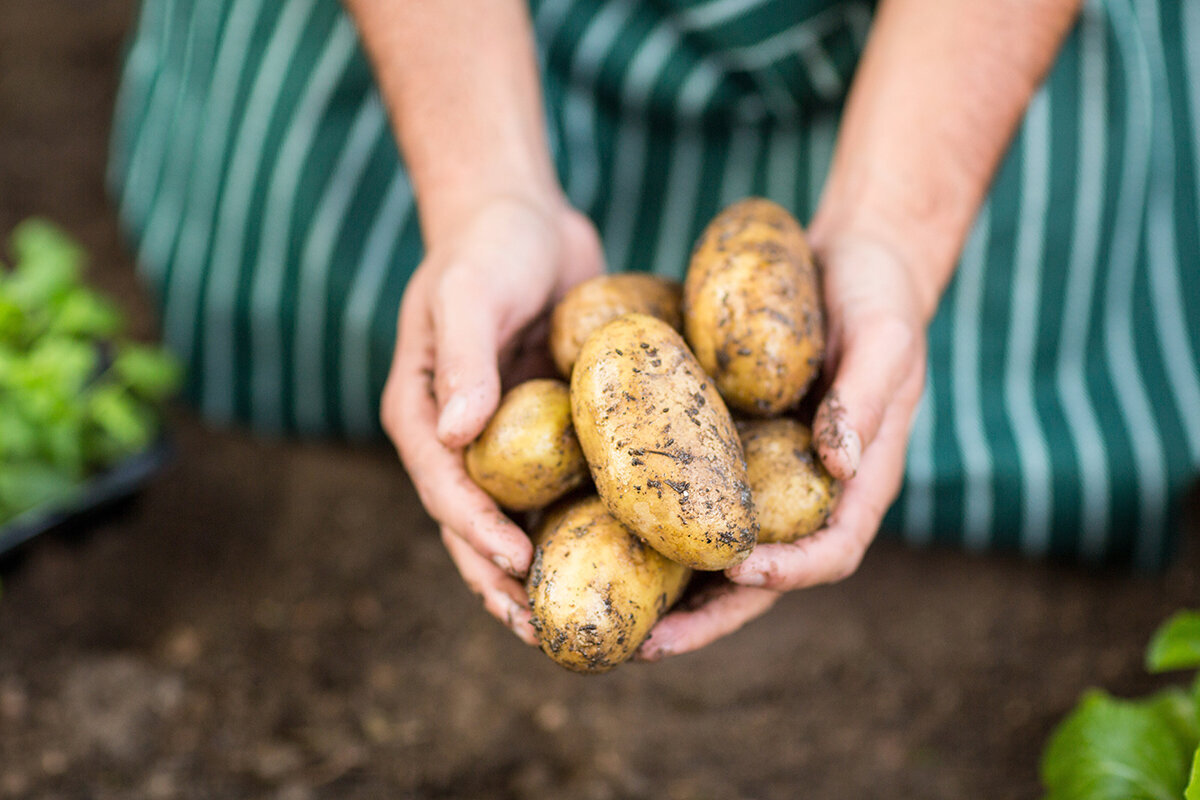
Hidden harvest · Greenhouse crop No. 09
Growing Potatoes Under Glass
Foliage tells only part of the potato’s story. Its harvest develops in cool soil away from light, as covered stem sections produce stolons and swelling tubers form at their ends.
Inside a greenhouse, you can closely manage the buried crop: growing medium, watering, airflow, hygiene and the loose soil held back for earthing-up. The shelter does not turn potatoes into heat-loving plants. Instead, it supports a deliberate early start with chitted tubers, warmer soil and protected shoots, allowing harvest before tomatoes or cucumbers take over.
Folio 09 · Ireland · Seed potato to storeroomDiagram A · Where potatoes form
Chapter I · Understanding what happens underground
A potato is a stem store, not a root vegetable.
Potatoes are normally raised from seed tubers, not true seed. Shoots emerge from the eyes and become stems. Fine side shoots, or stolons, grow from buried stem sections, and new tubers swell at their tips. That structure explains the basic method: plant in loose soil, protect the stem base, add soil during growth and keep every potato dark.
Earthing-up is practical protection rather than ornamental mounding. It darkens the zone where potatoes are forming, re-covers shallow tubers and keeps suitable loose soil around the stems. Guidance from Germany’s Federal Centre for Nutrition also explains that the crop forms on underground lateral shoots and that a ridge excludes light. Leave grow bags and tall pots partly empty at planting, keeping clean, friable medium aside for later additions.
Myth and reality.
Myth: a higher ridge automatically means a larger crop. In practice, ample soil must be matched by healthy leaves, even moisture and oxygen around the roots. A deep container of waterlogged compost is more likely to rot the crop than increase it.
Myth: a higher ridge automatically means a larger crop. In practice, ample soil must be matched by healthy leaves, even moisture and oxygen around the roots. A deep container of waterlogged compost is more likely to rot the crop than increase it.
Shelter changes the immediate environment without altering the potato’s basic preferences. Roofing limits rain on leaves, containers can be filled with fresh medium, and vents release moisture after irrigation. Glazing can nevertheless accumulate heat very quickly. Avoid a cycle in which compost bakes dry by noon, is drenched that evening and then remains surrounded by stagnant, humid air overnight.
Chapter II · Starting stock
Begin with dependable seed potatoes.
Sound planting material is the first defence against disease, not an indulgence. Supermarket potatoes may be treated to suppress sprouting and can carry unseen problems. Choose certified seed potatoes from a specialist supplier where possible. That precaution matters in a small, intensively used greenhouse, where failed plants are difficult to replace.
01
Choose its use
Early · waxy · storable
Early cultivars usually make best use of a short greenhouse window, benefiting from shelter before summer heat and main crops need the bed. Choose for the kitchen too: waxy potatoes suit boiling, all-rounders are versatile, and floury types suit mash. Cooking texture describes use, however, and does not guarantee a high yield.
02
Choose seed potatoes
Small whole · large divided only if needed
Hen’s-egg-sized seed potatoes can be planted whole and carry several eyes plus a dependable food reserve. Large tubers need not be divided. If you do cut one, use firm, healthy stock and a clean knife, leaving several sound eyes on each piece. Exposed surfaces increase the chance of rot and require careful handling.
03
Heal cut surfaces
Keep briefly dry, airy and sheltered
Arrange cut portions in one layer in a ventilated, dry position beyond direct sunshine. Wait until their exposed surfaces are dry. A newly cut piece should never enter cold, saturated medium: instead of fuelling roots and sturdy emergence, its reserves may begin to decay before growth is established.
04
Record the crop
Cultivar · supplier · date of planting
Record the cultivar, supplier, planting date, emergence, first earthing-up and unusual symptoms. In the second year, your notes show which choice matured early, stayed healthy, gave the texture you wanted and stored well. Also mark any bag that dried rapidly or position that became too warm.
Chapter III · Preparation before planting
Chit for short, sturdy shoots, not pale threads.
Chitting develops compact shoots before planting. Though optional, it can advance an early crop and lets you inspect each tuber. Place potatoes eyes-up in trays or egg boxes. The Bavarian Garden Academy recommends bright, indirect light at about 15 to 20 °C. Choose firm, pale-green chits rather than long, fragile shoots produced in darkness.
01 · Inspect
Sound and firm
02 · Arrange
Eyes uppermost
03 · Develop
Compact, robust growth
04 · Plant
Prepared for friable soil
- Inspect Discard soft, mouldy, badly shrivelled or damaged tubers before they enter the greenhouse.
- Arrange Arrange tubers separately in one layer. Bright, indirect light encourages short, sturdy chits.
- Develop One to two cm of strong growth is enough. Handle each tuber gently so its shoots do not break in transit.
- Plant For cut seed potatoes, check that surfaces have dried and healed. Plant into fresh, moist soil, never saturated medium.
Chapter IV · The protective ridge
Start deep, then add soil in stages.
Place chitted potatoes in the greenhouse bed about 10 to 15 cm down, normally leaving 30 to 40 cm between them and pointing the shoots upwards. With a large opaque vessel, establish a free-draining lower layer without filling it completely. The vacant depth is valuable because it provides room for the soil added during earthing-up.
Stage 1 · Plant
Cover loosely with soil
Stage 2 · First ridge
Foliage reaches 20 to 30 cm
Stage 3 · Final ridge
Keep every tuber dark
- Planting Use loose, humus-rich soil with dependable drainage. Do not tread on beds; fill containers with stable potting medium, not heavy, waterlogged garden soil.
- First ridge Draw loose soil gently around the stems, covering their lower sections while leaving healthy leaves exposed. Do not compact the soil, damage roots or bend shoots.
- Completed ridge Add more soil as growth continues. The finished ridge must keep every developing tuber dark without compacting the root zone.
Distance between plants also influences how the harvest divides into different sizes. Overcrowded plants must share available light, moisture and nutrition. Leaving 30 to 40 cm is a practical opening measure in a domestic greenhouse. Preserve an aisle beside the row for examining foliage, irrigating near the base and drawing in soil without treading on the growing ground.
Chapter V · Space planning
Choose a system with spare soil capacity.
Floor area alone is not decisive. Count the usable soil volume and the empty height reserved for building a protective ridge later.
A greenhouse bed offers even rooting space and easy earthing-up. In a smaller house, several large containers use the lower area temporarily and can leave after the early harvest. Both methods require open drainage, complete darkness around tubers and convenient access for watering at soil level.
When planning a productive growing area, consider the usable floor space and ventilation of the Classic Aluminium Greenhouse. Roof vents, doors and a well-planned interior help regulate conditions during changeable Irish spring weather.
| Growing arrangement | Allowance for each plant | Space retained for soil | What to monitor |
|---|---|---|---|
| In-ground row | A gap of 30 to 40 cm | Friable planting ground | Access and crop rotation |
| Planting bag | About 40 l or more for one plant | Keep the upper section vacant | Rapid drying around the sides |
| Roomy pot | Roughly 35 to 45 l for one plant | Add the medium layer by layer | Water escape and overcrowding |
- A row in the greenhouse bed. Several plants receive a consistent rooting zone in this arrangement, and soil stored beside the row can readily be moved around their stems. Retain a clear working aisle and plan the next crop carefully: avoid following potatoes immediately with more potatoes, tomatoes, peppers or aubergines in unchanged soil.
- A planting bag. A durable, permeable bag can be moved and is convenient over a paved floor. Budget at least about 40 l for each seed potato. A wider vessel may hold two plants when both spacing and irrigation are adequate. During bright weather, inspect the perimeter closely because it tends to lose moisture first.
- A broad, opaque pot. Provide clear drainage openings and normally limit the vessel to one plant. Pots organise a confined area neatly and may be replenished with clean medium for a future crop. Packing several planting tubers into a small container instead creates crowded tops, patchy moisture and numerous undersized potatoes.
A practical allowance for one plant is around 35 to 45 l of medium, while a bag should offer at least about 40 l. Opaque sides perform an important function because potatoes green after exposure to light. Check that drainage openings remain unobstructed, and never allow a saucer below the vessel to stay full.
Chapter VI · Maintaining balanced conditions
Irrigate below, renew the air and resist extremes.
Root-zone moisture
Potatoes dislike abrupt movement between drought and saturation. While tubers are initiating and enlarging, maintain consistent freshness in the medium without keeping it soaked. Each morning, feel roughly 5 to 8 cm beneath the top. Once that layer begins drying, irrigate slowly and deeply; exceptionally dry compost may require two rounds. Afterwards, make sure all surplus water escapes.
Feeding
Before setting the crop, incorporate mature compost or a restrained dose of organic vegetable fertiliser. Nutrition is necessary, but abundant readily available nitrogen can make luxuriant leaves while delaying tuber development. Supply more only when plants are visibly weak and still at an early point in growth. For beds used continually, a soil analysis helps identify and prevent accumulated excess.
Fresh air and temperature
Vent through doors and roof openings before warmth accumulates on clear days. Shade can be useful during a hot spell, while vessels should stand back from sun-heated glazing or walls. A closed, steamy greenhouse in summer does not suit potatoes. Circulating air and a moderate rooting environment matter more than extra warmth. Automatic openers may make this daily response easier.
Keeping leaves dry
Direct a can, drip hose or gently running line towards the medium around the plants. Do not spray overhead late in the day, as leaves may then stay damp overnight. Moving air clears condensation and discourages stagnant humidity. Cut away yellowing or suspicious foliage using clean tools, and remove discarded plant material from paths and vessels.
Good greenhouse design earns its value by making steady care easier. For an example, explore the Classic Aluminium Greenhouse . When planning the interior, allow for vents, shade, accessible paths and sensible positions for containers. The aluminium greenhouses range helps you compare layouts for containers, beds and planned seasonal succession.
Chapter VII · A register of crop problems
Notice warning signs before the unseen harvest is reduced.
Protection from rain does not stop humidity collecting around leaves when irrigation or air exchange is poorly managed. Examine plants at least twice each week, checking both leaf surfaces, stem bases and the top of the medium. Diagnose before intervening. Compare root-zone moisture, temperature and nutrition, then look for feeding injury or signs of infection.
Case 01 · Potato late blight
Water-soaked patches that quickly become brown
Late blight affects potatoes and tomatoes, spreading quickly while foliage stays wet. Start with certified stock, water below the leaves and ventilate consistently. Remove suspect foliage promptly using clean tools, and keep heavily infected material out of compost. With clear symptoms, an early harvest may be wiser than trying to produce a crop for storage.
Case 02 · Decay in planting stock or stems
Poor emergence, a darkened base and collapse
Early failure often follows from unhealthy stock combined with cold, saturated ground. Start with sound seed potatoes, heal any cuts and avoid setting them into sticky, chilled soil. Questionable medium should not be carried into another crop. Take collapsing plants away promptly so that healthy neighbours are not left beside them.
Case 03 · Scab on potatoes
Firm tubers marked by rough, cork-like patches
Scab is chiefly associated with the soil environment. Reliable planting stock, fresh container medium, a suitable cultivar and considered rotation are more useful than trying to rescue the crop late. In a permanent protected bed, shift potatoes and related nightshades between growing zones instead of returning them repeatedly to one place. Supply moisture consistently without soaking the ground.
Case 04 · Insect damage and virus symptoms
Chewed areas, grouped aphids or distorted foliage
Check beneath leaves for aphids, mottling and weak or irregular growth. Remove small colonies early by rubbing or a directed water jet that avoids soaking the crop. Isolate or discard suspect plants. Once cropping ends, clear every remnant so pests and possible pathogens cannot remain inside.
Case 05 · High temperatures and erratic irrigation
Wilting foliage and potatoes of irregular shape or size
These symptoms commonly indicate environmental strain rather than one particular pest. Both tuber initiation and enlargement can be disrupted by heat or sharp changes in moisture. Introduce shade and ventilation before conditions peak. Rewet a powder-dry vessel gradually instead of flooding it at once. Calm checks each morning allow more useful corrections than a hurried reaction later.
Case 06 · Tubers turning green
Green colouring or a shoulder emerging above the soil
Light exposure produces the colour change and indicates increased solanine. Put loose soil over every visible potato immediately, and inspect again after thorough watering in case the medium has sunk. Keep lifted potatoes away from light as well. A small green portion may be removed generously, but a potato that is widely green, bitter or strongly sprouted should not be eaten.
Chapter VIII · Bringing the crop to harvest
Lift in stages and allow storage skins to become firm.
Young potatoes and storage potatoes finish differently. Lift the former with tender skins and use them soon; leave the latter underground until the tops die and skins become firm. Ripening is part of harvest, and shortening it produces vulnerable tubers that bruise readily and keep badly.
1 · First lifting period
Young potatoes for immediate use
2 · Tops begin to die
Allow maturity to become evident
3 · Skins become resistant
Choose dry conditions and handle gently
4 · The keeping place
Dark, cool and supplied with air
- Young potatoes With an early cultivar, open one side of the ridge carefully and remove individual potatoes once they reach the size you prefer. Restore the soil afterwards so that those remaining are still protected from light. Their tender skins make them unsuitable for long keeping, so eat them within the following few days.
- Tops dying down For a crop that will be stored, allow the foliage to yellow and die naturally, reducing irrigation as growth finishes. The cultivar and soil both influence timing, but another two to five weeks may be needed before the skin sets. Rub gently with your thumb to check whether it still slips away.
- Lifting Choose a dry day and loosen potatoes cautiously with a garden fork, or empty a container over a sheet. Brush soil away lightly rather than washing the crop. Separate any soft, bruised or cut tubers; if they are otherwise sound, use them first in the kitchen.
- Keeping area Place only sound, intact and unwashed potatoes in crates that admit air. Choose somewhere dark, cool and protected from frost; about 5 °C is a practical guide for domestic storage. Inspect the stock often and take away anything softening or decaying. Do not keep apples alongside it, because their ethylene encourages potatoes to sprout.
Chapter IX · Working with an Irish growing season
Use shelter to extend the cool margins, not to ignore the weather.
For an unheated greenhouse in Ireland, planting should wait until the medium is workable and crumbly rather than chilled and sodden. The suitable week depends on the locality, elevation, recent weather, greenhouse conditions and soil temperature. Ireland’s Atlantic influence creates considerable regional variation, and inland air frost can occur even in May. Protect tender foliage whenever frost is still possible, and allow conditions at the actual site to determine timing.
Do not use greenhouse shelter to force potatoes through every season. Where conditions allow, an early crop from late winter into early summer often uses the space best, leaving room for cucumbers, basil or other warmth-loving plants. Autumn planting only makes sense with a suitable temperature window; in winter, an unheated greenhouse lacks enough warmth and light for reliable growth.
Note on rotating crops
Plan rotation by plant family, not crop name alone. Potatoes, tomatoes, peppers and aubergines are nightshades and share several disease risks. Avoid growing them consecutively in the same unchanged soil where possible. In a large greenhouse, move between zones; in a compact structure, containers make it easier to replace medium and change position.
To map out an orderly early crop, consider the Classic Aluminium Greenhouse. Beds, vessels, access routes and the summer crop that follows can all be arranged around the available footprint. The aluminium greenhouses overview presents further sizes and forms for a practical protected-growing plan intended to serve over many seasons.
The guiding rule: Success with potatoes under glass comes from balance rather than force. Neither the hottest interior, the richest feeding nor an oversized final ridge guarantees a better harvest. Observe the crop frequently and make modest adjustments to moisture, shade and airflow before conditions move too far.
Potato growing desk
Common questions about the protected crop.
Is it practical to keep greenhouse potatoes growing throughout the year?
Usually not in an ordinary unheated garden structure. Potatoes belong in the cooler portion of the growing year. Shelter can advance a spring start, reduce exposure to cold wind and give greater control over rainfall. High summer may bring excessive heat, while dependable winter growth would require appropriate heating and supplementary lighting.
What planting number suits a 40-l vessel?
Start with one plant. An opaque vessel holding about 35 to 45 l, with clear drainage and enough unused height, provides one seed potato with rooting volume and room for later soil. A much larger bag may accommodate two tubers if they can be spaced properly and kept evenly moist. Crowding complicates irrigation and commonly leaves many potatoes undersized.
Are potatoes bought for eating suitable as planting stock?
Purpose-sold certified seed potatoes are the safer choice. Food-market tubers may be treated to slow sprouting, and their plant-health background is often unclear. Bringing an infection into a compact protected area can be particularly disruptive. Stock obtained through a specialist supplier gives the crop a cleaner and more traceable beginning.
When does a protected potato crop need irrigation?
Judge watering by the root zone, not a calendar. Each morning, feel about 5 to 8 cm below the surface and water slowly and deeply when it begins to dry. Even moisture matters most while tubers form and enlarge; pots and bags need closer checks in sunny weather. Keep the medium fresh and freely draining, never continuously wet.
What causes potatoes beneath glass to become green?
Light has reached the tubers. Restore a covering of friable soil immediately, then inspect again after watering in case the level settles. Lifted potatoes must also be protected from light. Discard any that are extensively green, taste bitter or have produced heavy sprouting.
References and additional guidance
Horticultural background used for this article.
Continue reading at Bloomcabin: Planning a greenhouse interior for plants and routine care · Using water efficiently beneath glass · Looking after a greenhouse in summer
- Bavarian State Institute — Pre-sprouting for an earlier potato crop
- German Federal Centre for Nutrition — The purpose of earthing up potatoes
- Bavarian State Institute — Starting potatoes and sweet potatoes ahead
- Berlin Plant Protection Office — Guidance on potato late blight
- Bavarian State Institute — Potatoes in gardens and on balconies
- North Rhine-Westphalia Chamber of Agriculture — Lifting and keeping potatoes
- Organic Agriculture NRW — Practical notes for organic potato crops
Put the space below the canopy to work
Plan for food to develop out of sight beneath the leaves.
For a committed home gardener, a thoughtfully arranged greenhouse offers far more than shelter for visible foliage. Loose beds, generous vessels, reachable watering routes and adjustable ventilation create an orderly place for potatoes, while a carefully maintained ridge protects the meal developing quietly beneath the soil.
Classic Aluminium GreenhouseExplore the Classic Aluminium Greenhouse