
Planning Space and Guides for Retractable Pergola Screens
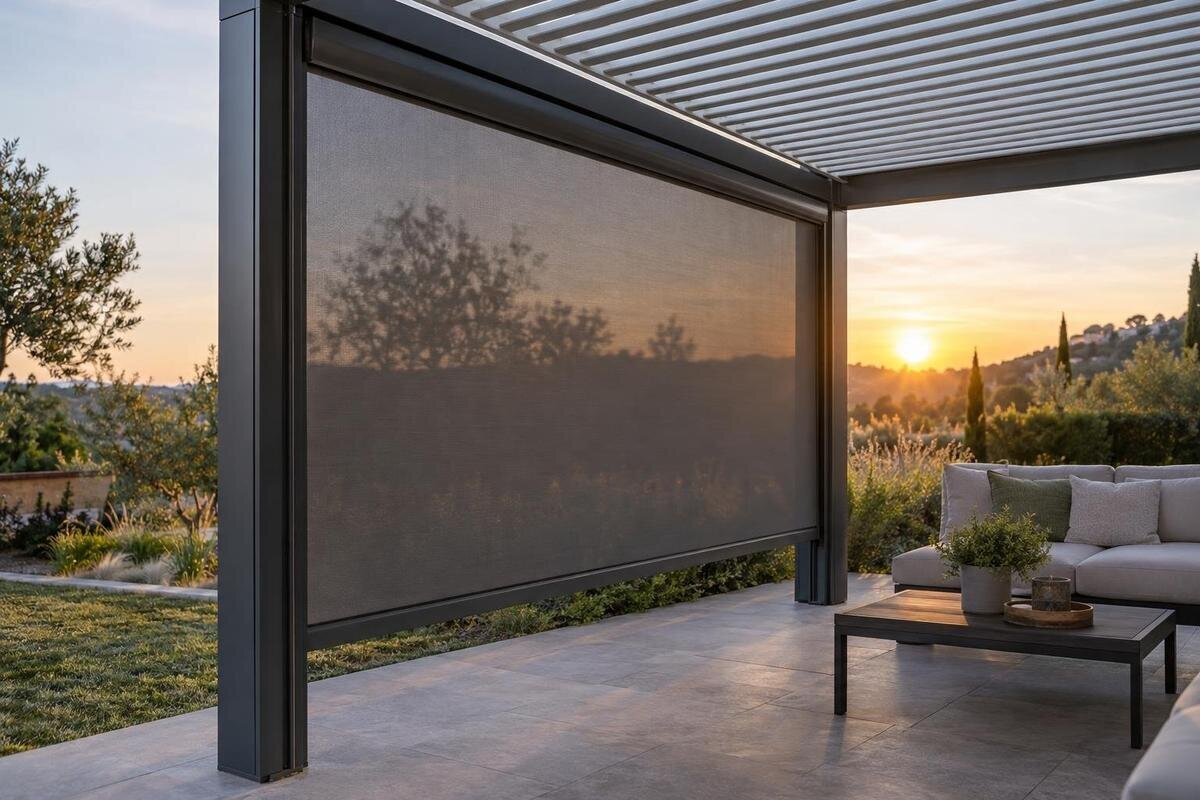
Pergola screen planning
Retractable pergola screens need space in both positions. When deployed, the panel and any side guides must follow a clear route; when raised, it may gather into a housing or another storage arrangement that remains visible and needs access. Guides, brackets and end pieces can reduce the usable opening, while adjoining screens may compete for the same corner. A measured sketch of the open and retracted positions helps reveal these constraints before furniture, lights or other fittings are fixed. The key is to confirm the proposed screen design against the exact pergola model rather than infer compatibility from appearance.

Draw each side in both screen positions
Start with a measured plan of the pergola, marking posts, beams, walls, openings and the finished floor line. For each side you may screen, draw a front elevation and record the clear opening between the surfaces the supplier will use as measurement points. Use finished faces as references, not the centre of a post or beam. Add a plan view showing how far a proposed housing or guide could project into or beyond that opening. The overall pergola footprint is not the usable screen span: posts, wall returns, trim and frame members may change the space available. Label each measurement with its start and end points, not just a total length. If the structure is not yet built, keep planned dimensions separate from site measurements and confirm the finished faces before specifying the screen.
Show two positions for each proposed screen: fully deployed and fully retracted. Mark the panel, side guides and storage package only as the chosen design specifies; do not assume the panel disappears inside the frame. Label sides from a fixed viewpoint, such as facing out from the house, and indicate which face is towards the house. Use the same side names on both views so that a left-hand measurement cannot be confused with a right-hand one. Mark doors and existing fittings on the drawing as well. Keep the Bloomcabin Pergola reference with the sketch when asking about compatibility: the model name identifies the frame, but does not confirm that a particular screen is supported.
Measure the storage package when retracted
Find out where the proposed design stores its panel. A cassette-style screen may leave a housing visible when retracted; another design may store differently. Ask for the housing’s outside length, height and projection, and a drawing showing the face it occupies. Request the complete outside envelope, including end covers, brackets and any protruding parts; dimensions for the opening alone will not answer the clearance question. Check whether any service allowance is stated separately from the housing dimensions. Do not estimate from a product photograph, where perspective can disguise depth. The relevant measurement is the whole parked package, not just the clear span.
Overlay that outline on the pergola elevation and inspect it from indoors, the patio and the garden approach. Check whether it masks a view, sits against trim, or conflicts with lights, gutters, wall returns or planned fittings. A high housing may be hidden from one viewpoint but visible from another, so include the main windows and sitting position. Also note whether it affects a door or window opening. If the proposed frame is the Bloomcabin Bioclimatic Pergola, request a drawing of the selected screen’s storage arrangement for that exact model; a pergola description alone cannot show where its housing can sit. Keep the parked position in the decision, not only the open span.
Leave room at the housing ends
Storage dimensions do not tell you how much working room the ends need. Depending on the approved screen design, the housing may have brackets, covers, connectors or operating parts beside it, each with its own position. Ask for the complete end-to-end outline and the clearances needed for operation and maintenance. Separate the fixed hardware dimensions from the access allowance, so you know what must fit and what must remain reachable. A drawing showing only the central box can miss a projection that clashes with a post cap, wall edge or neighbouring fitting. Check whether the stated width includes those end parts, and do not substitute a guessed standard gap for the specified allowance.
Beside a wall, compare the outline with the wall return, door trim and any nearby downpipe or light; a close wall is not automatically a suitable fixing surface. For the Bloomcabin Wall-Mounted Pergola, ask the supplier to mark the proposed screen location and end clearances on the exact model drawing. Leave the access required to inspect any end cover, as specified for the approved design. If a door or other fitting shares that area, show its full position before choosing the screen location. Do not settle on a flush-looking arrangement until the hardware envelope and maintenance access are both clear.
Place side guides on a compatible face
Where the system uses side guides, they help retain or align the panel edges, but their shape and position depend on the approved design. Mark each proposed guide on the post or other specified face, and request its full profile and projection, not just a centre line. An inward position may reduce the clear opening; an outward one may meet trim or another fitting. Check that the guide’s required run is not interrupted by a downpipe, bracket or decorative feature. If the mounting face is uneven, covered or shared with another component, ask for the approved detail rather than assuming that a visually flat surface is suitable.
For the regular Bloomcabin pergola, have the guide position marked against the exact model rather than choosing a face from a generic sketch. Ask which faces and clearances are approved for the chosen screen, and whether the guides align with the structure as proposed. Do not assume that a guide from another screen system will fit. Measure the passage from the finished guide face, not the post centre, so furniture and access plans use the real clear width. Record the intended clearance if a doorway or walkway runs alongside it, and check that nearby furniture will not catch on a projecting guide.

Trace the full travel path
Trace the movement from the stored position to the deployed position, not just its start and finish. Draw a band or envelope through the full route and mark anything that enters it: door leaves, window handles, lights, downpipes, wall-mounted accessories, furniture and large planters. Distinguish movable items from fixed obstructions; a planter may be movable on paper but still sit in the same spot every day. Check the door and screen in the combinations you actually use, so a route is not blocked when both are needed. If the design has a lower rail, handle or other moving part, include its clearance as shown on the supplier’s drawing.
Allow room for the person operating the screen as well. A pull point, handle or control can sit differently from one design to another, and access may be blocked by a chair or a narrow route beside a post. For a bioclimatic pergola model, mark the screen side and existing controls or fittings on the same drawing, without assuming that other pergola components can share space with the screen. Ask for the operating position and clearance for the chosen arrangement. The useful test is whether the screen can travel fully without reaching around an obstacle or moving fixed items.
Resolve adjoining screens at corners
Two screens on adjoining sides create a corner detail, not merely two independent lengths. Their guides, housing ends and covers may compete for space at the same post, while a gap or overlap can change the view and the degree of screening. The approved design may stop short, meet at a defined junction or use another specific detail; never assume that one screen can wrap continuously around a corner. Draw both sides together and show how each screen ends at the shared corner, including the space occupied by its components. This also makes it clear whether a screen’s retracted housing conflicts with the neighbouring screen’s guide.
Ask for a corner drawing that shows both stored and deployed positions, the end clearances and any post or junction piece required. If the layout involves the wall-mounted model, confirm how the screen meets the wall return instead of treating the wall as a corner post. Ask whether both screens can be operated independently or whether the approved arrangement sets a sequence. Keep access to doors, drains and controls available; an arrangement can fit on paper yet make a route awkward. If only one side is to be screened initially, record the future side too, so a later addition does not depend on an unverified junction.
Make cleaning and inspection accessible
Cleaning access belongs on the drawing. Check whether the outside of the housing and the full length of each guide can be reached from a safe standing position, with furniture and planters in their usual places. Mark which side needs attention and whether a wall, glazed panel or neighbouring structure limits access. Debris around an exposed guide or housing can make routine inspection difficult, so consider how you will see the parts as well as reach them. Think about tables or seats that will normally stay in place; a layout that needs heavy furniture moved for every clean is less practical.
Ask for maintenance instructions for the exact screen design before choosing the layout. Find out which surfaces and guide areas are intended to be cleaned, what products or tools are allowed, and whether any cover or part is meant to be left for a service person. Do not prise off covers, lubricate a guide or borrow cleaning advice from another system unless the manufacturer’s instructions permit it. For the regular Bloomcabin model, confirm accessory support and access for care together; a neat installation should remain inspectable after the furniture is in place.
Test sightlines from the places you use
A screen’s position can change what you see from the house and seating area, even when it is retracted. Sketch sightlines from the places people actually sit and stand, including the main view to the garden and the doorway used to reach the patio. Note whether the housing or guide interrupts those lines when parked and whether the deployed panel would cover a view you want to keep. Compare both screen positions on the same drawing; a photograph taken along the view can help explain the issue but will not replace a measurement. Do not judge visibility or privacy from the word screen alone; ask for the specified panel type and, where available, a sample.
Mark the times when low sun reaches the side if controlling glare or shade is part of the reason for adding a screen. This can show which opening matters without putting screens on every side by default. If planning around Bloomcabin’s bioclimatic model, label the chosen side on its plan and ask for the compatible screen positions; the model name alone does not establish the panel’s visibility or shade effect. If the panel specification is not yet chosen, note that as an open question. Keep sightline decisions separate from claims about privacy, since the result also depends on the panel specification, lighting and viewing angle.

Plan for operation and everyday clearance
Think about how the screen changes everyday use when deployed. Closing one or more sides can make an outdoor area feel more enclosed and alter airflow; the degree depends on the panel design and how much of the perimeter is closed. Ask what the chosen panel is intended to do and what its specification says, rather than using a generic screen description to predict airflow, privacy or weather protection. Keep the main walking route clear in both positions, especially between the house and the seating or dining area. Check that chairs, doors and access points still work together, not just in isolation.
Ask for the exact operating and stowage instructions, including conditions in which the screen must be retracted. There is no single weather threshold to infer from the pergola model or a photograph; use the instructions for the screen being considered. If it needs to be raised in particular conditions, keep the operating point reachable and ensure the parked housing is not blocked by furniture or later fittings. Also confirm whether the design can stop at intermediate positions; do not plan around that convenience unless it is documented. Ask whether the instructions differ when the screen is left unused for a period.
Confirm the exact screen design for the pergola
Before ordering or fixing other fittings around the pergola, put the proposed screen design and exact structure model on the same drawing. Ask for the approved screen type for that model, the opening dimensions used, the storage envelope, guide positions, full travel clearance, corner details and access required for care. Make clear which side each measurement describes and whether its dimensions include brackets or end covers. Request front and plan views in both screen positions, and identify the model’s orientation. A shared drawing gives everyone the same reference and makes a missing clearance easier to spot than a vague description such as ‘fits on the side’.
Confirm what is included and what is optional or supplied separately; a third-party screen should not be treated as a pergola feature or approved accessory without confirmation. Ask for written compatibility confirmation and the screen’s own instructions, including operation, maintenance and any conditions that affect stowage. Where the proposed attachment or layout falls outside the manufacturer’s documented arrangement, seek an assessment from the manufacturer or a qualified installer. Keep that confirmation with the model and configuration details, and recheck if the screen design or surrounding fittings change.
Frequently asked questions
Does a retractable screen still take up space when raised?
Yes. The panel may gather into a housing or another storage arrangement, and guides and end parts can remain in place. Ask for a drawing of the complete retracted envelope, including any projection beyond the opening and the access needed for inspection.
How much clearance do pergola screen side guides need?
There is no single figure for every system. It depends on the approved guide design and the face where it is positioned. Request a model-specific drawing that shows the guide profile, its projection, the resulting clear opening and any end allowances.
Can screens meet around a pergola corner?
Do not assume they can. Guides and housing ends may need a defined junction, or the screens may need to stop short. Ask for a corner detail showing both screens in their stored and deployed positions, and confirm that the arrangement is approved for the exact pergola model.
Can I add a screen to a pergola I already own?
Only if the proposed screen is confirmed as compatible with that exact model and configuration. Check the available mounting faces, clearances and approved arrangement with the manufacturer or supplier. A third-party screen is not automatically an included feature or approved accessory.
What should I send when checking screen compatibility?
Provide the pergola model, labelled sides, measured openings and photos or drawings of nearby fittings and obstructions. Ask for the approved screen design, its retracted envelope, guide positions, travel and corner clearances, care access, and the instructions for operation and stowage.
A workable layout accounts for the screen when it is in use and when it is parked: the storage package, guides, end clearances, corner arrangement and route for cleaning all matter. Put those details on a drawing for the exact pergola model, and use the screen’s own compatibility and care information to resolve anything uncertain before other fittings make access harder.
