
Wedding Venue Pergolas: Flexible Seating and Service Routes
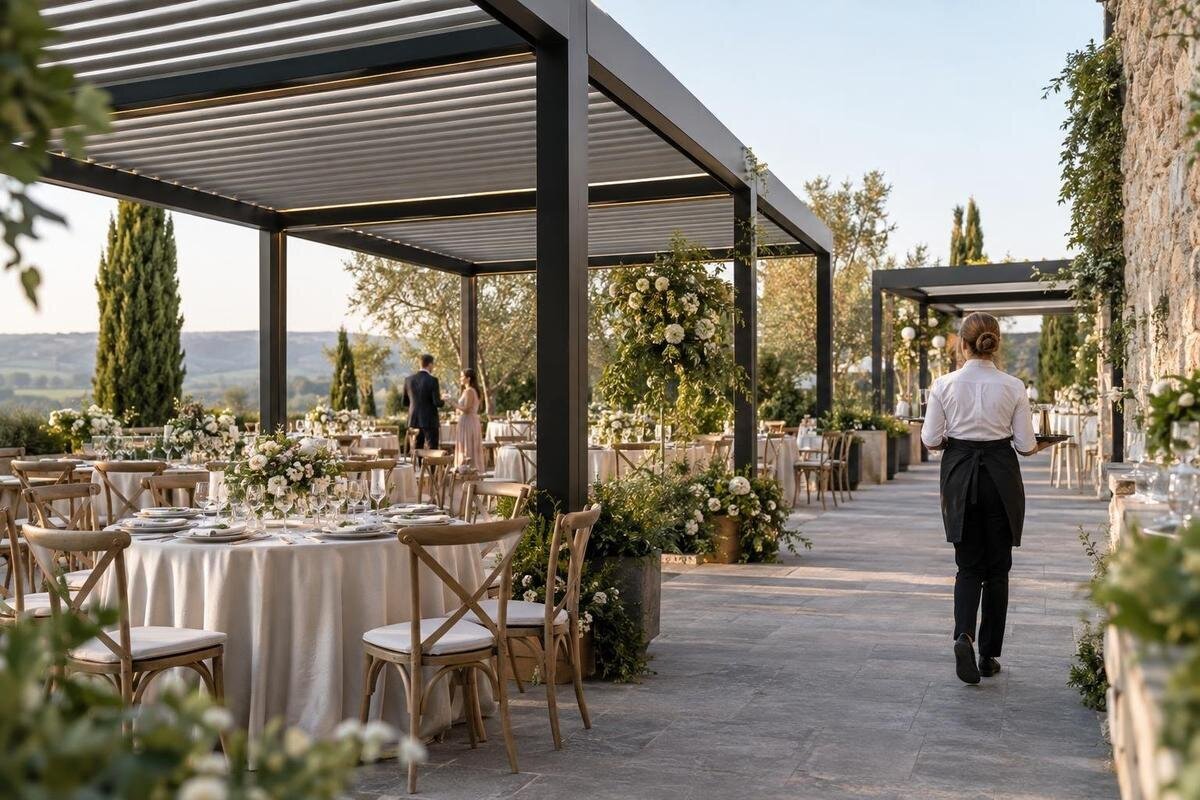
Wedding venue planning
A pergola at a wedding venue has to work across a sequence: ceremony seating, drinks or photographs, dining and the changeover between them. A layout that looks balanced in one photograph can still leave staff crossing an aisle or leave no practical place to stage chairs. Start from the venue’s measured floor plan and actual running order, then test every arrangement, guest route and supplier movement before deciding whether a proposed project fits.

Plan around every phase of the wedding day
Write down the venue’s running order as a sequence of phases: arrival, ceremony, drinks or photographs, meal, speeches and evening reception, where those are part of the event. Give each phase its own plan or clearly labelled overlay. Mark where guests are expected to sit or stand, which team is working in the area and what furniture is present. This shows whether the pergola is intended for one part of the day or several, and whether any uses overlap. It also prevents an attractive ceremony drawing from becoming the assumed dinner plan, when tables and service can change how the space works.
Add the timing and handover point for each change, using the planner’s and venue’s actual programme rather than a standard wedding timetable. Note when suppliers arrive, when guests move on and whether anyone remains in the space while staff reset it. If another venue area is the fallback or next destination, draw the route between them too. Show an indoor arrangement as a separate configuration, not just a note in the margin. The plan can then expose practical overlaps, such as a delivery crossing guest arrival or a furniture move beginning before the ceremony group has left.
Build the layout from a measured site plan
Use a measured, verified site plan as the base. Mark the proposed pergola footprint alongside entrances, doors, designated exit routes, service doors, steps or level changes, existing structures, fixed planting and furniture that will stay in place. Include areas that affect use even if they sit outside the pergola boundary: the route from arrival, the way to dining and the place suppliers can unload or stage equipment. Note anything not yet confirmed, such as a boundary, surface or obstruction. A photograph or rough sketch can help explain the proposal, but it cannot replace dimensions when chairs and tables are being placed.
Keep the candidate product’s confirmed footprint distinct from the space available for seating. The Bloomcabin Bioclimatic Pergola is listed from 9 to 24 m², but that range is not a guest-capacity figure and does not by itself show clearances, routes or suitability for a particular venue. Plot the proposed position against the actual site drawing and ask for the project-specific details needed to assess it. Where the plan includes a building, existing surface or nearby services, do not assume compatibility from a product name or gallery image; record the question for the supplier and the relevant professional.
Test ceremony seating and sightlines
For the ceremony version, draw the front focal point, the person leading the ceremony, each row of chairs, any reserved seats and the aisle in their actual positions. Check views from the back and sides as well as from the front: guests should not have to stand or move into a route to follow what is happening. Mark fixed pergola elements on the same drawing, since a post or edge left out of a sketch can change a sightline or the usable width of a row. If a photographer or another supplier needs a working position, show it outside the normal guest path rather than relying on a gap that disappears once chairs are occupied.
Use a scaled chair layout and test it from seated eye level, including the seats furthest from the ceremony area. Confirm that the route into each row does not cut across the main view or require guests to pass through the ceremony space. If you are considering the Bloomcabin Pergola listing, request the project footprint and add it to the ceremony drawing so that fixed elements are included in the sightline check. Keep this drawing separate from the dining and drinks layouts, with reserved seats and supplier working positions clearly marked.
Draw the change from ceremony seating to dining
Design the dining arrangement as a real table plan, not as chairs added to the ceremony sketch. Use the venue’s actual table and chair dimensions, show chairs pulled out for use, and allow staff space to reach guests and move between tables. If ceremony chairs are to be moved, decide which groups move first, where each group goes and whether guests have left the area. If furniture is being stored or temporarily staged, show that location too; otherwise the reset can quietly take over a guest route or service space. A layout that saves space on paper but makes the planned sequence impossible is not flexible.
If a Bloomcabin Wall-Mounted Pergola is part of the project enquiry, include the actual wall and complete dining arrangement in the material sent for review. Ask for the suitability of the wall and adjoining layout to be assessed for this venue. Decide which items, such as a signing table or reserved chairs, can remain between ceremony and meal, and show who moves the rest. Keeping that decision visible helps the caterer and planner agree where each piece goes instead of improvising around seated guests.

Separate guest movement from service routes
Draw guest movement and service movement as different lines. Guest routes may include arrival, the ceremony entrance, the way to drinks or dining and the route out. Service routes may include deliveries, caterers, florists, photographers, musicians and the removal of equipment. Use the venue’s actual doors and access points, then mark where routes cross or share a narrow area. A supplier’s route should include the time needed to bring items in and take them away, not just the place where the work happens. Ask the venue team which doors and passages are available at each phase; a route that works during setup may be occupied once guests arrive.
Where routes meet, decide whether the crossing can be avoided, moved to a quieter part of the programme or managed by a named team member. Show a staging point that does not take over seating, an accessible route or a designated exit. If the Bioclimatic Pergola product page identifies the candidate for the project, assess its proposed footprint alongside these routes, including the space needed for staff to pass. Have arrangements affecting access or fire-safety routes reviewed by the appropriate adviser for the site. Resolve route conflicts in the plan rather than leaving the venue team to manage them on the day.
Calculate seating from the actual furniture plan
Work out seating from the furniture that will actually be used. Show every table, chairs pulled out for use and the space staff need to serve and clear; then count assigned seats from that arrangement. A change to table shape, chair size or spacing can alter the plan, so do not translate pergola area into a maximum number of guests. Keep ceremony, dining and any standing arrangement as separate counts. If the couple expects a particular number of guests, label the layout with the number it genuinely accommodates and identify any seats that depend on furniture being moved or routes being shared.
When comparing the wall-mounted model page with the venue plan, request the dimensions and siting information needed to distinguish the proposed footprint from clear usable space. Count seats only after those details are confirmed. Check every arrangement separately: the highest seat count on one drawing may not work for both ceremony and dining. Keep the furniture dimensions and seat count together on each drawing, so a change of chairs or tables prompts a fresh check rather than leaving an outdated number in the event plan.
Check accessible routes in every layout
Check the route from where guests arrive to ceremony seating, dining, toilets and any other part of the event they need to reach. Show level changes, surface transitions, tight turns and temporary objects along the way; these are details a rectangle around the seating area will miss. Ask the venue’s access adviser or another appropriately qualified professional to review the actual plan against the needs of the event and applicable requirements. Involve the venue team early if furniture, supplier equipment or a changeover affects the route. Do not assume an arrangement remains accessible just because the route looked clear on the ceremony drawing.
Carry the route through every layout, including the move from ceremony seating to dining, and identify seating that lets guests stay with their party without blocking circulation. Make sure the changeover does not depend on a guest moving out of the way while furniture is being carried. If the regular pergola listing is on the shortlist, include its proposed location in the access review alongside the furniture arrangements. Record agreed adjustments in the staff version of the plan and brief the people directing guests, so the route remains clear if table positions or seat numbers change.
Schedule the reset as a working changeover
Treat the changeover as a small production schedule. List tasks in order: clear ceremony items, move or reset chairs, bring in tables, set place settings and confirm service routes, for example, using the venue’s actual equipment and meal plan. Assign each task to a named team and estimate the time by walking through it with those people, not by assuming the running order has a generous gap. Include time to remove packing, collect spare chairs and check the finished layout. If two teams need the same corridor or staging area, schedule their movements rather than assigning both the same interval.
Once a candidate such as the bioclimatic model has been assessed for the site, use its confirmed position to plan where staff will work during the changeover. Set a clear handover point, name the person who authorises the next phase and agree a fallback if the ceremony overruns or a supplier is delayed. Decide where guests wait or move during the reset, and check this against the rest of the venue’s timetable. A short rehearsal with the actual furniture and operations team can show whether there is enough working space and whether the handover is achievable without crossing an occupied route.

Prepare a site-specific pergola enquiry
Send a project enquiry with the information needed to understand the actual use: a measured site plan, proposed footprint, ceremony and dining layouts, event schedule, expected guest numbers, furniture list, accessible routes and supplier access points. Include photographs as a supplement, with the location and direction identified, and list unknown site conditions rather than guessing. The aim is to let the supplier and venue teams discuss a real proposal, not to ask a catalogue page to answer a site-specific question. Note who will supply missing information and when the venue can review a revised drawing; a decision made without the operations team can miss the routes that determine whether the layout works.
Name a candidate model clearly, but keep product selection separate from venue approval. Include the Wall-Mounted Pergola model in the brief if it is under consideration, identifying the wall and location to be assessed. Ask relevant professionals to review applicable access, fire-safety and planning questions, and refer technical site matters to the appropriate person. Record what is confirmed, what remains open and which drawing version each comment refers to. This makes revisions easier to compare and prevents an early sketch from being mistaken for a final, reviewed arrangement.
Issue one operating plan and a fallback
Give the operating plan a date and version number, and label every drawing by event phase. Include furniture positions, guest and supplier routes, the person responsible for each move and the planned seat count for that arrangement. Share the current version with the planner, venue manager, catering lead and relevant suppliers, while removing or clearly superseding earlier copies. State who can approve a change on the day and who must be told if a table, entrance or service route moves. A workable drawing can become inaccurate as soon as a delivery point or seating block changes, so make updates visible to everyone using it.
Add a contingency that fits the venue rather than assuming the pergola will make the outdoor area suitable in every condition. If the event may need to move, identify the alternative area, its own layout and route, the decision-maker and when guests and suppliers will be told. Check that the fallback does not depend on a space already committed to another part of the event. Also decide what happens if changeover time is lost: which elements can be simplified, who agrees the adjustment and how the venue preserves essential access and service routes. That is more useful than assuming one layout will cover every possibility.
Frequently asked questions
How many guests can a wedding venue pergola seat?
There is no reliable seat count to take from a model name or listed area. Draw the actual tables and chairs, including chairs pulled out for use, and account for guest movement and staff service. Use the venue’s chosen furniture and expected guest numbers, then check the arrangement. If the space changes between ceremony and dinner, give each layout its own seat count.
Can the same pergola area serve the ceremony and dinner?
It can be planned for more than one phase, but the timetable and changeover need to work in practice. Draw both arrangements, decide what moves and where it goes, and identify who does the work. Allow for guests leaving the area, staff access and any overlap with deliveries or service. Do not rely on a reset that has no time or staging space.
What should be shown on a supplier route plan?
Mark the venue’s actual access points, delivery and service paths, guest routes, proposed staging areas and any places where those movements cross. Include when suppliers need to arrive and remove equipment, not just where they will work. Ask the venue team to review the routes for each event phase, as a passage available during setup may be busy once guests arrive.
How should accessible movement be included in the layout?
Show the route from arrival to ceremony seating, dining and other relevant parts of the venue on every version of the plan. Note level changes, surface transitions and temporary obstructions, and review the actual arrangement with the venue’s access adviser or another appropriate professional. Make sure the changeover does not depend on guests moving through furniture being carried or reset.
What should we send with a commercial pergola enquiry?
Include a measured site plan, the proposed location, ceremony and dining layouts, the event schedule, expected guest numbers, furniture details and guest and supplier routes. Add photographs as supporting information, not as a replacement for dimensions. List unknown site conditions and any access, fire-safety or planning questions that need project-specific review.
A useful wedding venue pergola plan has several versions but one shared basis: the site as measured, the furniture actually chosen and the team that has to work through it. The ceremony drawing tests sightlines; the dining drawing tests service movement; the changeover schedule shows whether one arrangement can become the other without confusing guests or suppliers. Keep access, fire-safety and planning questions with the appropriate reviewers, and treat product suitability as specific to the venue and project. That makes flexibility something the venue can operate, rather than a promise based on a single empty-space sketch.
