
Child-Safe Windows: Restrictors, Lockable Handles and Opening Choices

Child-conscious window planning
Replacing windows in a home with young children is often less straightforward than adding a restrictor to an existing specification. The chosen control must suit the sash, the adult operating position, nearby furniture, curtains or blinds, cleaning access and the way fresh air is normally managed. These details become especially important during a retrofit, when new frames and hardware must work around an established room rather than an empty drawing. Treat each window as a small operating system: decide what needs to move, who should control it, how ordinary ventilation will work and what adults must be able to do when the normal limit is released. That approach produces a clearer quotation and a more usable result than asking generally for child-safe windows without defining the intended operation.
Order checklist 1
Start with the control objective, not the fitting
First decide what behaviour you want to control. One window may normally remain shut, another may provide a small amount of regular ventilation, and a third may be opened more widely only by an adult. Those are different requirements, even if the frames appear identical. Record the normal position, the person expected to operate the window and any circumstances in which the usual limit will be released. This gives the supplier a functional brief rather than a request for an unspecified safety accessory. It also reveals where a fixed pane, a restricted sash or a lockable handle would address a different part of the problem.
Use a simple hierarchy when reviewing each location. Remove an opening function where it serves no useful purpose; reduce ordinary movement where controlled ventilation is wanted; then manage the remaining operation through suitable hardware and an adult routine. Consider the whole route to the handle, not merely its height. A child may use a bed, storage box or chair as a step, while an adult may struggle to reach across a deep window board. Note curtains, blinds, radiators and planned furniture on the same sketch. A feature that works on an isolated sample may be inconvenient once the actual room is furnished.
Use fixed glazing where movement adds no value
A non-opening pane can be a purposeful choice when the window is mainly there for daylight, outlook or visual balance. For example, one part of a broad opening might remain fixed while a separate, smaller sash handles ventilation. A fixed non-opening window removes the handle, hinge movement and opening routine from that particular pane. This is not a reason to make an entire room non-opening without further thought. It is a way to assign ventilation only to positions where adults can operate it predictably and where the moving sash will not compete with furniture or circulation space.
Before choosing fixed glazing, check how the exterior face will be cleaned and how the room’s overall ventilation approach will work. A pane that is easy to reach from a garden may present a different maintenance question from glazing above a conservatory roof or narrow side passage. Mark the cleaning route on the drawings and identify which neighbouring sash, if any, provides adult access. Also check how fixed and opening sections align visually. Equal-looking panes can have different functions, but the quotation and elevation should identify them unambiguously so an opening sash is not ordered where a fixed section was intended, or vice versa.
Order checklist 2
Specify the restrictor as part of the sash
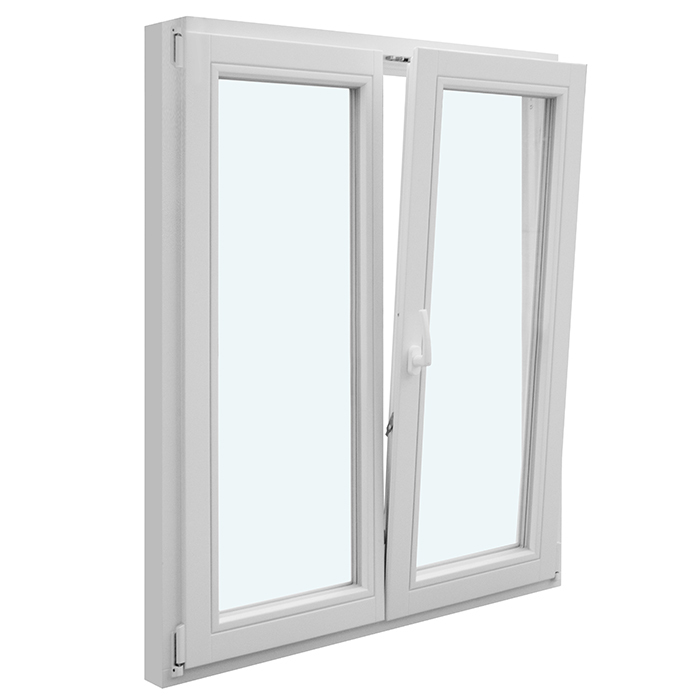
The word restrictor is not a complete specification. Ask how the proposed device works with the selected sash, where it will be positioned and what the window does during ordinary operation. The supplier should be able to explain the limited movement, the adult release action and the method for returning the fitting to its normal state. If an inward-opening design is being considered, assess a single-sash inward-opening window with the proposed restrictor shown in context. The sash enters the room, so its path, the internal reveal and nearby furnishings all influence whether the arrangement remains convenient.
Discuss deliberate adult release separately from everyday use. An arrangement that is awkward to reset may be left disengaged, while one that is difficult to reach may not support the intended routine. Ask whether the device remains engaged automatically after the sash is closed or requires a separate action; the answer must be confirmed for the actual hardware rather than assumed. Include cleaning and decorating in the review because these may require a wider opening. The objective is not the smallest possible movement in every circumstance, but a clear normal limit that responsible adults understand, can operate and can reliably restore after temporary release.
Match the opening action to the room
Opening style determines where the moving part travels and where the controls sit. A top-hung sash projects outwards from its lower edge, which can make it worth considering when ventilation is wanted without an inward swing. A top-hung outward-opening window should nevertheless be judged from a full operating drawing: confirm handle position, adult reach, opening action and compatible control options. Do not infer those details from the title or a photograph. Exterior obstructions, including planting, narrow access routes or other building elements, should be checked alongside the internal arrangement before the opening direction is approved.
Side-hung and inward-opening choices create different adult tasks rather than a universal safety ranking. An inward sash needs clear space in the room, whereas an outward sash may require an adult to reach the handle and any release without leaning awkwardly. Test the idea using the expected sill depth and finished floor position. If possible, have the person who will operate the window mimic the motion at the planned location. That simple exercise can expose a collision with a tap, desk, blind or curtain that is not obvious on an elevation. Select the movement first, then specify the control that works with it.

Order checklist 3
Treat lockable handles as a key-management decision
A lockable handle adds an intentional adult-controlled step, but its usefulness depends on what happens to the key. Decide whether each relevant sash needs this function, who will hold the keys and where they will be stored out of children’s reach but readily available to responsible adults. Ask how many keys are included and whether selected windows can use a common key. The answer should be documented before ordering. Avoid leaving keys in the handle as a permanent convenience, because that defeats the household routine the lock was intended to support and may make responsibilities unclear between family members or carers.
With an outward-opening side-hung design, such as a single-sash outward-opening side-hung window, confirm that the selected handle and locking option are available for the exact ordered configuration. Also ask whether locking the handle controls only handle movement or another part of the operation; broad wording can conceal practical differences. Consider handover between adults, overnight use and periods when a relative or childminder is responsible for the room. A short written note beside the household documents can be more dependable than expecting everyone to remember verbal instructions given on installation day.
Design ventilation around realistic habits
Start with what occupants actually do rather than an idealised pattern. A bedroom may be aired in the morning and kept slightly open at night, while a bathroom may need more active moisture management. Write down the expected use for each opening sash and discuss it with the relevant project professional where a designed ventilation system is involved. A restrictor that makes the preferred routine impractical is likely to be bypassed. Equally, a large sash need not be the everyday ventilation point merely because it can open. A smaller, deliberately positioned opening may provide a clearer adult-controlled routine.
Roof glazing requires a separate conversation because control positions, furniture and cleaning methods differ from vertical windows. When reviewing a pivot roof window, ask how an adult opens it in normal use, how the pivot or cleaning position is accessed and which controls are included in the selected order. A bed, desk or raised platform below the window can change who reaches it, so assess the finished room rather than the empty roof opening. If a pole, remote control or other operating method is proposed, confirm where it will be stored and who can use it confidently.
Order checklist 4
Divide large openings into understandable zones
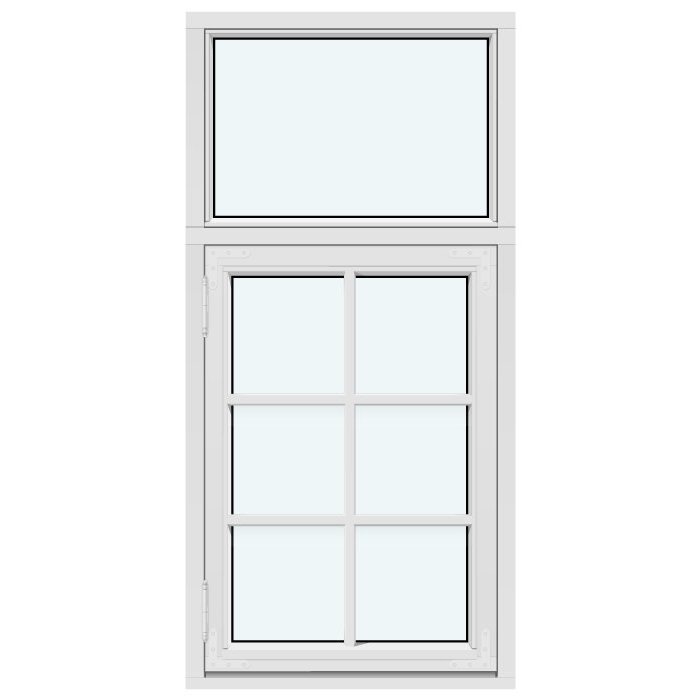
Large areas of glazing do not have to perform as one opening unit. Separating them into fixed and operable zones can preserve daylight while concentrating ventilation in a manageable location. A Kombi combination window provides a relevant configuration to compare where the design calls for combined window elements. Request a labelled drawing that distinguishes every fixed area, opening sash, handle and hinge side. If decorative bars or glass-dividing bars are part of the appearance, identify whether they alter only the visual arrangement or the actual division of the glazing. Do not approve the design from an exterior image alone.
Use the room elevation to test the zones against furniture and adult movement. A low fixed section may preserve the view from a seated position, while an opening section can be located where its handle is accessible to an adult without being the most obvious climbing destination. That is an illustrative planning approach, not a universal template. Window proportions, exterior access and the ventilation brief may point to a different solution. What matters is that each area has a declared purpose. The order schedule should not describe a composition simply as a multi-pane window when the function of each pane affects daily use.
Review unusual shapes and high-level glazing separately
Feature glazing can create awkward decisions if its operating function is chosen only for symmetry. Triangular, angled or other high-level panes may contribute light and character without needing to open. Fixed triangular and angled windows are a non-opening configuration to consider where that matches the design intention. Confirm the actual shape, orientation and dimensions on the order drawing rather than relying on a generic description. If ventilation is needed nearby, assign it to a separate sash that adults can reach, inspect and maintain more readily instead of automatically making the feature pane operable.
A fixed high-level pane still requires a maintenance plan. Establish whether it can be cleaned from outside at ground level, from an adjacent opening or through an arranged access method. Avoid assuming that a tall room or stair position makes the glazing inaccessible to children forever; later furniture, shelving or decorating equipment can change access. Conversely, do not add complicated controls to a pane nobody needs to open. Review unusual windows one by one with the installer and designer, because a standard note applied across the whole elevation may overlook their different geometry, reach and cleaning conditions.
Order checklist 5
Coordinate retrofit details before order confirmation
In a retrofit, inspect the finished surroundings before finalising hardware. Existing reveals may be deeper than expected, old curtain tracks may occupy the head of the opening, and shutters or blinds may limit handle movement. Radiator covers, kitchen taps and tiled window boards can also affect adult access. If comparing a Kombi outward-opening side-hung window with another arrangement, ask for equivalent information for each option: sash layout, handing, handle location, opening direction and proposed restrictor or lock. A side-by-side operational comparison is more useful than comparing overall frame dimensions or appearance alone.
Put each decision against a unique window reference. The quotation should identify fixed and opening sections, hardware choices, restrictors, lockable handles, key arrangements and any alternatives that have not yet been accepted. Do not rely on phrases such as child-safety fittings throughout, because different rooms may need different controls. Bloomcabin’s delivery timeframe for windows and doors is 4–6 weeks, subject to order confirmation. Use the period before installation to settle furniture plans, remove conflicts around the openings and prepare a simple key-storage arrangement rather than postponing these decisions until the windows arrive.
Commission the windows with the household present
Handover should be an operating session, not merely a visual inspection. Ask the installer to demonstrate every restricted sash, lockable handle and adult release. Open and close each window yourself, restore the normal setting and check that the controls can be reached without standing on unsuitable furniture. Confirm that keys operate the intended handles and label them discreetly if different keys are used. Then fit or return curtains, blinds and furniture and repeat the test. A sash that worked in an empty room may catch a blind or become difficult to approach once a desk is reinstated.
Keep the order schedule, hardware information and care instructions together. Bloomcabin windows and doors have a 5-year warranty, so retain the relevant purchase and product records. Revisit the arrangement when a cot becomes a bed, storage moves beneath a window or another person begins using the room. Check that restrictors engage as intended, keys remain controlled and adults still understand the release procedure. A child-conscious window plan is not a one-off label attached to the frame; it is a documented operating arrangement that should continue to make sense as the household and room layout change.
Common questions
Does a restrictor make a window child-safe on its own?
No. A restrictor can limit ordinary sash movement, but furniture, adult supervision, handle access and the way the device is released still matter. Confirm its operation for the selected window and test it after installation. The complete room arrangement, rather than the accessory alone, determines whether the intended control is practical.
Should I choose a restrictor or a lockable handle?
They address different actions. A restrictor limits sash travel, while a lockable handle introduces adult-controlled key use. Some windows may use one, both or neither, depending on their purpose and compatible hardware. Define the normal opening routine first, then ask the supplier which confirmed option suits that exact window configuration.
Can every pane in a bedroom be fixed?
Fixed glazing may suit panes needed only for daylight and outlook, but the room still requires a considered ventilation and cleaning strategy. Review the complete design rather than one pane in isolation. A combination of fixed glazing and a deliberately positioned opening sash may offer a clearer balance for some rooms.
What information should appear on the quotation?
Give each window a reference and record its opening style, fixed sections, handing, handle type, restrictor requirement and key arrangement. Alternatives should remain clearly labelled as alternatives. Ask the supplier to confirm compatible hardware for the actual configuration, rather than accepting a general statement that child-safety accessories will be added later.
When should the arrangement be reviewed again?
Review it after curtains, blinds and furniture are in place, and whenever the room changes. A new bed, desk or storage unit can alter access to the handle. Adults should also recheck key storage, restrictor engagement and release methods when carers change or operating instructions are handed to another occupier.
What to do next
A useful child-safety specification begins by deciding what each window must do, then controlling only the movement that remains necessary. Use fixed glazing deliberately, match opening direction to the room, and define restrictors and lockable handles against individual sash references. Coordinate those choices with adult reach, ventilation, cleaning, furniture and key storage before ordering. Finally, operate every control at handover and repeat the check once the room is furnished. The result should be a straightforward household system that adults can understand, maintain and use consistently, rather than a collection of accessories chosen without reference to everyday life.
